Tip #87 – Stop Describing, Start Showing with Annotation – 'Insider Insights'
Hello Zoho Assist Community!
A new employee needs help getting set up on the internal tools their team uses. The IT technician jumps on a remote session, but walking through an unfamiliar interface verbally only goes so far. "The icon at the top, no, not that one" gets old fast.
So the technician switches to Annotation. They draw arrows pointing to each step, circle the buttons to click, and label the sections the employee will need to come back to on their own. The employee isn't just following along anymore. They're building a mental map of the workflow as they go.
By the end of the session, the employee knows exactly where to go and what to click. No follow-up tickets. No "sorry, which button was that again?" a day later.
That's what Annotation in Zoho Assist makes possible.
What is Annotation?
Annotation lets you mark up and highlight the remote user's screen during a remote support or screen sharing session. Both the technician and the customer have access to annotation tools, making it a two-way visual communication layer right on top of the live session. Any annotations made during the session are also captured in the session recording, so they're available for review or documentation after the fact.
How to annotate during a session
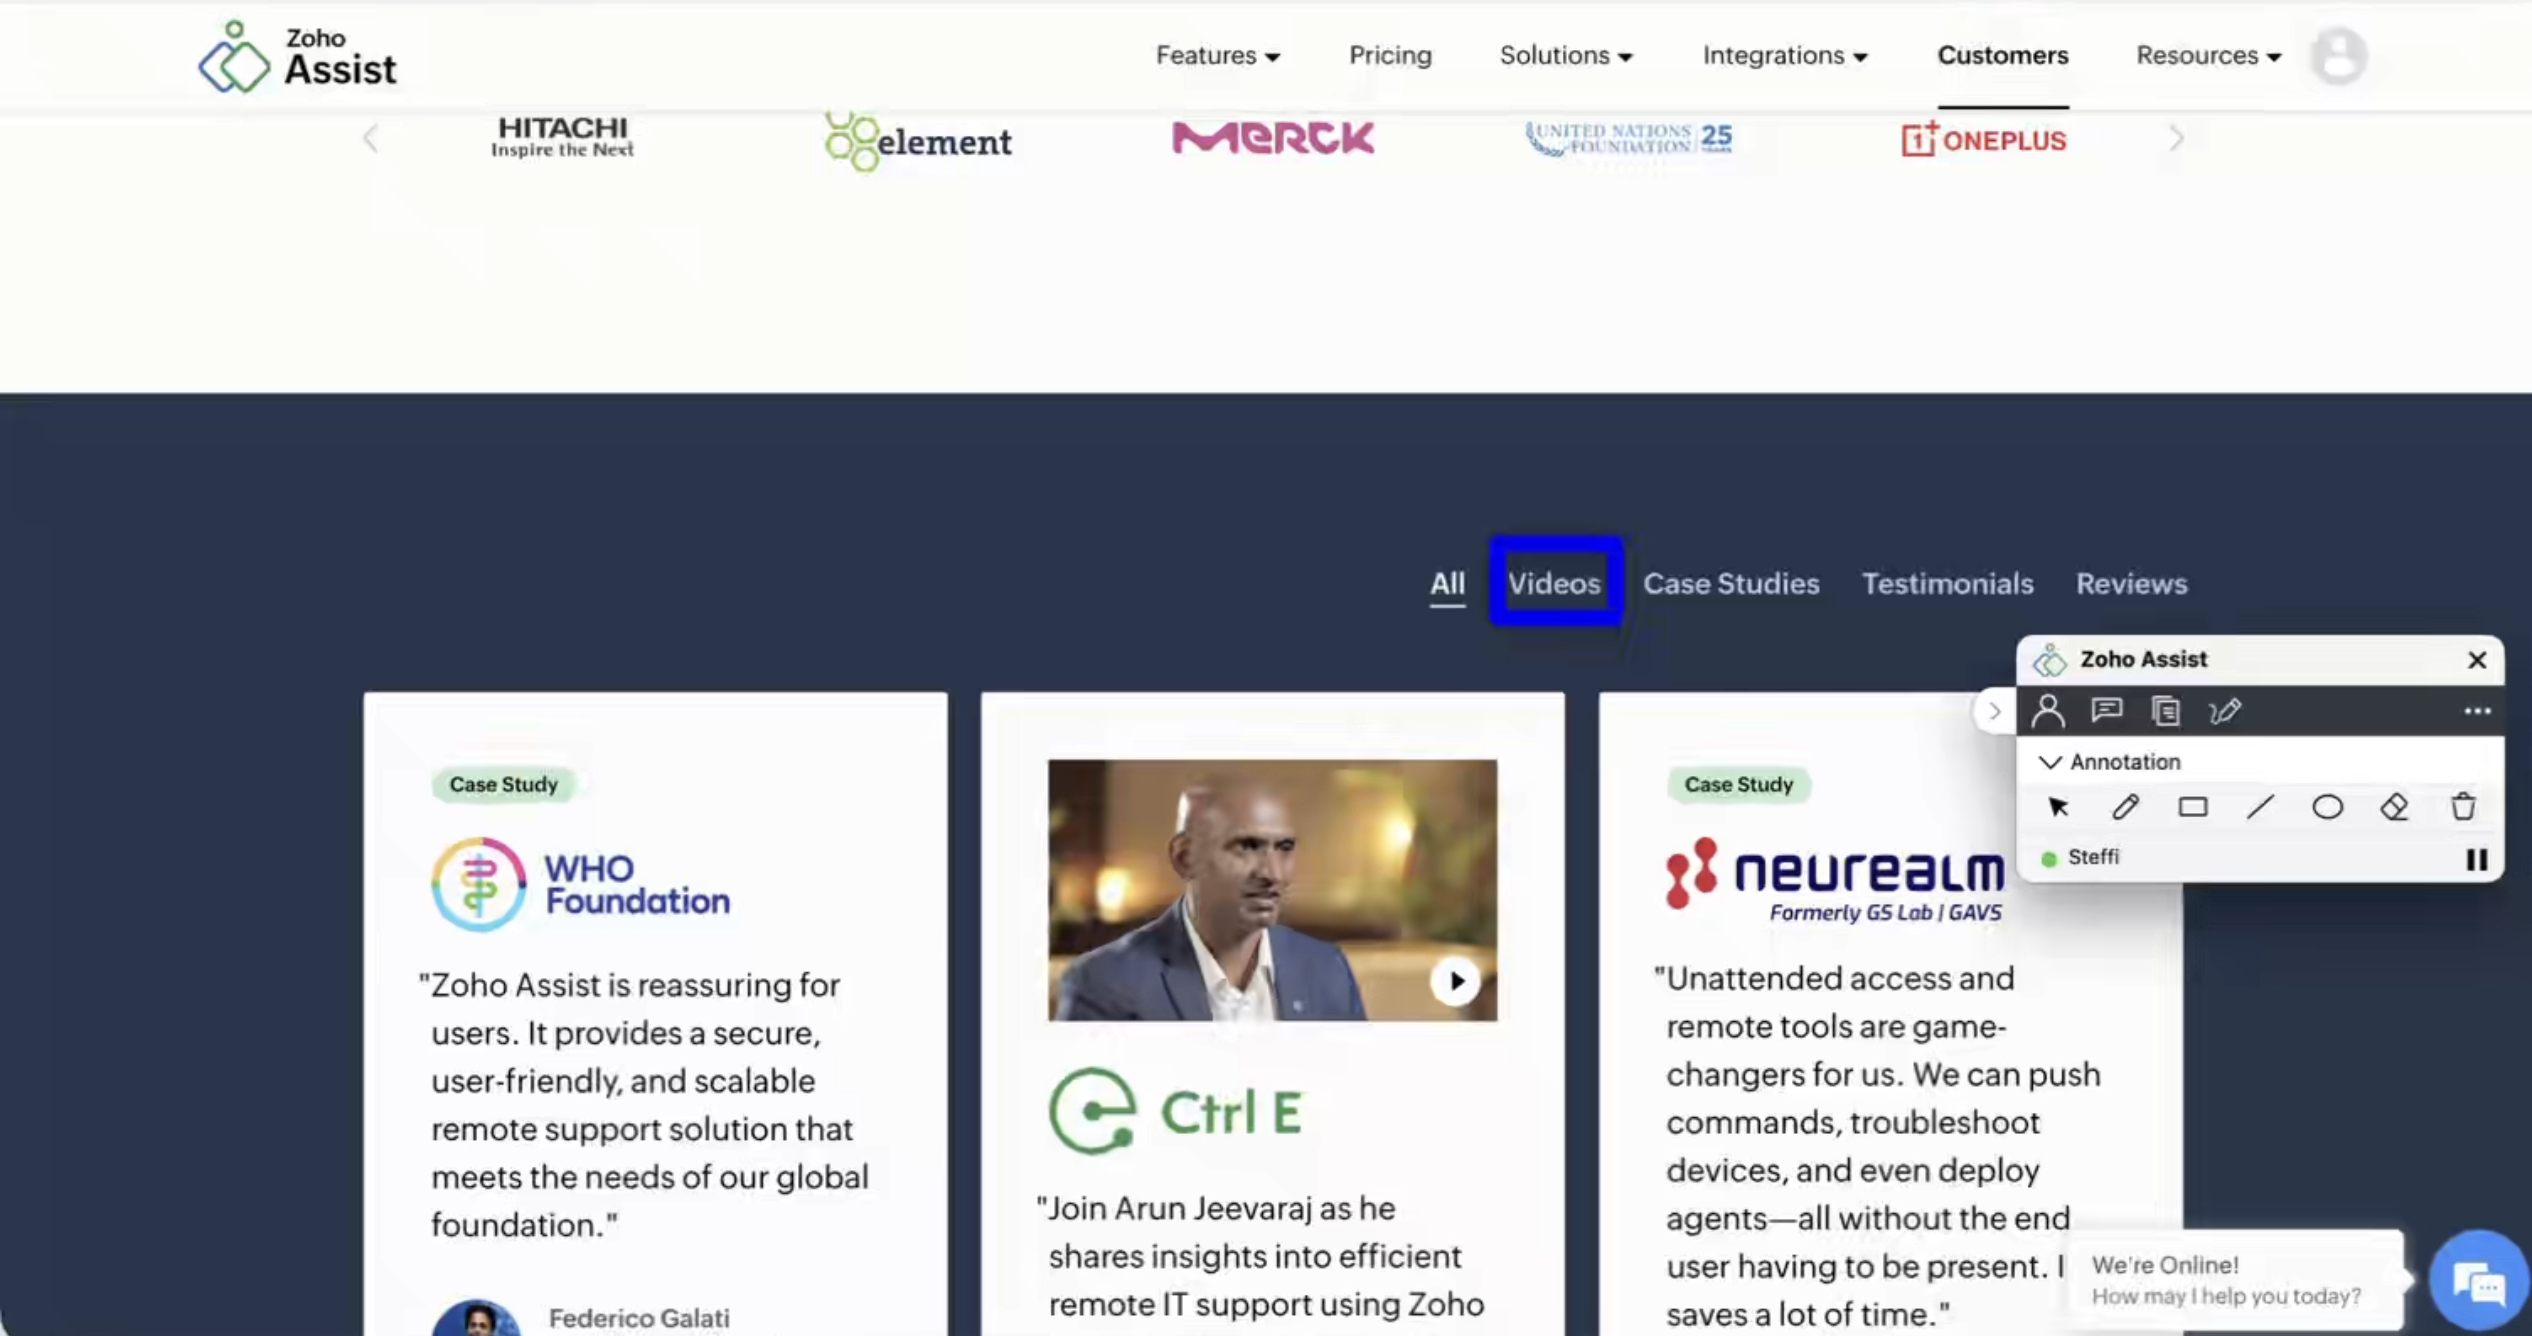
During an active session, click the Annotate icon from the customer toolbar in the session widget on the remote user's screen. The Annotation panel will expand, showing all available tools. Select a tool and start marking up the screen.
Annotation tools at your disposal
Pen – Draw freehand lines to highlight or mark any area on the screen.
Rectangle – Draw a box to frame a specific region of the screen.
Line – Draw a straight line to point out areas of interest. (macOS only)
Ellipse – Draw an oval or circle around a specific element. (macOS only)
Text – Type a label directly onto the remote screen. (Windows only)
Eraser – Remove specific markings without clearing the entire screen.
Clear Screen – Remove all annotations from the screen at once.
Cursor – Exit annotation mode and return to the standard cursor to interact with the screen.

Note:
Both the technician and the customer can annotate simultaneously, with markings visible to both parties in real time.
Annotations are captured in the session recording and can be reviewed after the session ends.
Whether you're guiding a customer to a specific setting, highlighting an error on screen, or collaborating in real time to troubleshoot an issue, Annotation removes the guesswork from remote communication entirely.
Have you used Annotation in your sessions? We'd love to hear how it's helped your team communicate more clearly. Share your experience in the comments below!
For help or questions, reach out to us at support@zohoassist.com. We're always happy to help!