If you're in a company that often works with customers on a day-to day basis, then you likely have to manage a lot of their data in multiple files and folders across various locations in your computer or on the cloud. You also may have faced a number of difficulties in organizing and managing your customers' data effectively.
In WorkDrive, you can create data templates and associate the required files and folders with them by adding custom information or properties. Once you associate files and folders to a data template with custom values, you can easily search for and manage data using the Data Templates filter.
Data Templates is ideal for any company that stores data in files and folders and manages them daily or at regular intervals.
Data templates are available in all paid WorkDrive plans.
Custom fields are only available in WorkDrive Business plans.
Sample use cases for data templates and custom fields are given below:
Insurance Agencies - Classify insurance based on its type, such as vehicle, property, and medical, and organize them by insurance date, coverage limit, renewal date, and insurance provider.
Training Institutes - Classify certificates based on courses, and organize them by completion status, certificate issued date, and certificate validity.
HR Teams - Classify candidates based on designation, and organize them by educational qualifications, experience, expected salary, certifications, and willingness to relocate.
Design Teams - Classify images based on their use, and organize them by name, size, format, designer, and created date.
Marketing Teams - Classify articles based on industries, and organize them by author, created date, published date, and words count.
Educational Institutions - Organize students by name, admission date, admission class, age, blood group, and emergency contact number.
- Only Team Admins can create and manage data templates and their custom fields from the Admin Console.
Create Data Template and add Custom Fields
1. Click Admin Console in the bottom-left corner of your WorkDrive account.
The Admin Console page will open in a new tab. Dashboard will be selected by default.
2. Click the Data Templates tab in the left pane to open it on the right.
3. Click + Create Data Template in the top-right corner.
4. Enter a data template name and description.
5. Under Who can associate, choose one of the following options:
All users with edit access
Any user with edit or higher access to a file or folder can associate or dissociate this data template, and can find it when searching.
Specific members or groups with edit access – Enter member email addresses or group names.
They must have edit or higher access to the file or folder.
Only these members can associate or dissociate this data template, and find it in search.
Note: Other users in the team with edit or higher access can still update the associated data template.
6. Click Create.
Your data template will be created. The custom fields page of this data template will appear.
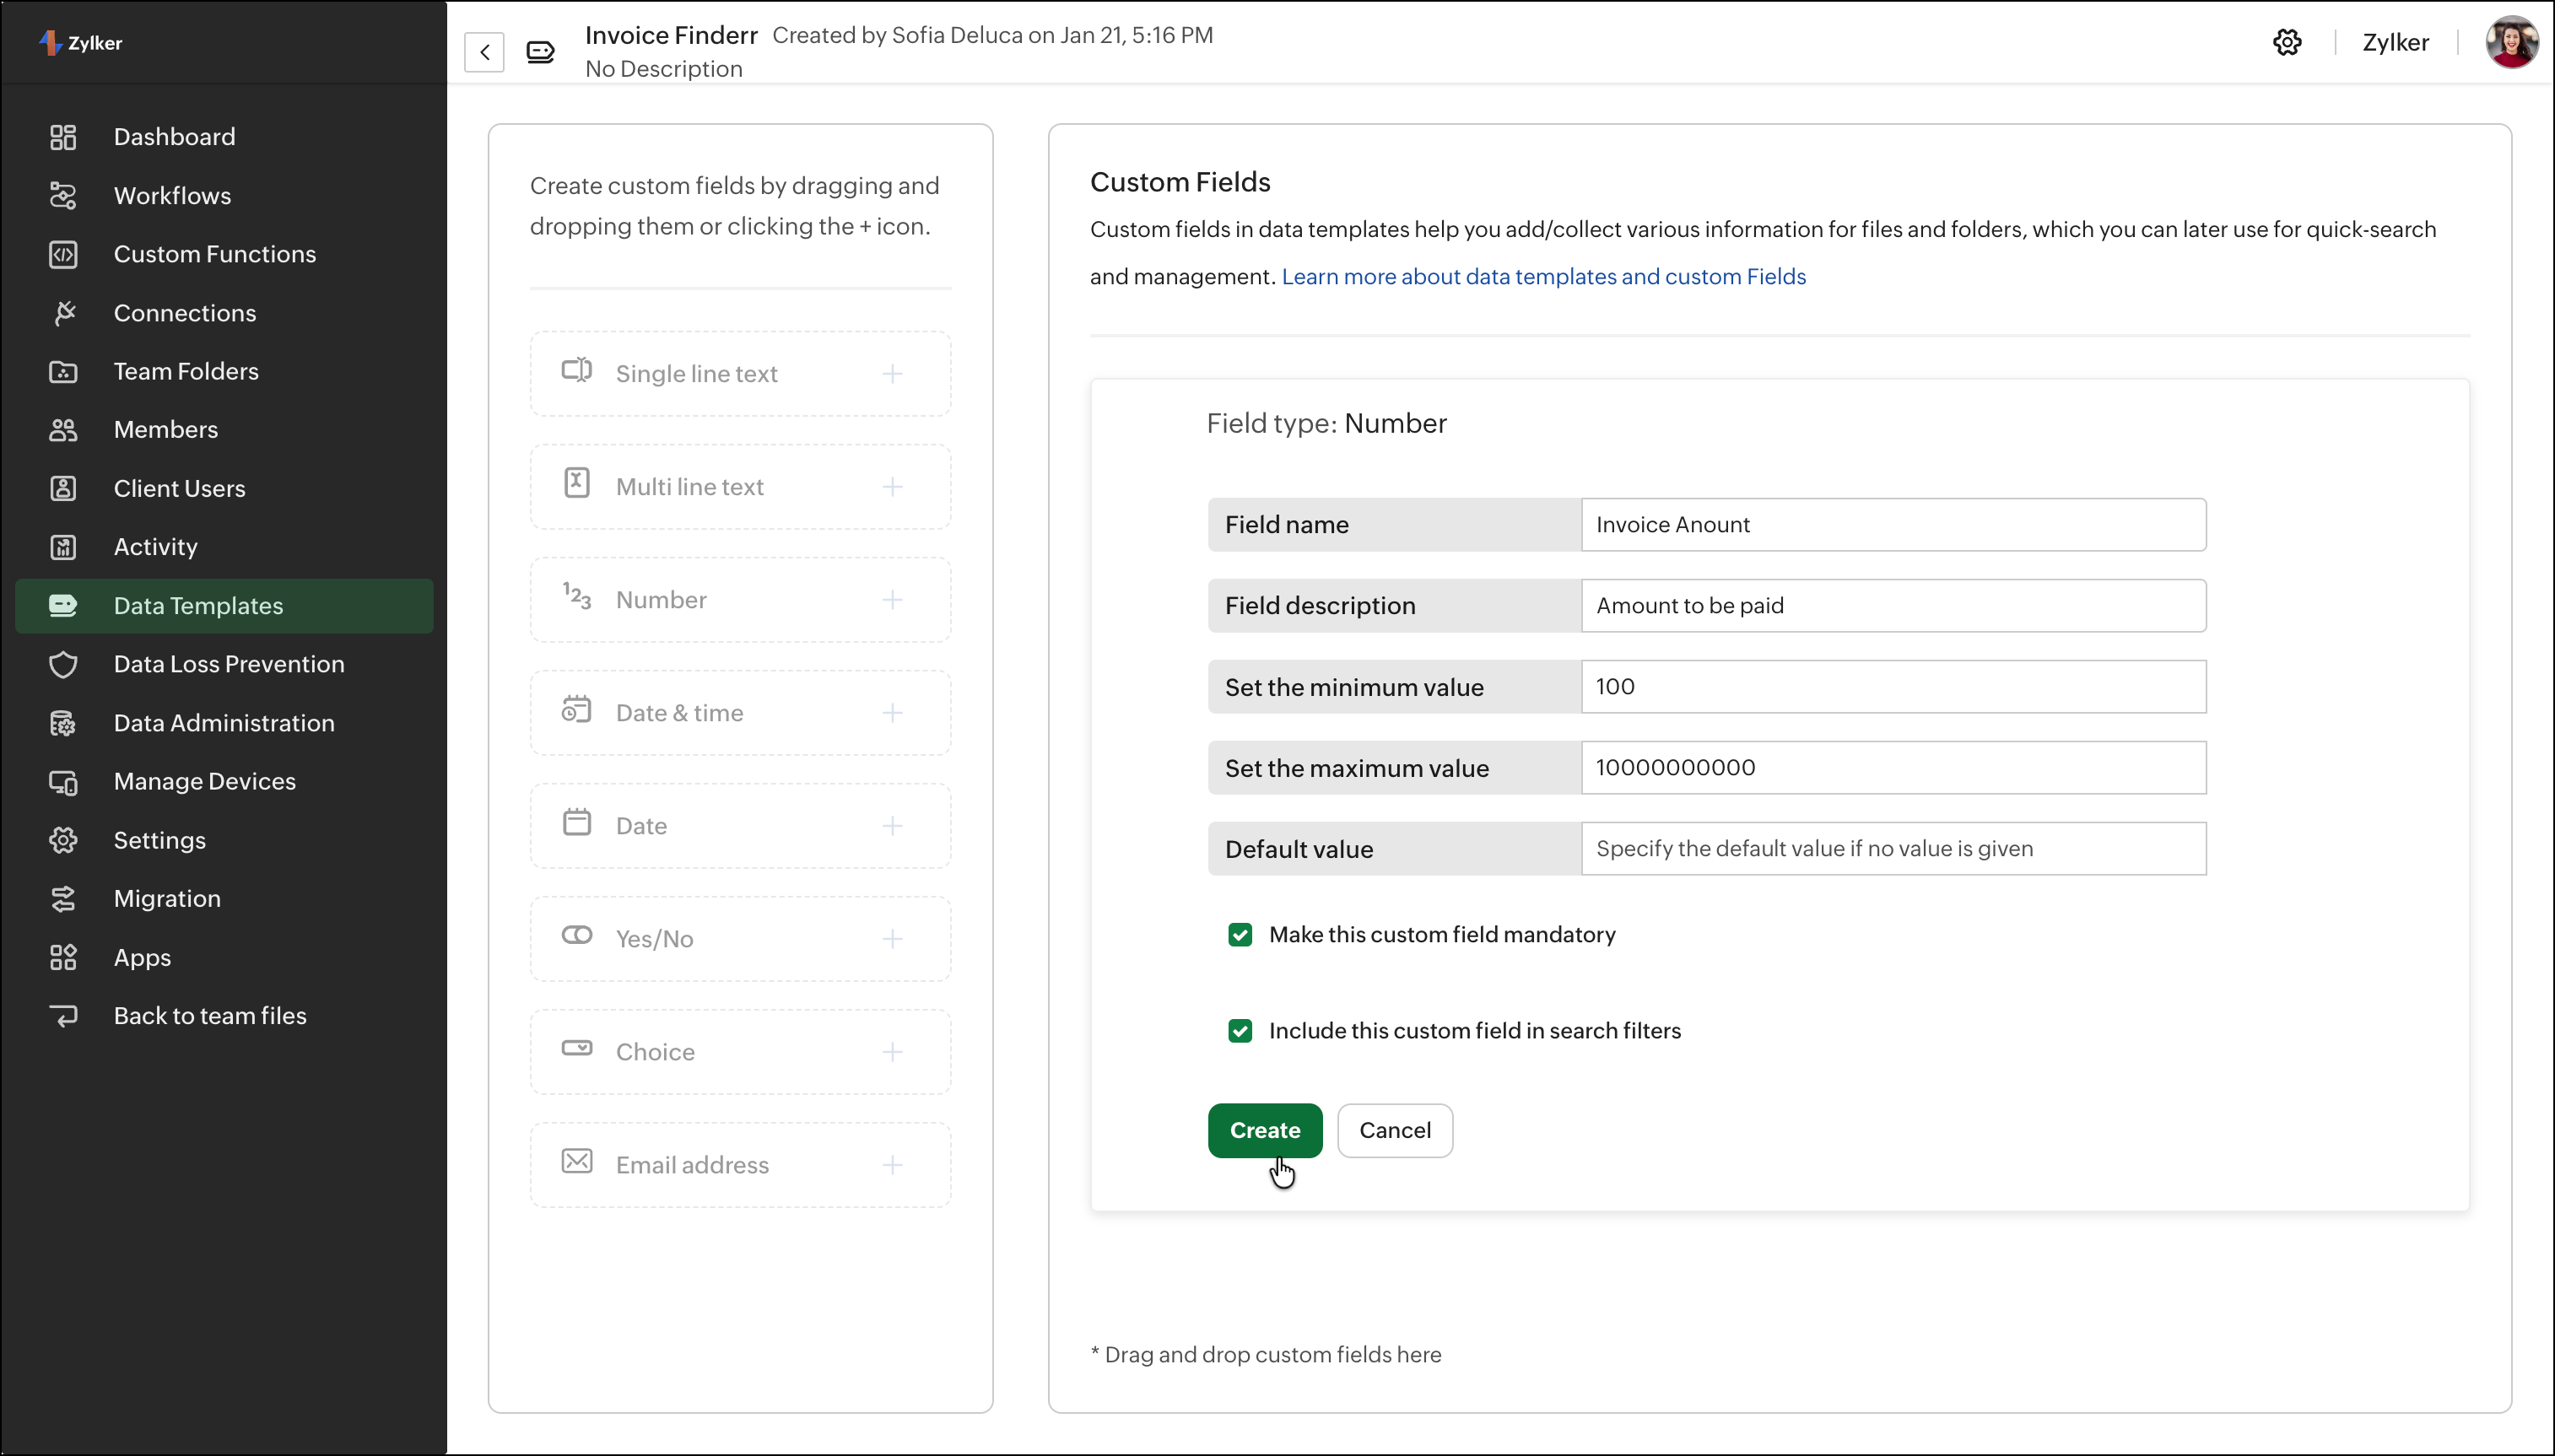
7. Create custom fields by dragging and dropping them or clicking the + icon.
The following custom field types are available:
Single line text (you can set the maximum characters)
Multi-line text
Number (you can set the minimum and maximum value)
Date & time
Date only
Yes/No
Choice (you can choose a type and provide choices)
Email address
8. Enter the custom field values as required for your template.
- Field name - Add a custom field name
- Field description - Add a description, if needed
- Default value - Specify the default value to be taken if no value is given
9. Mark the Make this custom field mandatory checkbox to make the custom field as mandatory for members when they associate files and folders.
10. Mark the Include this custom field in search filters checkbox to make this custom field appear in search filters.
If left unmarked, this custom field will not appear in the search filters.
11. After you've given the custom field values, click Create .
The custom fields will be created. Similarly, you can create many custom fields for a data template.
Example:
Data Template: Recruitment
Custom Field 1:
Field name: Role
Field type: Choice
Choice type: Dropdown menu
Choices:
Option 1: Developer
Option 2: Designer
Option 3: Marketer
Custom Field 2:
Field name: Experience
Filed type: Choice
Choice type: Dropdown menu
Choices:
Option 1: 0-5 years
Option 2: 5-10 years
Option 3: more than 10 years
Custom Field 3:
Field name: Willing to relocate
Manage Custom Fields
1. Click Admin Console in the bottom-left corner of your WorkDrive account.
The Admin Console page will open in a new tab. Dashboard will be selected by default.
2. Click the Data Templates tab in the left pane to open it on the right.
Data templates created in your team will be shown on the screen.
3. Click on the required data template.
Custom fields added to the data template will be shown on the screen.
4. Hover on a custom field and there will some options:
- To delete the custom field, click Delete.
- To edit the custom field, click Edit.
- To view its details, click on the dropdown icon.
6. After editing the custom field, click Update to save the changes.
7. To add new custom fields, click + Add Custom Field at the bottom.

- When you delete a custom field from a data template, the custom field, along with its values of all the associated files and folders, will be deleted permanently.
- When you edit a custom field name and description, all the changes will reflect on the associated files and folders.
- When you edit options for the Choice field type, the corresponding values will be updated in previously associated files and folders.
- When there is a change in custom field properties (i.e., maximum characters for Single line text, minimum/maximum value for Number, default value, and mandatory field status), all new files that you associate after the change will have the new custom field settings.
- When you update custom field values on already associated files, you will then be asked to update your values based on the new custom field settings.
- You cannot change the field type of a custom field after creating it.
Modification of searchable setting of a custom field will be scheduled and will take time to reflect in the search filters. While the update is in progress, the Searchable option will be temporarily disabled and will be available again shortly.
Manage Data Templates
1. Click Admin Console in the bottom-left corner of your WorkDrive account.
The Admin Console page will open in a new tab. Dashboard will be selected by default.
2. Click the Data Templates tab in the left pane to open it on the right.
Data templates created in your team will be shown on the screen.
3. Hover over a data template and click the Settings icon. You will see the following options:
Manage Custom Fields
All custom fields added to the data template will be listed here, you can manage them.
Edit Template
You can edit the name and description, or manage Who can associate for this data template.
Disable Template
When disabled, members cannot associate this data template with new files or folders.
However, existing associations will remain visible in read-only mode.
You can enable the template again at any time.
Delete Template
Permanently delete the data template and remove all its associations across files and folders. This action cannot be undone.
4. To enable a template, hover over a data template and click the Settings icon, then click Enable Template .
5. Click the Search icon in the top-left corner and enter a keyword to search for matching data templates.
6. You can sort data templates by Name or Recently Added. To do so, click the dropdown arrow next to Name or Recently Added , then select a sort option.
7. You can filter the data templates by All Data Templates, Active Data Templates, or Disabled Data Templates. To do so, click the dropdown arrow next to All Data Templates and select a required filter.
- When you disable a template, you will not be able to edit the template. You must enable the template again to make any changes.
- When a template is disabled, you cannot associate new files and folders with it, but you can still disassociate files and folders from it.
- To edit custom field values and associate or disassociate files and folders from data templates, members must have at least edit access on those files and folders.
- New Data Templates can only be created by Team Admins from the Admin Console.
- You can add a maximum of five custom field criteria (with four conditions - AND/OR) for your search.
- You can also start by searching with a keyword, then apply the Data Templates filter to find any associated files and folders.
Limitations
Maximum number of Data Templates per team is 200
Maximum number of Data Templates that can be associated to a file/folder is 5
Maximum number of custom fields per data template as 150
Maximum number of searchable custom fields is 1000
Maximum number of Multi line text custom fields per data template is 5
Maximum number of Checkbox custom fields per data template is 5
Maximum options for Checkbox custom field is 25
Maximum options for radio and dropdown custom field is 100
Maximum character limit for options in checkbox, dropdown, and radio options is 100
Maximum character limit for Data Template and Custom Field names is 50
Maximum character limit for Data Template and Custom Field descriptions is 200
Maximum character limit for single-line text is 200
Maximum character limit for multi-line text is 2048


 Note: Other users in the team with edit or higher access can still update the associated data template.