Booking Form for Guest Users and Customer Portal Users | Help - Zoho Bookings

Booking Form

Super Admins and Admins can view and edit this information. Managers can only view this information. Staff will not have access to this information.

When customers book appointments, they are required to specify details like their name, email address, and contact number. This information can be used to send them  reminders and notifications about their upcoming appointments, cancellations, or rescheduled appointments. The fields—which appear on the booking page—to collect this information can be configured in the Booking Form section.

Three mandatory fields, which can be edited, are available by default. However, if required, more fields can be added.

This section also contains  customer portal  settings, which enables your customers to maintain individual accounts for themselves. They can register a personal account that will capture all their appointment details in one place and allow them to view, reschedule, or cancel appointments. This is similar to an Amazon account, where you can see your details and your orders, which you can also cancel or modify through your account.

The fields to collect customer information can be configured separately for Guest Users and Registered Users (Customer Portal Users).
Note: The booking form field choices made here are just templates. They will be used by services created newly. But these choices can be overridden for one-on-one services only under the Service Booking Form section. Service Booking Form is not applicable to group bookings and resources.

To access the Booking Form

Click the Manage Business icon  in the top right corner, then click Workspaces.


Click the required workspace and click Booking Form


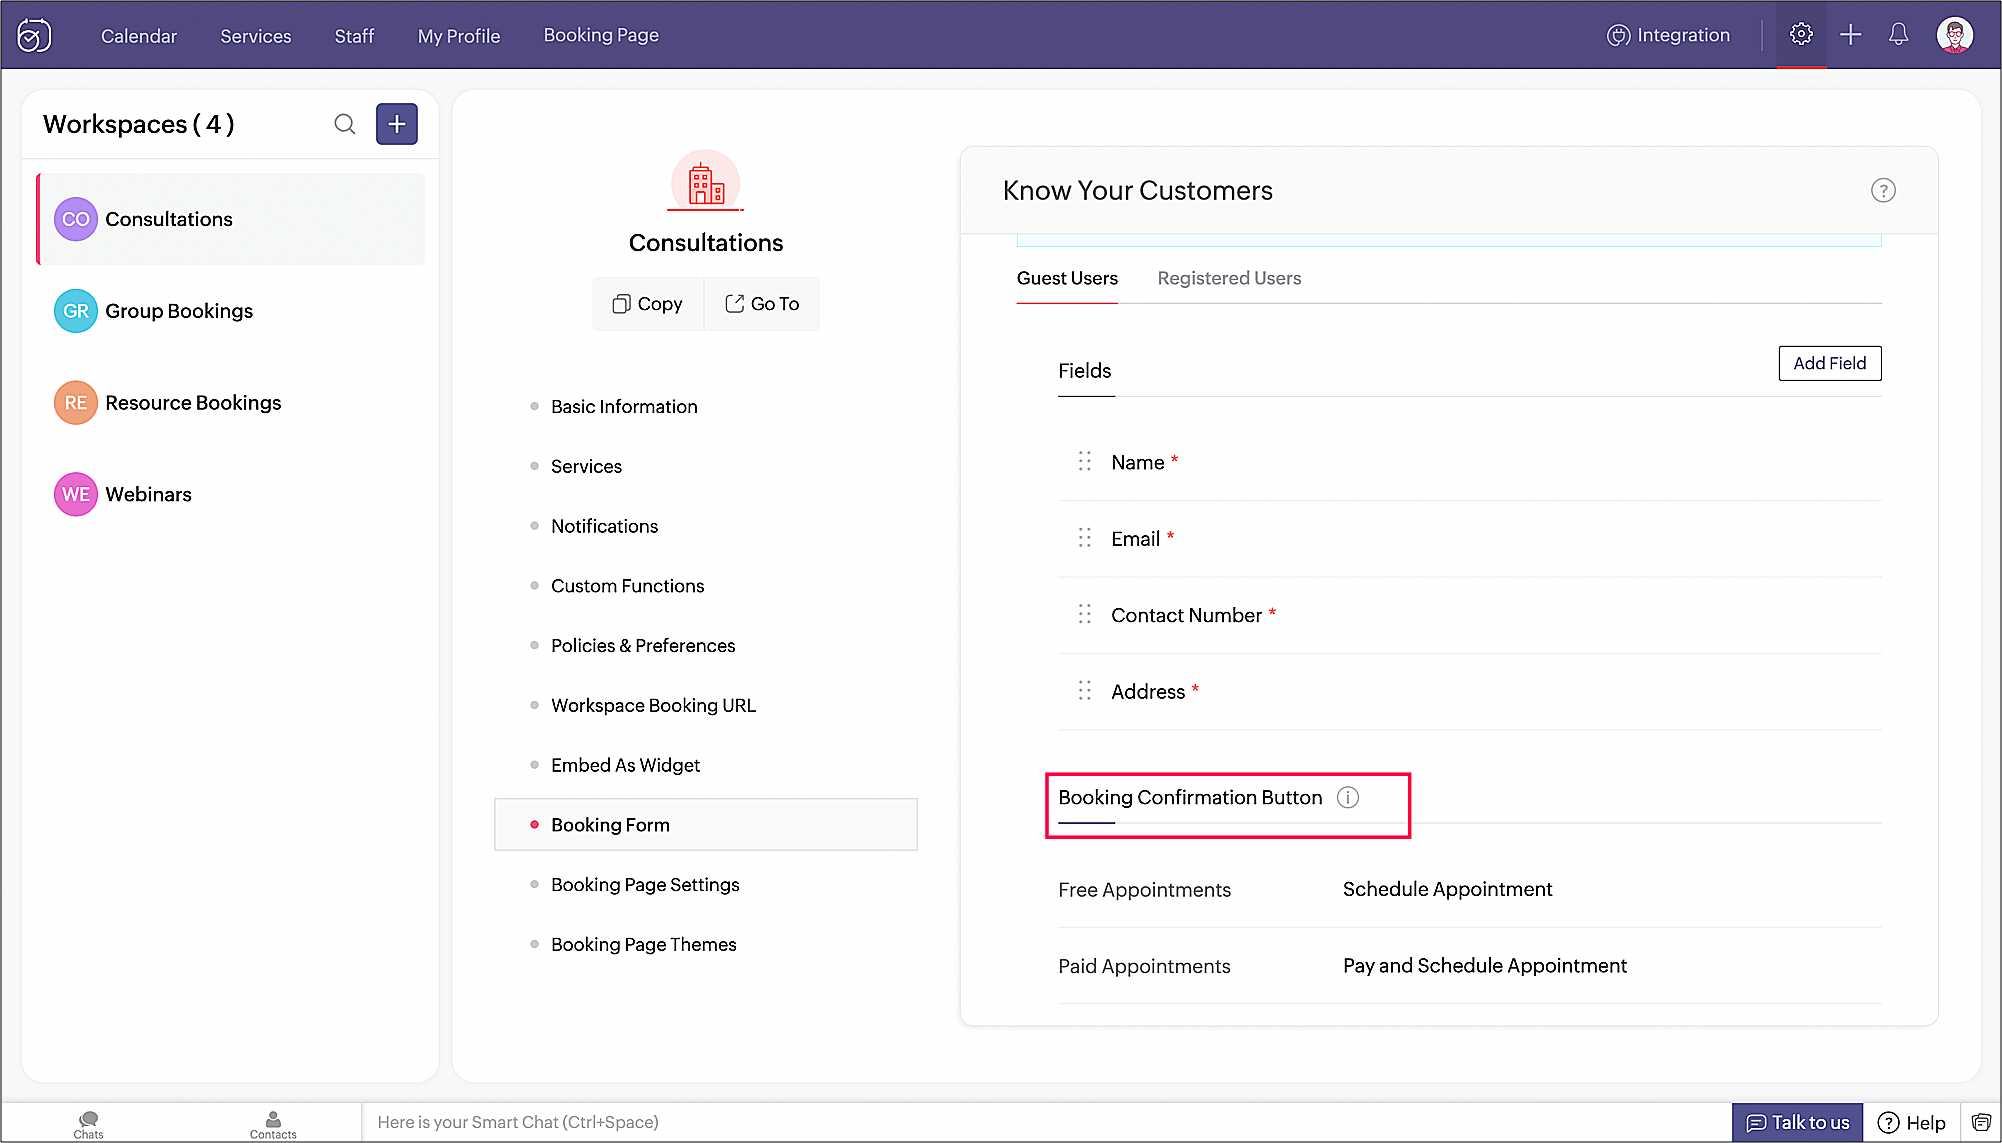
Configure fields for Guest Users

To configure fields for users who book appointments as guests (without logging in), click  Guest Users.


To edit the default mandatory fields

  1. Click the edit icon against the field you want to edit.


  2. Enter the desired text, then click  Save.


To customize the Name field

Note: The type of a Name field, is set to Name by default and can be changed First Name, Last Name as desired.
The Name field can be customized in the booking form to either accept a single name or the first and last names separately. When the  Field Type is selected as  Name, the field shows up as a Single Line in the booking form.


The booking form will show the name field like below.


If the account is integrated with Zoho CRM to push Zoho Bookings Customers as Contacts to Zoho CRM, then the entire name value will be pushed to the Last Name field.


When the  Field Type is selected as  First Name and Last Name, the field shows up as two Single Line fields in the booking form.


The booking form will show the name field like below.


If the account is integrated with Zoho CRM to push Zoho Bookings Customers as Contacts to Zoho CRM Contacts, then the name value will be pushed to the appropriate First Name and Last Name fields.


To customize country code

You can customize how country codes are shown in the booking form in a few ways. To do so, click the edit icon near Contact Number. A pop-up will appear.


Options: 


  • To display country code based on customer's location, choose Based on Customer's location. This is also chosen by default.


            Booking form country code will appear as follows: 


  • To display a specific country code:

    • Choose Select a specific country code.

    • Select the required code from the drop-down.

    • Click Save.


            Booking form country code will appear as follows : 


            You can make it uneditable by selecting Lock Country Code in the above screen.


            You can choose not to show country code by deselecting Show Country Code in the above screen.


To add a new field

  1. Click  Add Field.


  2. Enter the field name.

  3. Mark it mandatory, if required.

  4. Select the field type, then click  Save.


Enable Guest Invite

Certain bookings require multiple participants to attend, such as couple therapy sessions that involve two attendees. These types of bookings cannot be accommodated through a group booking, but rather through a one-on-one booking option that allows for multiple participants. The Invite guest field allows the customer to add email address of additional participants.

  • By default, this field will be hidden. You can enable it by hovering on the eye icon  next to the field and clicking it.


  • You can click the edit icon  to edit the field and change the label name (Invite guest).

  • A maximum of ten guests can be added for an appointment through this field. Email notifications, reminders, and calendar/online meeting invite will be sent to all the guests added. 

Learn more about Guest Invite here

Confirmation button text

You can customize the text on the appointment confirmation button separately for paid and free appointments. The default button text for free appointments is "Schedule Appointment" and for paid appointments it is "Pay and Schedule Appointment".
Note: Appointments are identified as paid or free based on the value of the Paid field in the Service Information section of the respective services.


To edit the button text

Let's see how the text on the appointment confirmation button can be customized to increase engagement.
  1. Hover over the required field. Click the edit icon.


  2. Enter the required text and click the Save button.


  3. The customized button text will reflect in the booking page.


Custom Fields

Custom fields are additional fields that can be added to the booking form (for both Guest users and Registered Users) apart from the Name, Email and Contact Number fields. There are seven types of custom fields to choose from.


  1. Single Line: To enter plain text, i.e. letters from any language, numbers, and special characters. Character limit for this field is 50.

  2. Multi Line: To enter plain text, i.e. letters from any language, numbers, and special characters. Character limit for this field is 2000.

  3. Email: To enter a valid email address. It validates if the email address entered is in this format: example@domain.com

  4. Checkbox: To select one or more values from a predefined set of choices that are displayed as checkboxes. Character limit for each option is 50.

  5. Dropdown: To select a value from a predefined set of choices that are displayed in a dropdown menu. Character limit for each option is 50.

  6. Radio Button: To select a value from a predefined set of choices that are displayed as radio buttons. Character limit for each option is 50.

  7. Date: To enter date values

Options to  hideedit, or  delete these custom fields appear when the user hovers over them.


Note: The option to edit is available for all fields. However, options to hide and delete will be available only with custom fields.
These custom fields show up in the Booking Summary page as  Additional Info, once the Appointment is booked.


The values submitted for these Custom Fields will also show up in the  List View in the  Additional Info section under  Appointment Summary.


Enable Customer Portal for users and configure fields for Registered Users

To configure fields for users who book appointments by signing in or signing up to the customer portal:
  1. Click  Registered Users.


  2. Check the box against "Booking as a registered user".


Only when the box  Booking as a registered user is checked, the options to "Sign up" and "Sign in" will appear in the Booking Page.

The process of adding and configuring fields is the same as explained above in the  Guest Users section.

The order of the fields can be altered by dragging and dropping them to a new position. This can be done for the required field using the icon highlighted below.


Note: The number of workspaces that can be added is governed by the subscription plan that users hold with Zoho Bookings.