Signup Pages and Emails

This feature gives you the ability to edit and customize the pages and emails sent out to contacts after they trigger an action from your campaigns and sign-up pages.
Zoho Campaigns allows your contacts to update their profile, tell a friend, and resubscribe and unsubscribe via email footer links. Signup pages customization lets you edit the sign up pages and emails related to all such functions. On the Create Campaign page, you can include the specific activities you wish to let your contact perform. However, you cannot remove the option to unsubscribe. Upon clicking the links, pages related to that particular activity will open.
Zoho Campaigns allows you to set up signup pages and emails that a contact will see after signing up to your organization. You can change its look and content however you wish.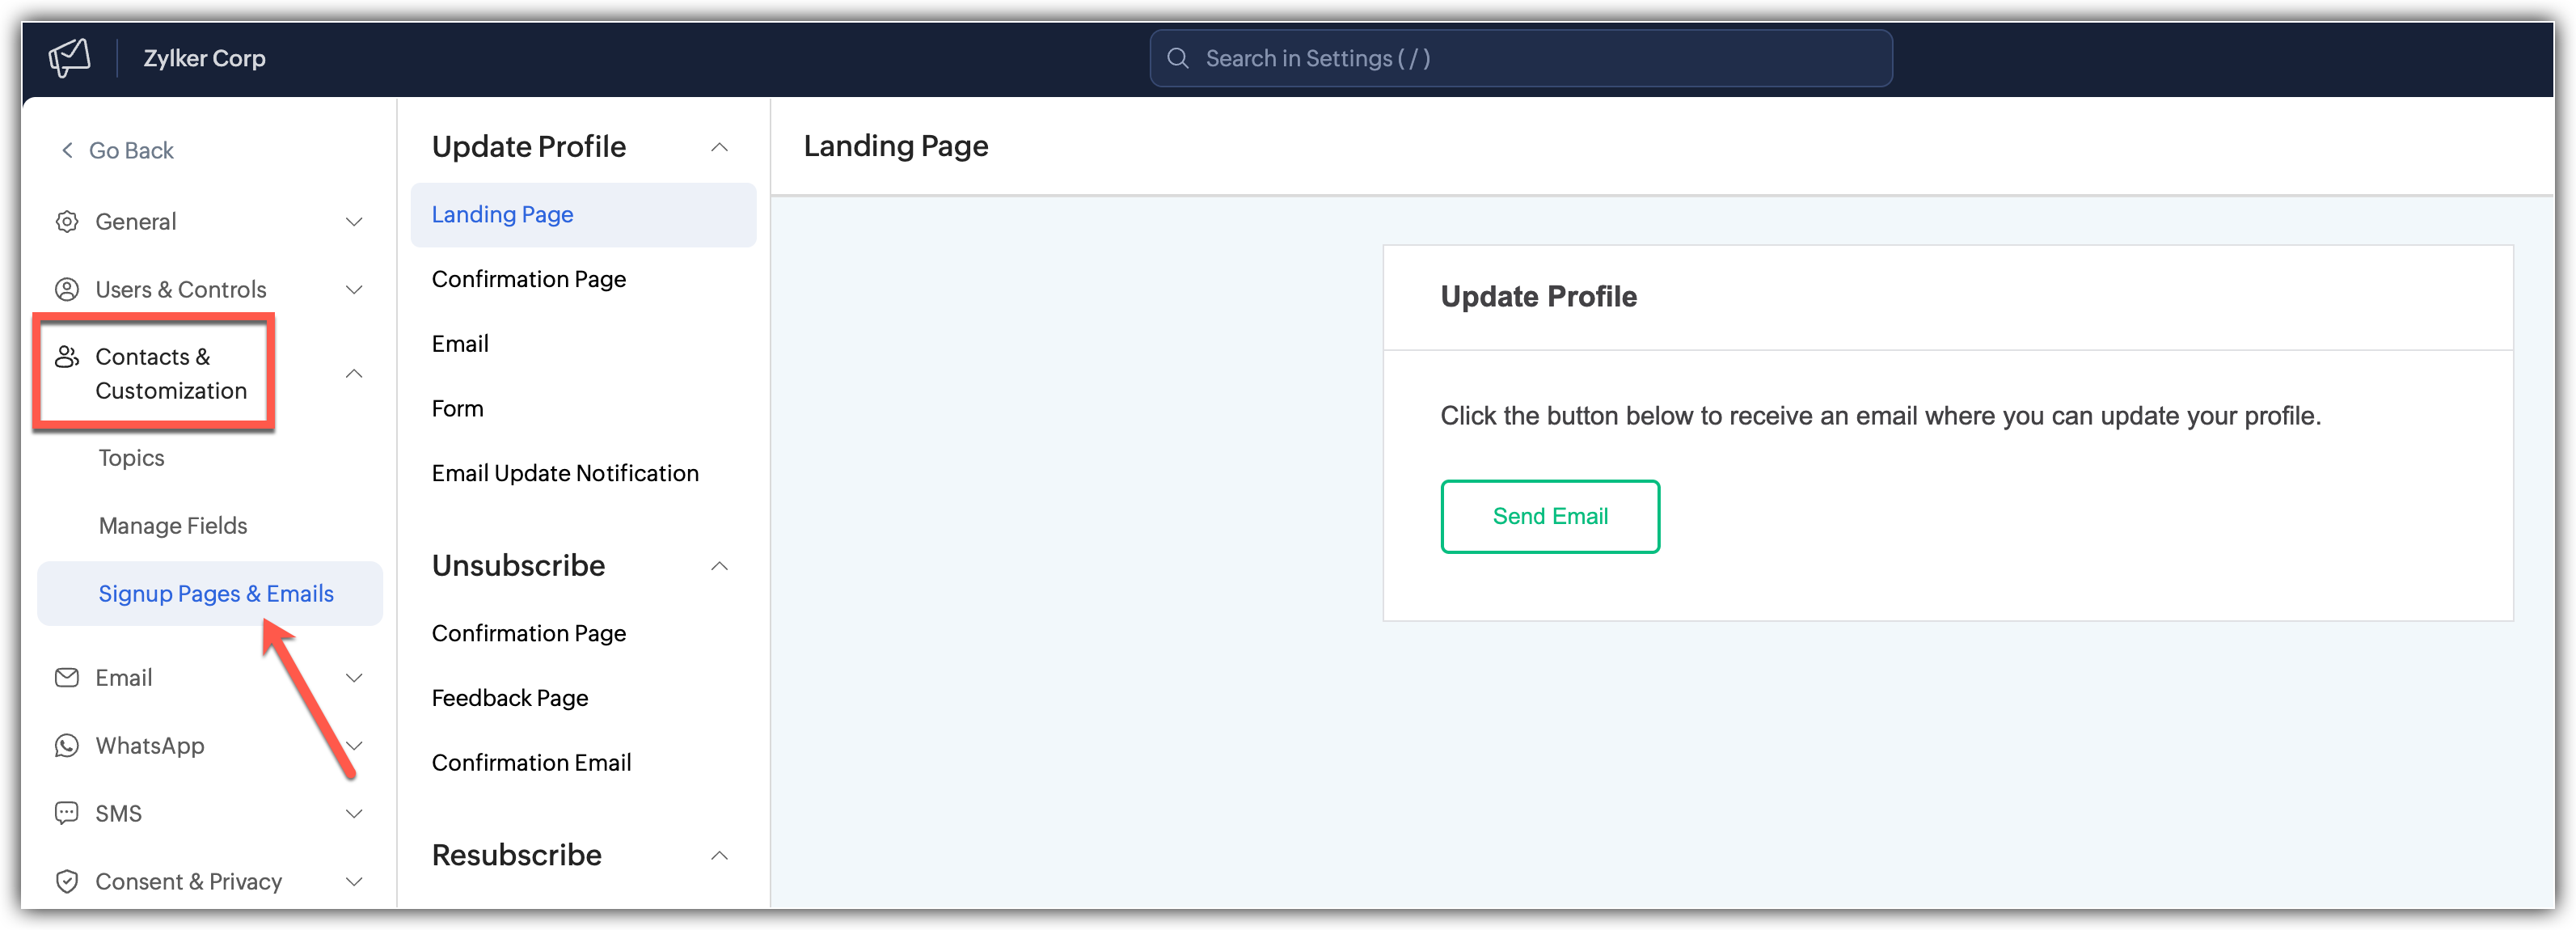
How do I customize signup pages and emails?
To customize signup pages and emails:
- Click Settings icon in the top right corner of the page.
- Select the Signup pages and emails tab under Contacts and Customization.
- A page will appear with a list of various activities.
- Select the activity you want to preview.
Choose the type of page or email you want to customize from the set of options listed under the an activity.
How will I edit the pages and emails inside separate activities?
After you click on an option, your edit page will contain all the elements that would be included in an email or a page. Each element can be edited individually depending on their functionality. Every text, every box, every background can be customized as per your brand needs. Some elements also allow you to add your brand images. The elements are listed in the left hand side of the screen, from which you can directly edit by clicking on the listed element dropdowns. Or you can just directly click on the elements shown on the canvas which will be highlighted with a doted box while moving your cursor around the canvas. Clicking on any element will automatically open the dropdown to customize the element. Once done, click on the cross button on the top right corner where you will be asked to save your changes or discard changes to the activity.
Update Profile
When a contact clicks this link, they can provide details like their first name, last name, and email address.
Landing page - Allows you to customize the page that appears when a user clicks the Update profile footer link in your emails.
Confirmation page - Allows you to customize the page that appears after an user clicks the CTA button on the landing page.
Email - Allows you to customize the content of emails that are triggered after a contact confirms the profile update changes. This is typically where forms are hyperlinked in the email to make the edits.
Form - Allows you to customize the profile update form. The form lets you enter the changes you need to make to your profile.
Email update Notification - Allows you to customize the content of the profile update notification email, which informs you of the changes made to your profile and may sometimes contain verification buttons as well.
Unsubscribe
A contact can unsubscribe from a mailing list or organization using the unsubscribe link. It is mandatory to include an unsubscribe link or button in all email campaigns as per the CAN SPAM act. You can customize the content that will be shown in the email as well as the pages associated with unsubscribe.
Confirmation page - Allows you to customize the opt-out confirmation page which displays the Unsubscribe button and option to erase your data through a checkbox. You can also include options to change your email preferences through a hyperlink.
Feedback Page - Allows you to customize the content of the exit survey that allows the contact to share their feedback either through text or poll or both.
Unsubscribe Thank You Page - Allows you to customize the thank you page shown after the feedback is submitted.
Data Erasure Page - Allows you to customize the data erasure page which informs the contact that their data will be deleted from the organization.
Unsubscribe Thank You Page - Allows you to customize the thank you page shown after the feedback is submitted.
Data Erasure Page - Allows you to customize the data erasure page which informs the contact that their data will be deleted from the organization.
Confirmation email - Allows you to customize the content of the email that is sent to the contacts to confirming their unsubscribing from the organization and erasure of data. It also lets you edit your sender details. You can include a re-subscribe button in the mail to give them a chance to join the organisation's mailing list again.
Resubscribe
Contacts can resubscribe to a mailing list by clicking the Resubscribe link.
Inactive email notification - Allows you to customize the email that informs the user about their inactive account in your organisation and gives them an option to re-subscribe with a button.
Confirmation email - Allows you to customize the content of the email that is triggered when a user clicks on the re-subscribe button from the email notification. The contact is instantly re-subscribed to your emails or organisation.
Confirmation Page - Allows you to customize the page that appears when a user clicks the button on the Inactive email notification. This page just informs the user of the process initiated to resubscribe to your organisation
Re-subscription Thank you page - Allows you to customize the content of the page that is triggered after a contact successfully resubscribes to. The page thanks the contact for coming back.

From the newer Campaigns 3.0 version, Resubscribe mails will be sent from org level that is configured here in the settings instead of setting up a resubscribe page from individual campaigns which might create a confusion due to difference in campaigns' format. Now, all the resubscribe pages will follow the same format.
Topics
A contact can manage their preferences by clicking the Manage Preference option. You can customize the Topics Preference Management page that contacts can see when they click Manage Preference.
Preference Management - Allows you to edit the content that is shown for the contact to select their email preference. It is just a way to give your contacts a choice to select the types of emails they want to receive.
Thank You Page - Allows you to customize the content of the Thank you page that a contact sees after successfully saving their preferences.
Tell-a-Friend
Contacts can share your newsletters with their friends by clicking this link.
Form - Allows you to customize the tell-a-friend form which lets you enter your friend's details and the message that you want them to see.
Forward email - Allows you to customize the content of the email that the friend will receive through the contact information submitted in the Tell a friend form. It is triggered when a user clicks the Tell a friend in the above form.
Thank you page - Allows you to customize the content of the Page that appears after a contact shares your newsletter to their friend.