Integrate with HelpDesk apps
Zoho Desk
Features
Import contacts from Zoho Desk into Zoho Campaigns.
Send targeted communication based on support interactions.
Prerequisites
You must have an active Zoho books account. If you have multiple accounts, only one account can be selected for integration.
Only users with Administrator permission in both Zoho Recruit and Zoho Campaigns can setup the sync.
Integrate with Zoho Desk 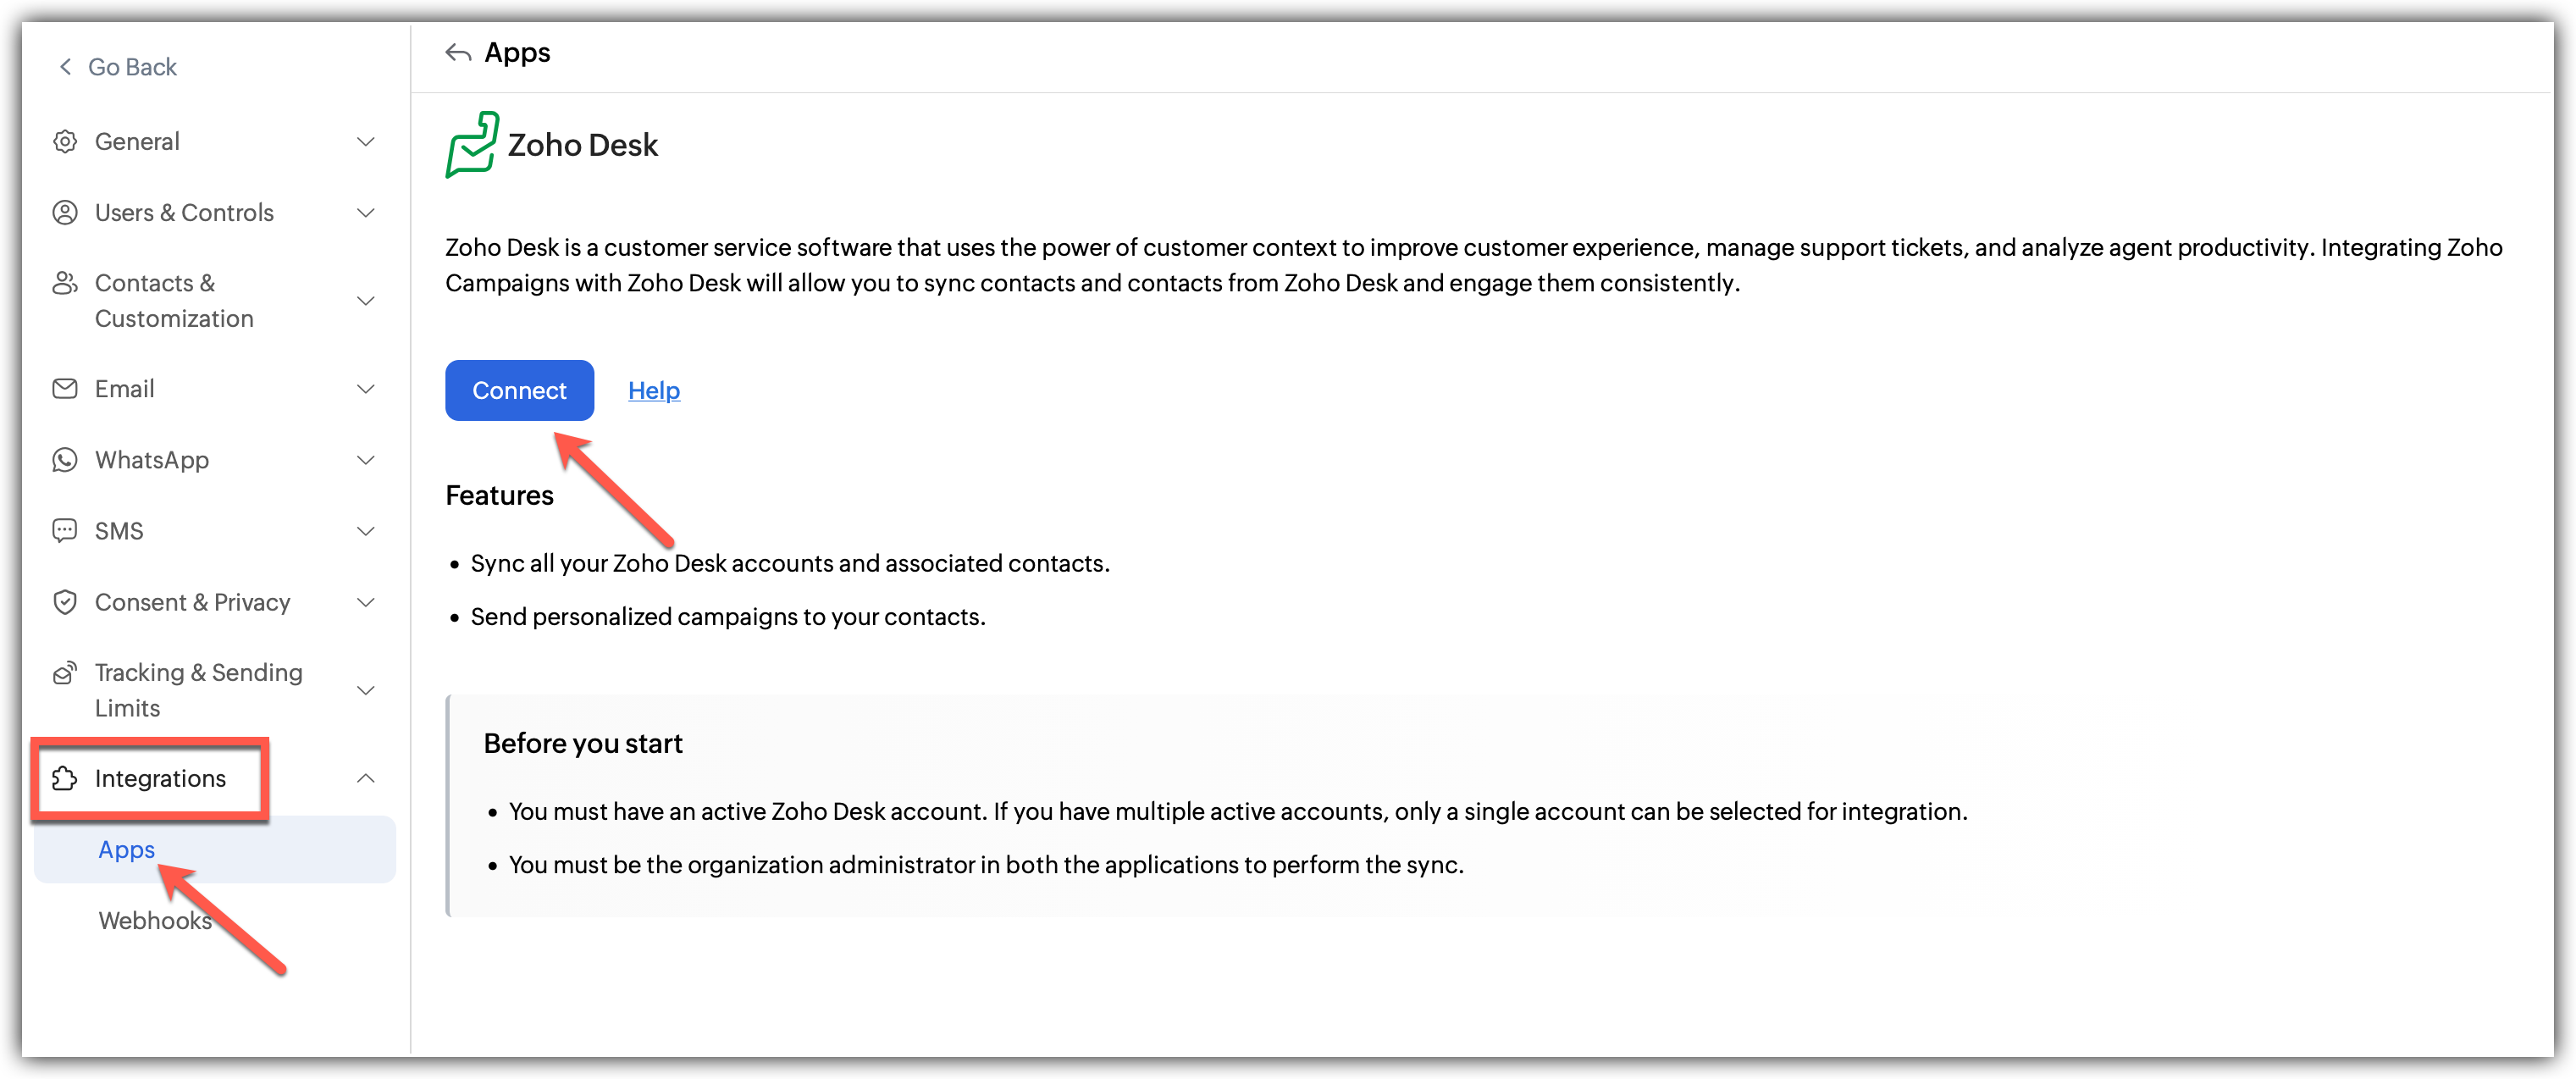
Click Settings icon on the top-right corner of the screen.
Choose Apps under Integration.
Select Zoho Desk under Zoho Apps and click Connect
A pop up appears to integrate and create a new sync.
After linking the account by choosing a desk organization to sync with Zoho Campaigns, proceed to the next step of configuring the sync.
Fill in the details of the sync:
1. Select the Desk module you want to sync.
2. Select the Workspace under it.
3. Select the list you want to sync with(optional).
4. Select the subscription type.
5. Choose a topic for the imports if required(optional).
6. Configure the Sync Date, Sync frequency and the exact condition for it.
7. Toggle whether you want to update empty field value as per Zoho Desk details.
8. Click Save and NextNow, Map the fields from Zoho Desk to Zoho Campaigns.
Click Initiate once you are done
Learn how to import contacts from Zoho Desk
What happens if I deny my Zoho Desk account Integration?
If you deny this integration,
All active syncs will be disabled.
You cannot import contacts from Zoho Desk.
You cannot send campaigns to synced contacts.
Denying access to Zoho Desk
Click Settings icon in the top-right corner of the screen.
Choose Apps under Integration.
Under connected apps, Select Zoho Desk.
Click the Disconnect option after clicking the three dots in the right.
A pop appears informing about the effect of disconnecting.
Click Proceed.
Post Integration
You can always go back and edit the Sync details and Field Mapping
You can also view the Sync History which logs all the actions related to this integration including Total Records, Added, Updated, Skipped contacts.
Zendesk
Zendesk is a customer service and helpdesk platform used to manage support tickets, customer conversations, and agent workflows from a centralized system.
Integrating Zendesk with Zoho Campaigns allows you to sync Zendesk contacts into your mailing lists and use them for targeted customer communication and engagement campaigns.
Features
IImport contacts from Zendesk into Zoho Campaigns.
Sync Zendesk contact data with mailing lists.
Send personalized campaigns to your Zendesk contacts.
Prerequisites
You must have an active Zendesk account. If you have multiple accounts, only one account can be selected for integration.
Only users with Administrator permission in Zoho Campaigns can setup the sync.
To integrate with Zendesk 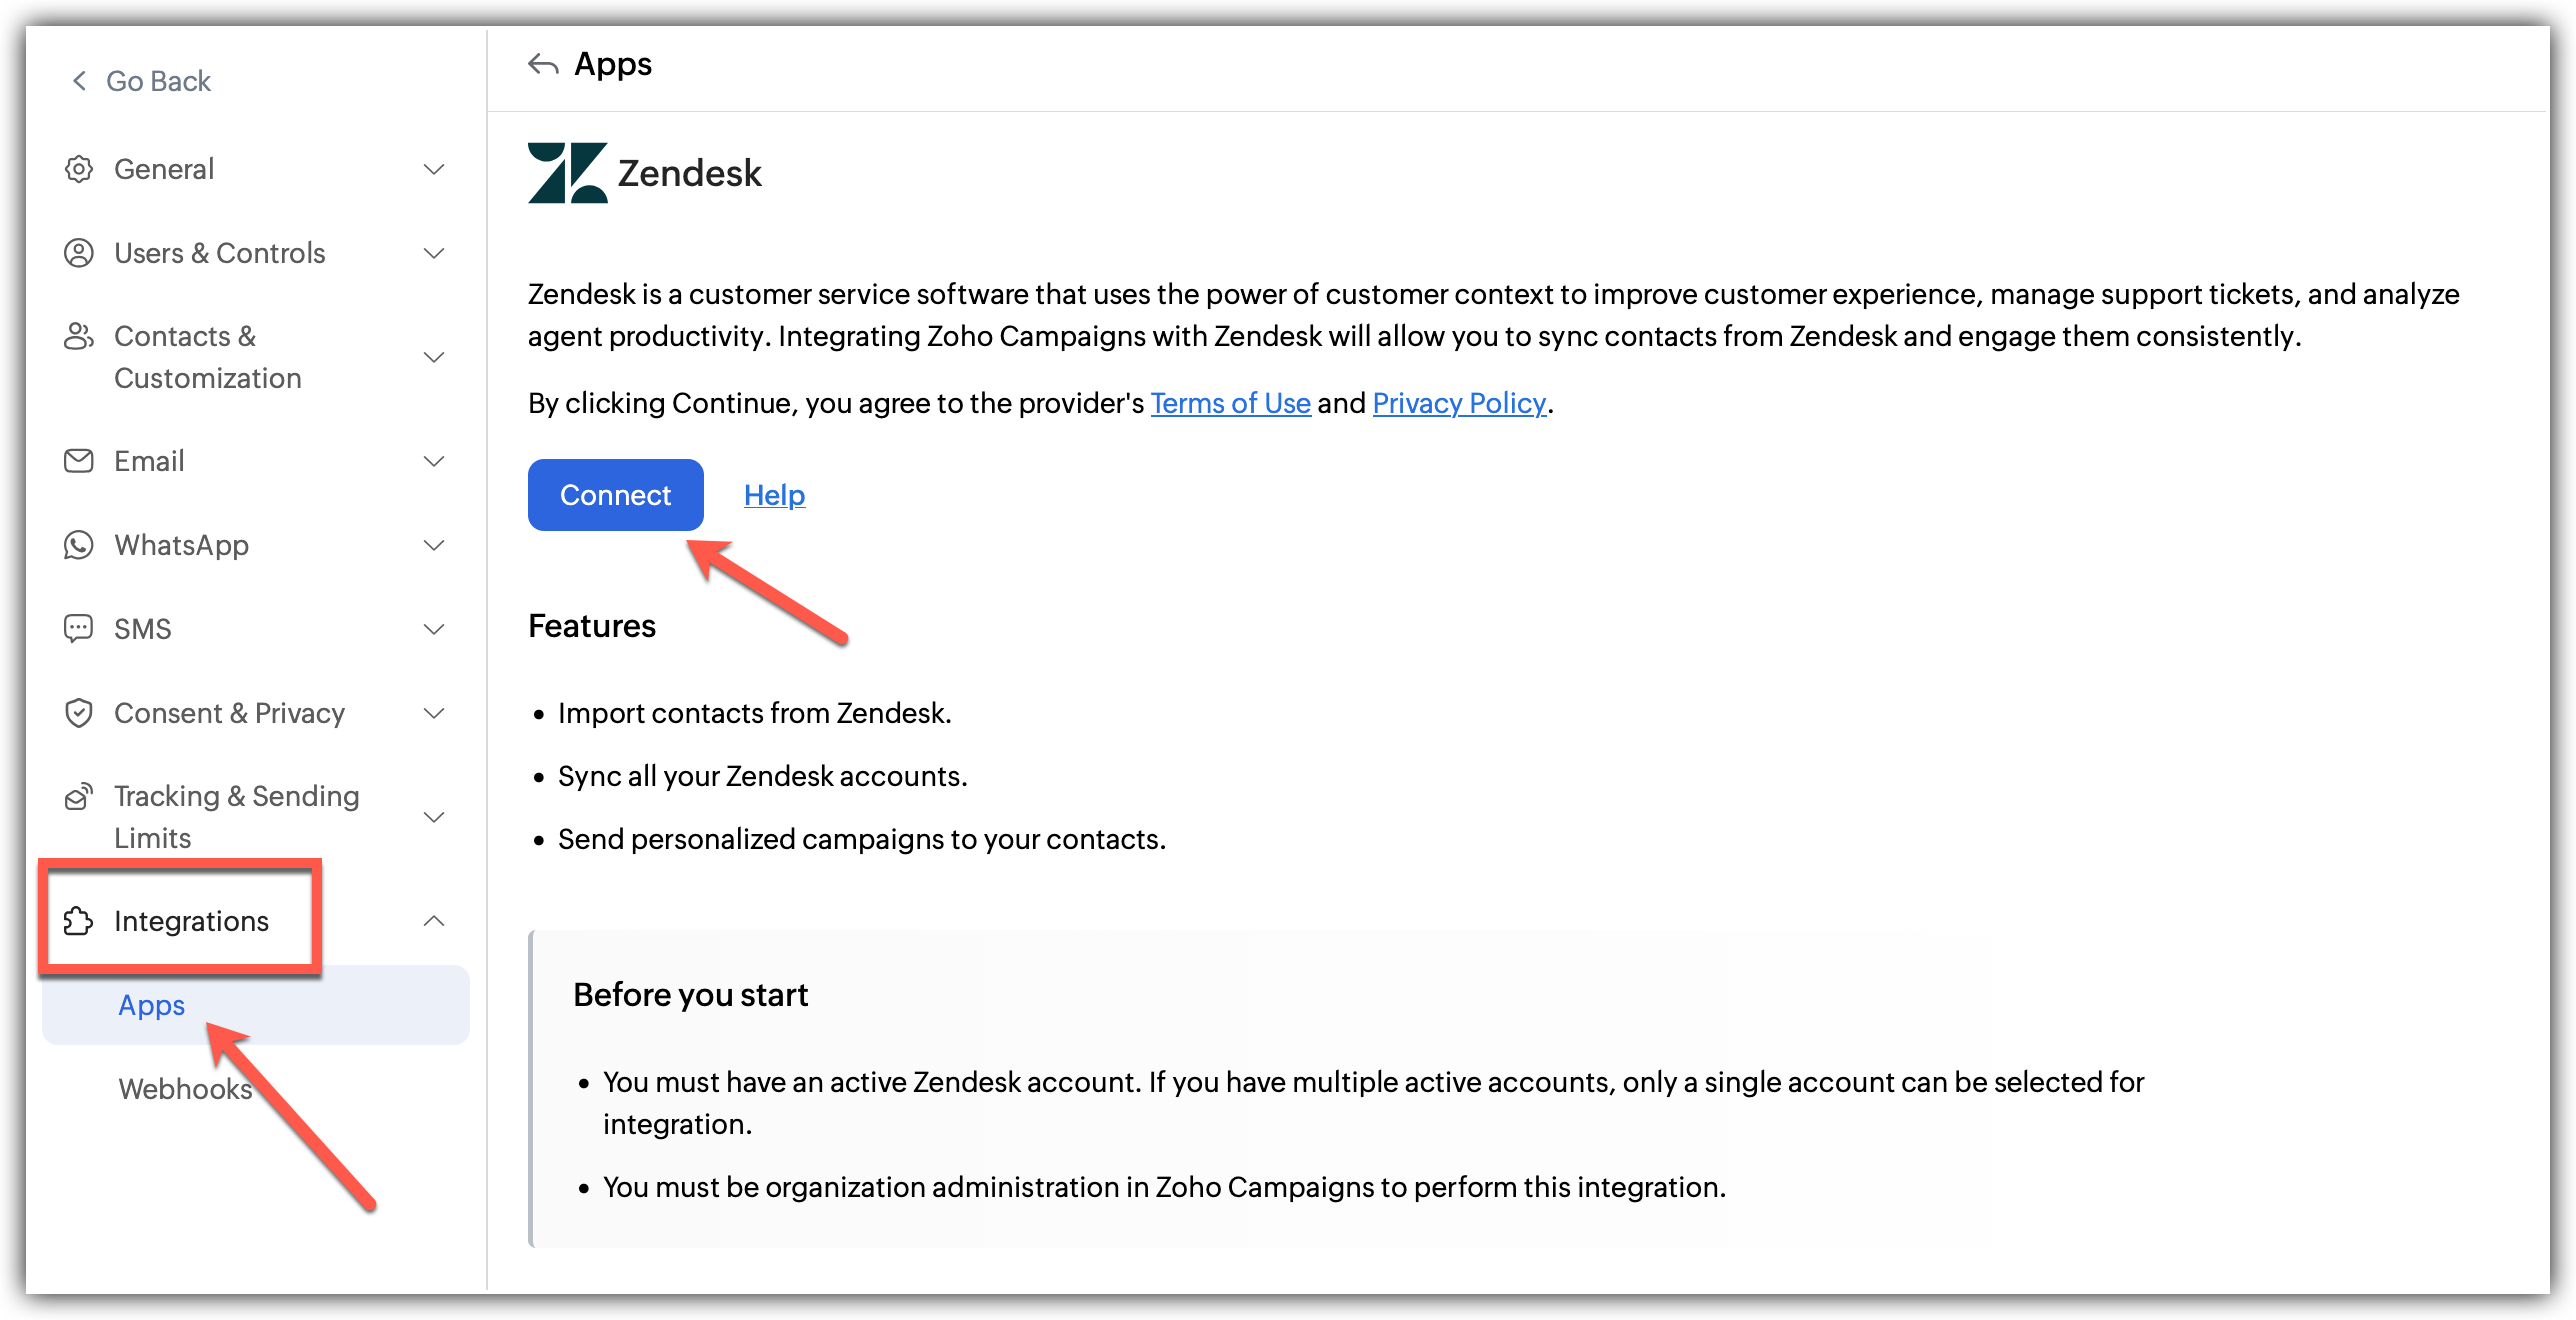
Click Settings icon on the top-right corner of the screen, then click Apps under Integrations.
Click Helpdesk under Categories and then, select Zendesk.
Click Connect.
A popup window will appear to configure the integration.
Enter Zendesk URL and click Integrate.
On the redirected page, enter your Zendesk Login credentials and enter the passcode sent to your email.
Click Allow after confirming the permissions that will be required by Zoho Campaigns for the integration.
Your account is now integrated with Zendesk.
Click Create Sync to initiate integration
A pop up appears to create a new sync.
Fill in the details of the sync:
1. Choose the Zendesk module that you want to sync.
2. Select the Workspace under it.
3. Select the list you want to sync to.
4. Select the subscription type.
5. Choose a topic for the imports if required.
6. Select the Date, Sync frequency and the exact condition for it.
7. Toggle whether you want to update empty field value as per Zendesk detailsClick Save and Next
Now, Map the fields from Zendesk to Zoho Campaigns.
Click Save and your sync will be initiated.
What happens if I deny my Zendesk account integration?
If you deny/change Zendesk integration
Import of contacts from Zendesk will be stopped.
All active syncs will be aborted.
Campaigns that depend on Zendesk-synced contacts may be affected.
Denying access to Zendesk
Follow the steps given below to disconnect your Zendesk account.
Click the Settings icon in the top-right corner.
Click Apps under Integrations.
Select Zendesk under Connected Apps.
Click the Disconnect option after clicking the three dots in the right.
A pop appears informing about the effect of disconnecting.
Click Proceed.
Post Integration
You can always go back and edit the Sync details and Field Mapping
You can also view the Sync History which logs all the actions related to this integration including Total Records, Added, Updated, Skipped contacts.