Integrate with Sales apps
Integrating your CRM account with an email marketing software helps you to establish a strong relation with your contact base and improve contact engagement. You can keep a track of each and every action that you take, eventually creating a complete record of your engagement with your contacts. Zoho Campaigns allows you to integrate with different CRM applications apart from the in-house Zoho CRM integration. This guide will help you understand how you can integrate your Zoho Campaigns account with CRM applications.
Integrate with Salesforce
Salesforce is a customer relationship management (CRM) platform used to manage leads, contacts, accounts, deals, and sales activities from a centralized system. Integrating Salesforce with Zoho Campaigns allows you to sync contacts and leads between both platforms and use your CRM data for email campaigns and customer engagement activities. You can configure scheduled syncs, manage field mappings, and keep your marketing lists updated using Salesforce records.
Features
- Import leads and contacts from Salesforce.
- Sync all your Salesforce accounts and deals associated with a contact.
- Nurture your contacts using multiple channels.
- View sync activity and record updates through Sync History.
Before you start
- You must have an active Salesforce account. If you have multiple accounts, only one account can be selected for integration.
- Only users with Administrator permission in Zoho Campaigns can setup the sync.
Connecting your Salesforce account
- Click Settings icon on the top-right corner of the screen.
- Choose Apps under Integration.
- Click Sales under Categories and then, select Salesforce.
- Click Connect.
- On the redirected page, Sign into Salesforce and complete the integration.
- Now, enter the passcode sent to your email.
- Your account is now integrated with Salesforce.
- Click Create Sync to initiate integration
- A pop up appears to create a new sync.
- Fill in the details of the sync:
1. Choose the Salesforce module that you want to sync.
2. Select the Date, Sync frequency and the exact condition for it.
3. Select the Workspace under it.
4. Select the list you want to sync to.
5. Select the subscription type.
6. Choose a topic for the imports if required.
7. Select the checkbox to Update empty field value as per Salesforce details
8. Select the checkbox to Exclude contacts who had opted-out and Remove contacts who opted out. - Click Save and Next
- Now, Map the fields from Salesforce to Zoho Campaigns to import the contact information.
- Click Save and your sync will be initiated.
What happens if I deny my Salesforce account Integration?
If you deny this integration,
- All active syncs associated with Salesforce will be stopped.
- You cannot import further contacts from Salesforce.
- Campaigns that rely on Salesforce-synced contacts may be affected.
- Marketing-related activity data will no longer be shared with Salesforce.
Denying access to Salesforce
- Click Settings icon in the top-right corner of the screen.
- Choose Apps under Integration.
- Under connected apps, Select Salesforce.
- Click the Disconnect option after clicking the three dots in the right.
- A pop appears informing about the effect of disconnecting.
- Click Proceed.
Post Integration
- At the integration page, you can view the syncs in a list view format under modules if multiple syncs are running simultaneously.
- Also, individual integrations have a pause, re-intitiate and delete sync options for easier accessibility.
- You can view all the syncs and you can view the details of a particular sync, and also edit the configuration or delete it.
- You can re-map or map more fields for your sync settings by clicking the Sync name to get a Detail View.
- Individual syncs also have their Sync History which logs all the actions related to this integration including Total Records, Added, Updated, Skipped contacts.
- Enable Exclude opt-out contacts - By enabling this, the leads/contacts who have opted out of Salesforce will not be synced to Zoho Campaigns.
- Enable Remove leads/contacts opted out of Salesforce - By enabling this, the leads/contacts that are synced in Zoho Campaigns but have opted out of Salesforce will be removed.
Integration with Hubspot
Hubspot is an online sales CRM software for managing your business sales processes. Integrating Zoho marketing Automation with Hubspot will allow you to sync contacts instantly, engage them consistently and make them sales-ready.
Before you start
- You must have an active Hubspot account.
- You must be the organization administrator in both the applications to perform this integration.
Connecting your Hubspot account 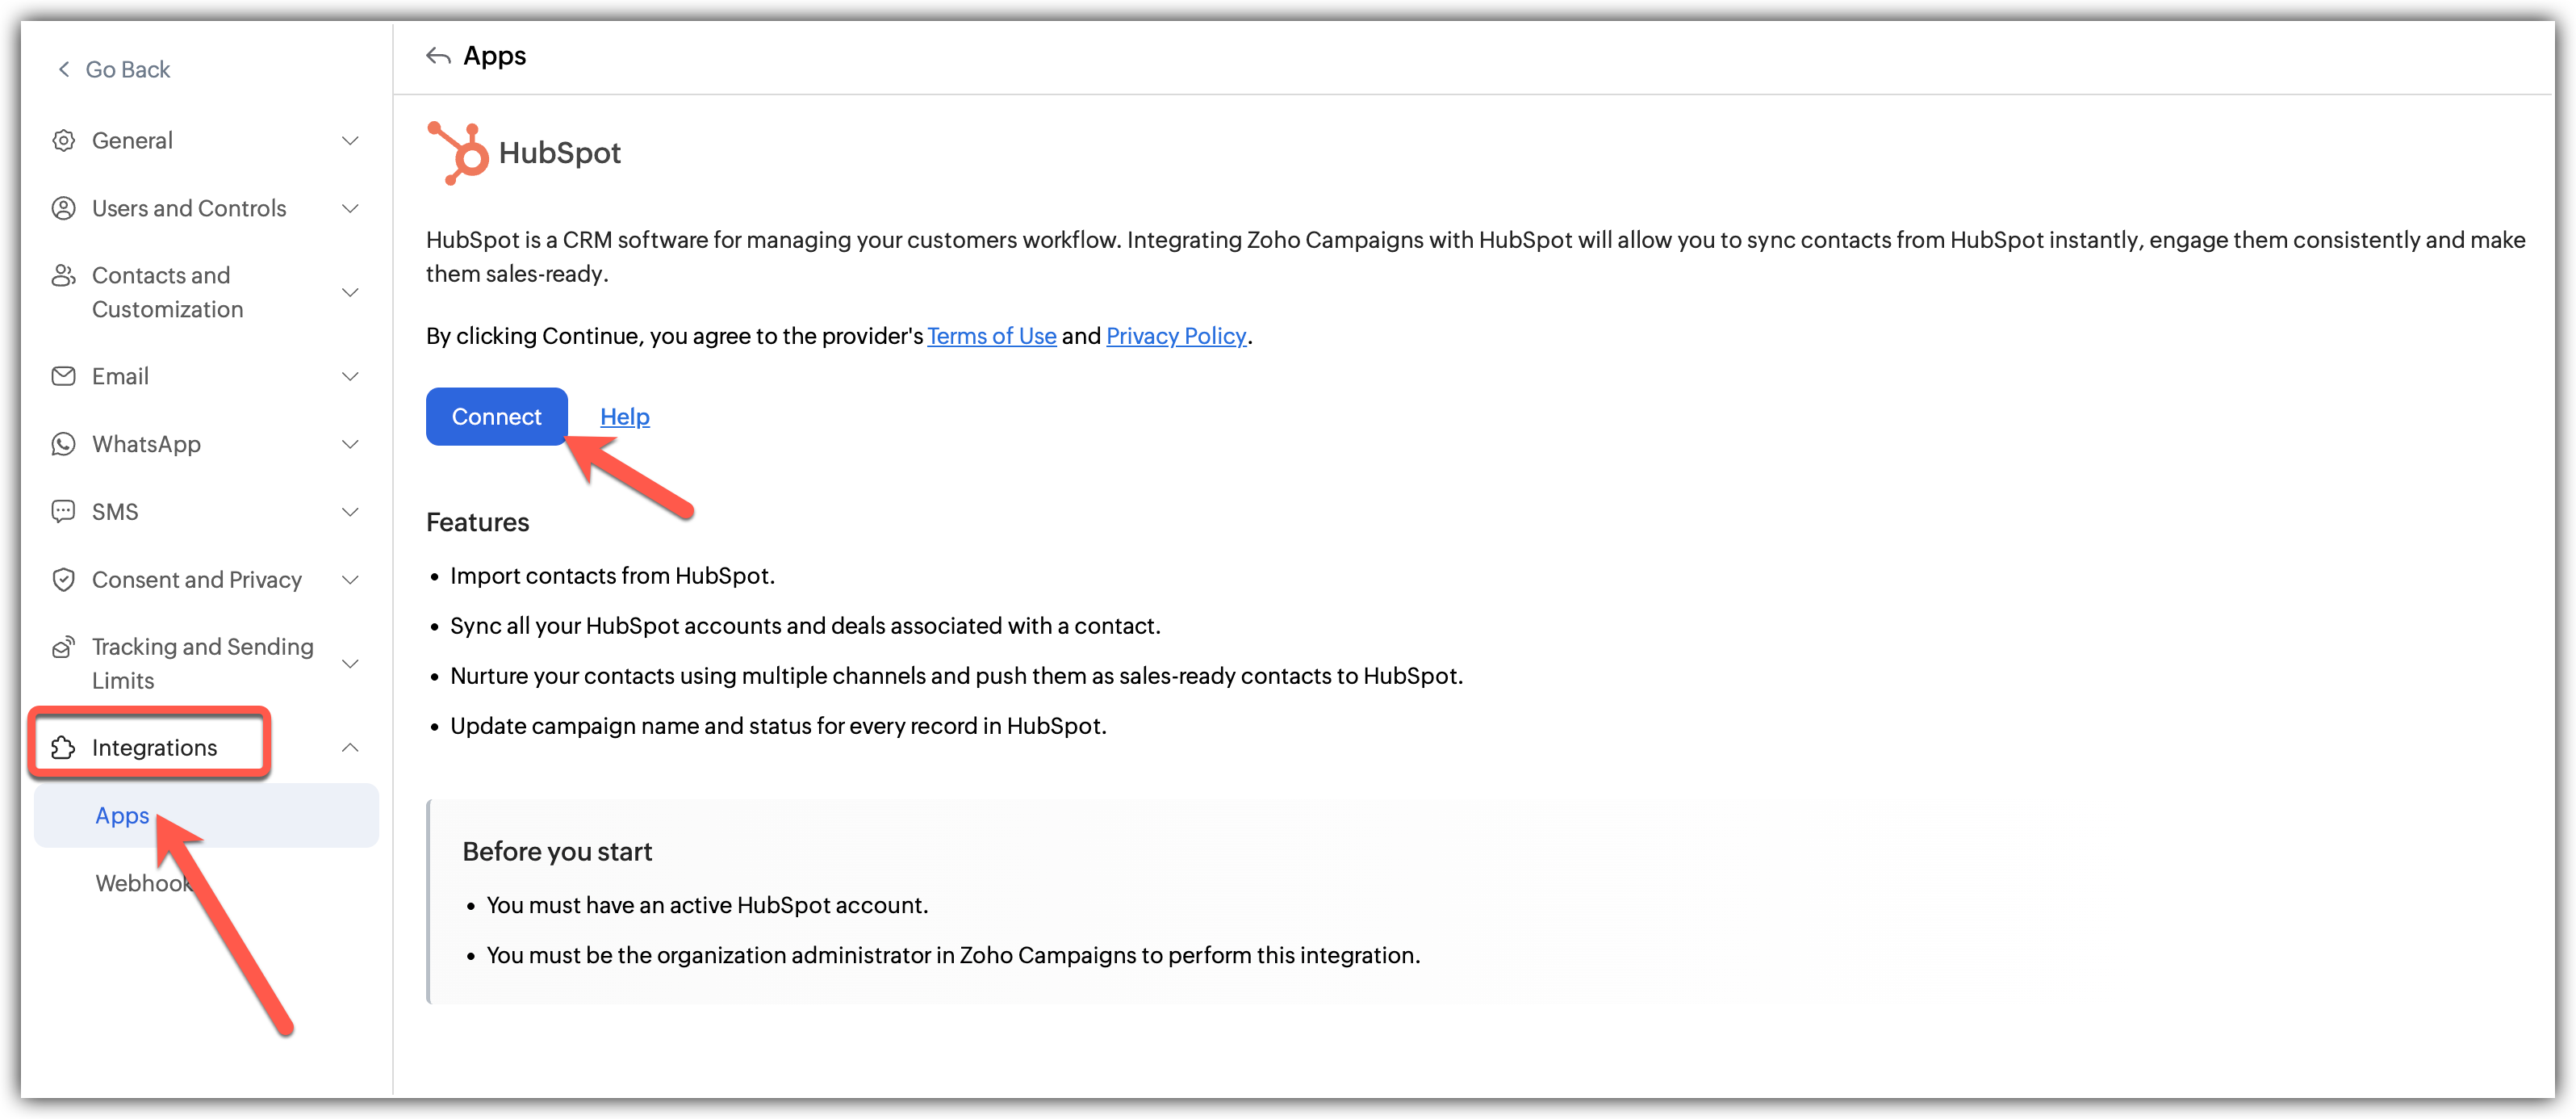
- Click Settings icon on the top-right corner of the screen.
- Choose Apps under Integration.
- Click Sales under Categories and then, select Hubspot.
- Click Connect.
- On the redirected page, Sign in to Hubspot and complete the integration.
- Now, enter the passcode sent to your email.
- Your account is now integrated with Hubspot.
- Click Create Sync to initiate integration
- A pop up appears to create a new sync.
- Fill in the details of the sync:
1. Choose the Hubspot module that you want to sync.
2. Select the Date, Sync frequency and the exact condition for it.
3. Select the subscription type - Marketing or Non-marketing contacts.
4. Select the Workspace under it.
5. Select the list you want to sync to.
6. Choose a topic for the imports if required.
7. Select the checkbox to Update empty field value as per Hubspot details
8. Select the checkbox to Exclude contacts who had opted-out and Remove contacts who opted out. - Click Save and Next
- Now, Map the fields from Hubspot to Zoho Campaigns to import the contact information.
- Click Save and your sync will be initiated.
Integrate with SugarAI
SugarAI is an online sales CRM software for managing your business sales processes. Integrating Zoho Campaigns with SugarAI will allow you to sync contacts from SugarAI, engage them consistently and make them sales-ready.
Before you start
- You must have an active SugarAI account. If you have multiple active accounts, only a single account can be selected for integration.
- You must be the organization administrator in Zoho Campaigns to perform the sync.
Connecting your SugarAI account 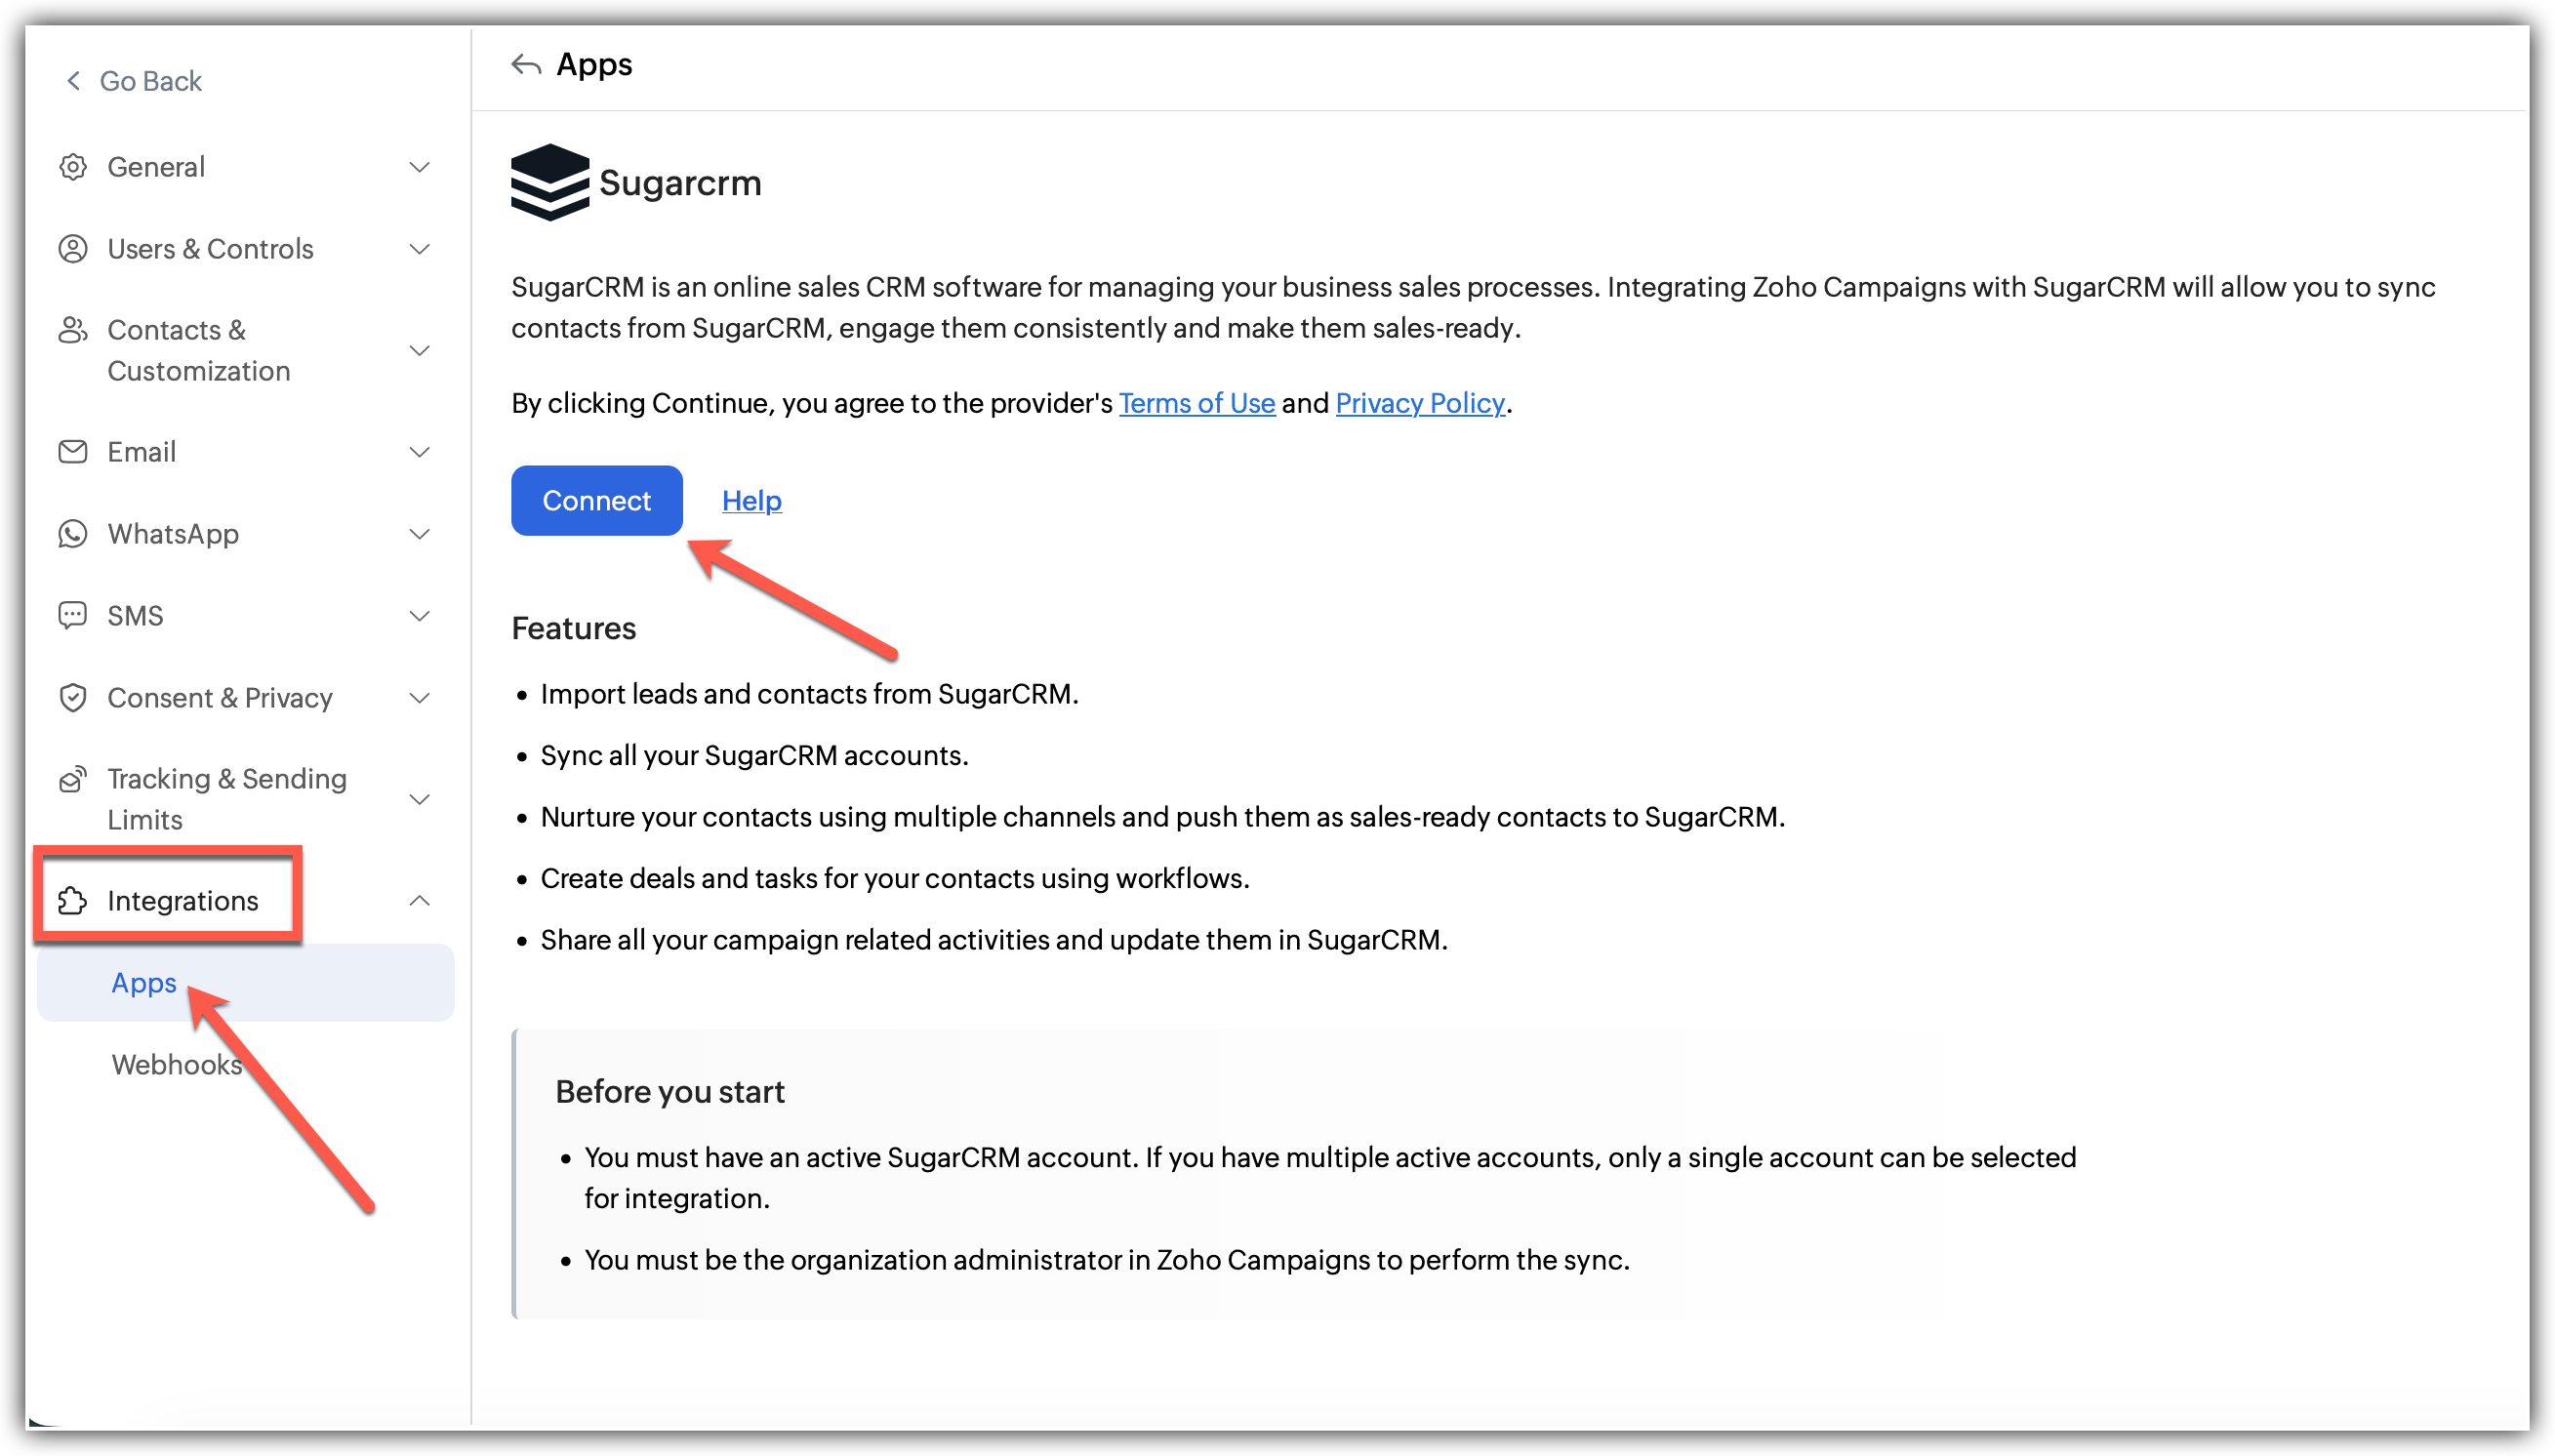
- Click Settings icon on the top-right corner of the screen.
- Choose Apps under Integrations.
- Click Sales under Categories and then, select SugarAI.
- Click Connect.
- On the redirected page, Sign into your SugarAI account to complete the integration.
- Your account is now integrated with SugarAI.
- Click Create Sync to initiate integration
- A pop up appears to create a new sync.
- Fill in the details of the sync:
1. Choose the SugarAI module that you want to sync.
2. Select the Date, Sync frequency and the exact condition for it.
3. Select the Workspace under it.
4. Select the list you want to sync to.
5. Select the subscription type.
6. Choose a topic for the imports if required.
7. Select the checkbox to Update empty field value as per SugarAI details
8. Select the checkbox to Exclude contacts who had opted-out and Remove contacts who opted out. - Click Save and Next
- Now, Map the fields from SugarAI to Zoho Campaigns to import the contact information.
- Click Save and your sync will be initiated.
Integration with MS Dynamics
MS Dynamics is an online sales CRM software for managing your business sales processes. Integrating Zoho Campaigns with MS Dynamics will allow you to sync contacts from MS Dynamics, engage them consistently and make them sales-ready.
Before you start
- You must have an active MS Dynamics account. If you have multiple active accounts, only a single account can be selected for integration.
- You must be the organization administrator in Zoho Campaigns to perform the sync.
To integrate with MS Dynamics, 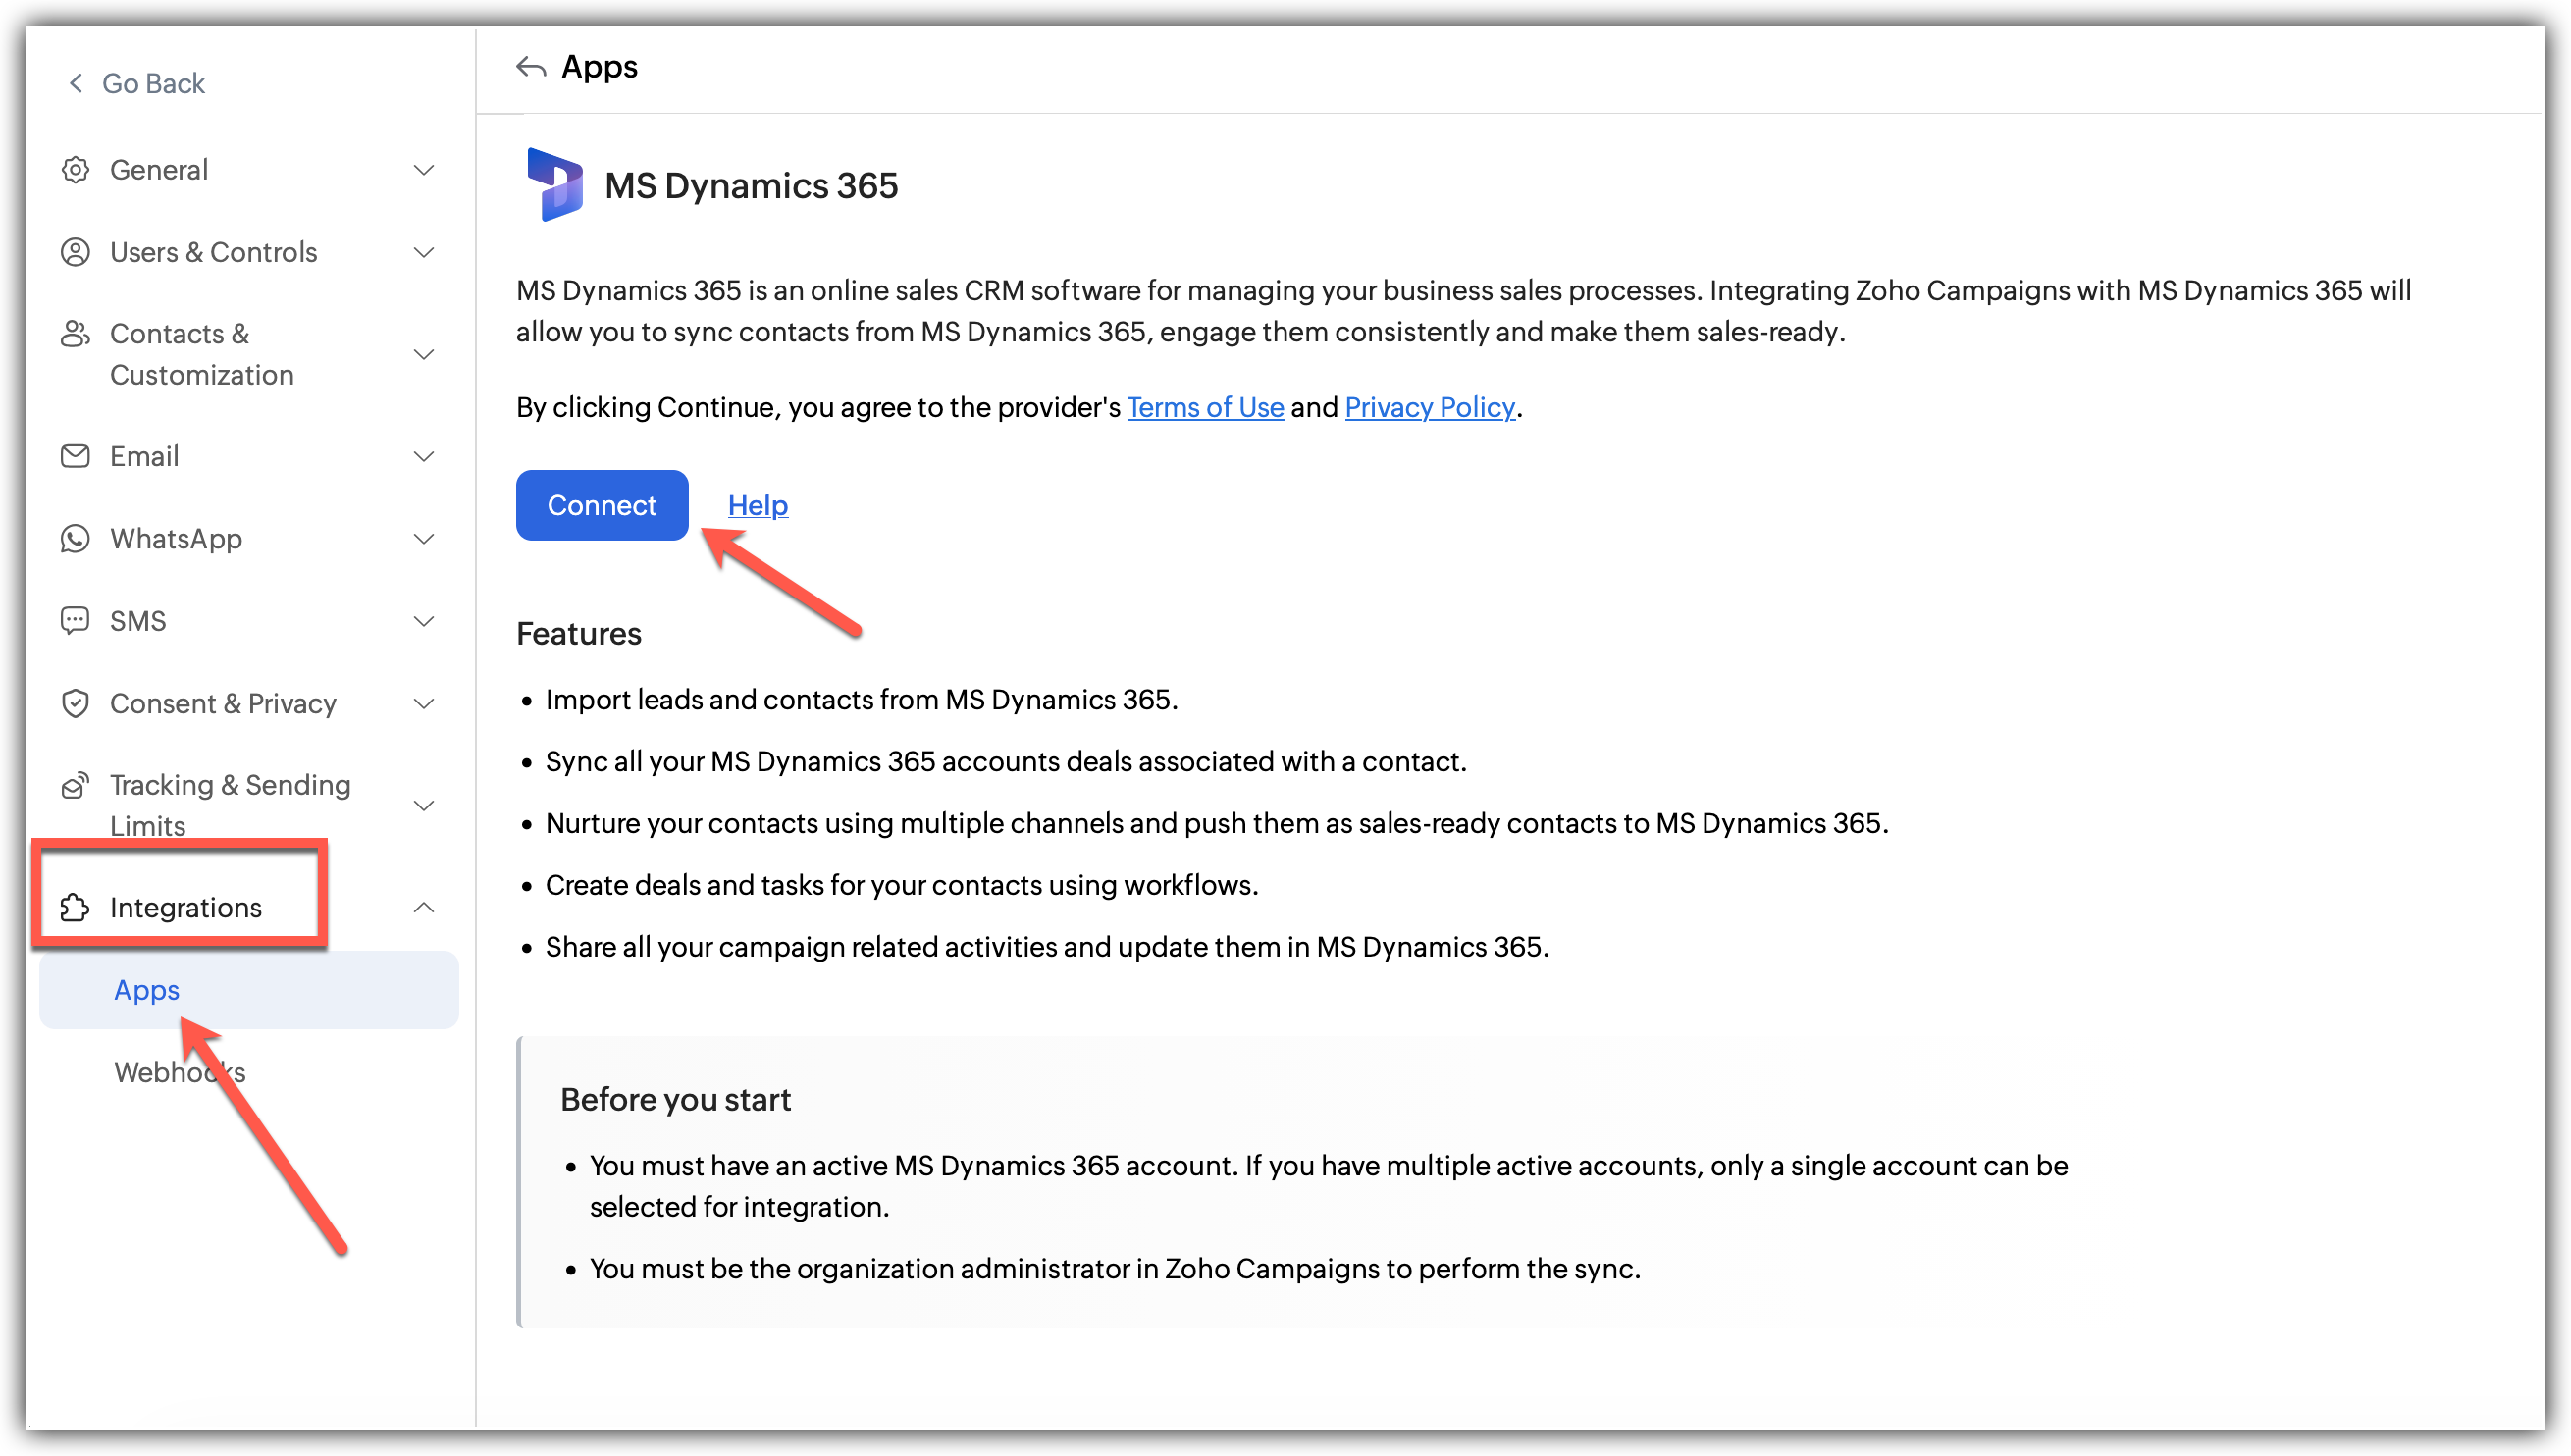
- Click Settings icon on the top-right corner of the screen.
- Choose Apps under Integrations.
- Click Sales under Categories and then, select MSDynamics.
- Click Connect.
- On the redirected page, Sign into your MSDynamics account to complete the integration.
- Your account is now integrated with MSDynamics.
- Click Create Sync to initiate integration
- A pop up appears to create a new sync.
- Fill in the details of the sync:
1. Choose the MSDynamics module that you want to sync.
2. Select the Date, Sync frequency and the exact condition for it.
3. Select the Workspace under it.
4. Select the list you want to sync to.
5. Select the subscription type.
6. Choose a topic for the imports if required.
7. Select the checkbox to Update empty field value as per MSDynamics details
8. Select the checkbox to Exclude contacts who had opted-out and Remove contacts who opted out. - Click Save and Next
- Now, Map the fields from MSDynamics to Zoho Campaigns to import the contact information.
- Click Save and your sync will be initiated.
Integrate with Zoho Books
Zoho Books helps you manage your accounting data, including customers and transactions. When integrated with Zoho Campaigns, it allows you to use your financial data to drive communication—so you can engage customers based on billing activity without manual data handling. This is particularly useful for sending updates, reminders, or campaigns tied to customer transactions.
Features
- Import customer details from Zoho Books into Zoho Campaigns.
- Build campaigns based on customer activity and transactions.
- Send updates and reminders without manual follow-ups.
Before you start
- You must have an active Zoho books account. If you have multiple accounts, only one account can be selected for integration.
- Only users with Administrator permission in both Zoho Books and Zoho Campaigns can setup the sync.
Connecting your Zoho Books account 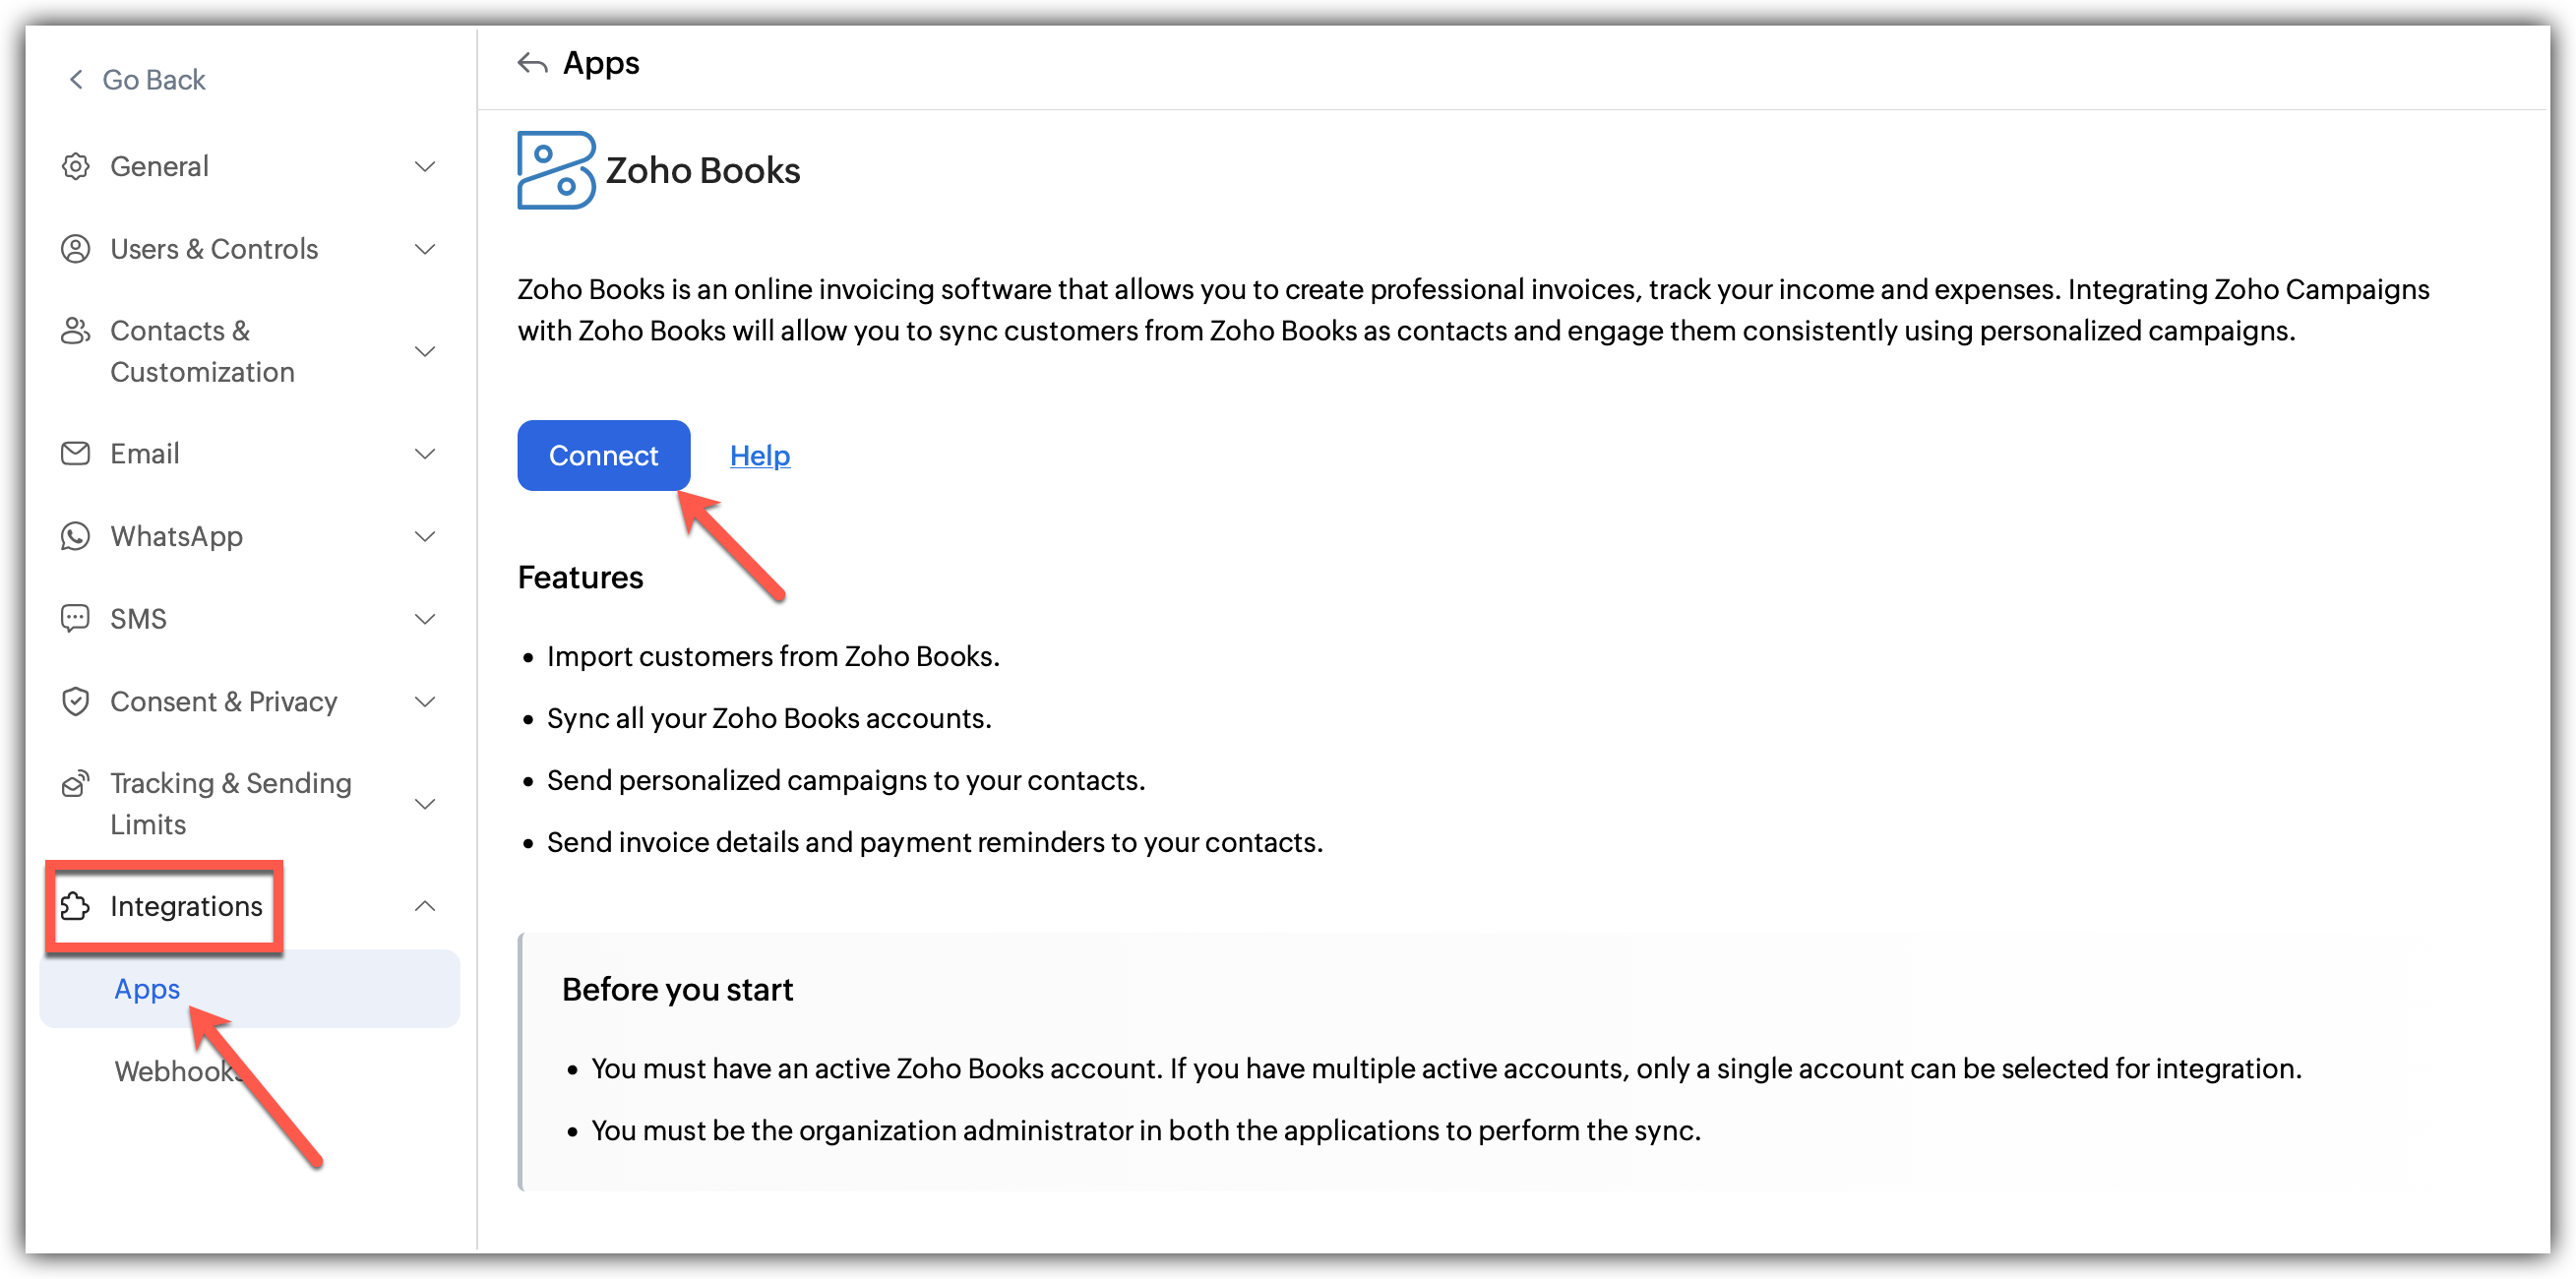
- Click Settings icon on the top-right corner of the screen.
- Choose Apps under Integration.
- Select Zoho Books under Zoho Apps and click Connect.
- A pop up appears to integrate and create a new sync.
- After linking the account by choosing an organization to sync with Zoho Campaigns, proceed to the next step of configuring the sync.
- Fill in the details of the sync:
1. Select the Books module you want to sync.
2. Select the Workspace under it.
3. Select the list you want to sync with(optional).
4. Select the subscription type.
5. Choose a topic for the imports if required(optional).
6. Configure the Sync Date, Sync frequency and the exact condition for it.
7. Select the checkbox to Update empty field value as per Zoho Books details
8. Select the checkbox to Exclude contacts who had opted-out and Remove contacts who opted out.
8. Click Save and Next. - Now, Map the fields from Zoho Books to Zoho Campaigns.
- Click Initiate once you are done
What happens if I deny my Zoho Books account Integration?
If you deny this integration,
- All active syncs will be disabled.
- You cannot import further customer data from Zoho Books.
- You cannot send campaigns to synced contacts.
Denying access to Zoho Books
- Click Settings icon in the top-right corner of the screen.
- Choose Apps under Integration.
- Under connected apps, Select Zoho Analytics.
- Click the Disconnect option after clicking the three dots in the right.
- A pop appears informing about the effect of disconnecting.
- Click Proceed.
Post Integration
- You can always go back and edit the Sync details and Field Mapping
- You can also view the Sync History which logs all the actions related to this integration including Total Records, Added, Updated, Skipped contacts.
Integrate with Bigin by Zoho CRM
Bigin by Zoho CRM is a pipeline-centric CRM designed to manage customer relationships. When integrated with Zoho Campaigns, it allows you to sync contacts and track engagement, helping you move leads through your pipeline more effectively.
This integration is useful for aligning your marketing efforts with your sales pipeline.
Features
- Import contacts along with associated deal information.
- Engage contacts through campaigns and move them through your pipeline.
- Update campaign-related details for records in Bigin.
Before you start
- You must have an active Zoho Bigin account. If you have multiple accounts, only one account can be selected for integration.
- Only users with Administrator permission in both Zoho Bigin and Zoho Campaigns can setup the sync.
Connecting your Zoho Bigin account 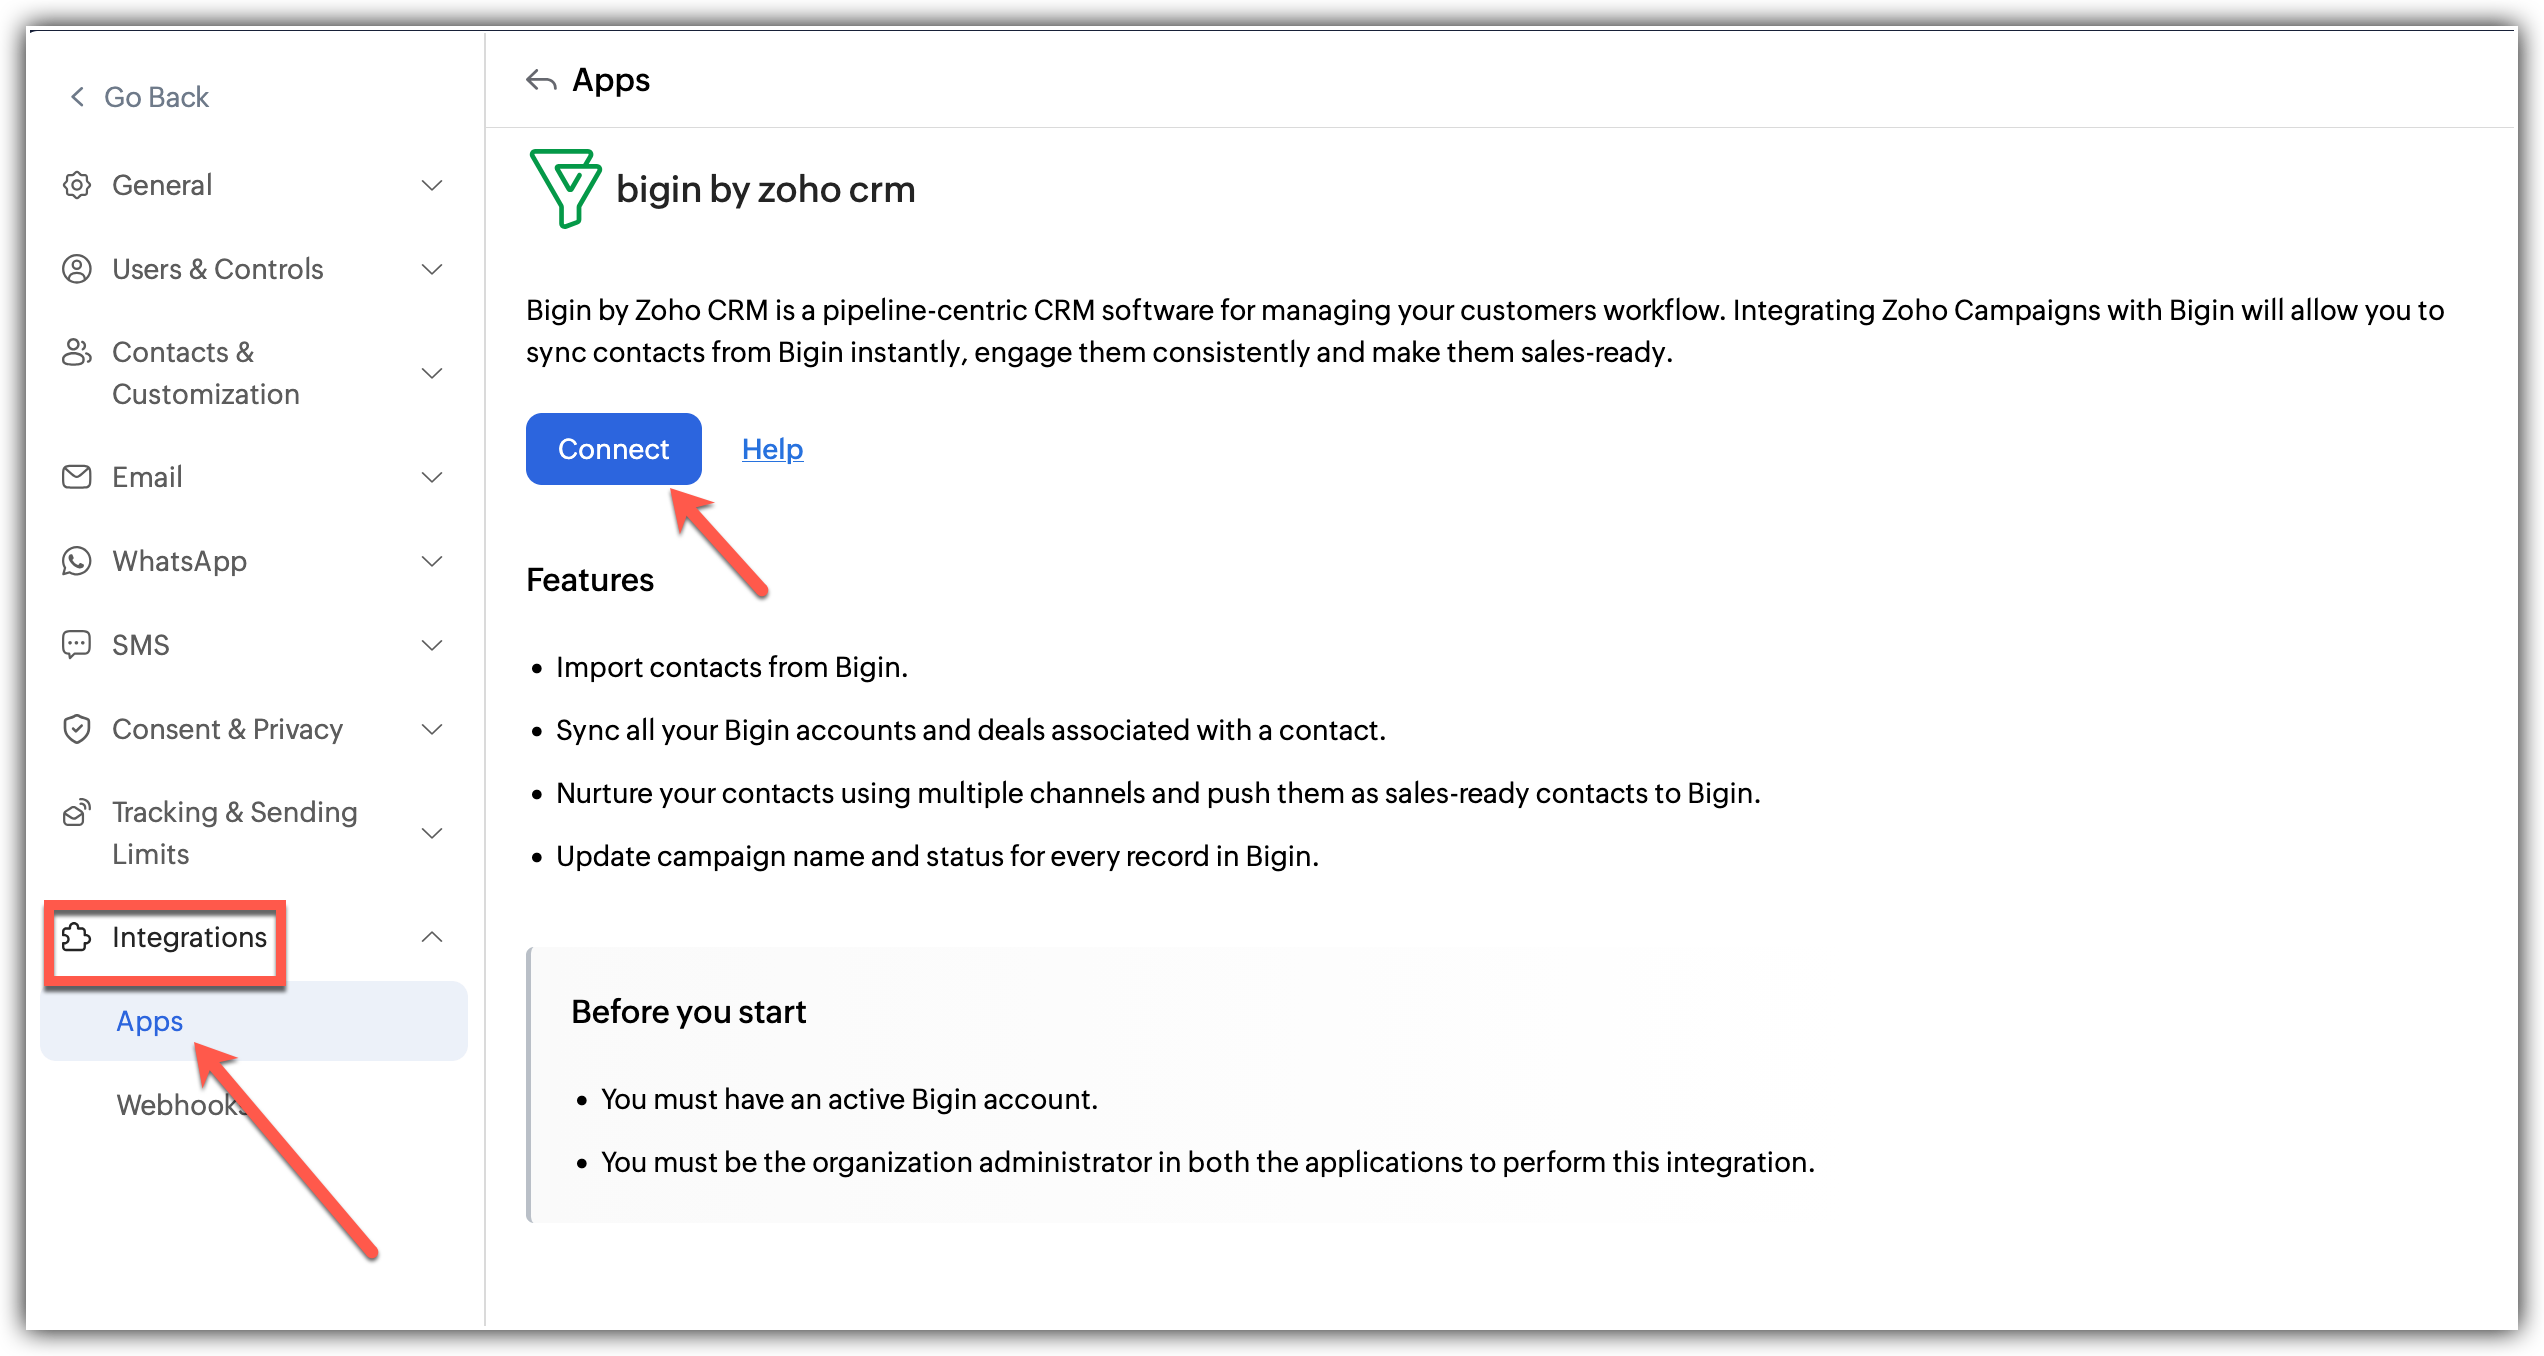
- Click Settings icon on the top-right corner of the screen.
- Choose Apps under Integration.
- Select Zoho Bigin under Zoho Apps and click Connect
- A pop up appears to integrate and create a new sync.
- After linking the account by choosing an organization to sync with Zoho Campaigns, proceed to the next step of configuring the sync.
- Fill in the details of the sync:
1. Select the Bigin module you want to sync.
2. Select the Workspace under it.
3. Select the list you want to sync with(optional).
4. Select the subscription type.
5. Choose a topic for the imports if required(optional).
6. Select the checkbox to Update empty field value as per Zoho Bigin details
8. Select the checkbox to Exclude contacts who had opted-out and Remove contacts who opted out.
8. Click Save and Next - Now, Map the fields from Zoho Bigin to Zoho Campaigns.
- Click Initiate once you are done.
What happens if I deny my Zoho Bigin account Integration?
If you deny this integration,
- You cannot import further contacts from Bigin.
- All active syncs will be disabled.
- Your existing syncs and settings may be deleted.
Denying access to Zoho Bigin
- Click Settings icon in the top-right corner of the screen.
- Choose Apps under Integration.
- Under connected apps, Select Zoho Bigin.
- Click the Disconnect option after clicking the three dots in the right.
- A pop appears informing about the effect of disconnecting.
- Click Proceed.
Post Integration
- You can always go back and edit the Sync details and Field Mapping.
- You can also view the Sync History which logs all the actions related to this integration including Total Records, Added, Updated, Skipped contacts.
Integrate with Zoho Recruit
Zoho Recruit helps you manage candidates and hiring workflows. When integrated with Zoho Campaigns, it allows you to engage candidates and contacts through campaigns while keeping recruitment data aligned. This is useful for sending updates, nurturing candidates, and maintaining communication throughout the hiring process.
Features
- Import candidates and contacts from Zoho Recruit.
- Use Campaigns to engage candidates at different stages.
- Sync campaign-related updates back to your recruitment workflows.
Before you start
- You must have an active Zoho books account. If you have multiple accounts, only one account can be selected for integration.
- Only users with Administrator permission in both Zoho Recruit and Zoho Campaigns can setup the sync.
Connecting your Zoho Recruit account 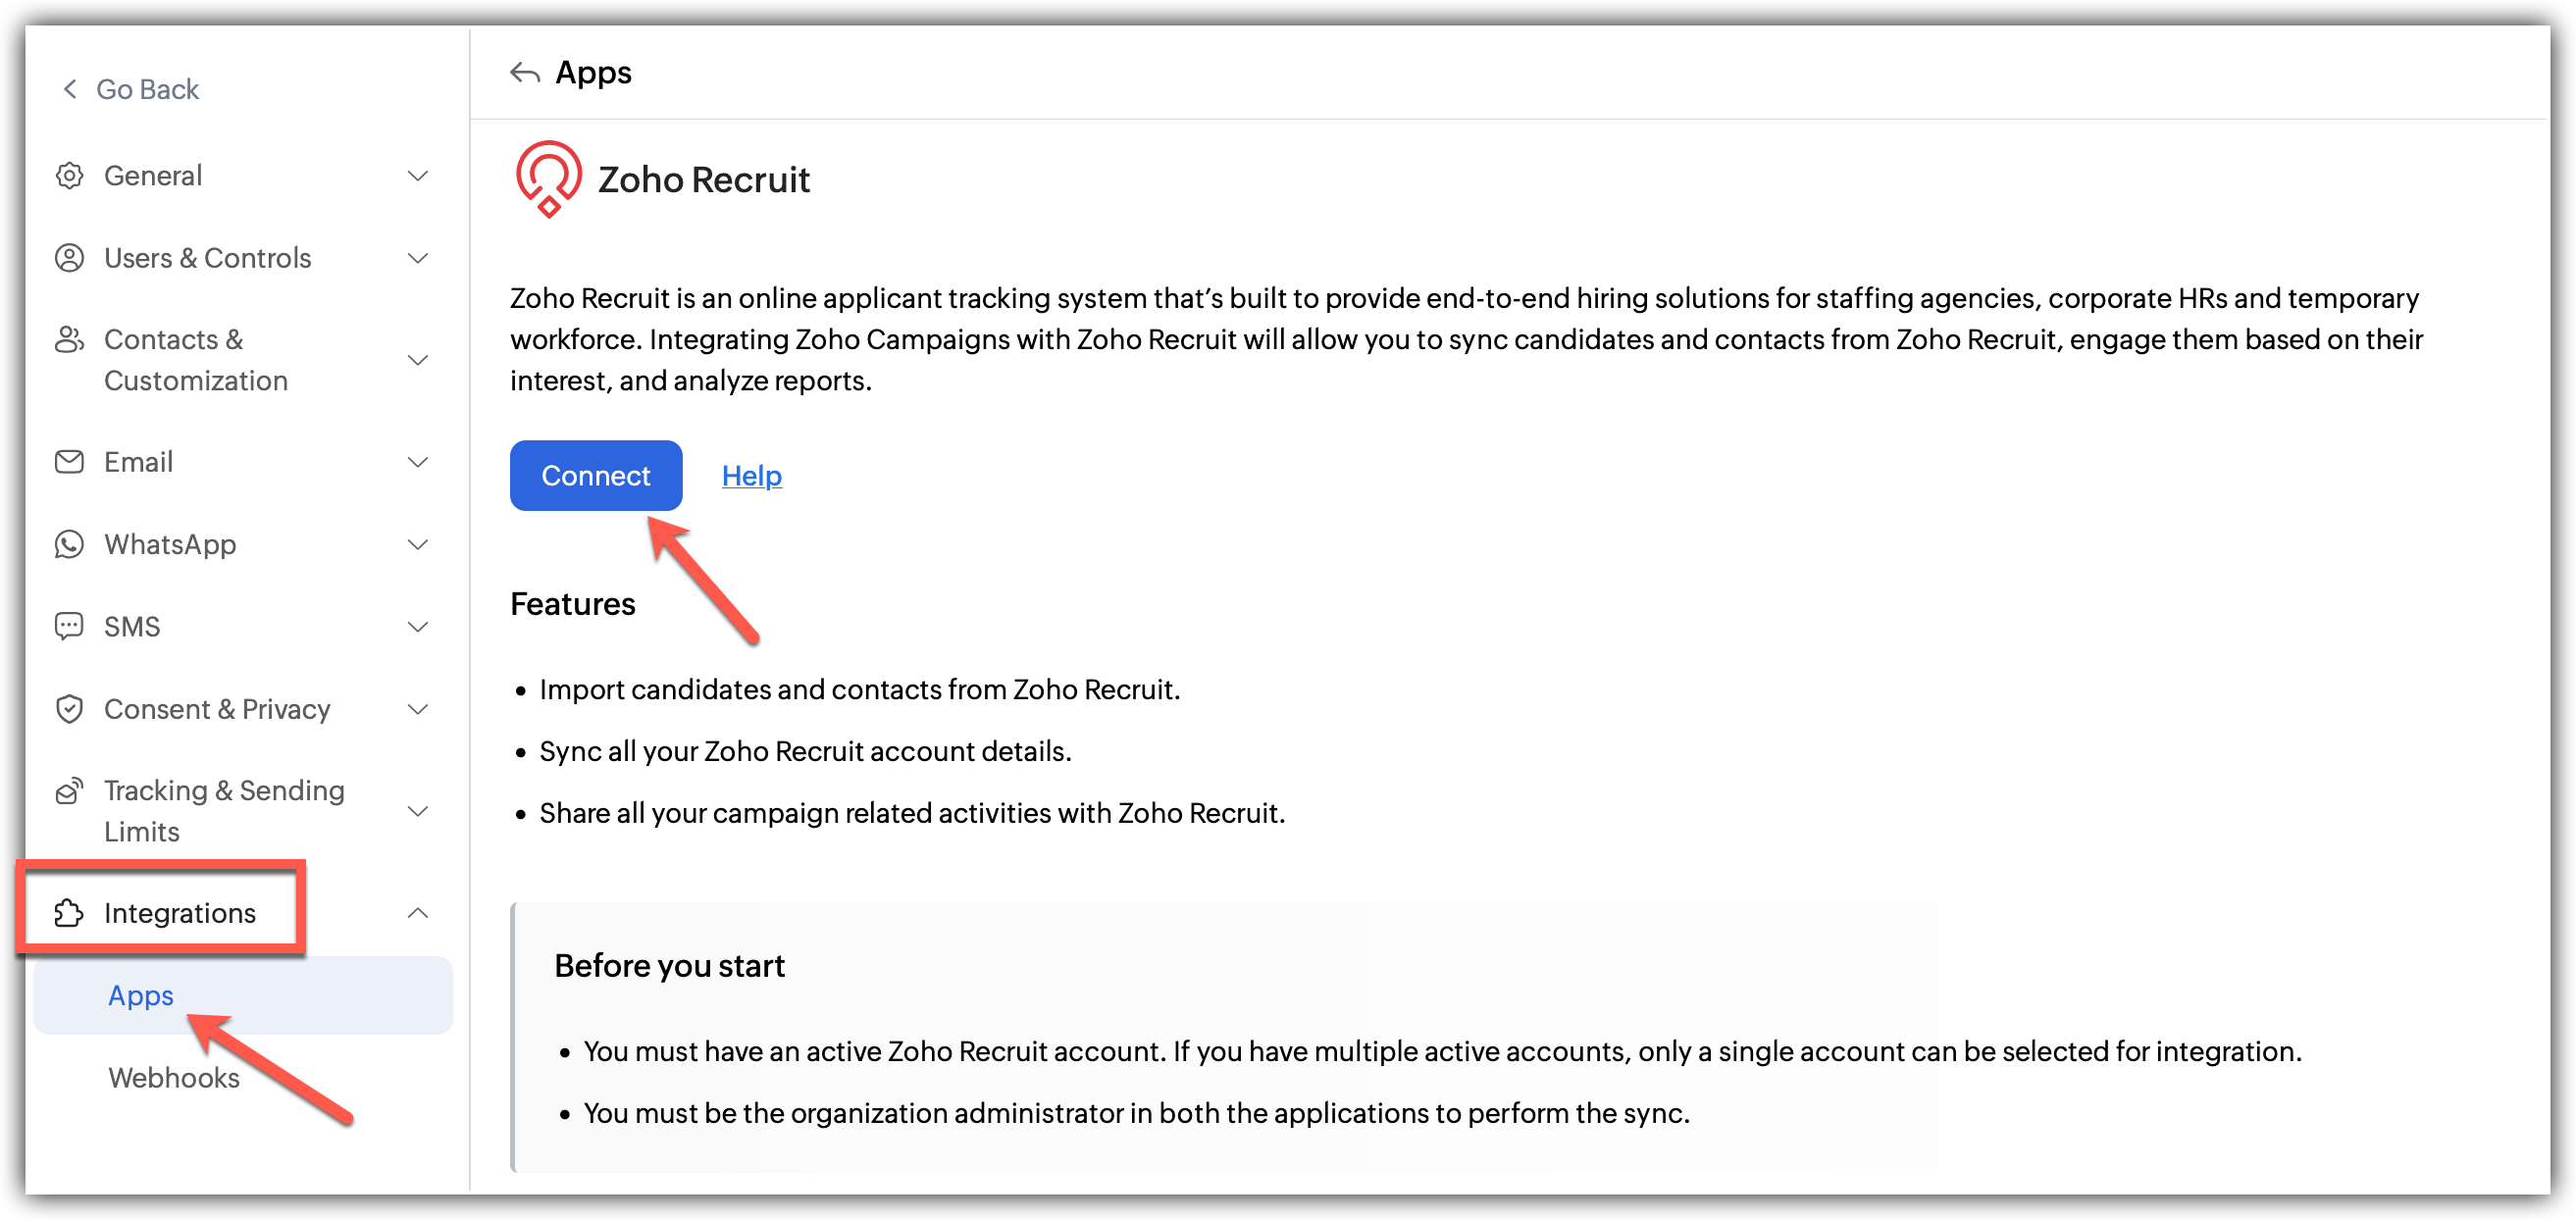
- Click Settings icon on the top-right corner of the screen.
- Choose Apps under Integration.
- Select Zoho Recruit under Zoho Apps and click Connect
- A pop up appears to integrate and create a new sync.
- After linking the account by choosing an organization to sync with Zoho Campaigns, proceed to the next step of configuring the sync.
- Fill in the details of the sync:
1. Select the Recruit module you want to sync.
2. Select the Workspace under it.
3. Select the list you want to sync with (optional).
4. Select the subscription type.
5. Choose a topic for the imports if required(optional).
6. Select the checkbox if you want to update empty field value as per Zoho Recruit details.
7. Select the checkbox to Exclude contacts who had opted-out and Remove contacts who opted out.
8. Click Save and Next. - Now, Map the fields from Zoho Recruit to Zoho Campaigns.
- Click Initiate once you are done
What happens if I deny my Zoho Recruit account Integration?
Campaign activity will no longer sync with Zoho Recruit.
You cannot import new candidates or contacts.
All active syncs will be disabled.
Denying access to Zoho Recruit
Click Settings icon in the top-right corner of the screen.
Choose Apps under Integration.
Under connected apps, Select Zoho Recruit.
Click the Disconnect option after clicking the three dots in the right.
A pop appears informing about the effect of disconnecting.
Click Disconnect.
Post Integration
- You can always go back and edit the Sync details and Field Mapping.
- You can view the Sync List showing all the modules running simultaneously and their details including Status, Mapped List and Last synced details.
- Also, individual integrations have a pause and delete sync options for easier accessibility.
- You can also make changes to the toggles excluding contacts who had opted-out and remove contacts who opted out from the dashboard.