Suppression List
Suppression List is one of the modules of Zoho Campaigns Email API that can be accessed from the left Navigation Toolbar.
What is a Suppression List?
A suppression list is a list consisting of those email addresses that do not wish to receive any more future email campaigns from you. The owners of these email addresses would've either opted-out from receiving your campaigns or marked your email campaigns as spam.
As you may be aware, according to the CAN-SPAM act of 2003, the recipients to whom you send marketing emails outside of your organization should be allowed to opt out or unsubscribe from such emails. This is done to ensure that these recipients are not troubled with unsolicited emails, commercial advertisements, or promotional campaigns.
Uses of Suppression List
Some of the uses of keeping a suppression list include:
- Maintaining the reputation of your domain: If you continue to send emails to those recipients who are uninterested or who have already marked you as spam, your sender domain's reputation will take a severe hit. To prevent that from happening, a suppression list is necessary.
- Maintaining the reputation of your IP: Similar to domain reputation maintenance, it is crucial that your IP is also on the safer side instead of being blacklisted. Suppression list allows you to do just that.
- Sending emails to only the intended recipients: If you maintain a suppression list, you'd not be sending email campaigns to unintended or unneeded recipients. This helps in having a clean recipient list showing interest in what you send to them.
Suppression List in Zoho Campaigns Email API
After you click on the Suppression List module from the left Navigation Toolbar, you can see a page where you can add emails to be included into the list. If there are already emails added, either manually or via API, they will appear here. Let's check the operations that can be performed within this module.
Add Email
You can manually add email addresses to whom you do not wish to send email campaigns anymore. To do that:
Click Suppression List from the Navigation Toolbar to the left.
Click Add Email in the top-right corner.
- Add the email address in the window that appears.
- Type in the additional data for adding the email address to the suppression list in JSON format.
- Click Add.
Adding via API
To add email addresses to the suppression list using the API, you need to use the Create Suppression List API. The email addresses need to be passed in the body of the API request call. Please check here for more information about this API.
Suppression Labels
Each suppression email that gets added in the Suppression List module will have a label associated with them to indicate how the email was added. Currently, there are two labels: Bounce and Manual.
Bounce: These email addresses are automatically added by the system when an email address to which email campaigns are sent suffers from a hard bounce. These email addresses can't be deleted by the user.
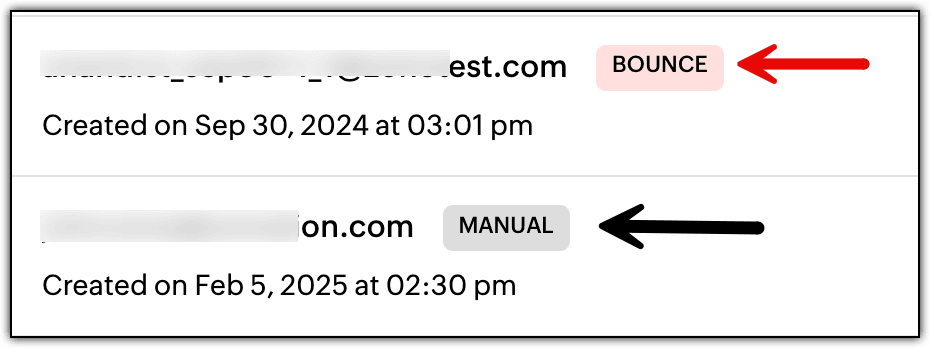
Manual: These email addresses are manually added by the user inside the Suppression List module of Zoho Campaigns Email API. These email addresses can be deleted.
Deleting an email in Suppression List
To delete an email from the suppression list:
Click Suppression List from the Navigation Toolbar to the left.
Click the trash icon on the right and choose Delete.
Other Actions
At the bottom of the Suppression List module, you can change the number of emails that can be displayed on a single page. Click on the drop-down field to change the count.
At the top-right corner, you can search for emails by typing their name in the search bar. Once you've typed the keyword, click Search or press enter to display the results.