Manage Contacts - New Version
Contacts are the most important part of any marketing business. In Zoho Campaigns, the All Contacts section under the Contacts module helps you build, organize, and maintain a high-quality contact database for your marketing activities.
Contacts are useful not only for sending email campaigns but also for building relationships in the long run. You must ensure you're managing your contacts properly. If you grow your contacts organically, chances are that you'll be building long-lasting relationships with them.
In Zoho Campaigns, you can create and manage contacts in multiple ways with ease—you can create, import them via file and cloud, or sync them by integrating with other apps. Not only that, you can also create custom fields to include additional information about your contacts such as their birthdays. If you want an offline database of these contacts, you can export them from Zoho Campaigns.
Managing your contacts is an ongoing process. You need to actively monitor the contacts based on their engagement behavior with your campaigns. By keeping all contact information in one place, you can ensure consistency, accuracy, and better coordination across your marketing efforts.
You can import contacts from various sources such as excel sheets, CSV files and Google spreadsheets and manage them by maintaining the contacts under mailing lists. You can view the contact history to check the number of sent campaigns for a specific contact and the history of that contact pertaining to different lists.
Add multiple contacts
This is a quick option where you can add a maximum of 20 contacts and associate to a list.
To add multiple contacts:
- From the Navigation Toolbar, click Contacts and select All Contacts.
- Click Add New at top right.
- Click Multiple Contacts from the drop-down menu.
- As email address is a mandatory field, specify it in the Contact Email box of the Email column.
- Alternately, if you want to add only email addresses of the contacts, click the Email address only button at far right. Press Enter key to separate the email addresses from each other.
- Associate contacts to a mailing list by selecting the lists.
- You can also create a new mailing list by clicking the Create mailing list option to add the contacts to new mailing list.
- Select the Subscription Type for these contacts. You can choose between Marketing, Non-marketing, and Unsubscribed.
- If you'd like to overwrite the subscription type of existing contacts, tick the Overwrite the subscription type for the existing contacts checkbox.
- If you've chosen the subscription type as marketing, you must associate contacts with the relevant Topics and select an option in the Lawful basis for communication field. These options won't appear if the subscription type is non-marketing or unsubscribed.
- Tick the These contacts have given consent to receive emails relevant to my product checkbox.
- Click Add to add these contacts.

Note:
- You can add a maximum of 20 contacts using the Multiple Contacts option.
- If you want to import high volume of contacts i.e. more than 20 contacts, we recommend you to make use of Import Contacts option.
- The Non-marketing subscription type will not be available for users in the Free plan of Zoho Campaigns.
- The Lawful basis for communication field will appear if you've enabled GDPR compliance for your Zoho Campaigns account under Settings -> General -> Compliance Settings -> Manage GDPR.
Syncing Contacts from other Apps
There are different ways present to create multiple contacts. One way is to sync the contacts from other Zoho apps (such as Zoho CRM) or other apps to Zoho Campaigns. The below help links will be of use to you in knowing how to import or create multiple contacts from various applications.
- Import Contacts from different applications
- In the case of Zoho CRM, currently, the contacts from Zoho CRM will sync to Zoho Campaigns by default. But, if you are looking to sync contacts from Zoho Campaigns to Zoho CRM, you'd have to set up workflows in Zoho Campaigns. You can check here to know how to perform the setup.
Creating Multiple Contacts using API
An API (Application Programming Interface) is a set of rules and protocols that allows different software applications to communicate with each other, enabling them to work together seamlessly. APIs are essential for integrating various software components and services, allowing them to interact and perform functions efficiently. The Zoho Campaigns API documentation can be accessed here.
Via Signup Forms
You can create your own signup form and embed it in your webpages to add multiple contacts. Once your recipients interact with the form and sign up, they would be added as contacts in your Zoho Campaigns account. To know more about Signup Forms, check here.
Filter contacts based on criteria
In All Contacts, you can view the list of contacts present in your organization. You can also sort contacts by filtering them based on certain criteria. We’ll take a look at the different ways to view contacts based on filtering system.
To filter contacts based on criteria:
- From the Navigation Toolbar, click Contacts and select All Contacts.
- In the All Contacts page, you can find the filter section on left side of the screen.
- Choose how you want to filter contacts.
- Click Apply.
Contact status
Contacts can be classified under different views based on their status. Contact status describes important aspects of a contact like when they were added to Zoho Campaigns, their subscription type, and if they are bounced or blocked.
The contact status types are listed below:
- Marketing contacts - These contacts are ready to receive email campaigns and they have shown their interest in receiving email campaigns or expressed explicit consent to receive campaigns.
- Unsubscribed contacts - These contacts have either unsubscribed or have communicated to you that they don't want to receive email campaigns anymore. You can also add individual contacts to the Unsubscribed registry.
- Bounced contacts - These contacts are classified as bounced if emails cannot be delivered to those contacts or if their email address does not exist.
- Blocked contacts - These contacts are possible spam contacts. Such contacts are filtered by Zoho Campaigns moderation team and are classified as blocked contacts.
- Added in last thirty days - These contacts were added to your Zoho Campaigns within the last month.
- Added in last seven days - These contacts were added to your Zoho Campaigns within the last week.
- Non-marketing contacts - These contacts will not receive any marketing-related communication. Adding these contacts will not be reflected in your subscription plan.
Sort contacts based on contact status
In All Contacts, you can view the list of contacts present in your organization. You can also sort contacts by filtering them based on the contact status. We’ll take a look at the different views of contacts classified based on their current status
To sort contacts based on contact status:
- From the Navigation Toolbar, click Contacts and select All Contacts.
- In All Contacts page, you can find the contact status drop-down present on top-left corner of the screen.
- Click the required status to display contacts in that view.
Delete contacts
To delete contacts:
- From the Navigation Toolbar, click Contacts and select All Contacts.
- Select the email address, you wish to delete by clicking the checkbox present to the left of each contact.
- Click More Actions button which appears at the top and click Delete.
- This will prompt a message to confirm that you want to delete the subscriber.
- Click Go Ahead.
Note:
You can also delete all contacts from a specific view.
You can also delete all contacts from a specific view.
- In the All Contacts page, filter out and view the contacts of your choice.
- Click Select all contacts matching the current view
- Click the Delete icon to delete the selected contacts.
If there are too many contacts to be deleted, the deletion process will take some time and you cannot delete any contact from that view until the deletion gets over.
Sort Contacts
To sort contacts:
- From the Navigation Toolbar, choose Contacts and select All Contacts.
- Click on Sort icon present next to Contact Email.
- Choose how you want to sort (ascending or descending) the contacts.
Associate topics with existing contacts
- From the Navigation Toolbar, click Contacts.
- Click All Contacts.
- Select the necessary contacts using the checkbox present to the left of each contact.
- Click More Actions button which appears at the top and click Assign Topics.
- Select the topics to be associated with the selected contacts and click Save.
Move unsubscribed contacts to active list
You can retrieve/reactivate contacts that were moved to unsubscribed contacts view by you. To reactivate contacts that were moved to unsubscribed contacts view:
1. From the Navigation Toolbar to the left, click Contacts and select All Contacts.
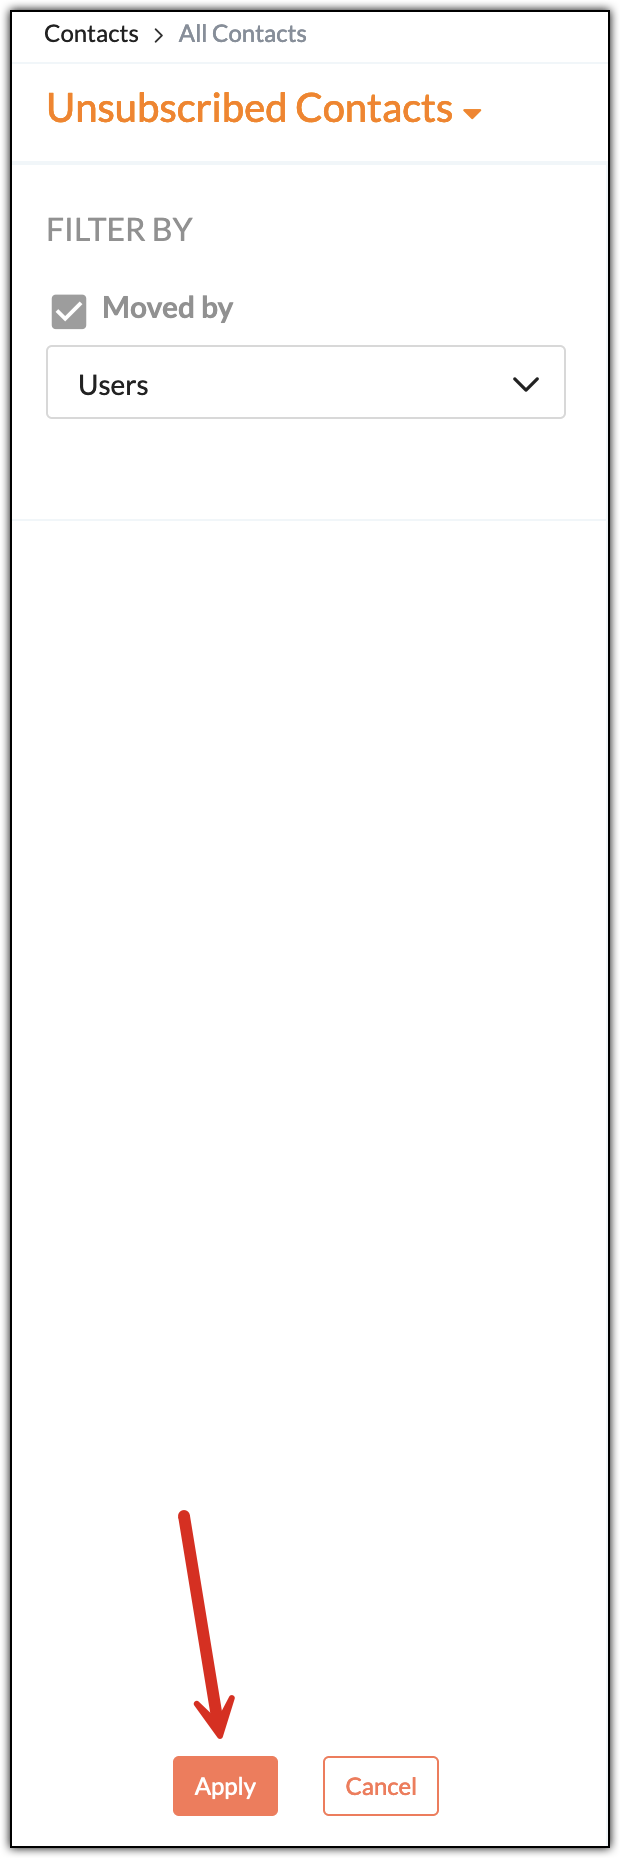
2. Select the drop down at the top-left and choose Unsubscribed Contacts view.
3. In the "Filter by" drop down, choose Users to filter
contacts that were moved to this list by the users.
You
cannot use this option if the contacts have unsubscribed from their
end. In that case, ask them to resubscribe or signup again using the
relevant signup form to reactivate them.
4. Click Apply.
5. This will list down the contacts moved to Unsubscribed Contacts list by different users.
6. Select the email addresses that you wish to move back to
your mailing lists using the checkbox present to left of each email
address.
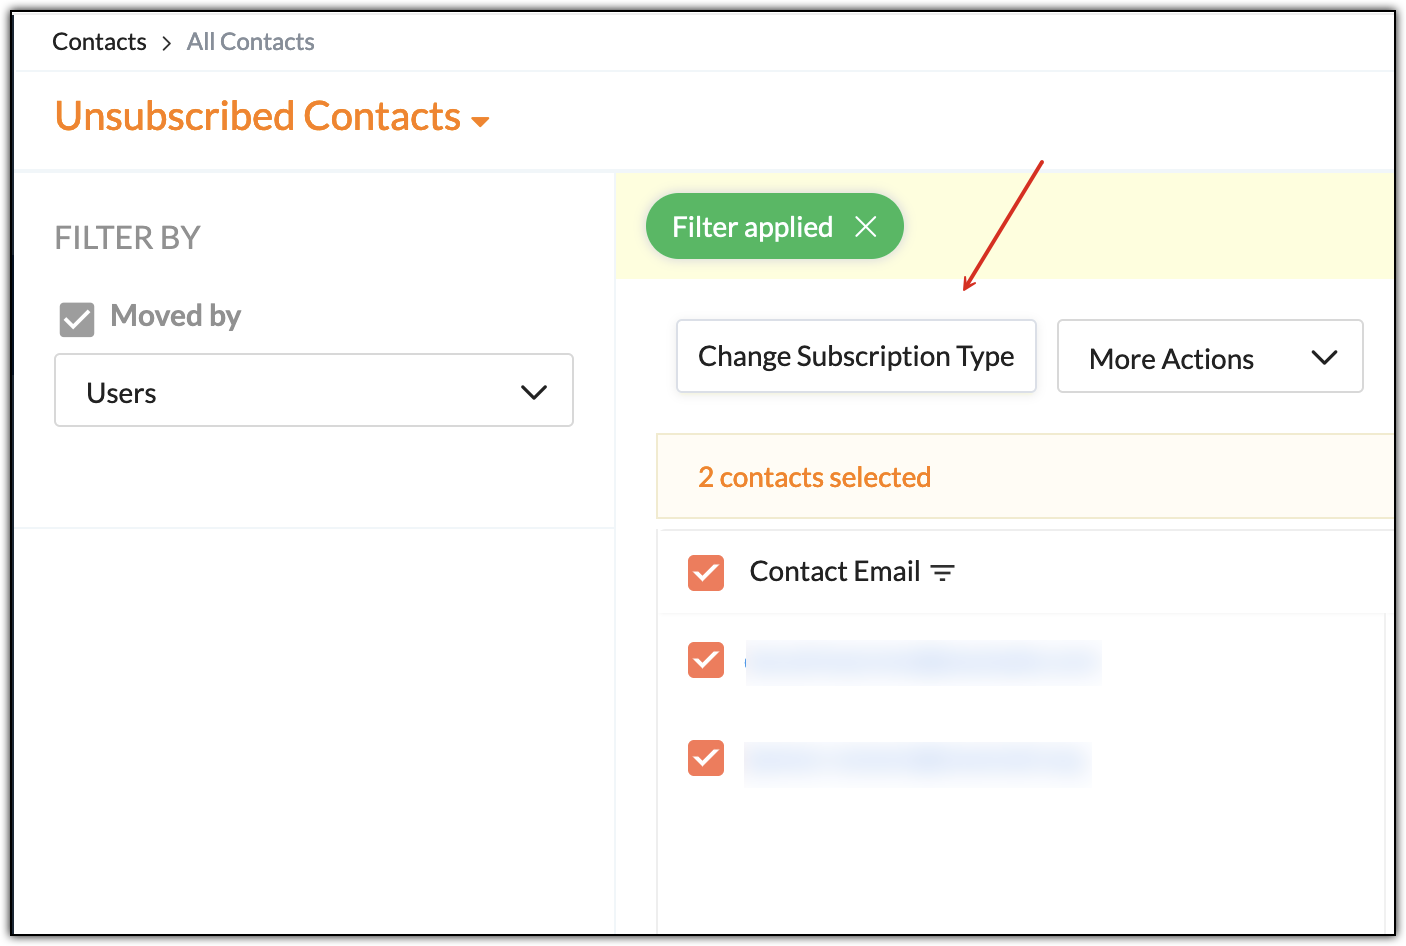
7. Click on Change Subscription Type button.
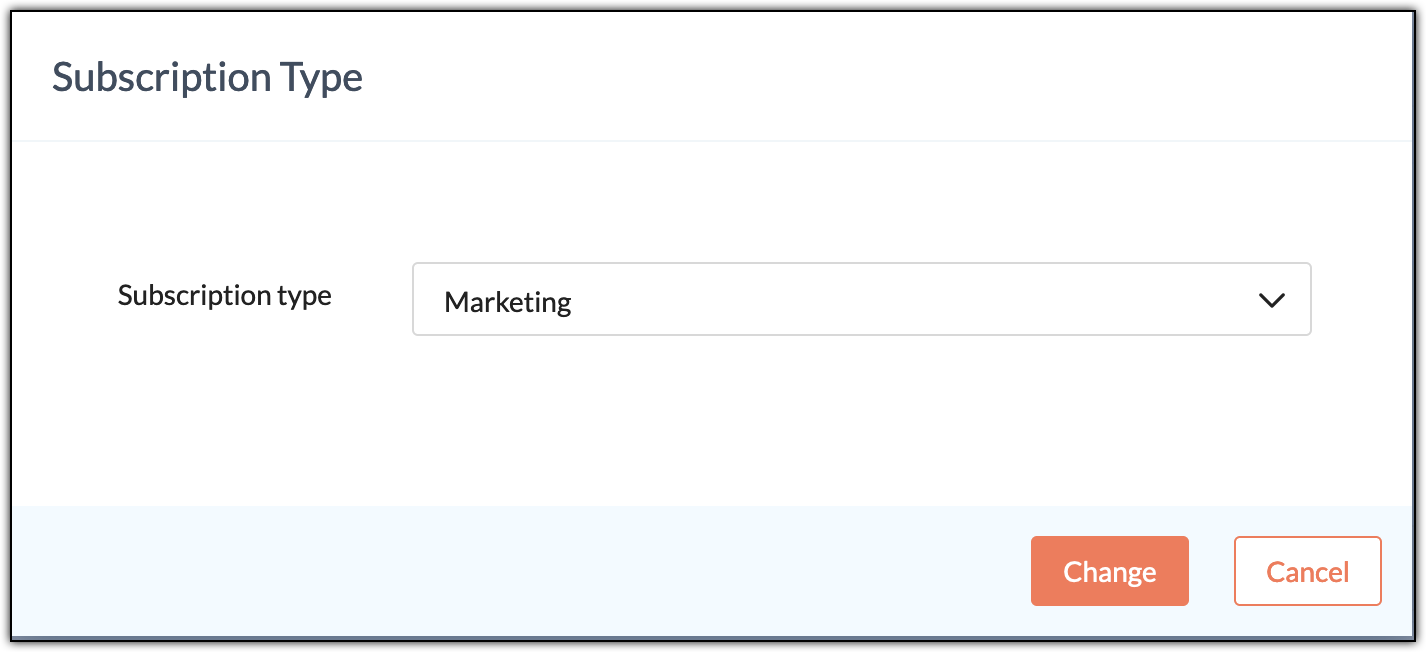
8. Select Marketing in Subscription type drop down.
9. Click Change.
Export Contacts
You can export contacts in any format so that it provides a backup for your database. Apart from this, if you’ve sent a campaign to a mailing list, you can easily track the active contacts.
To export the contacts:
- From the Navigation Toolbar, click Contacts and select All Contacts.
- Click the More button at top-right and select Export Contacts.
- In Export Contacts page, do the following:
- Export – Choose the type of contacts to be exported.
- Added by – select the users whose contacts you’d like to export.
- Filter by Date – Select a time to export contacts based on activity
- Arrange by – Opt on how you want to arrange the contacts.
- Select fields to be exported – Select the checkbox fields to include additional information.
- File Name – Give a name to the file to be exported.
- Click the format (CSV, TSV, XLS, JSON, etc.); you want to export the file.
- Click Export.
Import as Unsubscribed contacts
To import contacts as “Unsubscribed contacts”:
- From the Navigation Toolbar, click Contacts and select All Contacts.
- Click the More button at top-right and select Import to Unsubscribed contacts.
- Click Go Ahead in the Unsubscribed contacts popup.
- Click the Select File button.
- Choose a .csv or an excel file from your computer or from online services like Zoho WorkDrive.
- Click Next.
- Once you've uploaded your file, it is time to map the column headers to the fields in the mailing list. If you find a field to be irrelevant, you can skip it.
- Click the Show advanced options and turn on the toggle for Do you want to transfer active contacts as Unsubscribed? option. This option is used to change the subscription type to Unsubscribed for any existing contact present in Zoho Campaigns.
- Click Import.
Note:
You can also add individual contacts to the Unsubscribed registry. There can be scenarios, when your contacts have personally contacted you asking to stop sending emails rather than unsubscribing. In such scenarios, you can move those specific contacts to this registry instead of importing. You can add a maximum of 20 contacts to this registry. To add contacts to this list:
- In the All Contacts page, change the view to Marketing Contacts.
- Select the contacts that you wish to move to unsubscribed registry.
- Click the More Actions button that appears at the top.
- Click the Mark as unsubscribed option.
- In the popup that follows, confirm the action by clicking the Go Ahead button.
Import History
The Import Overview page contains all of your imported contacts' details. You can view a generated report on your contacts after the import is complete. Zoho Campaigns makes it easy to view the entire history of imported contacts in a single step.
To view the import history:
- From the Navigation Toolbar, click Contacts and select All Contacts.
- Click the More button at top-right and select Import Overview.
- In the Import Overview page, you can view the overview for various imports of the contacts you've done.
- Click the file name of an import to view detailed summary of it.
- You can also click the count of the newly added contacts, re-added contacts, duplicate contacts, and ignored contacts to view the list of contacts comprising this count.
- At the top-right of each import you can use the delete icon to delete that particular import. Imports that are a less than year old cannot be deleted.
Only the import history will be deleted; contacts that got imported via this import won't be deleted. - You can also filter the list of imports using the Filter icon present at the top-right.
Export contacts from Import overview
You can export specific category of contacts that you have imported. E.g. If you have imported 200 contacts out of which 100 are newly added and 100 are not added (ignored due to some reasons). You want to export only the newly added 100 contacts.
To export such contacts:
To export such contacts:
- From the Navigation Toolbar, click Contacts and select All Contacts.
- Click the More button at top-right and select Import Overview.
- In the Import Overview page, you can view the overview for various imports of the contacts you've done.
- Click the count of the newly added contacts, re-added contacts, duplicate
contacts, and ignored contacts to view the list of contacts comprising
this count.
- Click the Export button at the right side.
- In the dialog box that appears, if needed, set a file name and password for this file. Click Export.