How does cyclic trigger work?
This is a recurring trigger where contacts enter the workflow based on the conditions specified in the trigger. This trigger will only be scheduled after you activate the workflow and reset when you freeze it. When you reactivate the workflow, it will start from fresh and it will not continue from where it was frozen.
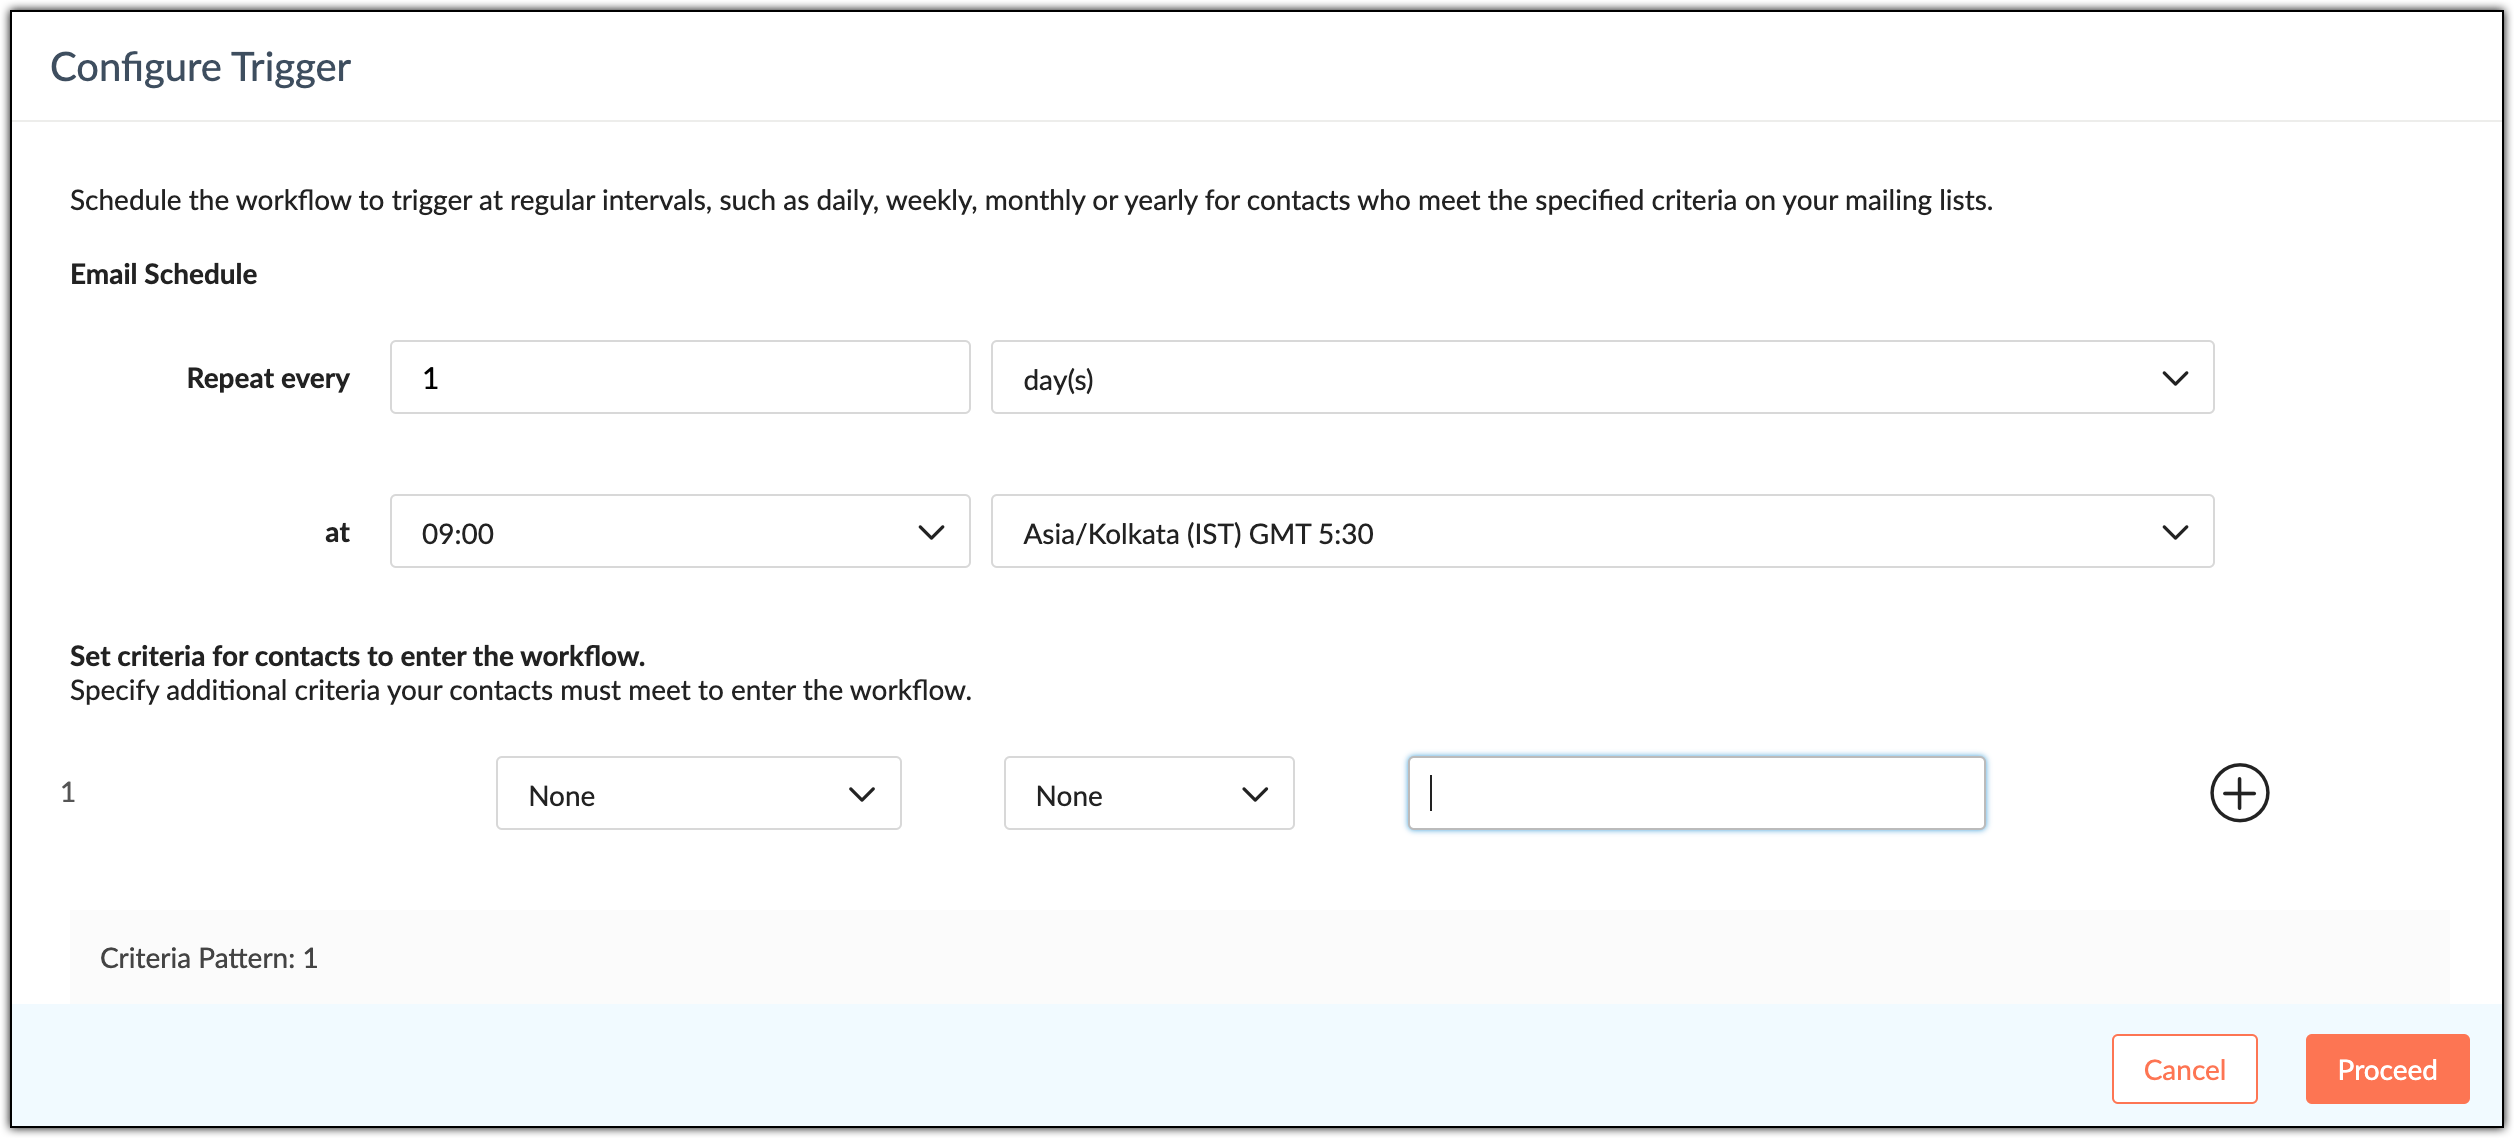
Daily Configurations
- If the scheduled date and time is passed, this trigger will automatically schedule at the next specified date and time. For example, if you configure this trigger to be scheduled at 14:00PM every three days, but you activate the workflow at 14:10PM then the trigger will schedule the workflow at 14:00PM of the third day from the current day. This holds true for monthly and yearly configurations as well.
Weekly configurations
- If you configure the trigger to be scheduled every three weeks, then the workflow will initiate on Mondays and Fridays every third week. For example, If the workflow was activated on Sunday, then the schedule will start on Mondays and Fridays every third week. However, if the workflow was activated on Wednesday, then the schedule will start on Fridays of that week and again on Mondays and Fridays every third week.
Monthly Configurations
- If you've configured this trigger on a monthly basis and two days/dates coincide, then the workflow will only be triggered once.
- If you've configured this trigger on a specific date, such as the 30th of every month, and the last day of the month is also the 30th, then the workflow will only be triggered once.
- If you've configured this trigger on specific days, such as the 4th Thursday of the month and the last Thursday of the month and if the 4th Thursday of the month also happens to be the last Thursday of the month, then the workflow will only be triggered once.
Follow the instructions below to create a workflow with a cyclic trigger:
- From the Navigation toolbar, choose Automation and select Workflows.
- Click Create Workflow in the top-right corner.
- Zoho Campaigns offers six types of workflows such as Welcome and On-boarding series, Nurture Series, Re-engagement, Customer Retention, E-commerce, and Conditional Workflows.
- Choose the type of workflow you need and click Use Template, or click Custom Workflow in the top-right corner to design your own workflow.
- Drag and drop the cyclic trigger onto the canvas and configure them.
- Under the Process section on the left panel, select a flow control component or a condition component.
- To control the flow of your contacts moving through your workflow, drag and drop the flow control components from the left panel under the Process section. The flow control components are Random, Split, and Merge.
- To add conditions or criteria your contacts must meet to continue in the workflow, drag and drop the condition components from the left panel under the Process section. The condition components are Simple, Multiple, and Email Activity.
- Under the Action section, select actions from Engagement, Productivity, and Zoho CRM actions.
- The engagement actions are Send Email, Send SMS, and A/B Test.
- The productivity actions are Wait Time, Email Activity, Subscription Management, Wait Conditions, List-based Actions, Tag-based Actions, Score-based Actions, Update Field, and Internal Notification Emails.
- The Zoho CRM actions are Push Data and Create Task.
- Drag and drop the actions onto the canvas and configure them.
- To enable response actions, click the response toggle in the Send Email or A/B Test engagement component.
- Click Settings to set up exit and re-entry criteria if you want contacts to exit the workflow or renter the workflow at any stage, if needed.
- Once you've built your workflow, click the Activate button on the top-right corner above the canvas to activate the workflow.