Drawing in ChemStudio
Add Atoms and Bonds
Click on the canvas to place the default atom (Carbon).
Select H, O, C or use the Periodic Table to insert other elements.
Draw bonds by dragging from one atom to another.
Change bond type using the Bond Tool (single, double, triple, wedge, hashed, etc.).
Replace atoms
- Click an existing atom and type the new element symbol (e.g., N, Cl, Br).
- All bond connections are preserved.
Replace bonds
- Click an existing bond and press 1 / 2 / 3 to cycle through single, double, and triple.
- Wedge and dashed bonds are available in the Bond Tool for stereochemistry.
Select and Edit Structures
- Use the Select Tool to move, copy, paste, rotate, or delete atoms and bonds.
- Drag a bond from one atom to another to extend or reshape structures.
- Drag between molecules to merge fragments automatically.
- Use Substructure Drag to reposition only a part of a molecule while keeping the rest fixed.
Stereo editing
- Apply 3D stereochemical representation using wedges, hashed bonds, and the Stereochemistry Tools.
- Use ABS / OR / & labeling when needed for complex stereochemical groups.
Modify Structures
Use selection to adjust structures at any time:
- Drag atoms, bonds, or entire substructures to reposition them
- Rotate or flip the selected area for alignment
- Move one structure onto another to merge overlapping connection
- Undo or redo changes as needed
Bond dragging automatically maintains standard chemical geometry.
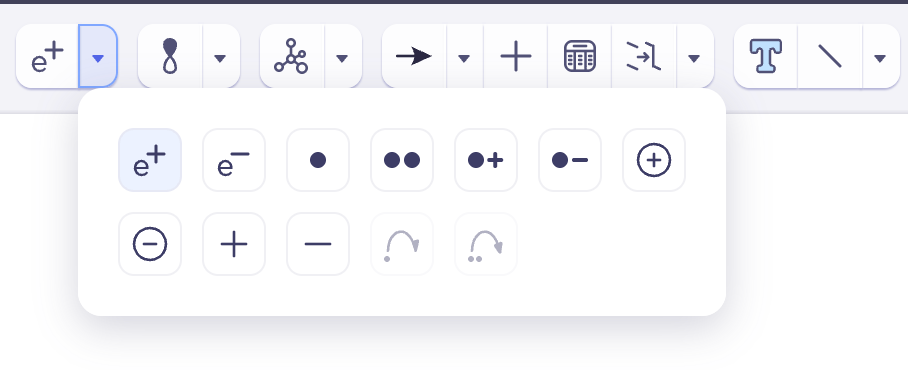
Add Charges and Electron Features
- Apply charge symbols (positive, negative) using the charge tool.
- Add radicals, lone pairs, and curved arrows when representing reaction mechanisms.
- Toggle aromatic representation for supported ring systems.
 Insert Abbreviated Groups
Press Enter while hovering over an atom to insert commonly used substituents (e.g., Me, Et, Ph, CF₃). These abbreviations replace the atom label and remain chemically linked to the structure.
Cleanup structures
Tidy up your chemical drawings by standardizing bond lengths, angles, and overall alignment. Improve readability, correct uneven geometry, and produce a clear, publication-ready structure. Use this feature to quickly refine molecules after editing or when importing structures from other sources.
Apply Document Standards
Follow publisher-specific formatting standards such as ACS, RSC, and Wiley. These presets automatically adjust key drawing parameters including bond lengths, line widths, fonts, and spacing, to ensure your structures meet each publisher’s submission requirements. Applying these document standards helps maintain consistency and ensures your chemical drawings are ready for publication.
Format Display
These options affect only appearance, not connectivity:
- Adjust bond length, line width, and spacing in bond settings
- Show or hide atom labels, indices, and stereochemical markers in atom settings
- Add and format text labels using text settings
Object settings
Control how a selected structure appears while drawing in ChemStudio using object settings. These options help maintain consistent geometry, clear visibility, and publication-ready structure quality.
To open object settings:
To open object settings:
- Draw or select a molecule or structure.
- Open Object Settings from the toolbar or right-click menu.
- Adjust the required parameters and click Apply.
Create and edit Markush Structures
- Create the core scaffold: Use ChemStudio’s standard drawing tools to construct the fixed portion of the molecule, often referred to as the scaffold.
- Insert variable R-groups: Select the Radical Label tool to place R-groups at positions where substituents may vary. Use text labels to define each R-group (e.g.R1,R2).
- Define variable regions: Use the Brackets Tool to surround atoms or bonds that can take on multiple forms. This helps indicate optional or interchangeable groups, such as regions that could be methyl, ethyl, or other alkyl groups.
- Specify allowed alternatives: Within the bracketed region, list the possible substituents or bond types to show the permitted variations. This can include atom lists, bond lists, or multiple substituent options.
Grouping and ungrouping
- Group- Combines selected molecules or objects into a single movable and editable unit.
- Ungroup- Separates a grouped structure back into individual editable molecules or objects.
- Group with integral- Groups the selected structure and locks it to prevent editing until the integral is removed.
How to group/ungroup objects
- Select the required molecules or objects on the canvas.
- Right-click the selection.
- Click Group, then choose Group, ungroup or integral.
Save and Export
- Save structures in .zcxml format to continue editing later.
- Export to formats such as Mol, CDXML, SMILES, InChI, and SMARTS for use in external applications.
- Print if a physical or PDF copy is required.