Mega menu
Mega menu is used to give users a bird's-eye view of all the menus in your store, in rows and columns, so that your store's products can get maximum visibility.
Benefits
- Enhances the quality of your visitor's site navigation
- Helps arrange the titles through layout, typography, and images
- User-friendliness can be increased by forming logical groups and categories
- Reduces scrolling as everything is visible at the same time
- Go to Settings > Menus under Customize.
- Click New Menu. Provide a menu name and select check box Is this a Mega menu?
- Click OK to create a mega menu.
Rows
By default, mega menus have one row. The default row will have four columns.
To add a new row
-
Click Add Row at the bottom.
- Select the layout and click OK.
To change row layout
- Click the layout icon above the row name.
- Select the layout design. The row will automatically change to the desired layout.

Selecting a layout with fewer columns than the current number of columns will push the Menu Items (from the columns being removed) to the end of the column that will remain after transition.
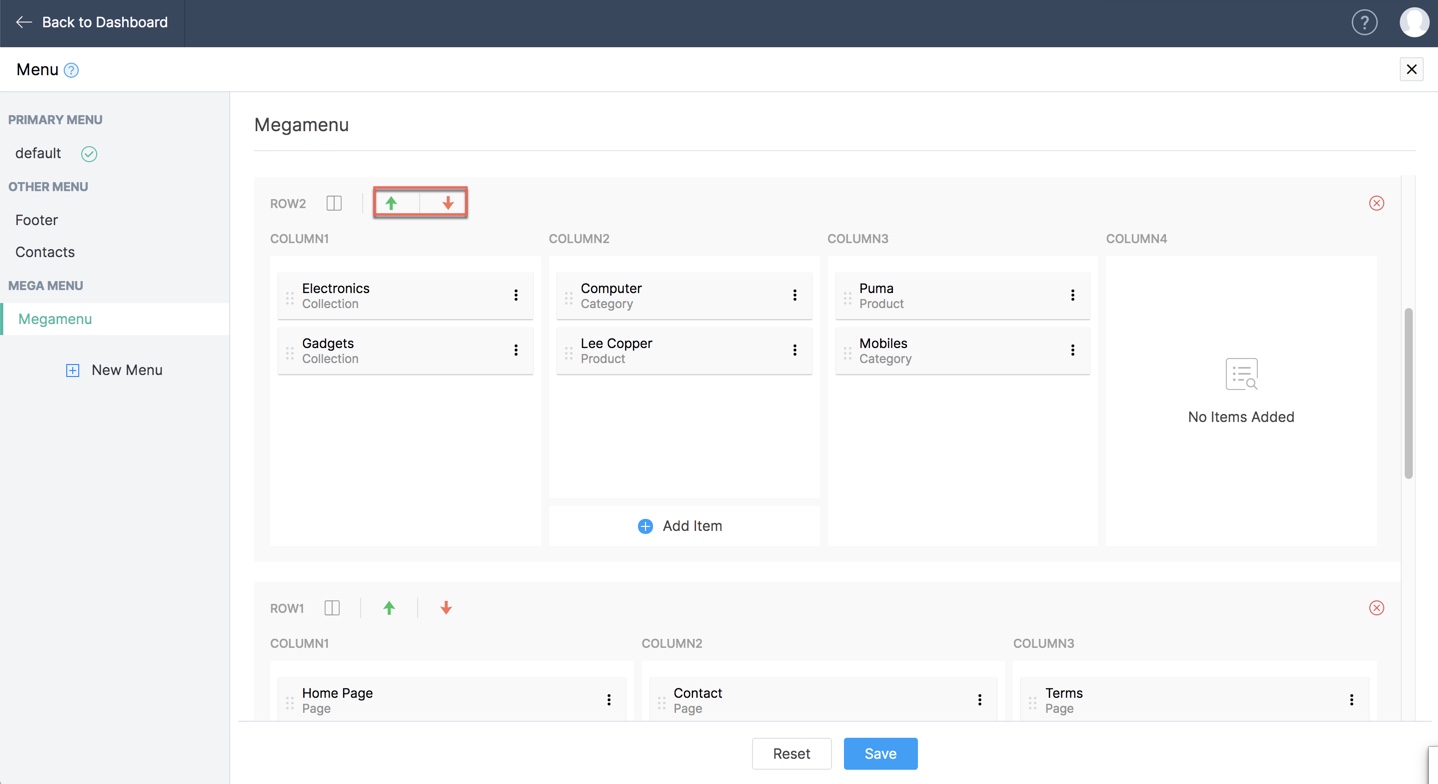
To rearrange row order
Use the arrows provided beside the layout icon to move rows up or down to rearrange as per your wishes.
To delete a row
-
Click the Delete icon.
- Confirm by clicking Delete once more.
Columns
Add new menu items
- Hover over the column and click Add Item.
Add collections as a menu item
- Select Collections from the left panel.
- Provide Menu Item Name.
- Choose to Show as Text, Heading, or Image.
- Select a collection from the drop-down list. All the available collections in your store will be listed here.
- Click Save.
Display images in mega menu
-
Select Collections from the left panel.
-
Provide Menu Item Name.
- Choose to Show as Image.
- Click Add + icon. You can select existing images, or upload a new image or even select image library. Click Save.
- Select Collection from drop-down.
- Click Save.
Add products as a menu item
- Select Products from the left Panel.
- Provide Menu Item Name.
- Choose to Show as Text, Heading, or Image.
- Select Product by clicking on the Add (+) icon.
- A list with all products will open. The categories will be listed on the left for easier navigation. Click Add Product.
- The added product will be shown. Click Change Product if required.
- Click Save.
A menu item will be created for the product page. Clicking on this will redirect your customers to the product page of the linked product.
Add categories as a menu item
- Select Categories from the left Panel.
- Provide Menu Item Name.
- Choose to Show as Text, Heading, or Image.
- Select a Category from the structure.
- Click Save.
Add page as a menu item
- Select Page from the left Panel.
- Provide Menu Item Name.
- Choose to Show as Text, Heading, or Image.
- Select a Page from the list.
- Click Save.
Add an external link as a menu item
- Select External Link from the left Panel.
- Provide Menu Item Name.
- Choose to Show as Text, Heading, or Image.
- Provide External Link URL.
- Enable Target toggle to open Page in a new tab.
- Click Save.
Add a file as a menu item
- Select File from the left Panel.
- Provide Menu Item Name.
- Use the Upload button to add new files. You can also add a New Directory.
- Open Image Library to use stock images.
- Select the required file and click Save.
Add blog category as a menu item
- Select Blog Category from the left Panel.
- Provide the Menu Item Name.
- Choose to Show as Text, Heading, or Image.
- Select a Category from the list.
- Click Save.
Add text as a menu item
- Select Text from the left Panel.
- Provide Menu Item Name.
- Enable toggle to Show as Heading.
- Click Save.
Rearrange menu items between columns
Drag and drop existing menu items to a different column to move them around within different columns.
Columns cannot be rearranged as a whole.
Edit or Delete menu items
- Click More Options [
] beside the menu item.
- Click Edit to change features of the menu item.
- Click Save.
Delete menu items
-
Click More Options [
-
Click Delete, then confirm by clicking Delete on the pop-up window.