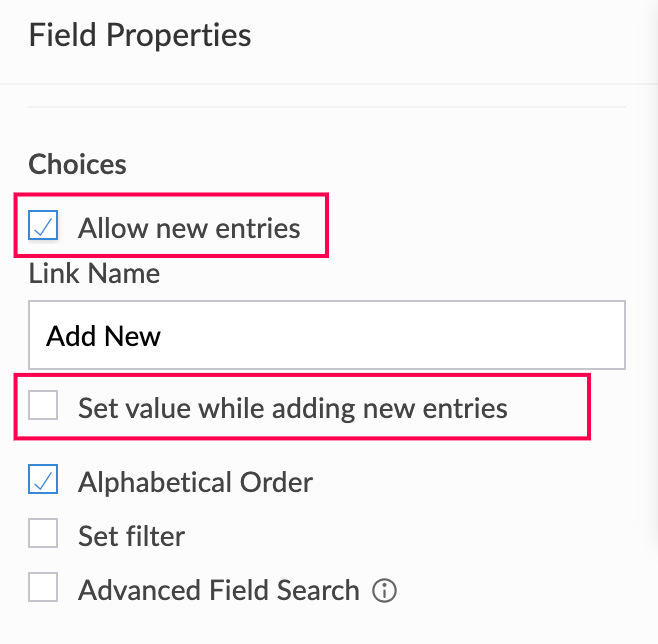
Allow New Entries
You can choose to allow the addition of new entries in a lookup field using a looked-up form. Follow the below steps to configure this:
1. Open the form builder of the target form.
2. Select the required lookup field.
3. Navigate to the Choices section in the Field Properties pane.
4. Check the checkbox next to Allow new entries. The Link Name property will appear. It will be set as 'Add New' by default. You can edit it as required.

Note:
- Ticking the Allow new entries checkbox in the form builder will allow the addition of field entries in the lookup field (live mode). You can add an entry only once if the source form allows only one entry per user. Otherwise, you can add multiple entries.
- The entries added here will automatically be populated in the report of the source form.
Set Value While Adding New Entries
After you've configured allowing new entries using the above steps, you can also choose to preset field values from the current form in the looked-up form that pops up.
To configure field mapping to automatically set values in a looked-up form while adding new entries, follow the below steps:
2. Check Allow New Entries under Choices in the Field Properties pane.
3. Check Set value while adding new entries which subsequently appears below the Allow new entries checkbox. The Map fields while adding new entries popup will appear.
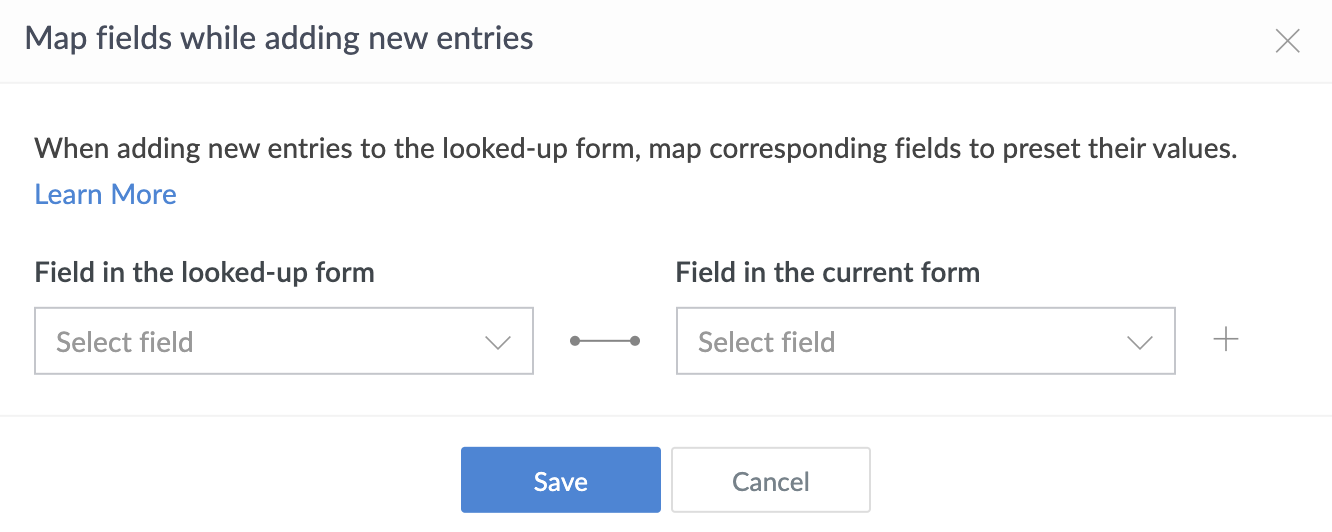
4. In the popup, select the looked-up form's field on the left and map them to the corresponding field from the current form. The acquired information will be populated in the mapped looked-up form fields on load.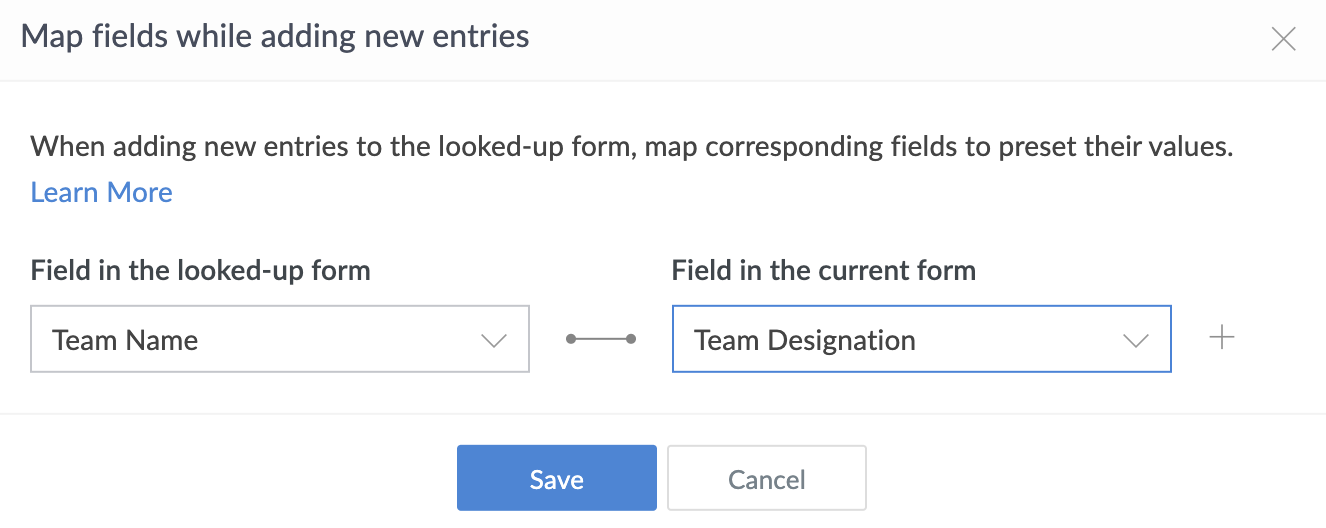
Note: The following fields are not supported for mapping: URL, Image, SubForm, Signature, File upload, Audio, Video, Auto Number, Formula, Section, Add Notes, Prediction, Keyword Extraction, Sentiment Analysis, OCR, Object Detection.
5. Click the + icon to the right of a mapped fields pair to add a new mapping below it.
You can also use the bin ( )icon to the right of a mapped fields pair to delete the mapping.
Note: A maximum of 10 fields can be mapped from the current form to the looked-up form.
6. Click Save after mapping all necessary fields.
Edit Mappings
To edit the mappings again, click on the text box below the Set value while adding new entries checkbox in the Field Properties pane. The Map fields while adding new entries popup will appear.
Note:
- Make sure to match fields with the same data type. Eg. Email field can be mapped to Single Line field.
- To map a AR field or a Multi Select field, the exact field type must be used.
- If composite fields are present in the current form, you can either map one composite field to another or map each sub-field within to the corresponding sub-field of the looked-up form.
- A field from the current form can be mapped with one or more fields in the looked-up form as long as their data types match. Rationally, a field in the looked-up form cannot be mapped with multiple fields from the current form.
After configuration is successful, the field values get auto-populated in the looked-up form as seen below:
Limitations
- When the Set value while adding new entries option is enabled, a minimum of one field mapping should be configured. If not, the option should be disabled.
- A looked-up form might fail to load if there are too many selections in mapped Drop Down, Radio, Multi Select, Checkbox, Lookup, and Integration fields present in it.