Code sign Android app for users
 This help page is for users in Creator 6. If you are in the older version (Creator 5), click here. Know your Creator version.Note:
- Refer to this page for the Android code sign prerequisites
- From August 1, 2021, Google mandates that newly-created apps are to be published with the Android App Bundle (AAB) on Google Play, for those who are publishing their app for the first time.
- Firebase Cloud Messaging server key has been deprecated by June 21, 2024. To continue using push notifications, update your new service account JSON file (FSA file) instead of the deprecated FCM server key before the above mentioned date.
- Google has mandated the declaration of foreground service information when uploading an application to the Google Play Console. As Zoho Creator code-signed apps use these services, you must declare them when uploading AAB or APK apps. Learn how to declare foreground service information on the Google Play Console.
AAB is a new publishing format used to upload mobile apps to Google Playstore. This format includes all your app’s compiled code and resources, and defers APK generation and signing to Google Play. AAB is used to optimize the size of your mobile app, by allowing users to download the required assets or files based on their device specifications.
In Creator, we now support two file types for Android:
- AAB - for publishing in Playstore.
- APK - for directly installing in your Android device.
Things to know
- You can code-sign your mobile apps using either AAB, APK, or both AAB and APK file types.
- When you choose to code-sign your apps using AAB you can generate the APK file as well from AAB. Learn more
There are two different keystore files required to generate the appropriate file types:
- Upload Keystore file (for AAB)
- App Signing Keystore file (for APK)
Upload Keystore File
This is the second-level keystore file used to identify the developers who are responsible for their published apps. Users have to create this keystore file and use it while generating AAB. Learn how to generate upload keystore file
App Signing Keystore File
This is the main keystore file used to sign a mobile app to install them in your mobile and tablet devices. Users have to create this keystore file and use it while generating APK. Learn how to generate app signing keystore file
You can codesign your Android apps using either of the below file types.
- AAB
- APK
- Both AAB and APK
Using AAB
- Code sign using AAB
- Distribute the code-signed app
- Generate APK from AAB
- Disable push notifications
- Re-code sign your Android app
Code sign Android app for users using AAB
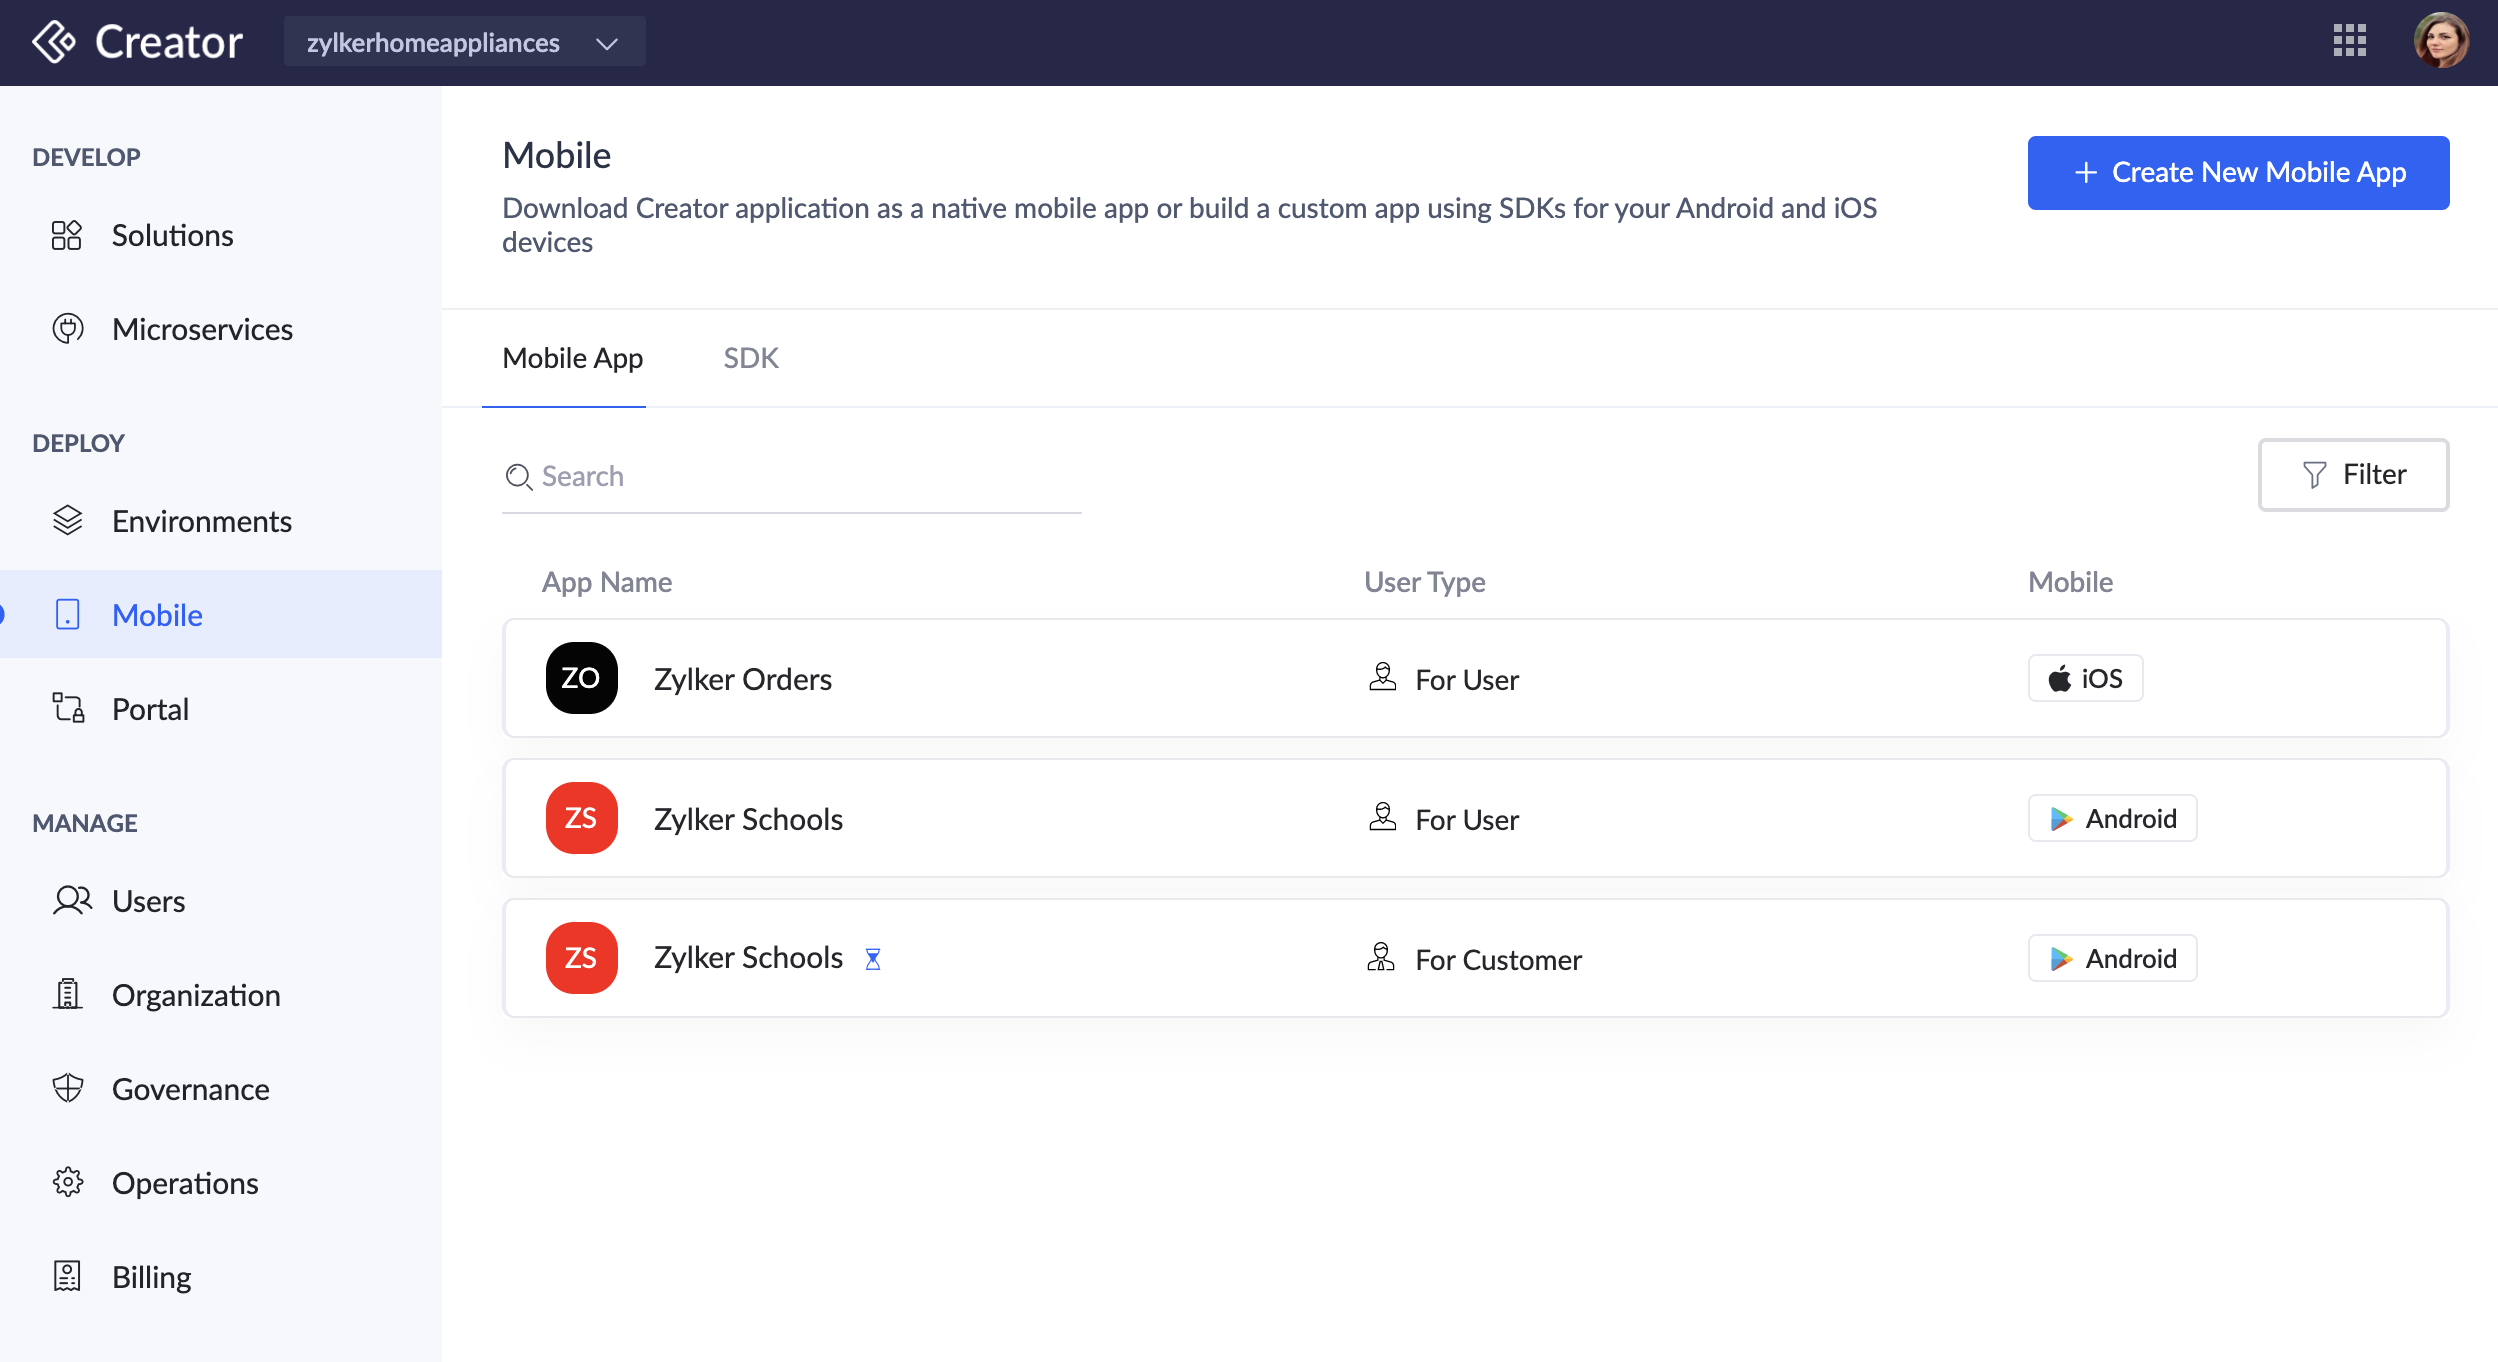
- Navigate to the Mobile section on the left pane and click the Mobile App tab.
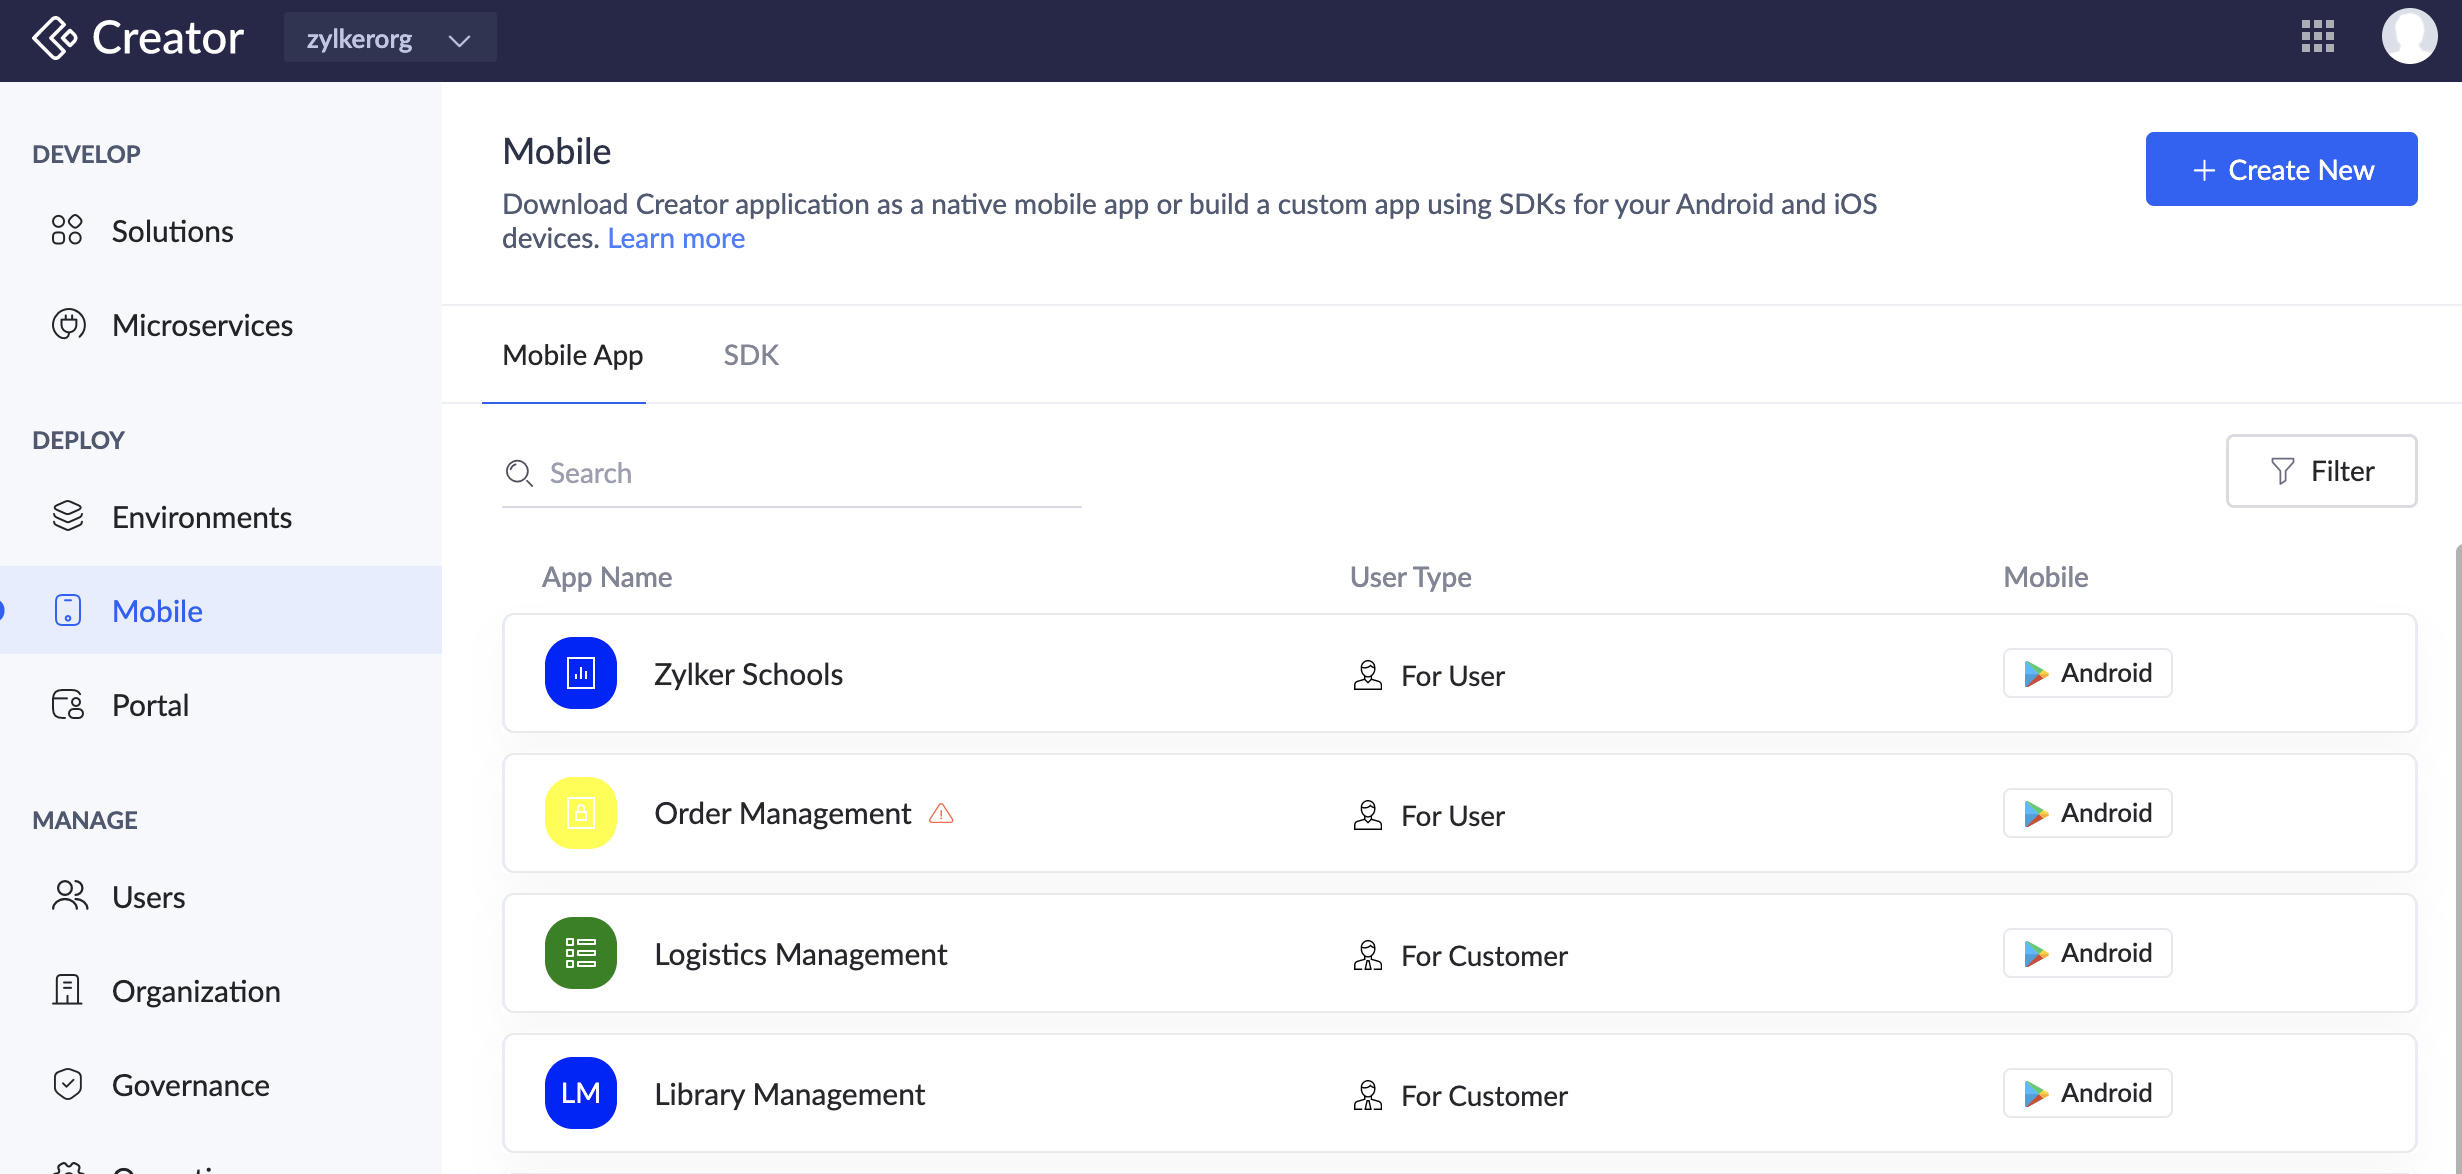
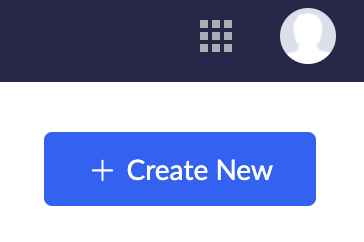
- Click on the Create New button. It opens the Create New slider.
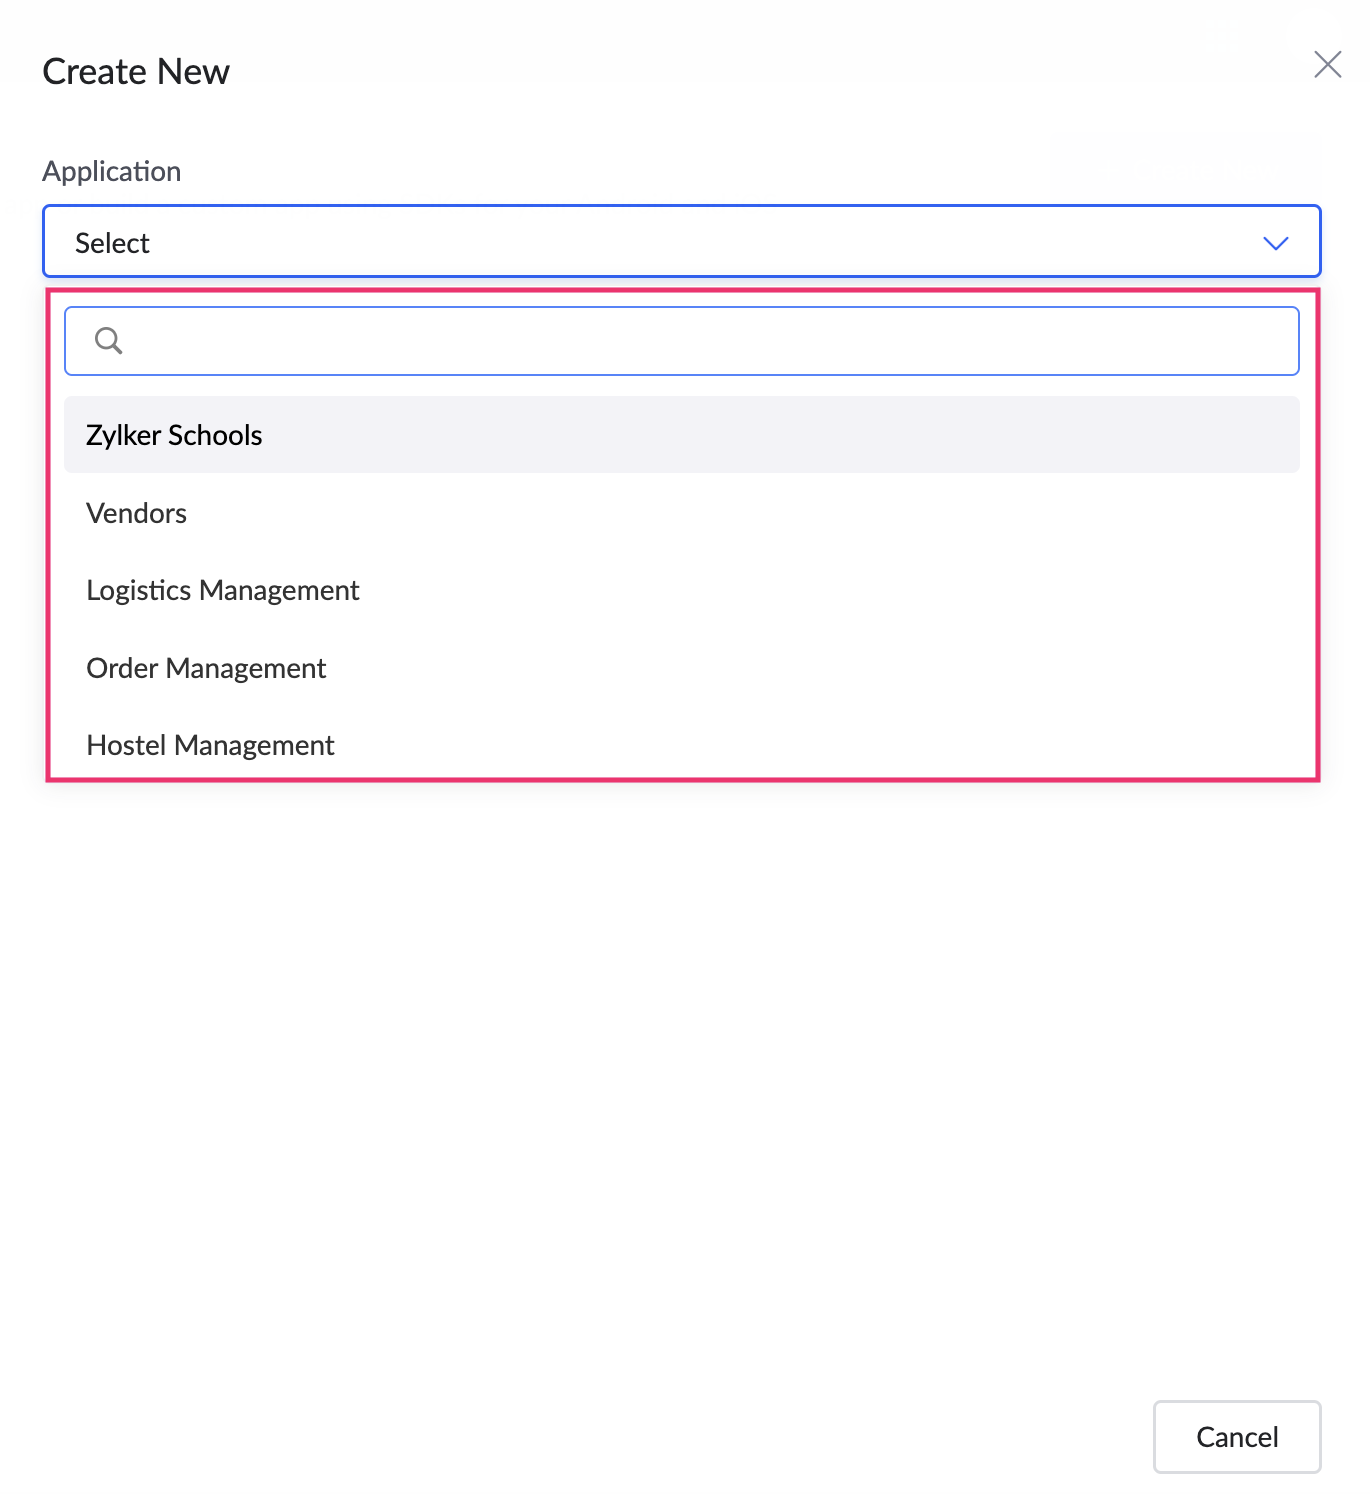
- Select the Application Name from the dropdown.
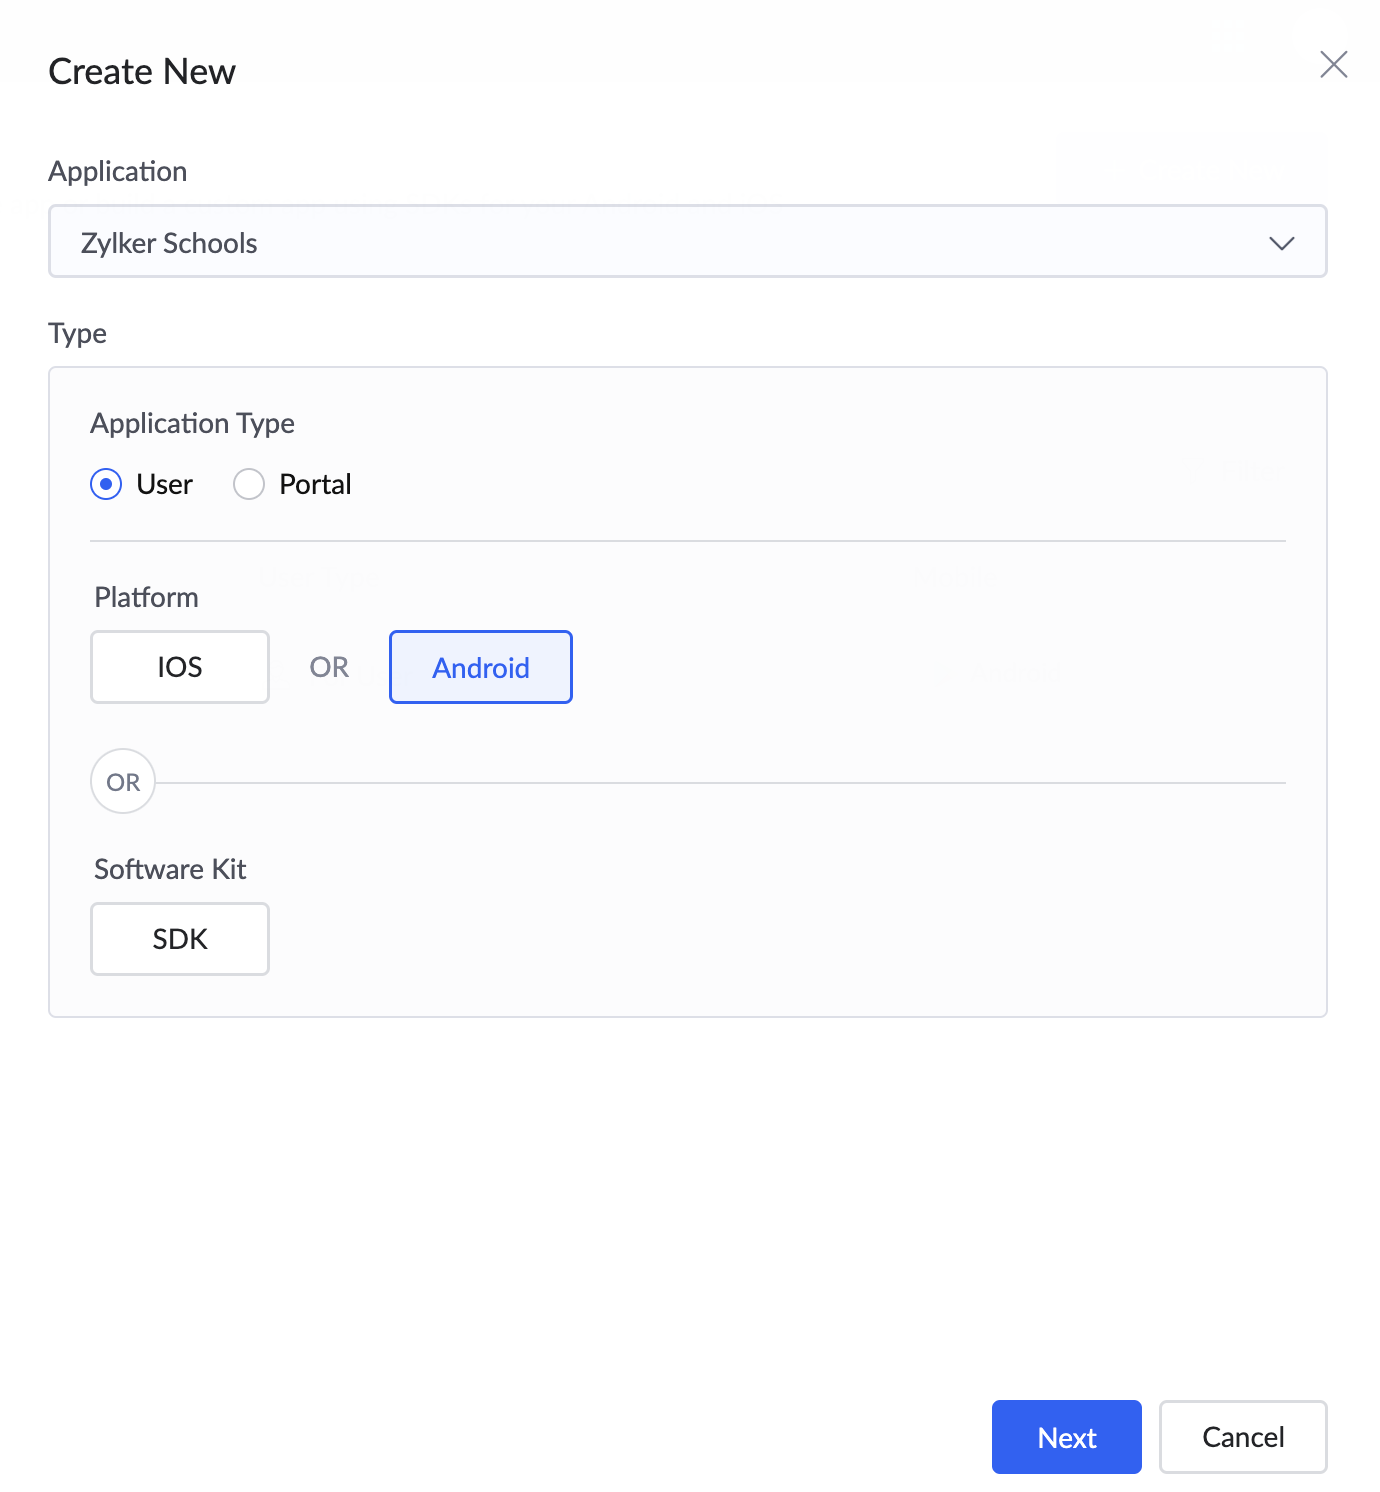
- Select the Application type as User and the platform as Android, then click Next.
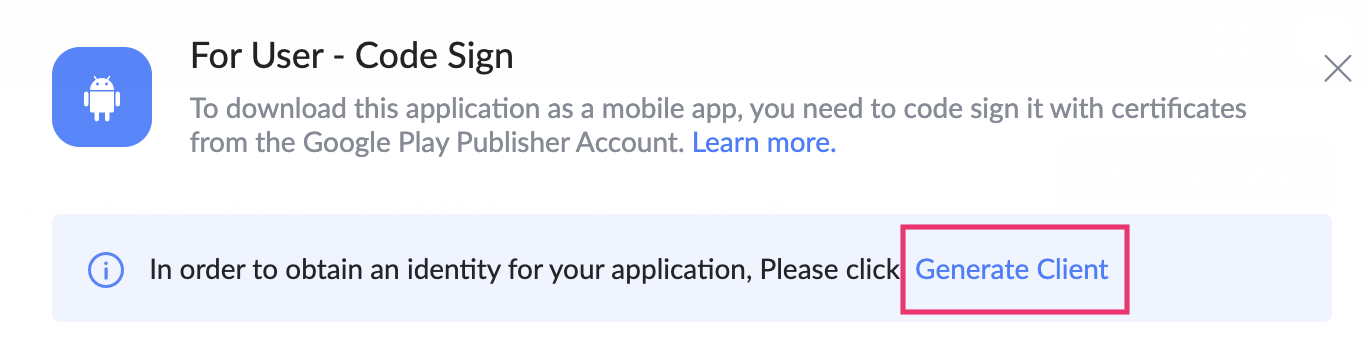
- In the For User - Code Sign slider, click Generate Client. This will open a Zoho Accounts link in a new tab and create a new client for the Android app to communicate with Zoho Creator.
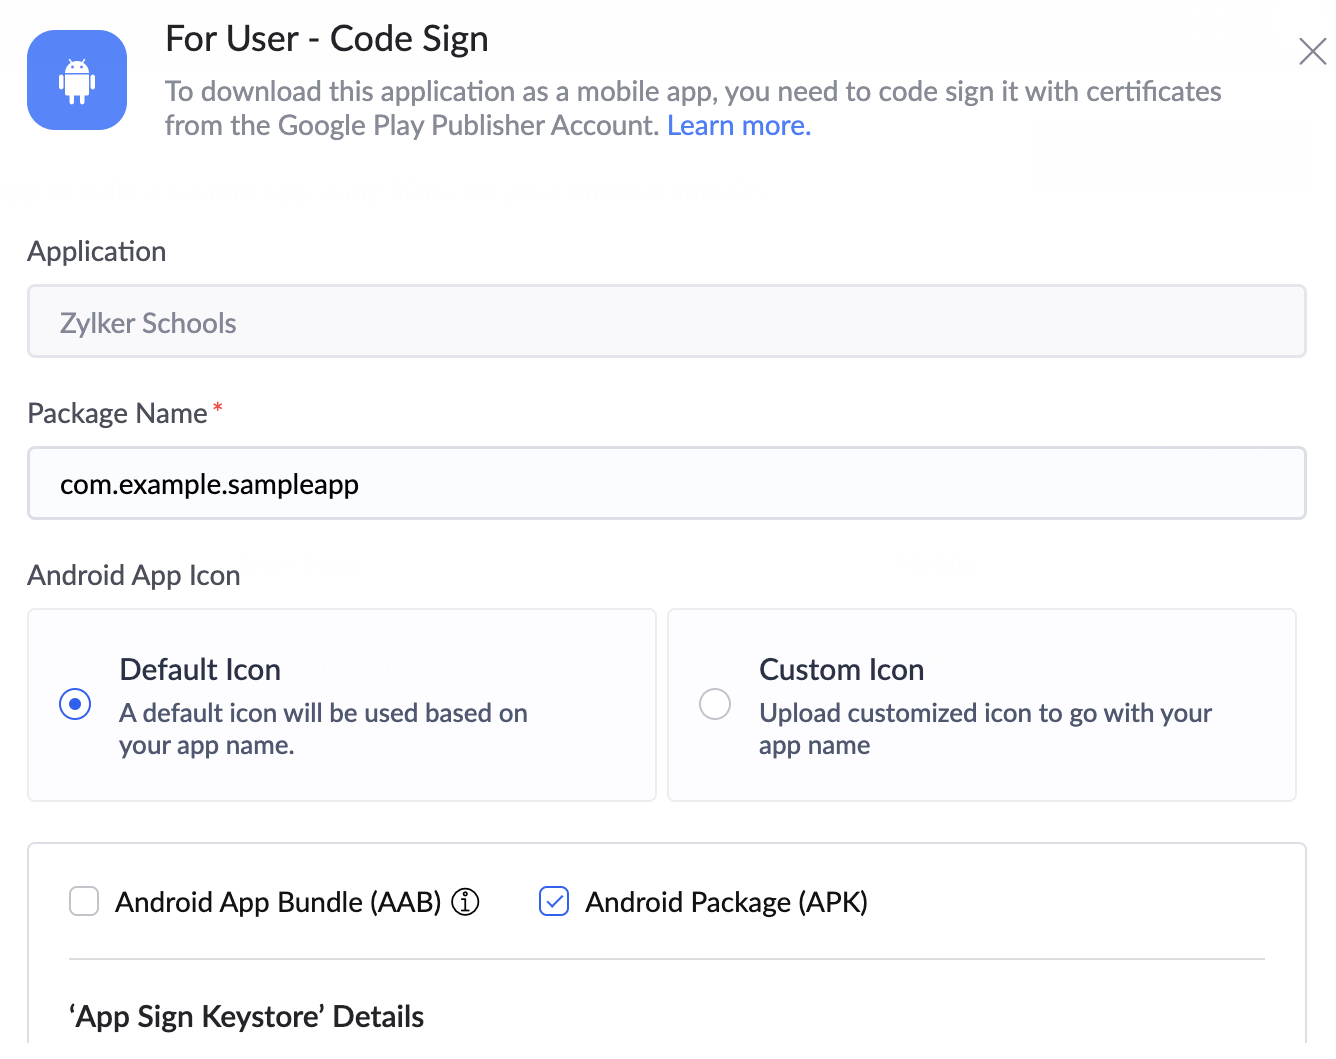
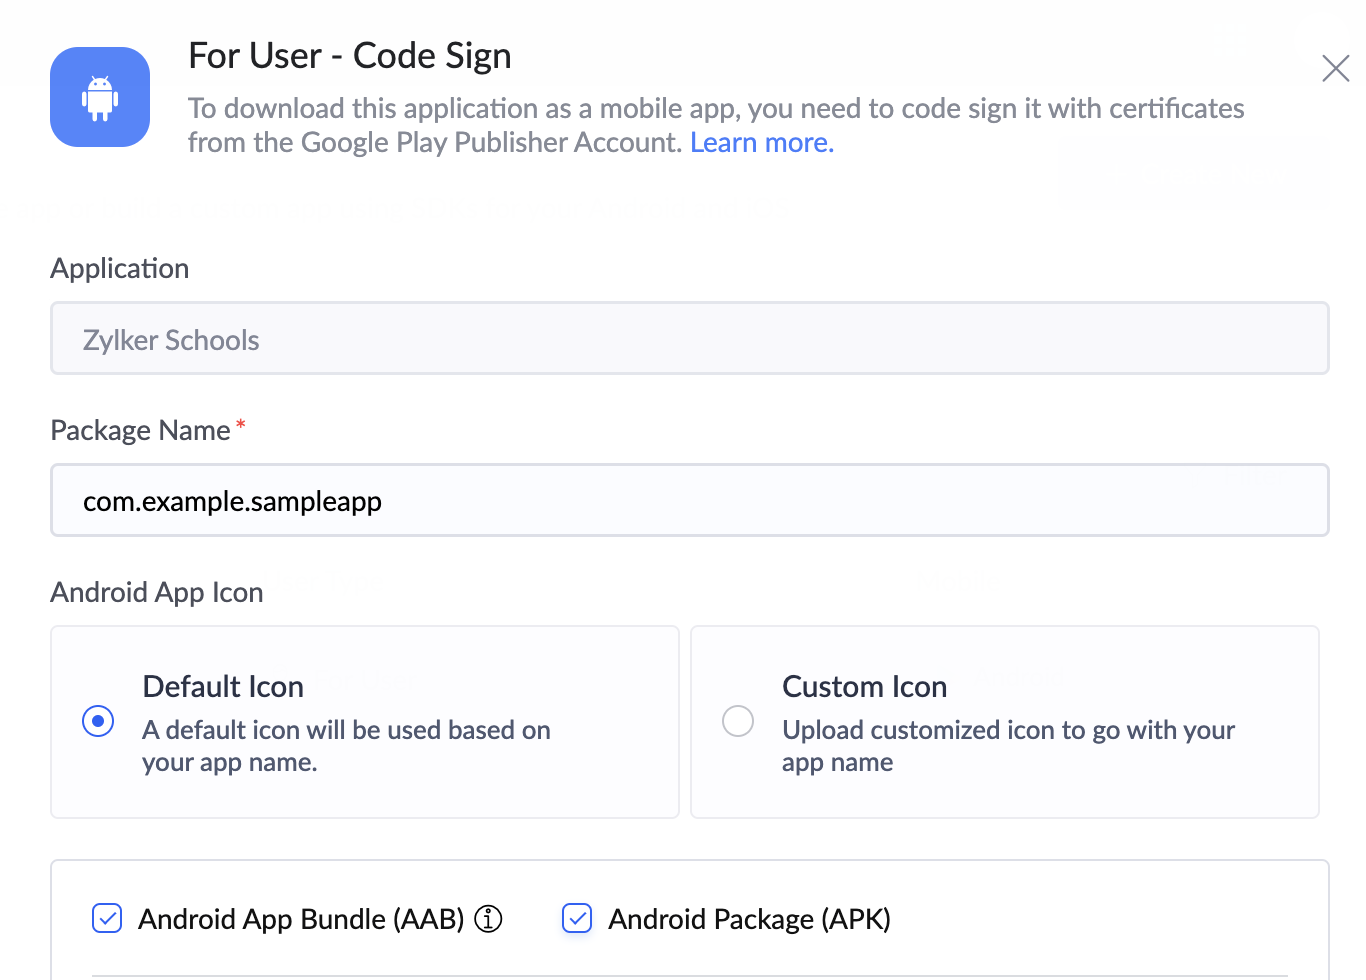
- Enter Package Name. This will uniquely identify your Android app and is usually in the format:
For example,
- Set Android App Icon as follows. This will be your app's icon in your users' mobile devices.
- The Default Icon option will be selected by default. This icon is set based on your application's name.
- You can opt to upload a Custom Icon, which needs to be a PNG file of 1024x1024 px resolution.
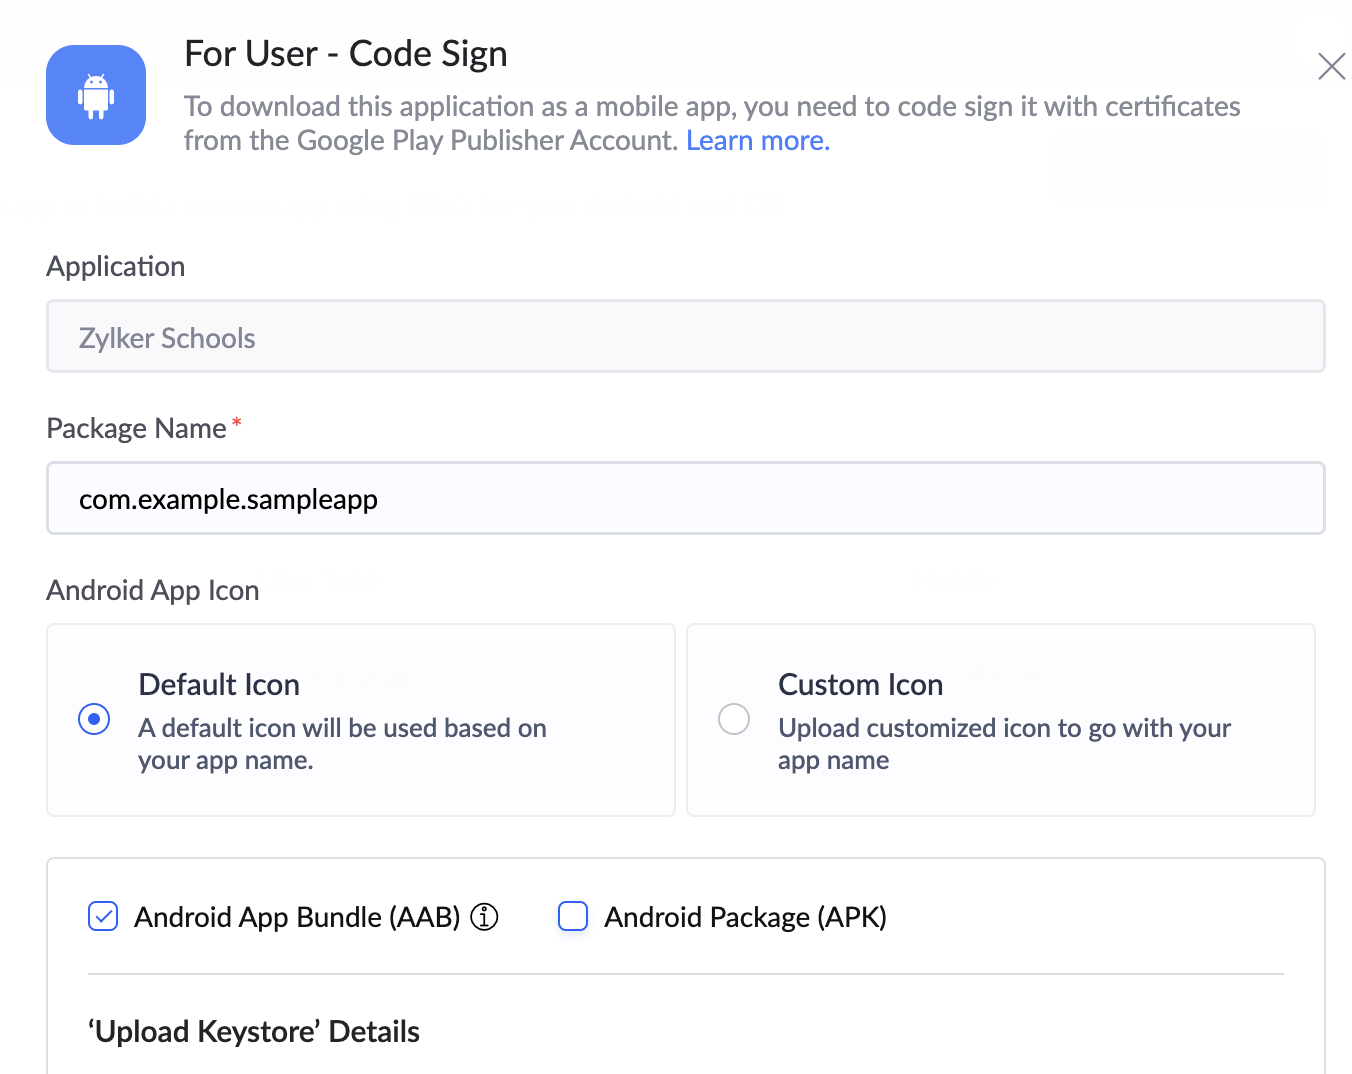
- Tick the check box beside Android App Bundle (AAB).
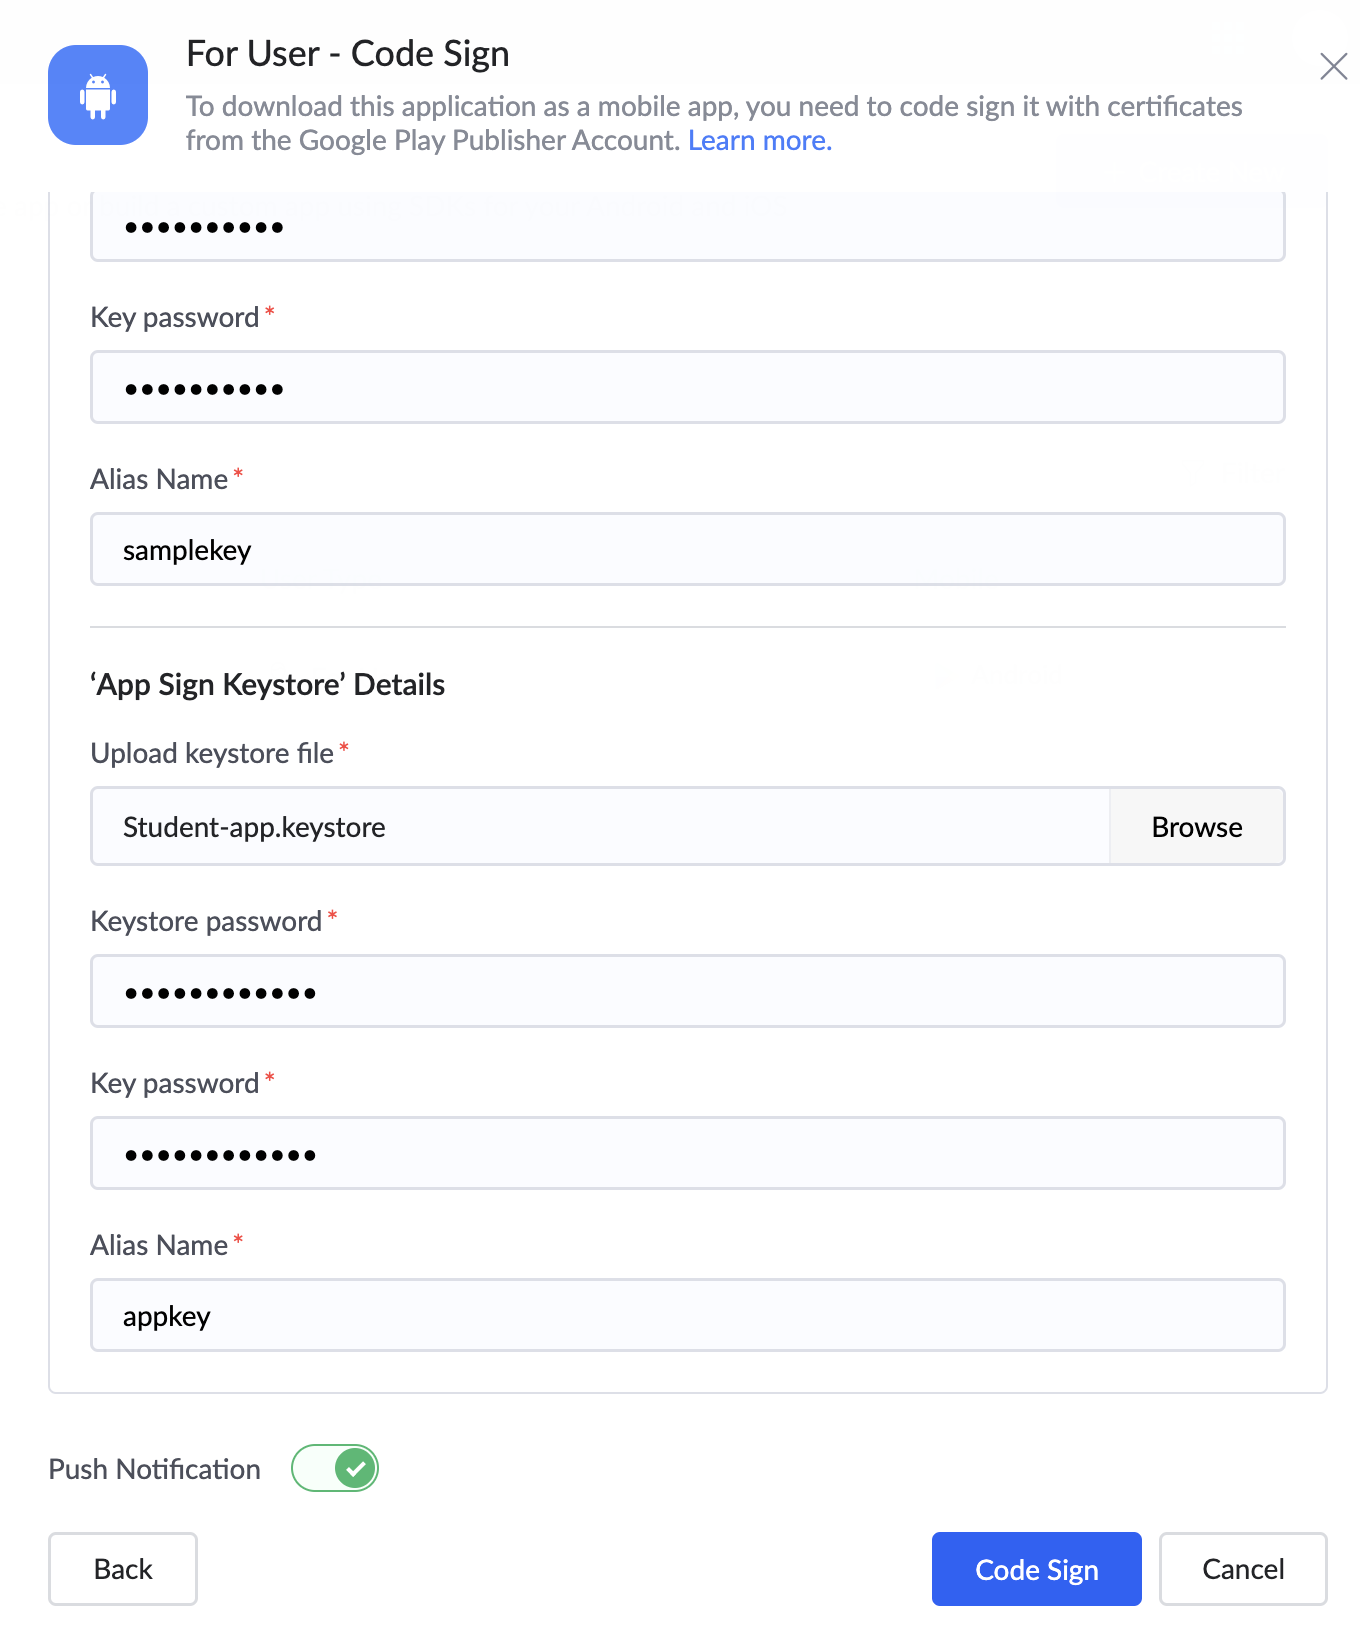
- Under the 'Upload Keystore' Details, enter the required details.
- Upload Keystore file. Refer to this page to know how to generate an upload keystore file.
- Enter Keystore password and the Key password.
- Enter Alias Name.
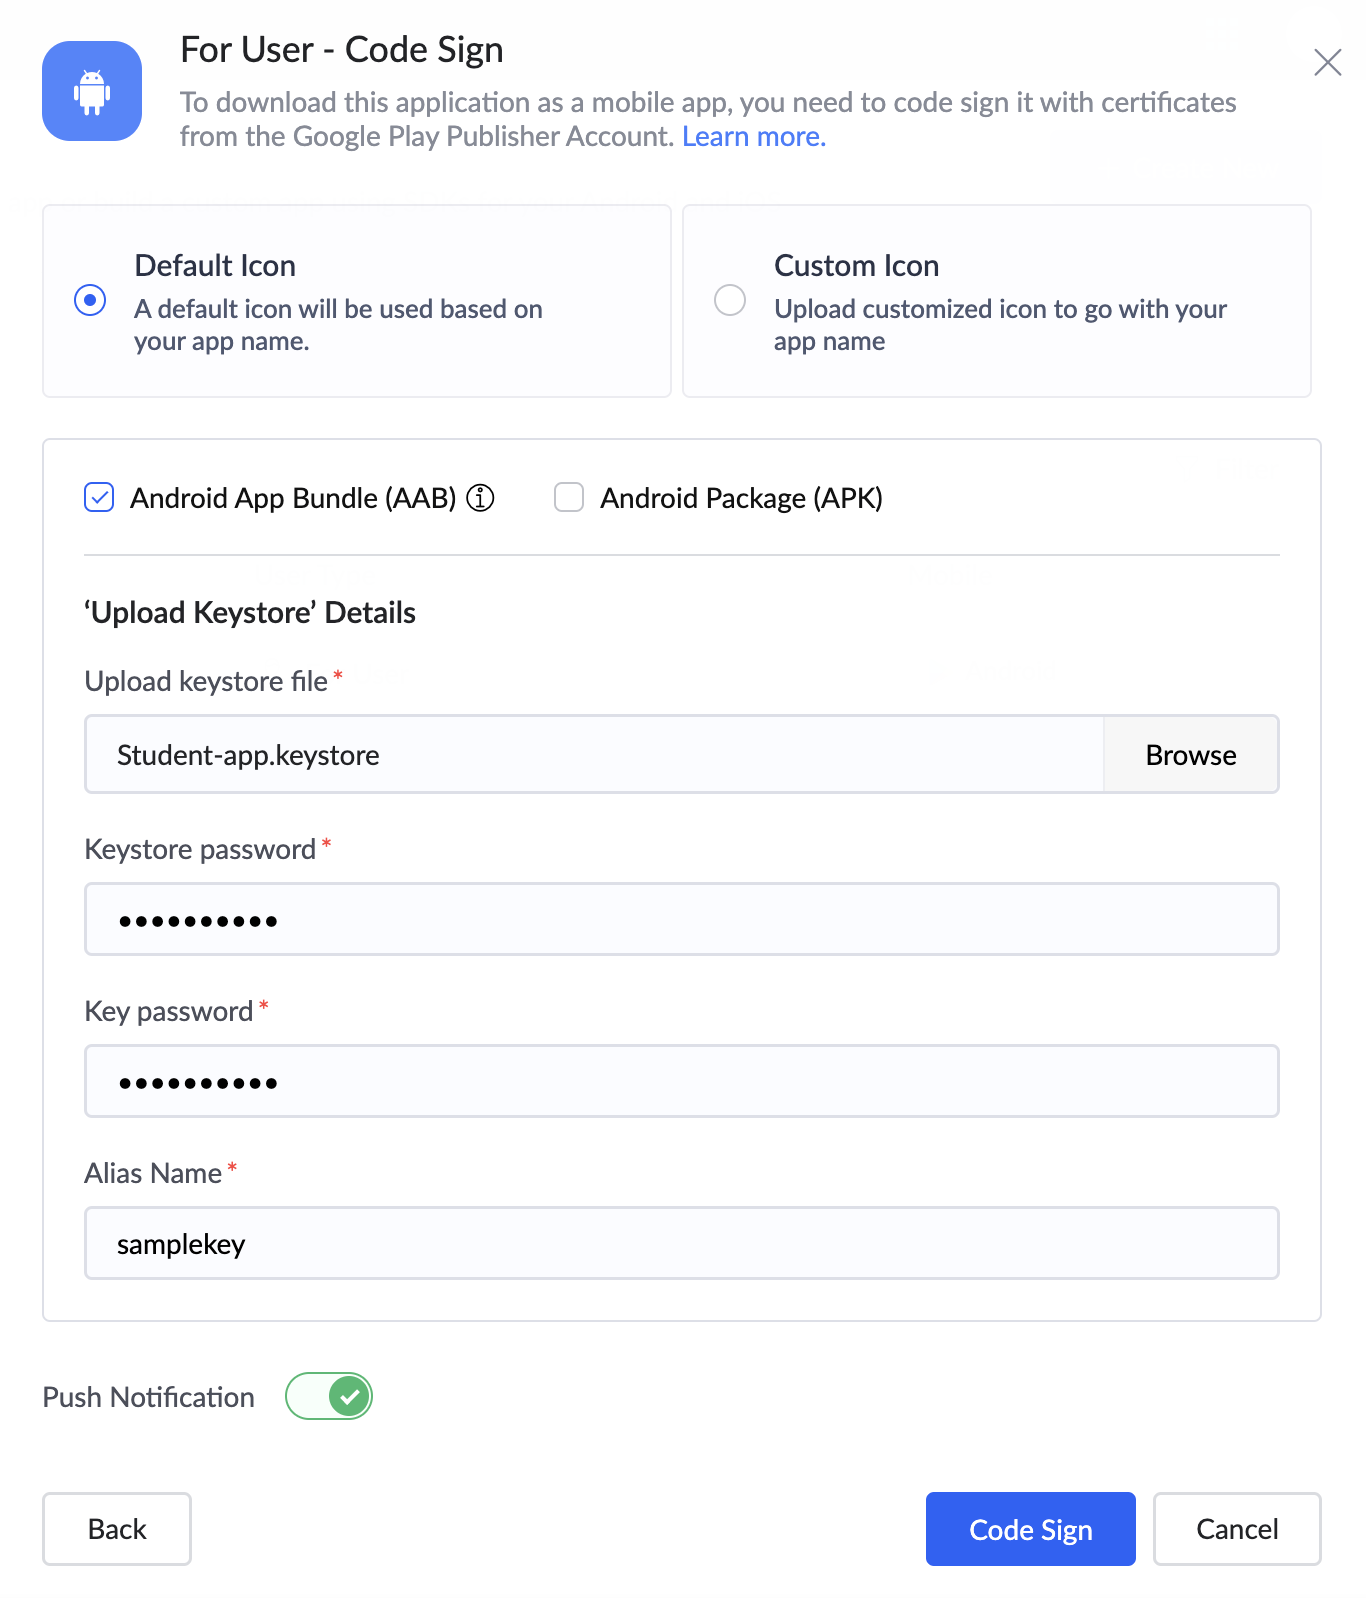
- Toggle the button next to Push Notification to enable push notification support for your Android app.
- In the Push Notification popup, enter the required details. Firebase config file and Firebase Service Account file are required for enabling push notification support. Refer to this page to learn how to source them.
- Upload the Firebase Config file and the Firebase Service Account file. Click Enable.
- If you want to enable tracking metrics for the Android app, toggle the button beside App Metrics. Otherwise, skip to step 17.
You can disable the toggle button, then click Disable in the popup that appears if you do not want to track metrics. - Now, click Code Sign. The code sign process can take up to 10 minutes.
- On successful completion, the status of your app will be code signed.
- Distribute the code-signed Android app to your users by either of the following methods as required.
- To disable the push notifications support for your Android app, refer here.
- You can re-codesign your Android app. Learn how
Distribute your app by downloading its .aab file
- Navigate to the Mobile section on the left and select the Mobile App tab.
- Click on the corresponding row of the code signed Android app, it will open the For User - Code Sign pane on the right as below.
- Click the Download AAB button beside the Download and send the .aab file section.
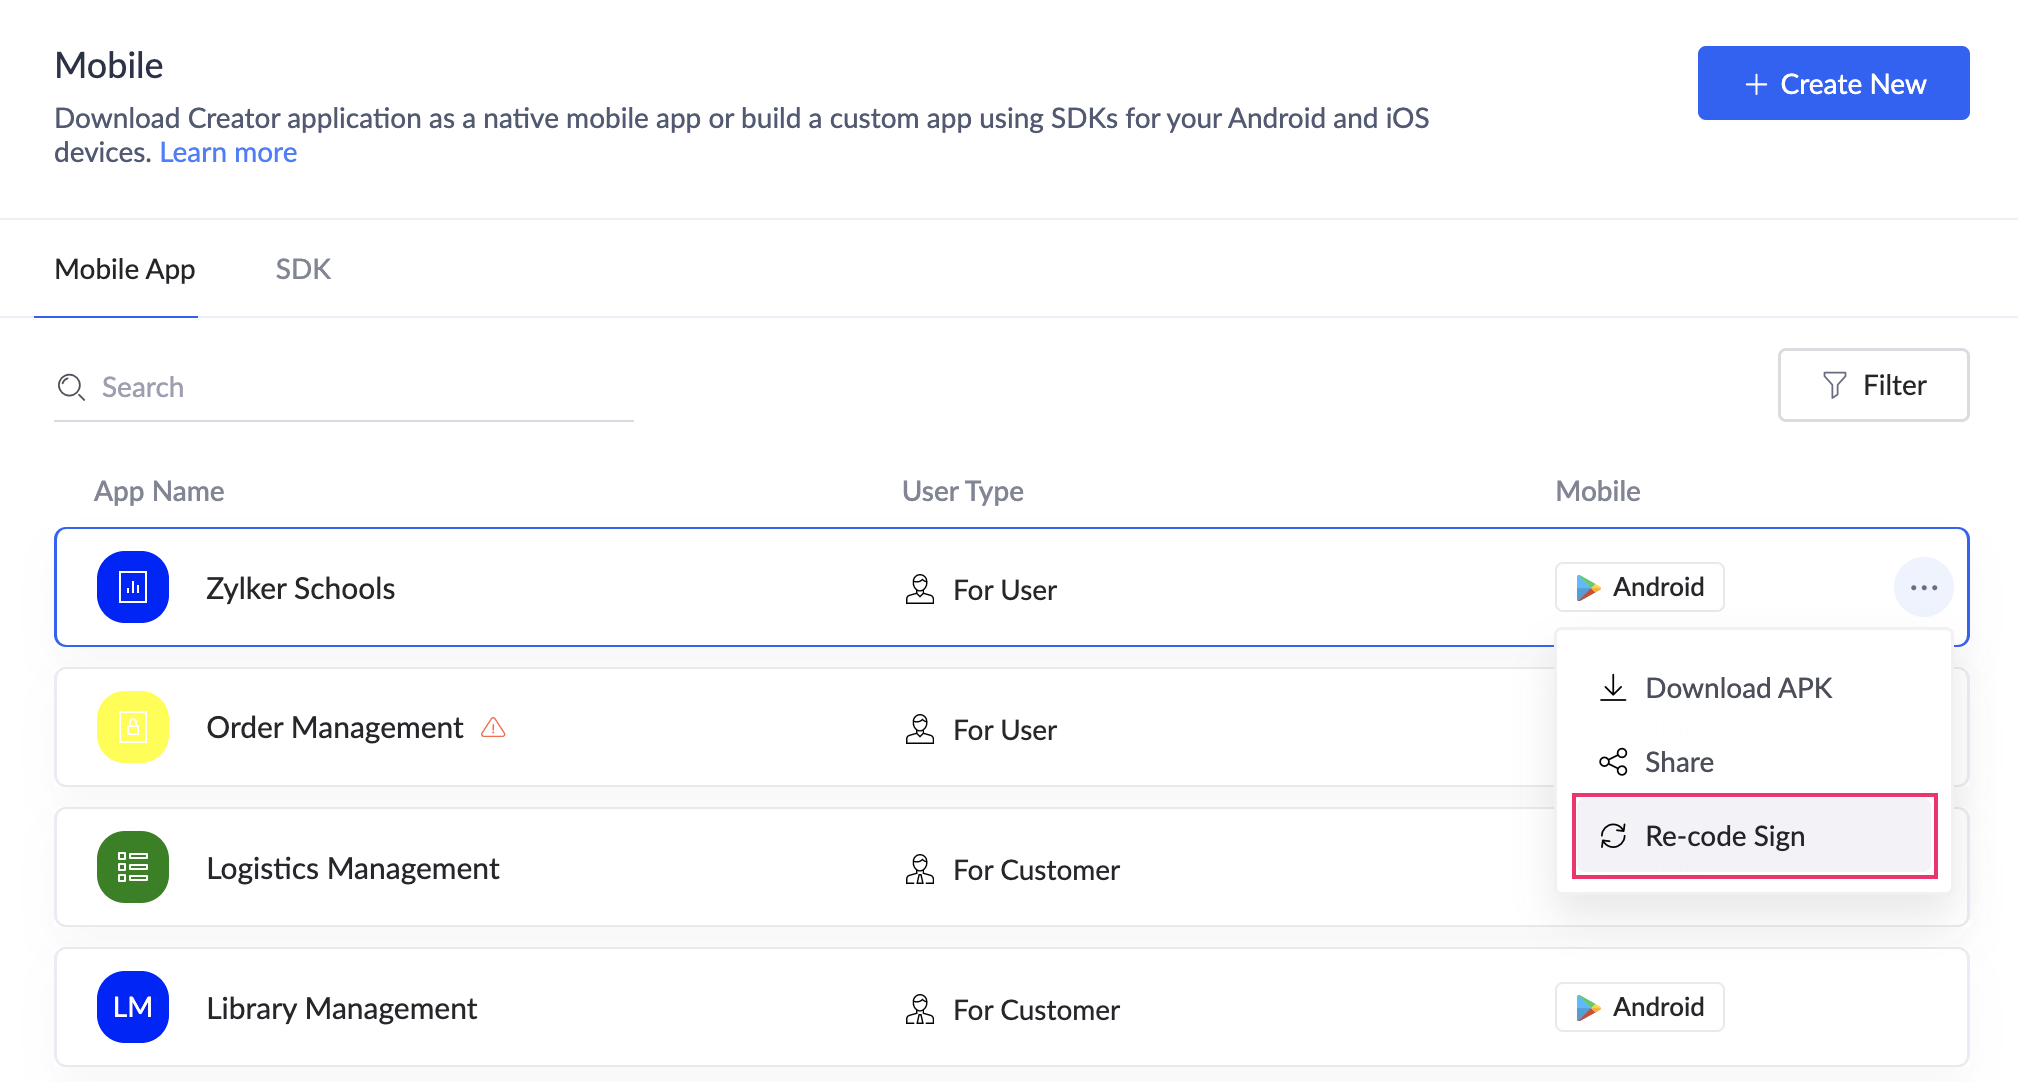
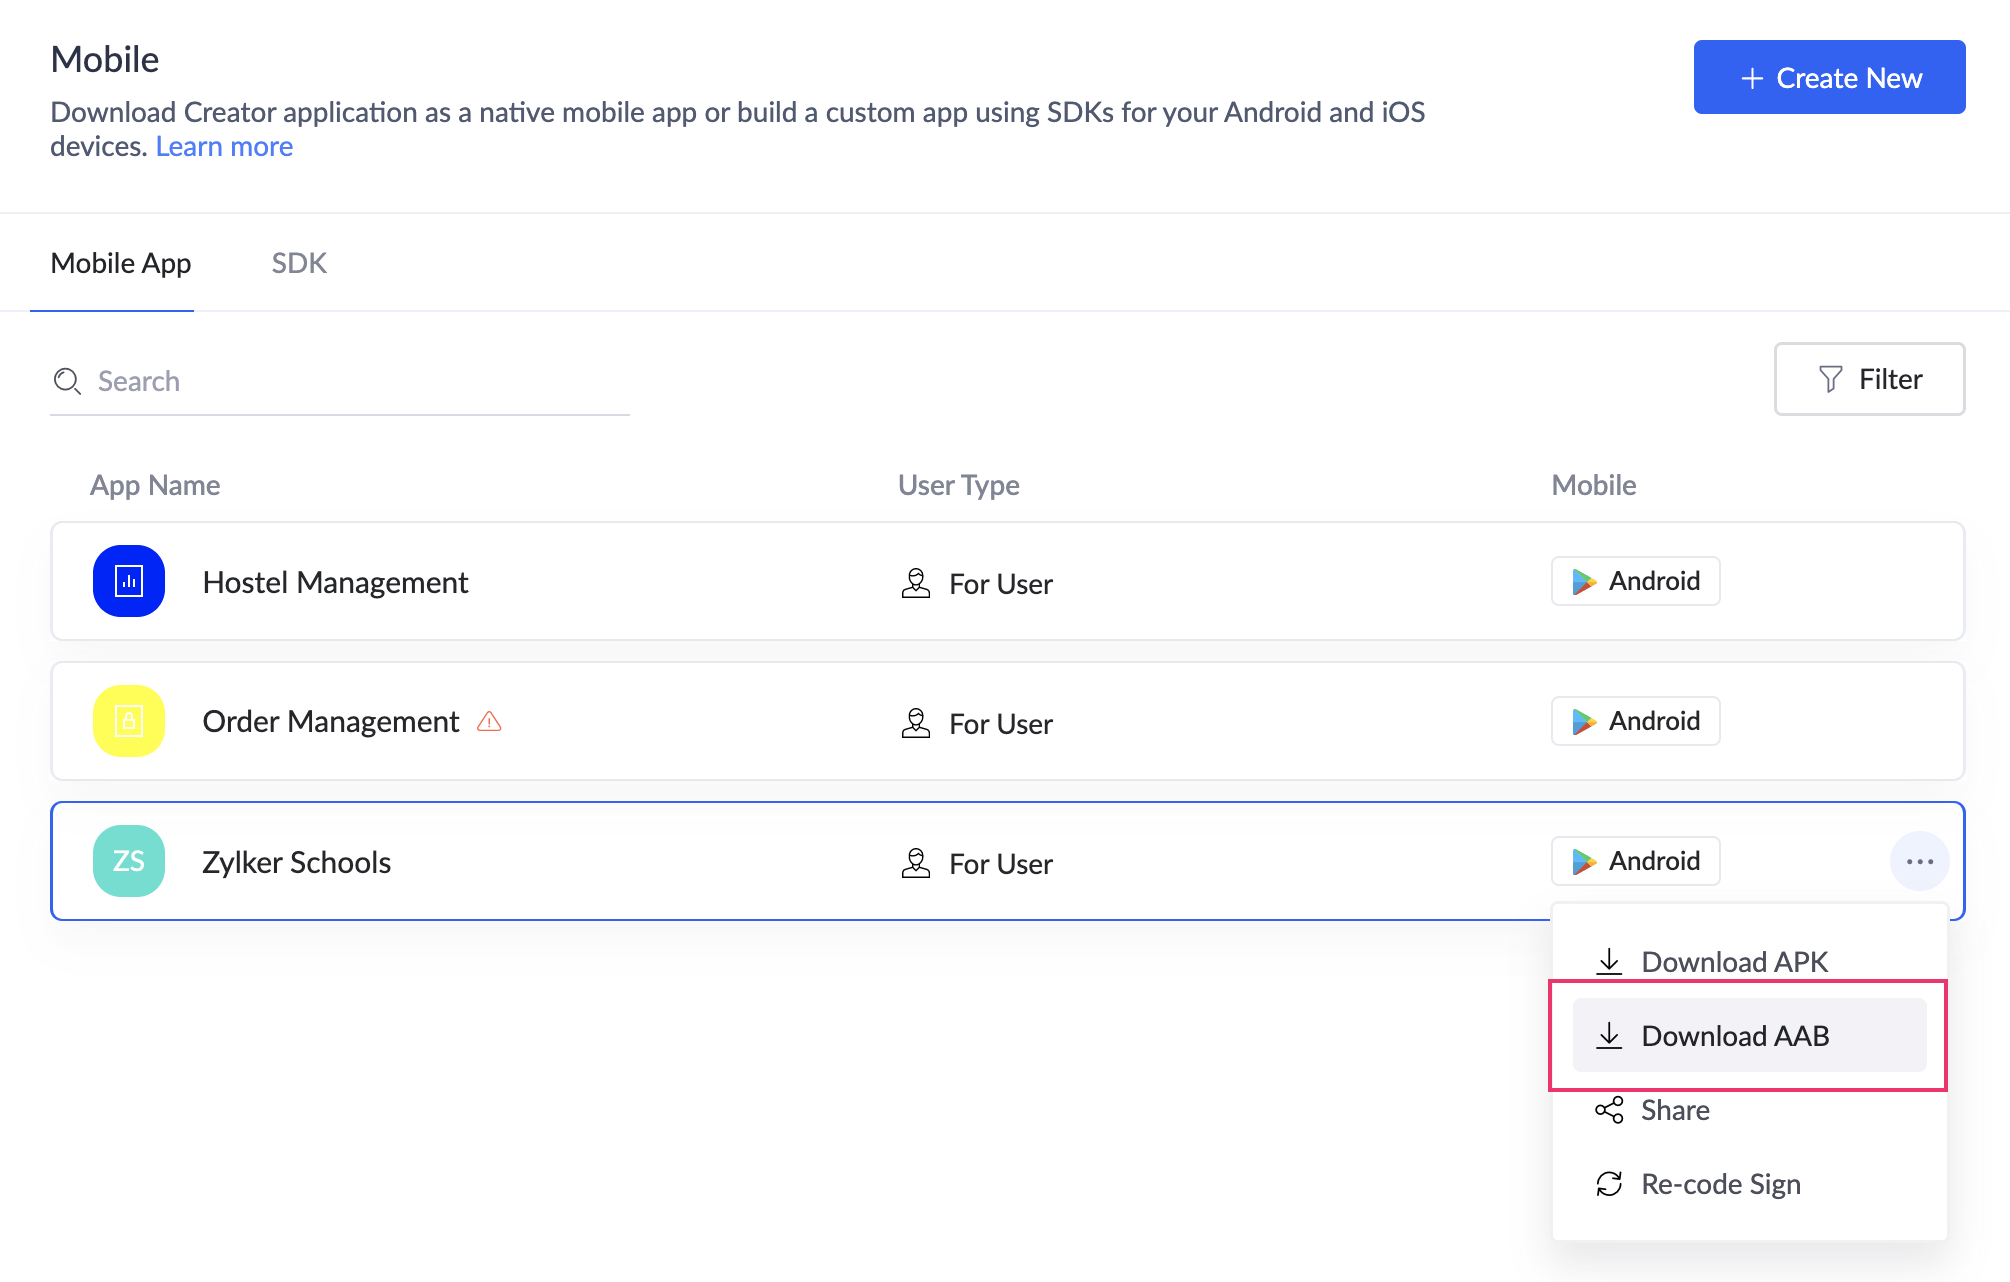
- Alternatively, navigate to the Mobile App tab and hover on the corresponding row of the code signed Android app, it will show a three-dot action popup at the right end of the row.
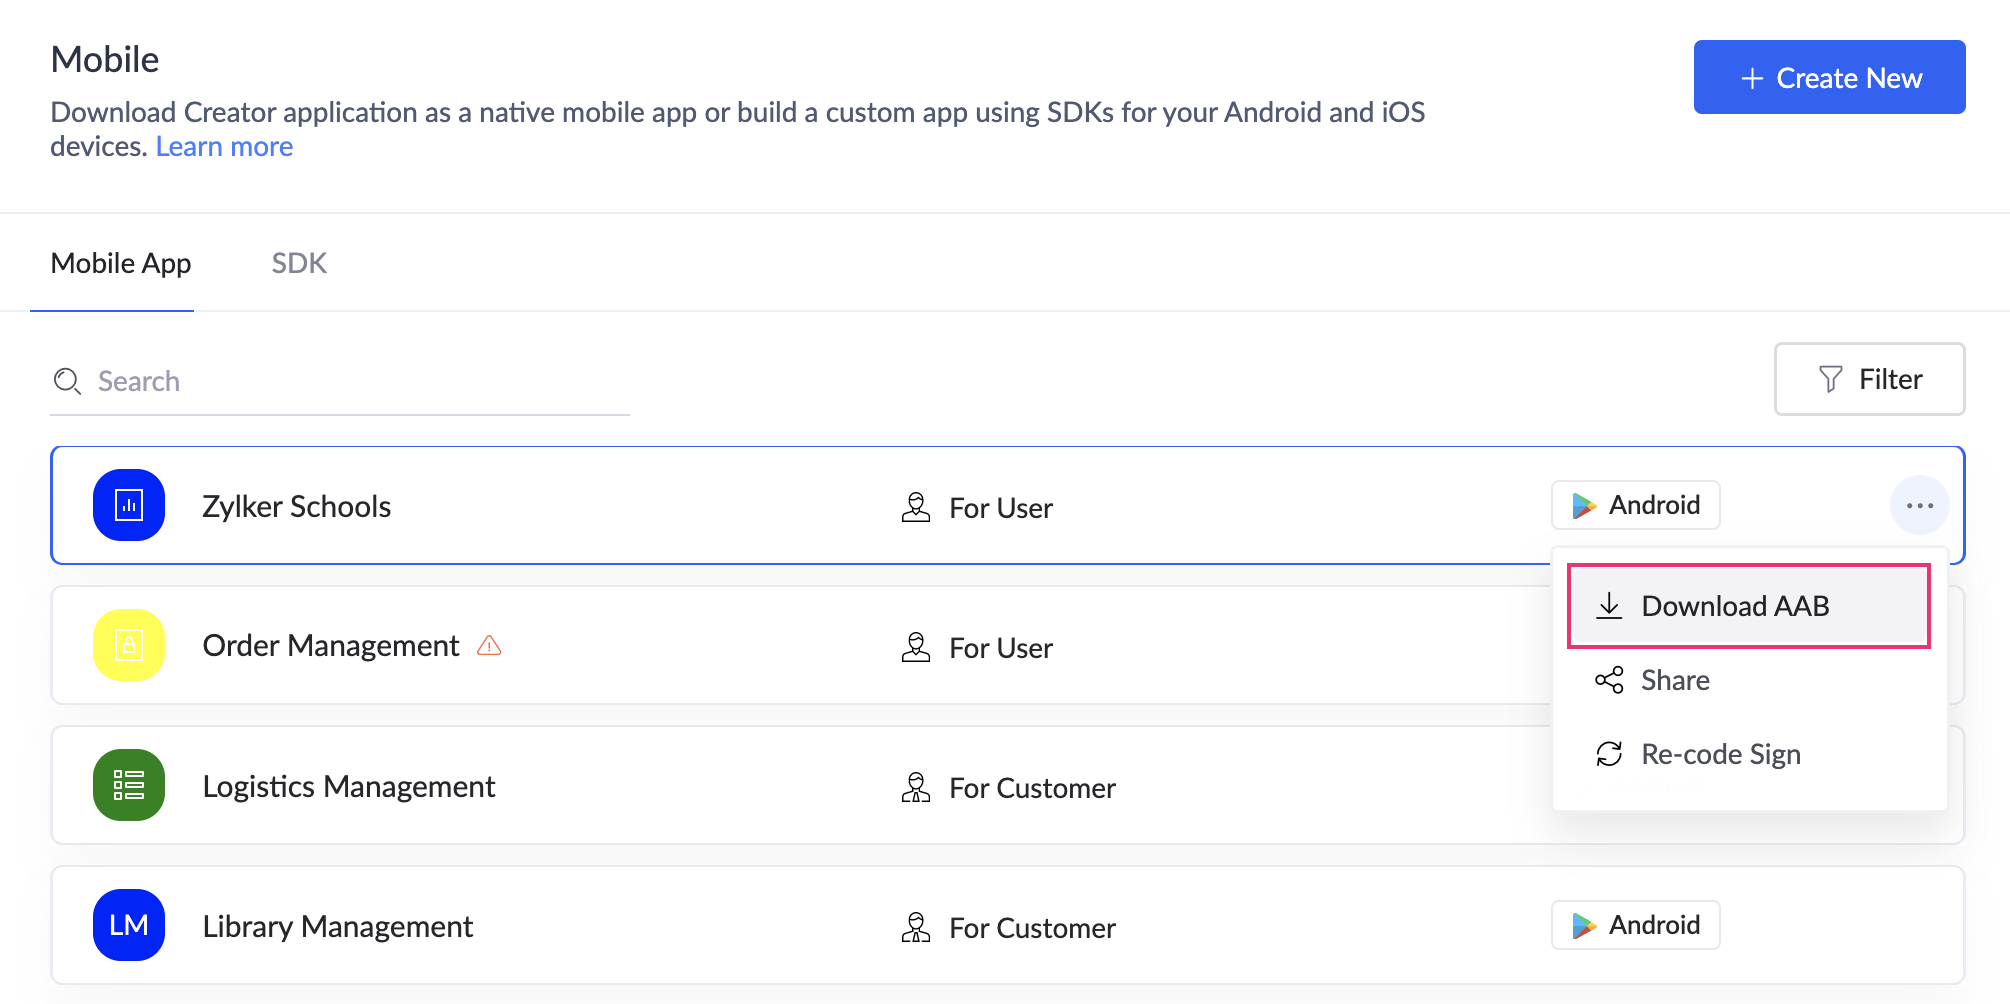
- Click the Download AAB button, then share the resulting Android App Bundle (.aab) file with your users.
Distribute your app by sending its invitation link to your users
- Navigate to the Mobile section on the left and select the Mobile App tab.
- Click on the corresponding row of the code signed Android app, it will open the For User - Code Sign pane on the right as below.
- Under the Share the AAB installation link with users section, enter the email addresses of your users and click the Share button.
- Your users will receive an email.
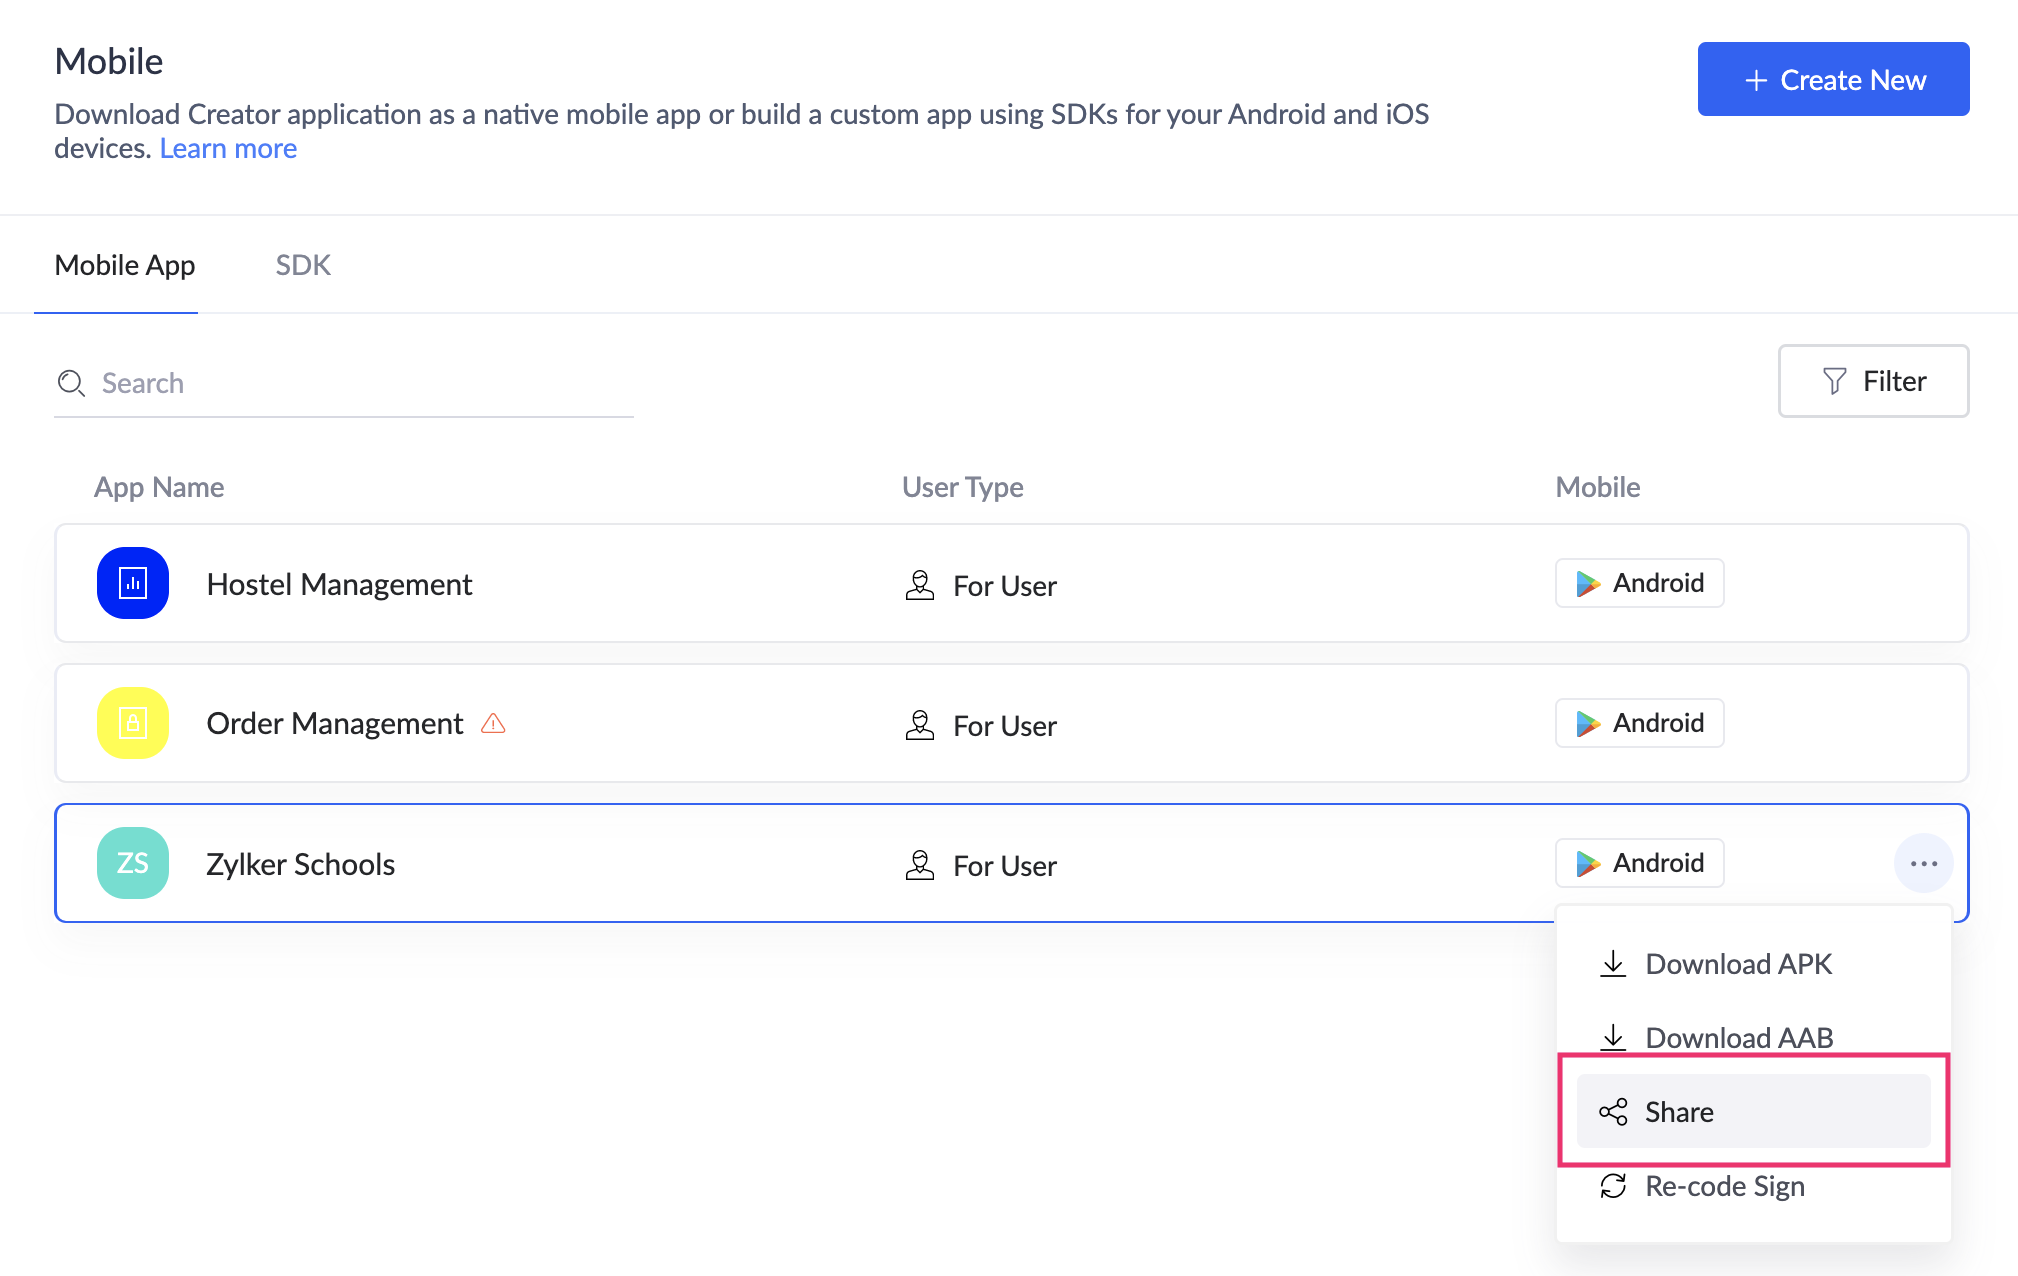
- Alternatively, navigate to the Mobile App tab and hover on the corresponding row of the code signed Android app, it will show a three-dot action popup at the right end of the row.
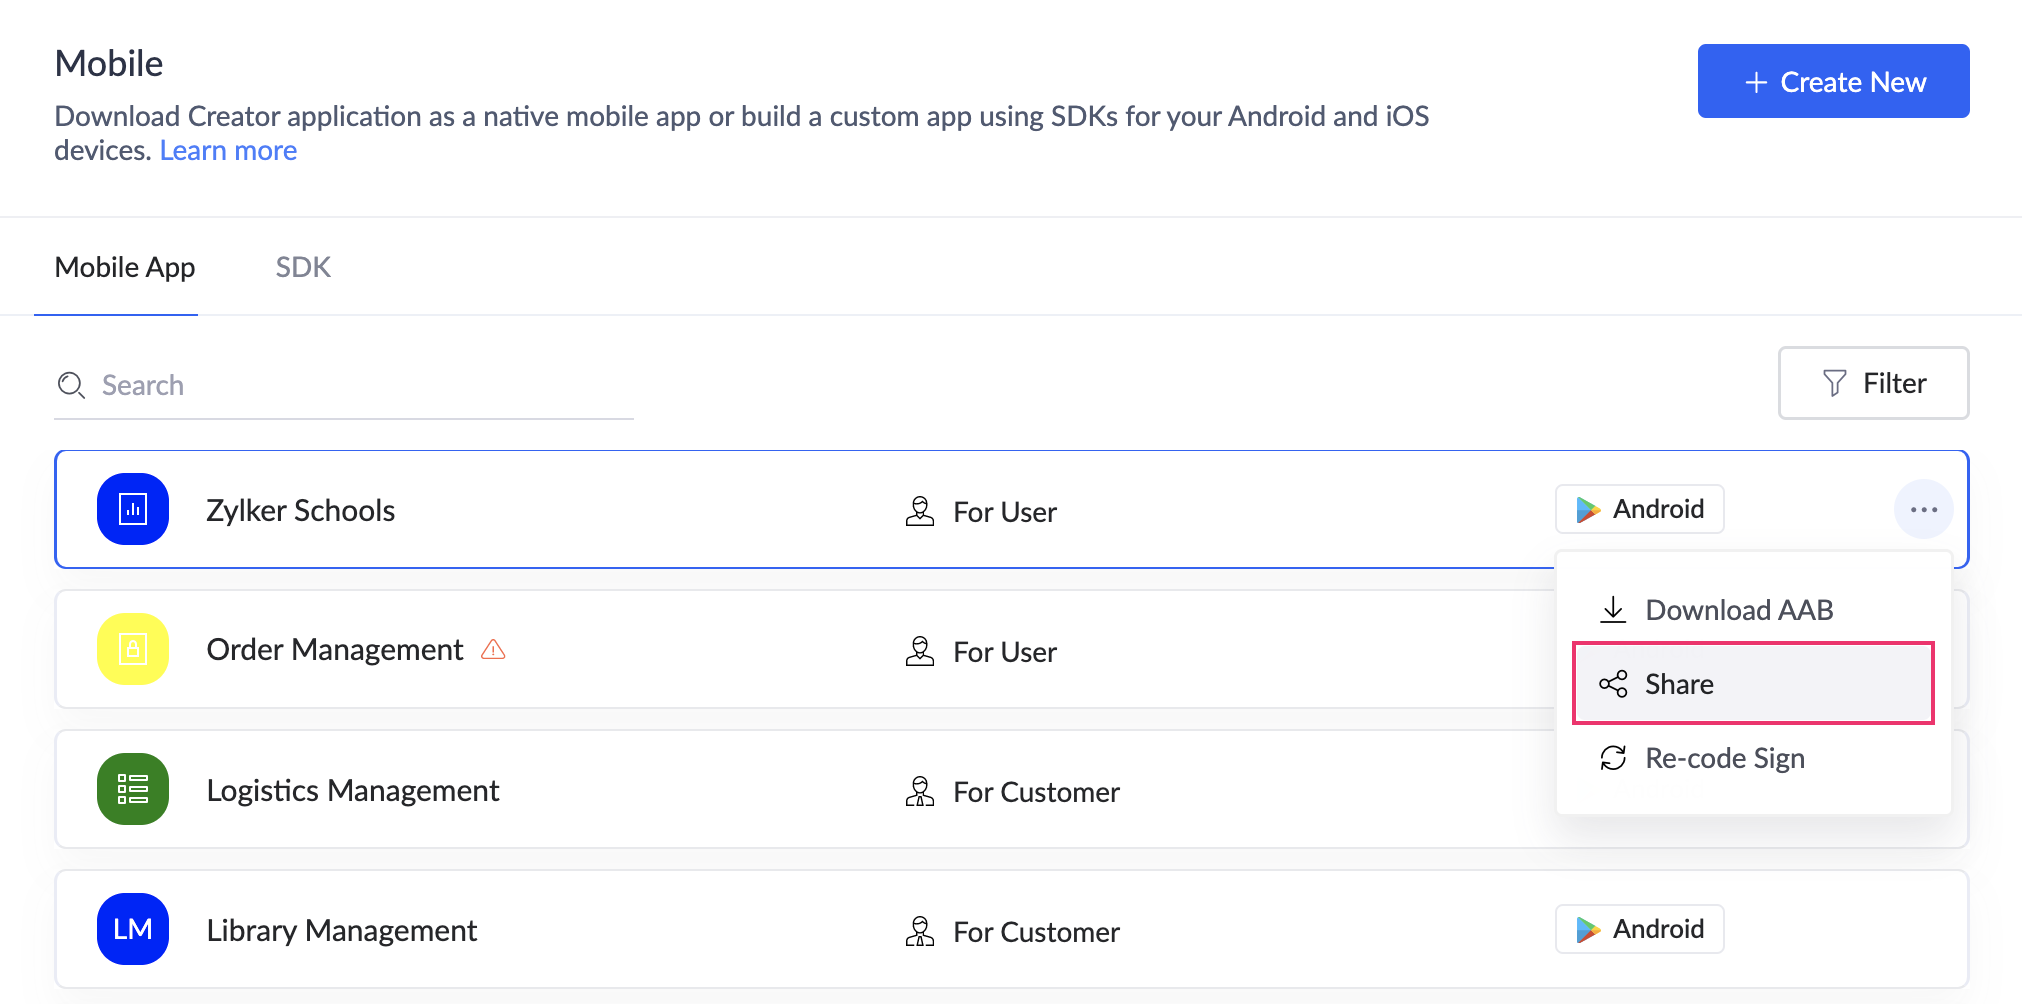
- Click on the Share button, it will open the Share the app installation link with users popup.
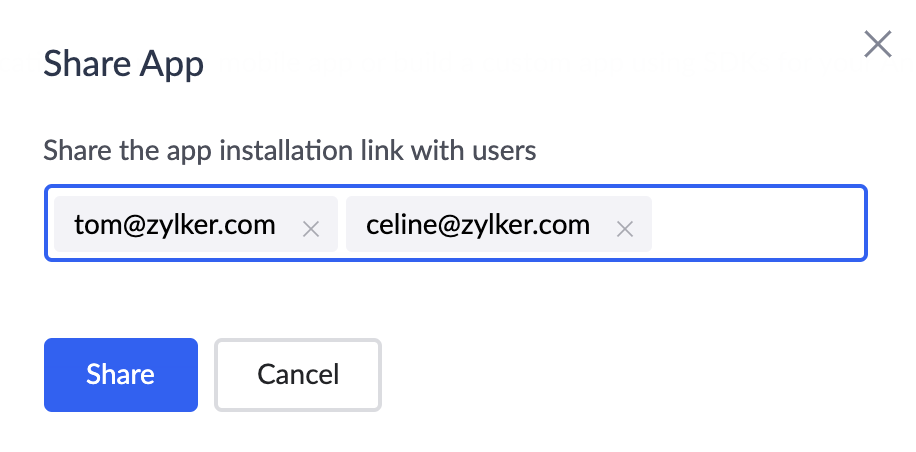
- Enter the list of email addresses of the users and click Share.
Generate APK from AAB
Once AAB is generated, we can easily generate APK from it by using the App Signing keystore details.
To generate APK from AAB,
- Navigate to the Mobile App tab.
- Click on the corresponding row of the code signed Android app, it will open the For User - Code Sign pane on the right as below.
- Click the Generate APK button beside the Download and send the .apk file section.
- Enter the required details in the Generate APK popup and click Generate.
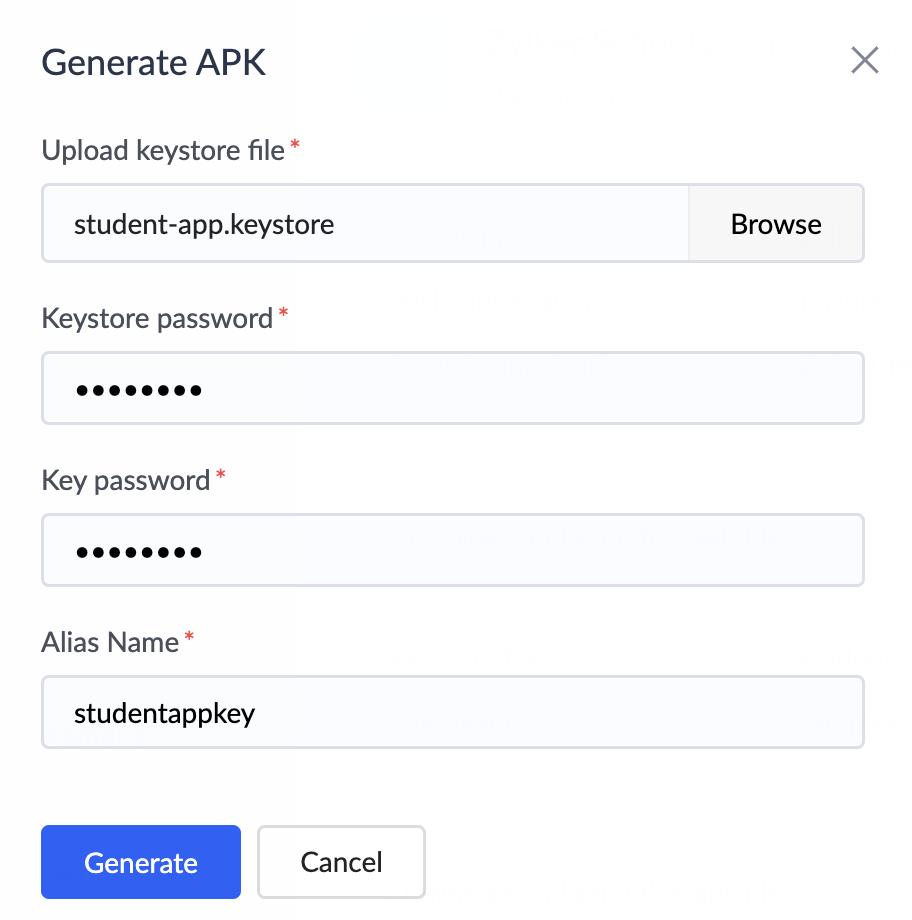
The .apk file will be generated and you can share it with your users.
Disable the push notifications support for your Android app
- Navigate to the Mobile App tab.
- Click on the corresponding row of the code signed Android app, it will open the For User - Code Sign pane on the right as below.
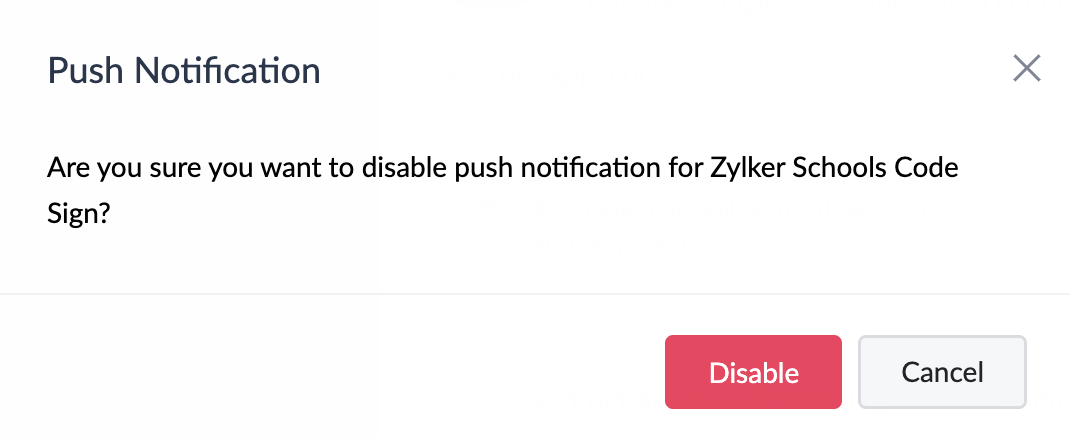
- Click the Disable button beside the Push Notification section.
- Click Disable in the Disable Push Notification for Android app popup.
To manage metrics post code sign
- Navigate to the Mobile section on the left and select the Mobile App tab.
- Click on the corresponding row of the code signed Android app to open the For User - Code Sign pane on the right.
- Click Enable beside App Metrics.
- Click Enable in the Enable App Metrics popup that appears. You'll be taken to the For User - Code Sign pane.
- Enter the required details mention in the To code sign your Android application and enable push notification for users section from step 5 - 13 to re-code sign your app.
After code signing is complete, Apptics will start tracking app usage and you can view the usage data in the Mobile Metrics dashboard.
To deactivate the tracking of metrics, click Deactivate beside App Metrics. This will temporarily pause the tracking of key insights for your code signed application. You can continue to view the existing data.
To activate the tracking of metrics, click Activate beside App Metrics. This will restart the tracking of metrics for your code-signed app.

Re-code sign your Android app
- Navigate to the Mobile section on the left and select the Mobile App tab.
- Click on the corresponding row of the code signed Android app, it will open the For User - Code Sign pane on the right as below.
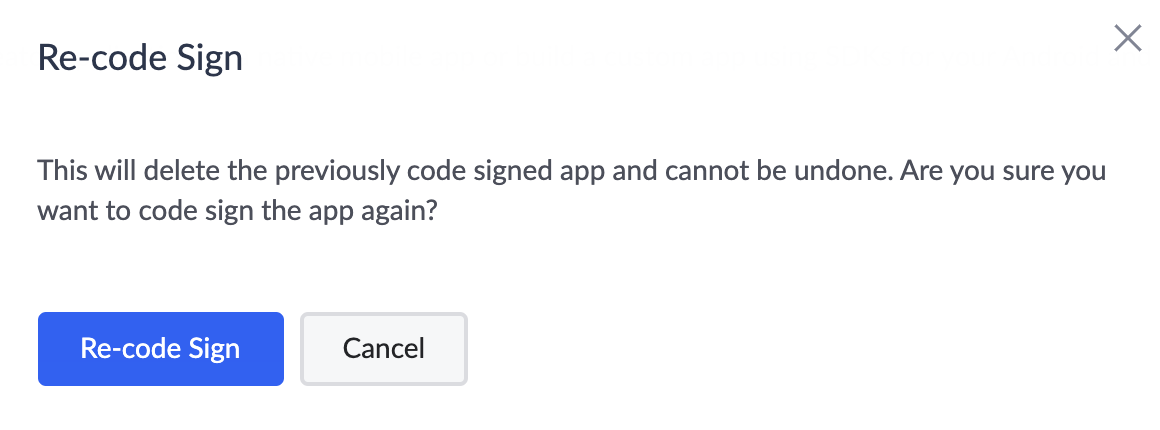
- Click Re-code Sign beside your code-signed app's name. A popup will appear.
- Click Re-code Sign to confirm. Your app will be code signed again
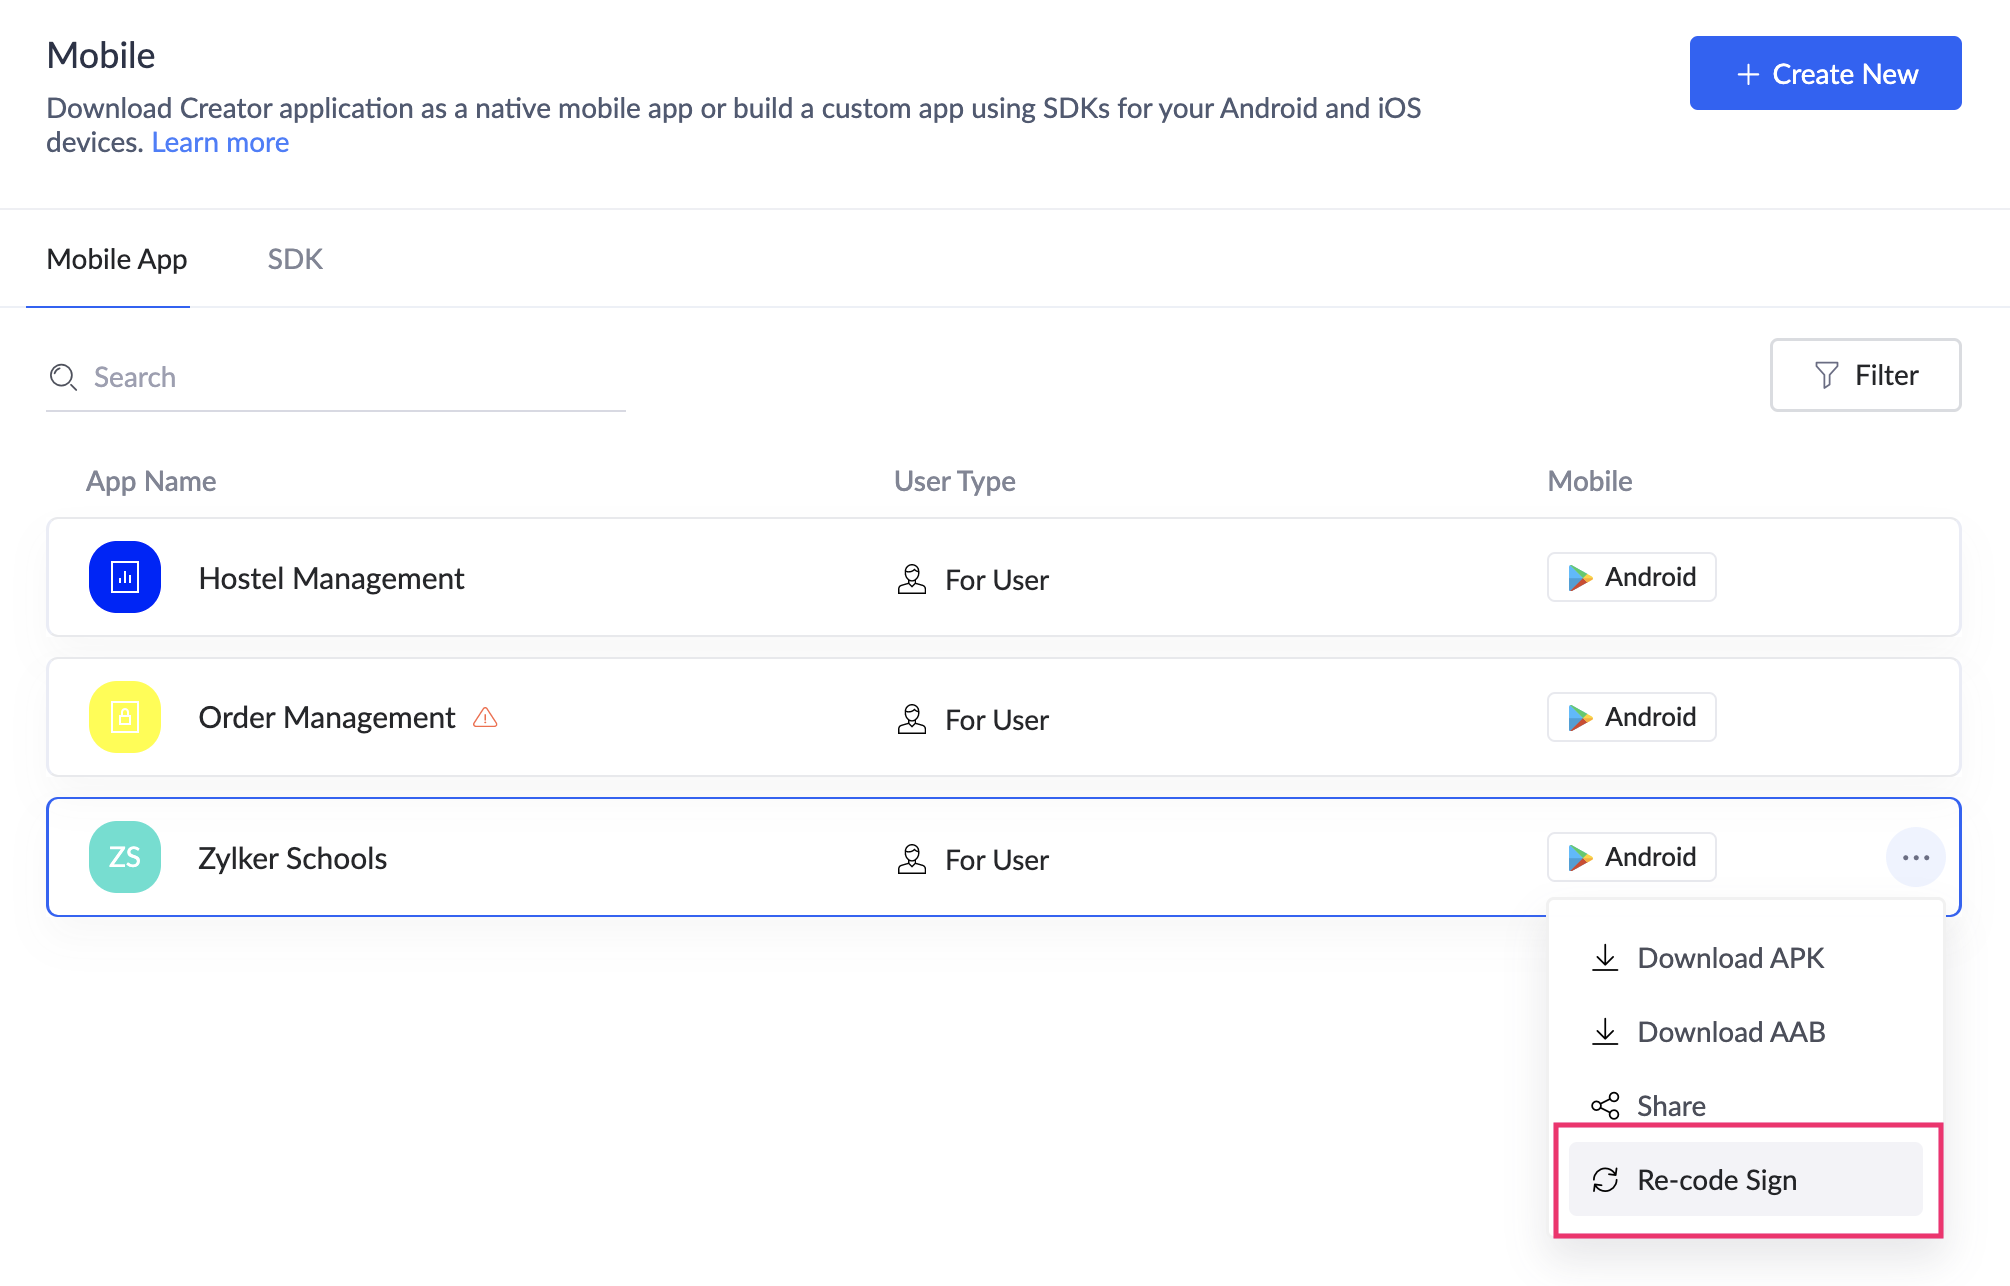
- Alternatively, navigate to the Mobile App tab and hover on the corresponding row of the code-signed Android app, it will show a three-dot action popup at the right end of the row.
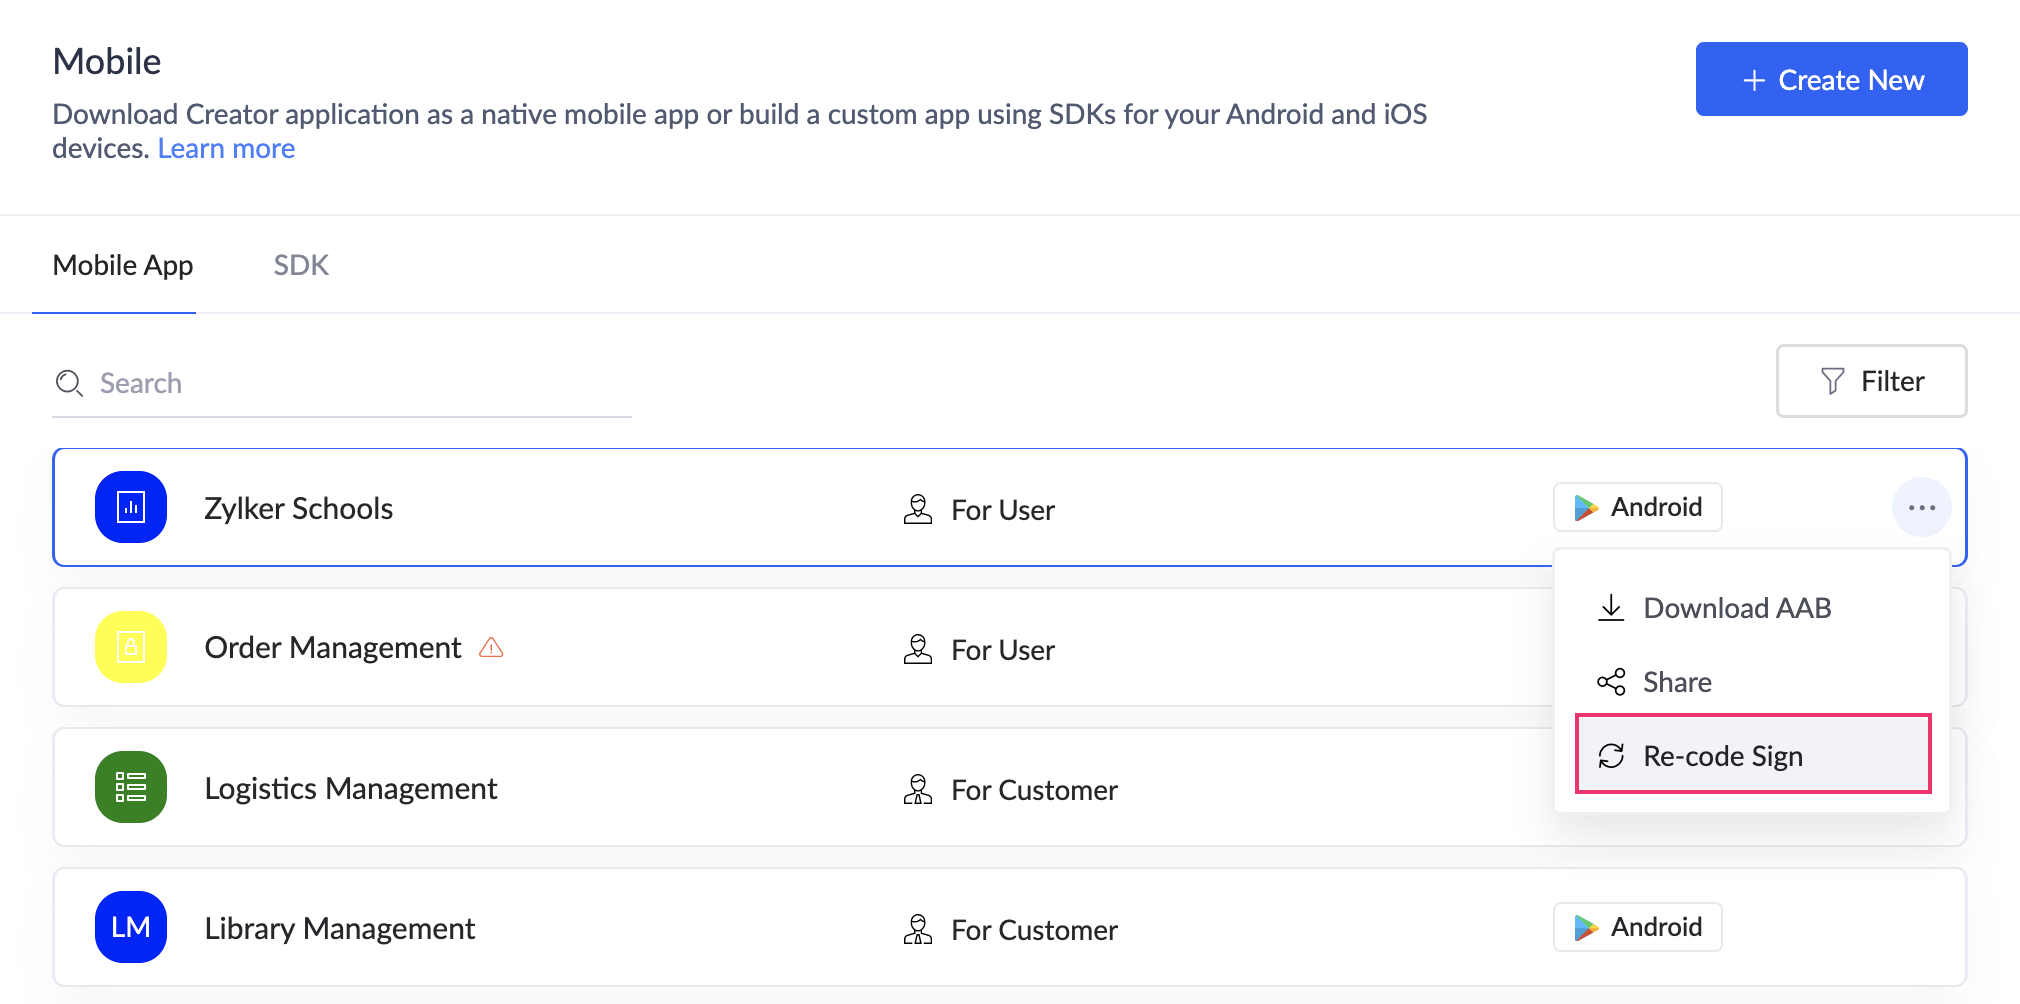
- Click Re-code Sign. A popup will appear.
- Click Re-code Sign to confirm. Your app will be code signed again.
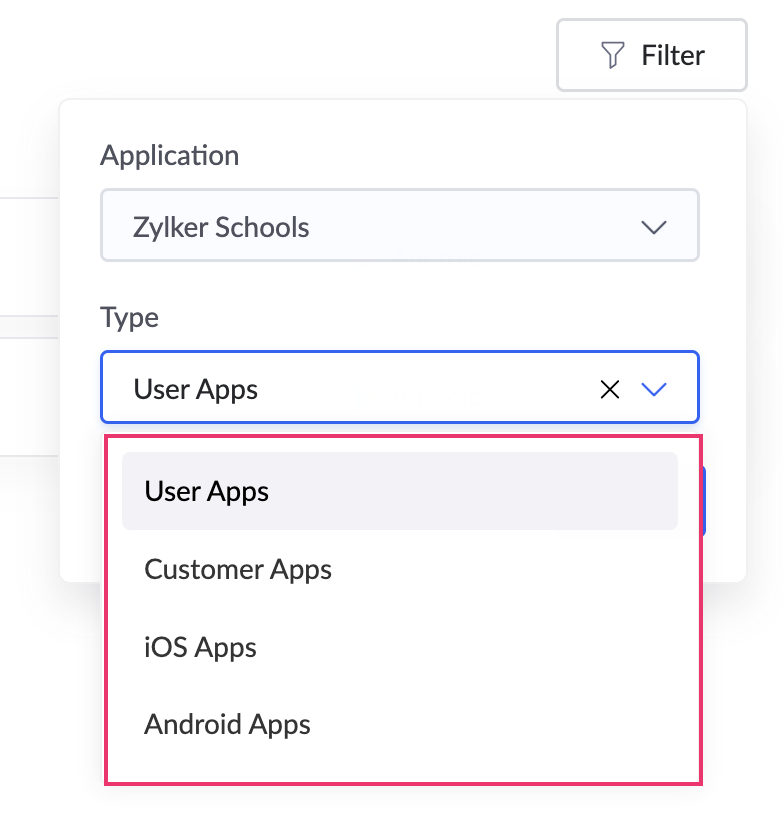
- You can filter your code-signed apps based on the Application and type by clicking on the Filter option at the right side of your screen.
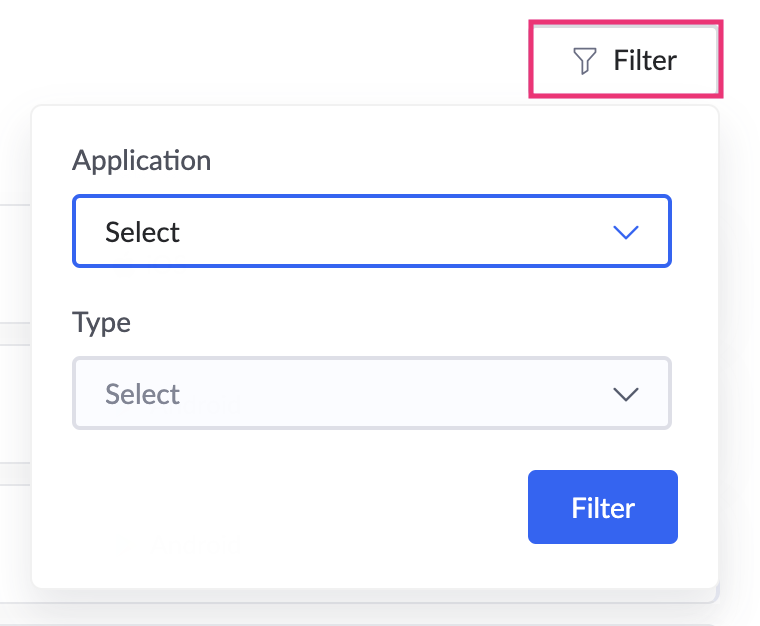
- The Type filter lets you filter apps based on User apps, Customer apps, iOS apps, and Android apps.
Using APK
Code sign Android app for users using APK
- Navigate to the Mobile section on the left pane and click the Mobile App tab.
- Click on the Create New button. It opens the Create New slider.
- Select the Application Name from the dropdown.
- Select the Application type as User and the platform as Android, then click Next.
- In the For User - Code Sign slider, click Generate Client. This will open a Zoho Accounts link in a new tab and create a new client for the Android app to communicate with Zoho Creator.
- Enter Package Name. This will uniquely identify your Android app and is usually in the format:
For example,
- Set Android App Icon as follows. This will be your app's icon in your users' mobile devices.
- The Default Icon option will be selected by default. This icon is set based on your application's name.
- You can opt to upload a Custom Icon, which needs to be a PNG file of 1024x1024 px resolution.
- Tick the check box beside Android Package (APK).
- Under the 'App Sign Keystore' Details, enter the required details.
- Upload Keystore file. Refer to this page to know how to generate an app signing keystore file.
- Enter Keystore password.
- Enter Key password.
- Enter Alias Name.
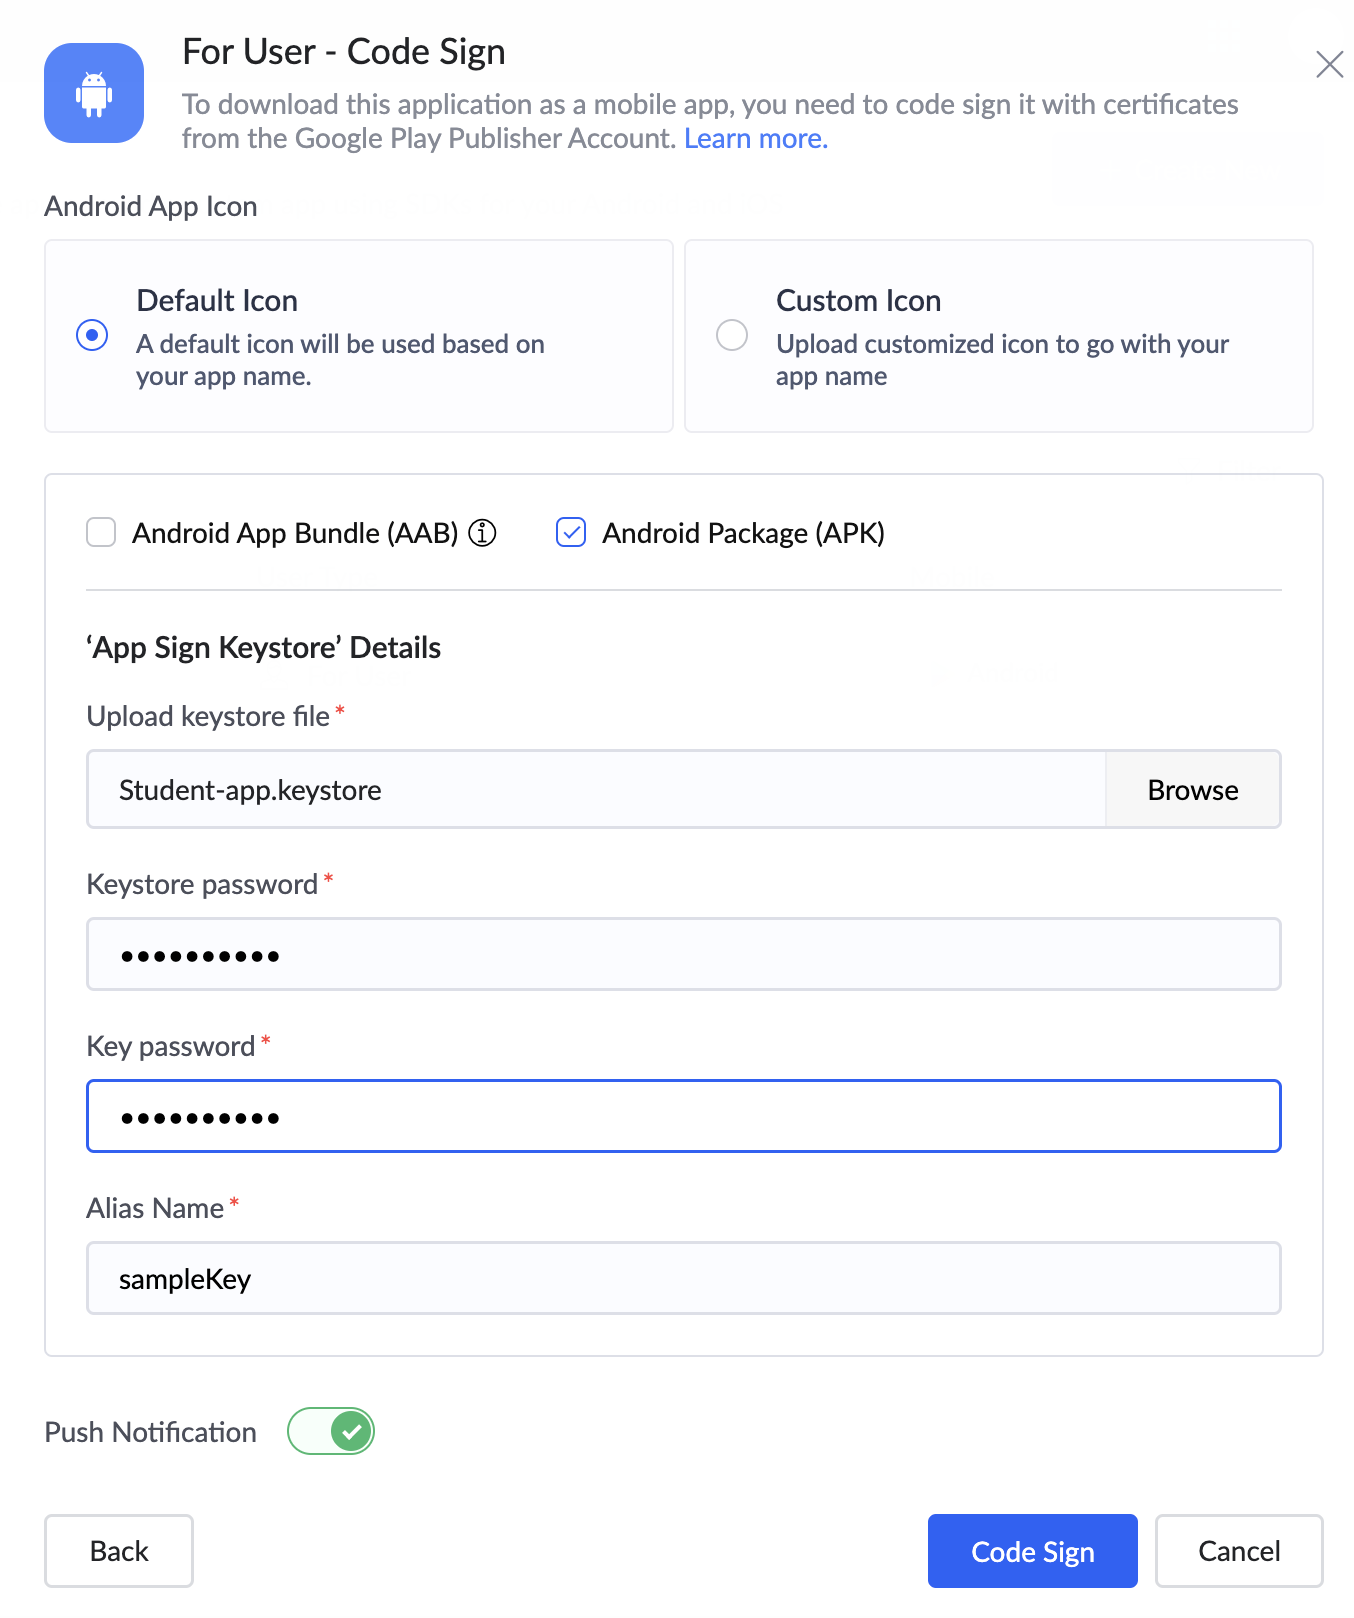
- Toggle the button next to Push Notification to enable push notification support for your Android app.
- In the Push Notification popup, enter the required details. Firebase config file and Firebase Service Account file are required for enabling push notification support. Refer to this page to learn how to source them.
- Upload the Firebase config file.
- Upload the Firebase Service Account file and click Enable.
- Now, click Code Sign. The codesign process can take up to 10 minutes.
- On successful completion, the status will be code signed.
- Distribute the code-signed Android app to your users by any of the following methods as required.
- To disable the push notifications support for your Android app, refer here.
- You can re-codesign your Android app. Learn how
Distribute your app by downloading its .apk file
- Navigate to the Mobile section on the left and select the Mobile App tab.
- Click on the corresponding row of the code signed Android app, it will open the For User - Code Sign pane on the right as below.
- Click the Download APK button beside the Download and send the .apk file section, then share the resulting Android Package (.apk) file with your users.
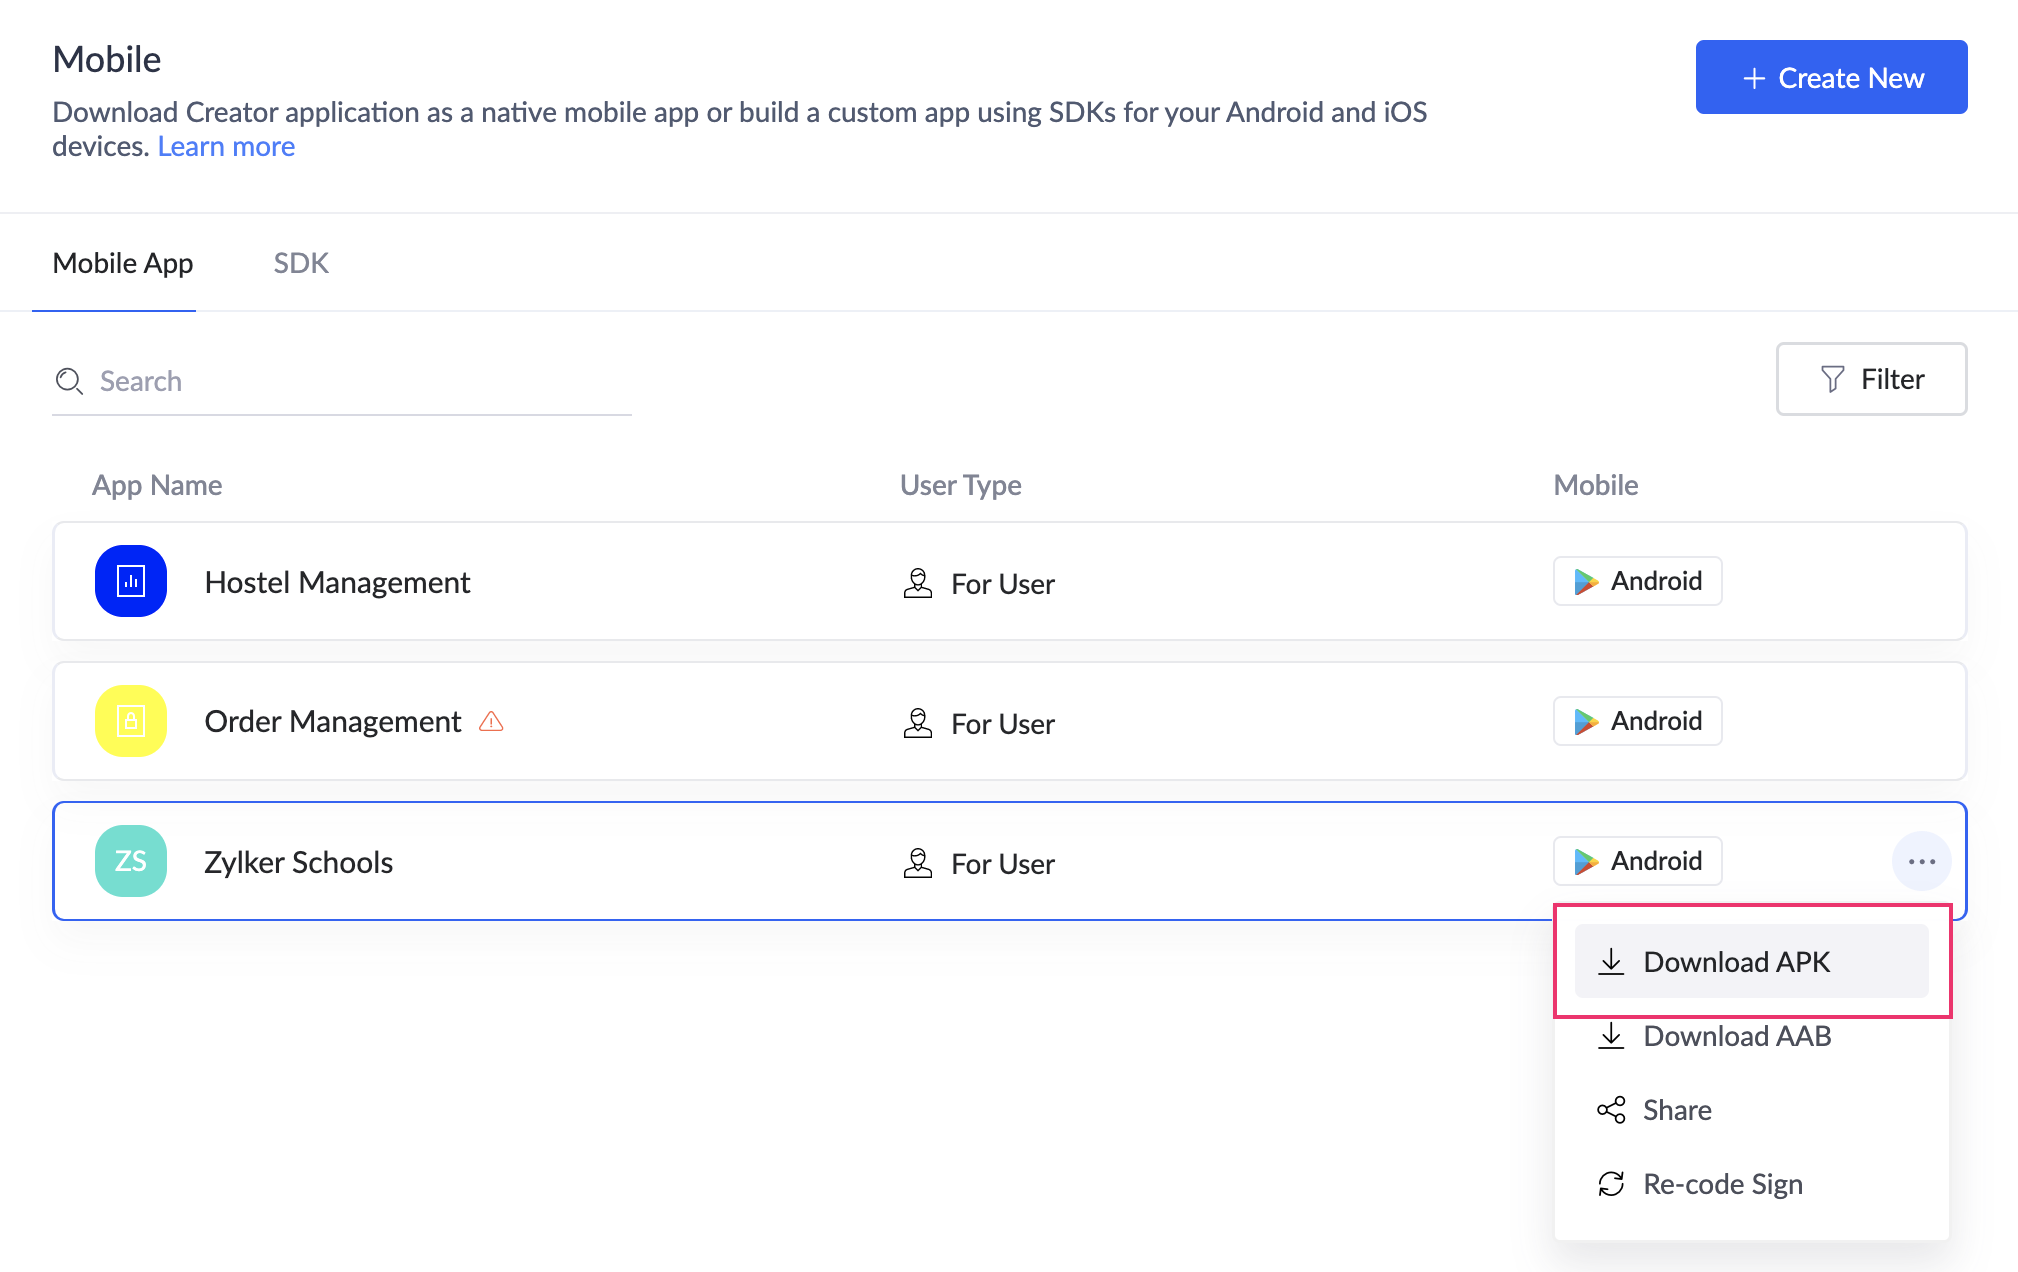
- Alternatively, navigate to the Mobile App tab and hover on the corresponding row of the code signed Android app, it will show a three-dot action popup at the right end of the row.
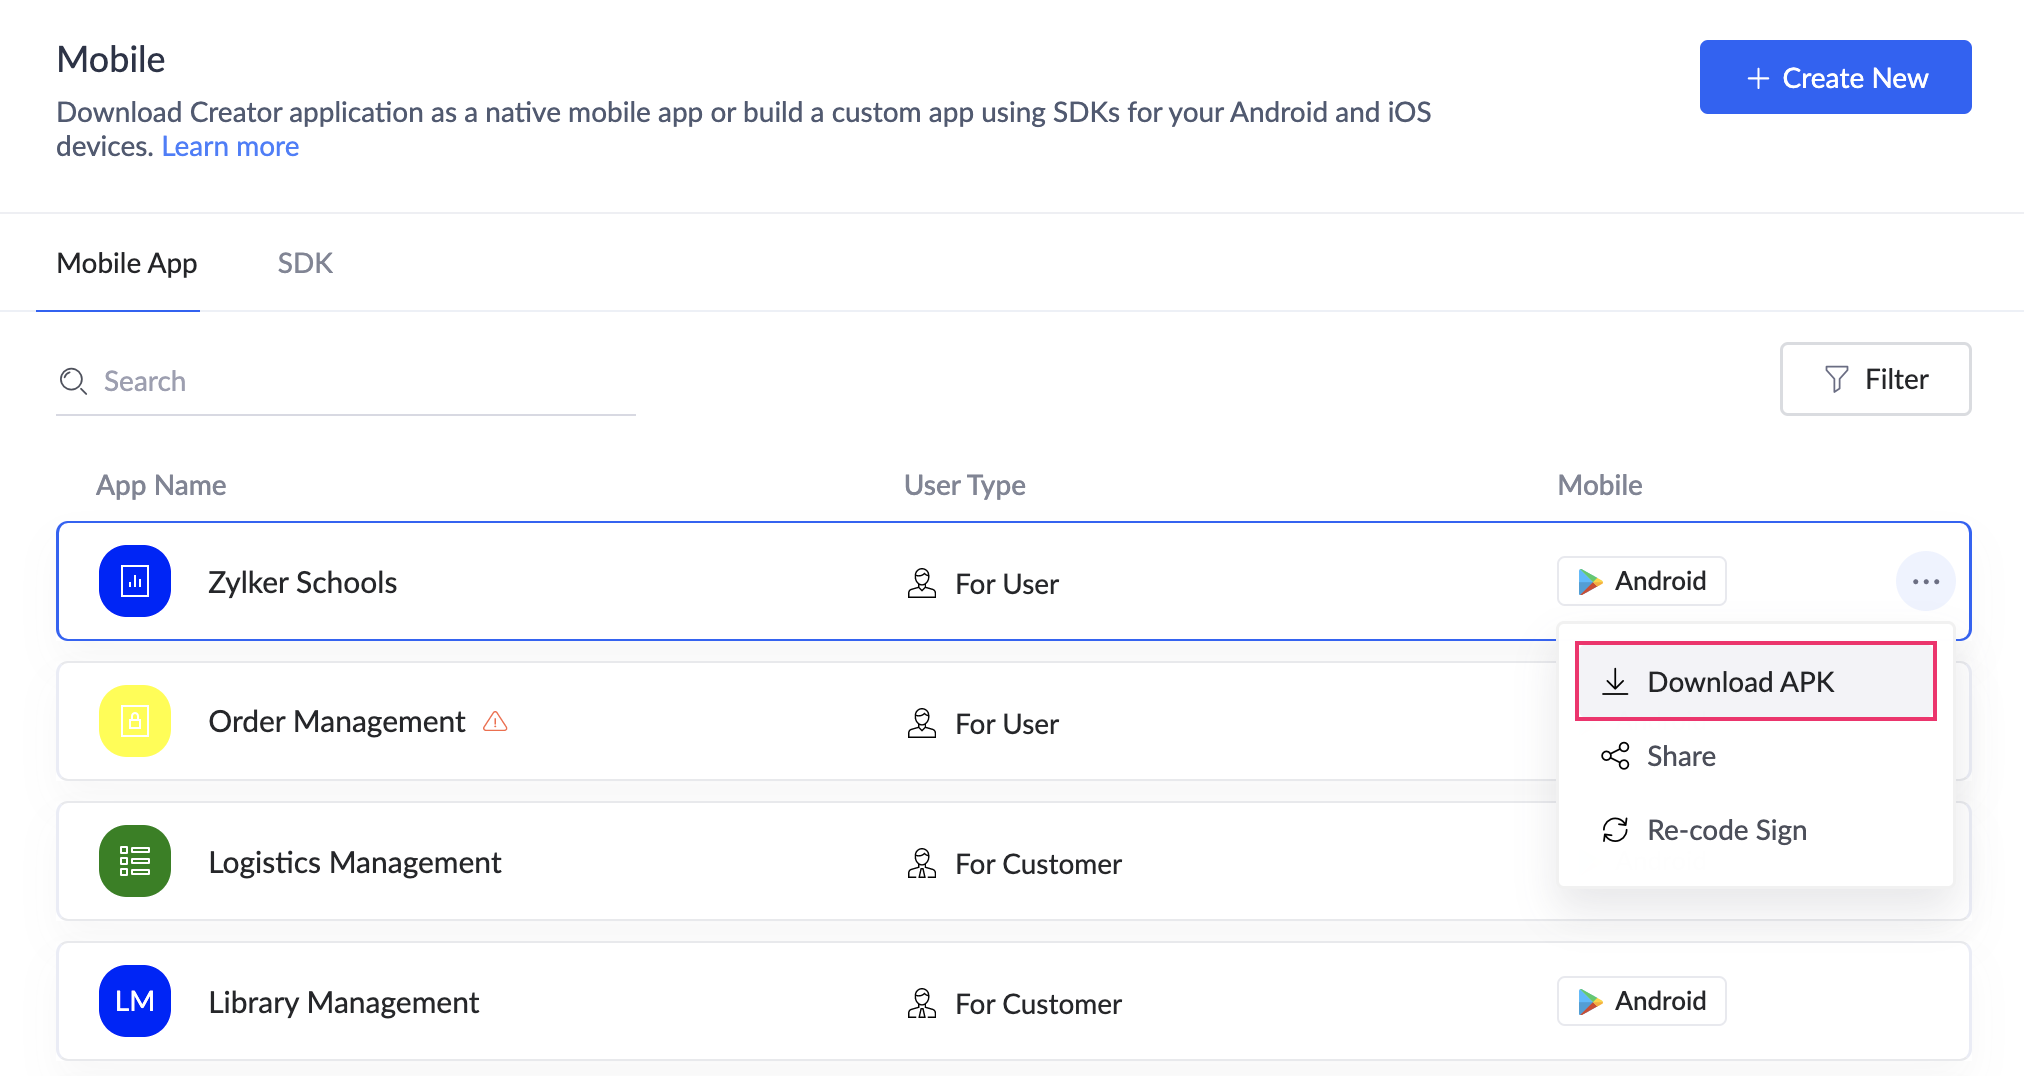
- Click the Download APK button, then share the resulting Android Package (.apk) file with your users.
Distribute your app by sending its invitation link to your users
- Navigate to the Mobile section on the left and select the Mobile App tab.
- Click on the corresponding row of the code signed Android app, it will open the For User - Code Sign pane on the right as below.
- Under the Share the APK installation link with users section, enter the email addresses of your users and click the Share button.
- Your users will receive an email.
- Alternatively, navigate to the Mobile App tab and hover on the corresponding row of the code signed Android app, it will show a three-dot action popup on the right side of the row.
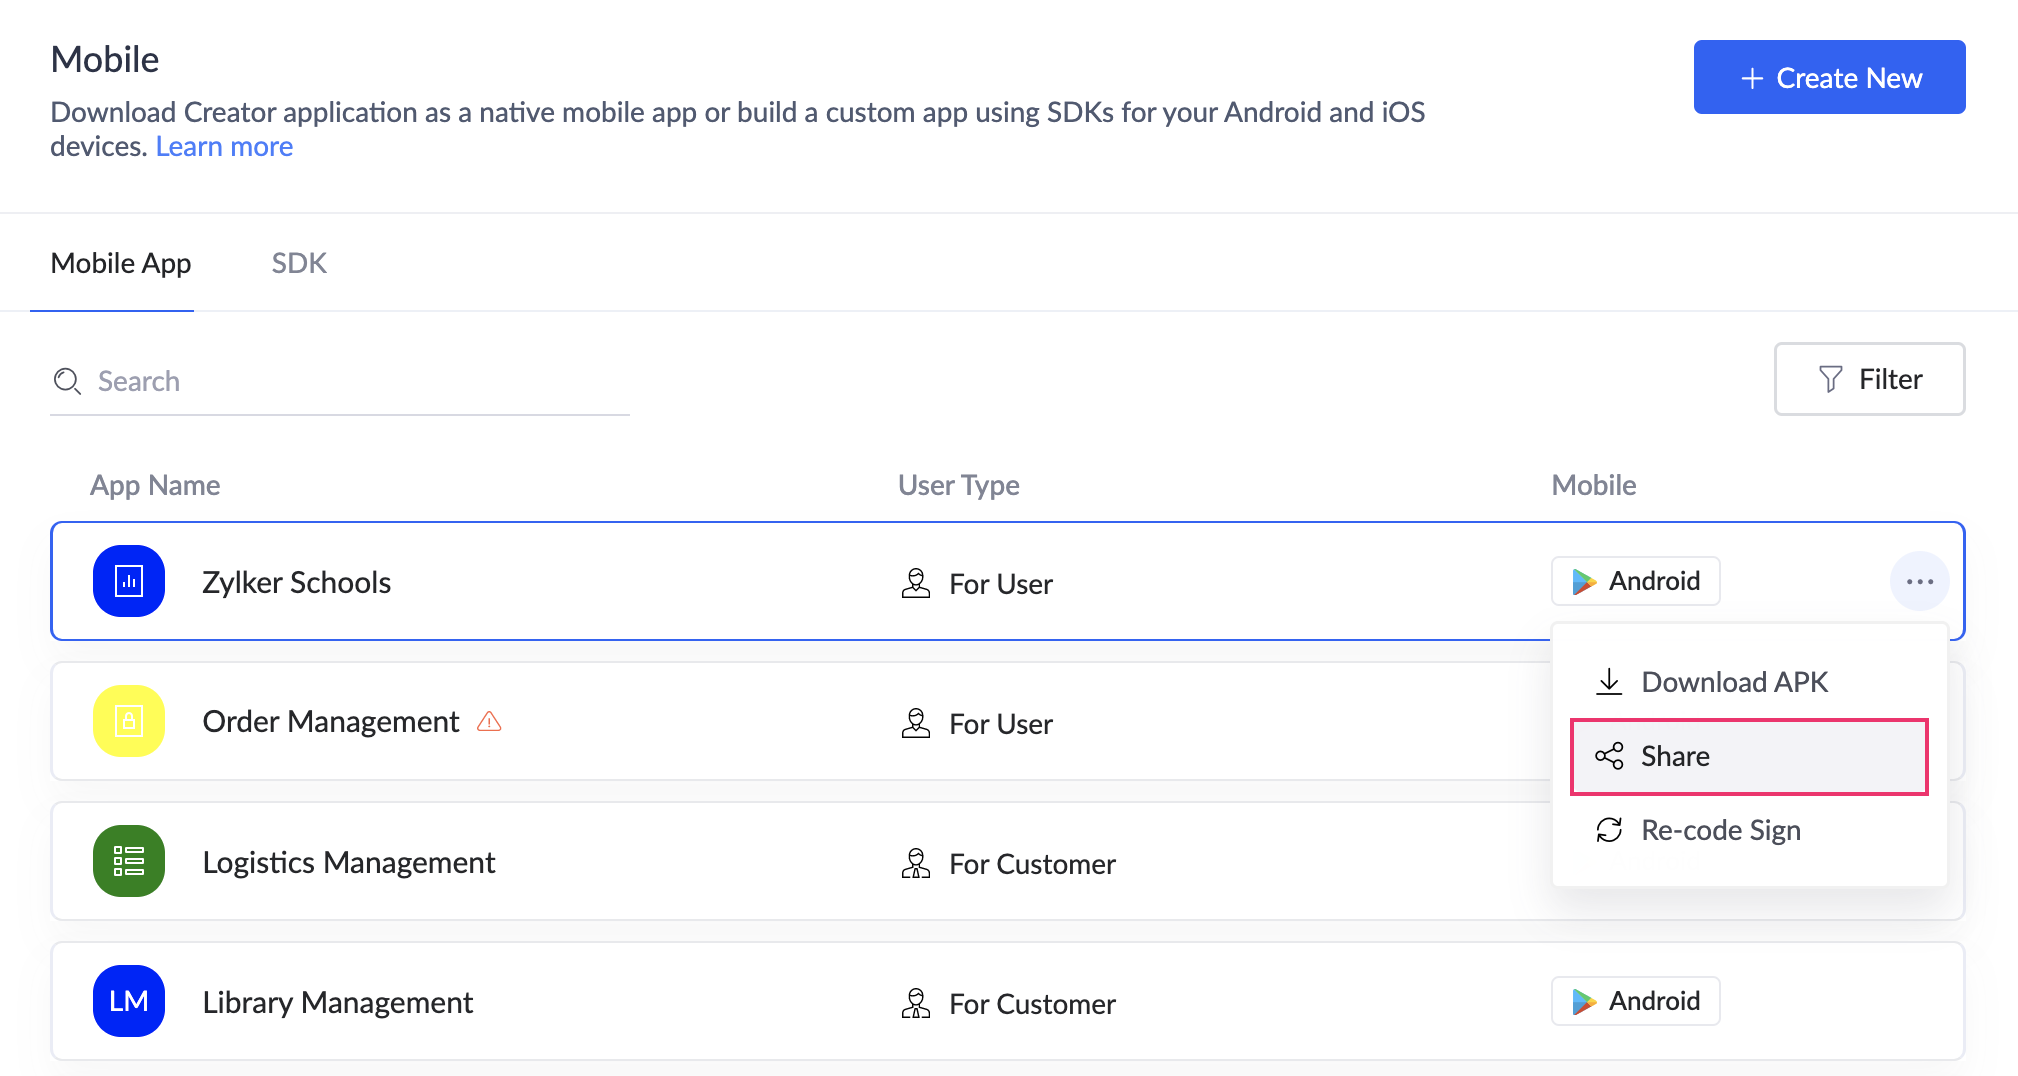
- Click on the Share button, it will open the Share the app installation link with users popup.
- Enter the list of email addresses of the users and click Share.
Distribute your app via MDM (Mobile Device Management)
- Navigate to the Mobile section on the left and select the Mobile App tab.
- Click on the corresponding row of the code signed Android app, it will open the For User - Code Sign pane on the right as below.
- In the Distribute the app with Employees through MDM section, enter the email addresses of your users.
- Click Distribute.
To disable the push notifications support for your Android app
- Navigate to the Mobile App tab.
- Click on the corresponding row of the code signed Android app, it will open the For User - Code Sign pane on the right as below.
- Click the Disable button beside the Push Notification section.
- Click Disable in the Disable Push Notification for Android app popup.
To re-code sign your Android app
- Navigate to the Mobile section on the left and select the Mobile App tab.
- Click on the corresponding row of the code signed Android app, it will open the For User - Code Sign pane on the right as below.
- Click Re-code Sign beside your code-signed app's name. A popup will appear.
- Click Re-code Sign to confirm. Your app will be code signed again
- Alternatively, navigate to the Mobile App tab and hover on the corresponding row of the code-signed Android app, it will show a three-dot action popup at the right end of the row.
- Click Re-code Sign. A popup will appear.
- Click Re-code Sign to confirm. Your app will be code signed again.
- You can filter your code-signed apps based on the Application and type by clicking on the Filter option on the right side of your screen.
- The Type filter lets you filter apps based on User apps, Customer apps, iOS apps, and Android apps.
Using AAB and APK
You can also code-sign your mobile apps using both the AAB and APK file types.
- Code sign using AAB and APK
- Distribute the code-signed app
- Disable push notifications
- Re-code sign your Android app
Code sign Android app for users using AAB and APK
- Navigate to the Mobile section on the left pane and click the Mobile App tab.
- Click on the Create New button. It opens the Create New slider.
- Select the Application Name from the dropdown.
- Select the Application type as User and the platform as Android, then click Next.
- In the For User - Code Sign slider, click Generate Client. This will open a Zoho Accounts link in a new tab and create a new client for the Android app to communicate with Zoho Creator.
- Enter Package Name. This will uniquely identify your Android app and is usually in the format:
For example,
- Set Android App Icon as follows. This will be your app's icon on your users' mobile devices.
- The Default Icon option will be selected by default. This icon is set based on your application's name.
- You can opt to upload Custom Icon, which needs to be a PNG file of 1024x1024 px resolution.
- Tick the check box beside Android App Bundle (AAB) and Android Package (APK).
- Under the 'Upload Keystore' Details, enter the required details.
- Upload Keystore File. Refer to this page to know how to generate an upload keystore file.
- Enter Keystore Password.
- Enter Key Password.
- Enter Alias Name.
- Under the App Sign Keystore Details, enter the required details.
- Upload Keystore file. Refer to this page to know how to generate an app-signing keystore file.
- Enter Keystore password.
- Enter Key password.
- Enter Alias Name.
- Toggle the button next to Push Notification to enable push notification support.
- In the Push Notification popup, enter the required details. Firebase config file and Firebase Service Account file are required for enabling push notification support. Refer to this page to learn how to source them.
- Upload the firebase config file.
- Upload the Firebase Service Account file and click Enable.
- Now, click Code Sign. The code sign process can take up to 10 minutes.
- On successful completion, the status will be code signed.
- Distribute the code-signed Android app to your users by any of the following methods as required.
- To disable the push notifications support for your Android app, refer here.
- You can re-codesign your Android app. Learn how
Distribute your app by downloading its respective (.aab/.apk) files
- Navigate to the Mobile section on the left and select the Mobile App tab.
- Click on the corresponding row of the code signed Android app, it will open the For User - Code Sign pane on the right.
- Click the respective download button.
- Click Download AAB button beside the Download and send the .aab file section if you want to download and share the .aab file with your users.
- Click the Download APK button beside the Download and send the .apk file section if you want to download and share the .apk file with your users.
- Alternatively, navigate to the Mobile App tab and hover on the corresponding row of the code signed Android app, it will show a three-dot action popup on the right side of the row.
- Click Download AAB button, then share the resulting Android App Bundle (.aab) file with your users.
- Click Download APK button, then share the resulting Android Package (.apk) file with your users.
Distribute your app by sending its invitation link to your users
- Navigate to the Mobile section on the left and select the Mobile App tab.
- Click on the corresponding row of the code signed Android app, it will open the For User - Code Sign pane on the right as below.
- Under the Share the AAB/APK installation link with users section, tick the checkbox beside the required option (AAB and/APK).
- Enter the email addresses of your users and click the Share button.
- Your users will receive an email.
- Alternatively, navigate to the Mobile App tab and hover on the corresponding row of the code signed Android app, it will show a three-dot action popup at the right end of the row.
- Click on the Share button, it will open the Share the app installation link with users popup.
- Enter the list of email addresses of the users and click Share.
Distribute your app via MDM (Mobile Device Management)
- Navigate to the Mobile section on the left and select the Mobile App tab.
- Click on the corresponding row of the code signed Android app, it will open the For User - Code Sign pane on the right as below.
- Under the Distribute the app with Employees through MDM section, enter the email addresses of your users.
- Click Distribute.
To disable the push notifications support for your Android app
- Navigate to the Mobile App tab.
- Click on the corresponding row of the code signed Android app, it will open the For User - Code Sign pane on the right as below.
- Click the Disable button beside the Push Notification section.
- Click Disable in the Disable Push Notification for Android app popup.
To re-code sign your Android app
- Navigate to the Mobile section on the left and select the Mobile App tab.
- Click on the corresponding row of the code signed Android app, it will open the For User - Code Sign pane on the right as below.
- Click Re-code Sign beside your code-signed app's name. A popup will appear.
- Click Re-code Sign to confirm. Your app will be code signed again
- Alternatively, navigate to the Mobile App tab and hover on the corresponding row of the code-signed Android app, it will show a three-dot action popupat the right end of the row.
- Click Re-code Sign. A popup will appear.
- Click Re-code Sign to confirm. Your app will be code signed again.
- You can filter your code-signed apps based on the Application and type by clicking on the Filter option on the right side of your screen.
- The Type filter lets you filter apps based on User apps, Customer apps, iOS apps, and Android apps.
Points to Note
- Declare foreground service information on Google Play Console:
It is mandatory to declare foreground service information in the Play Console when uploading the AAB or APK application to the Google Play Console. To do so: - Create a screen recording that demonstrates the following steps in your codesigned app:
- Navigate to Settings > Offline Components > Add Components and download the preferred component.
- Return to the Offline Components section, where all downloaded components will be listed.
- Click the Sync icon (
) next to the offline components.
Refer below for a sample screen recording: - Upload the recorded video to Zoho Workdrive or Google Drive and generate an external share link. Learn how to generate an external share link for uploaded files in Zoho Workdrive
- Follow these steps in the Google Play Console to declare foreground service information:
- Go to Google Play Console and navigate to App Content > Foreground service permissions.
- Under Data sync, select Other in Network processing. Enter the external share link and click Save