Android UI library
 This help page is for users in Creator 6. If you are in the older version (Creator 5), click here. Know your Creator version.
The Android UI library helps you use the UI components of the modules and also to design your own custom UIs.
Prerequisites
- The latest version of Android Studio
Register your Android app with Zoho
- Click Mobile from the left pane.
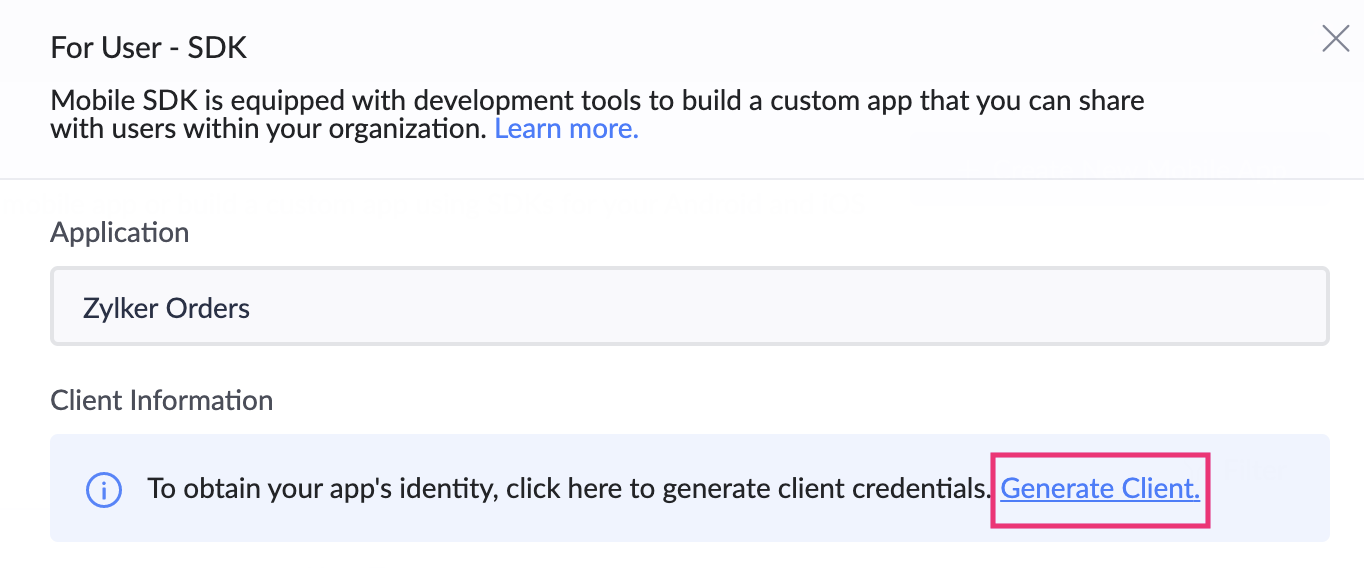
- Click on the required row of the iOS app for which you want to configure the core framework. The For User - SDK pane will open on the right.
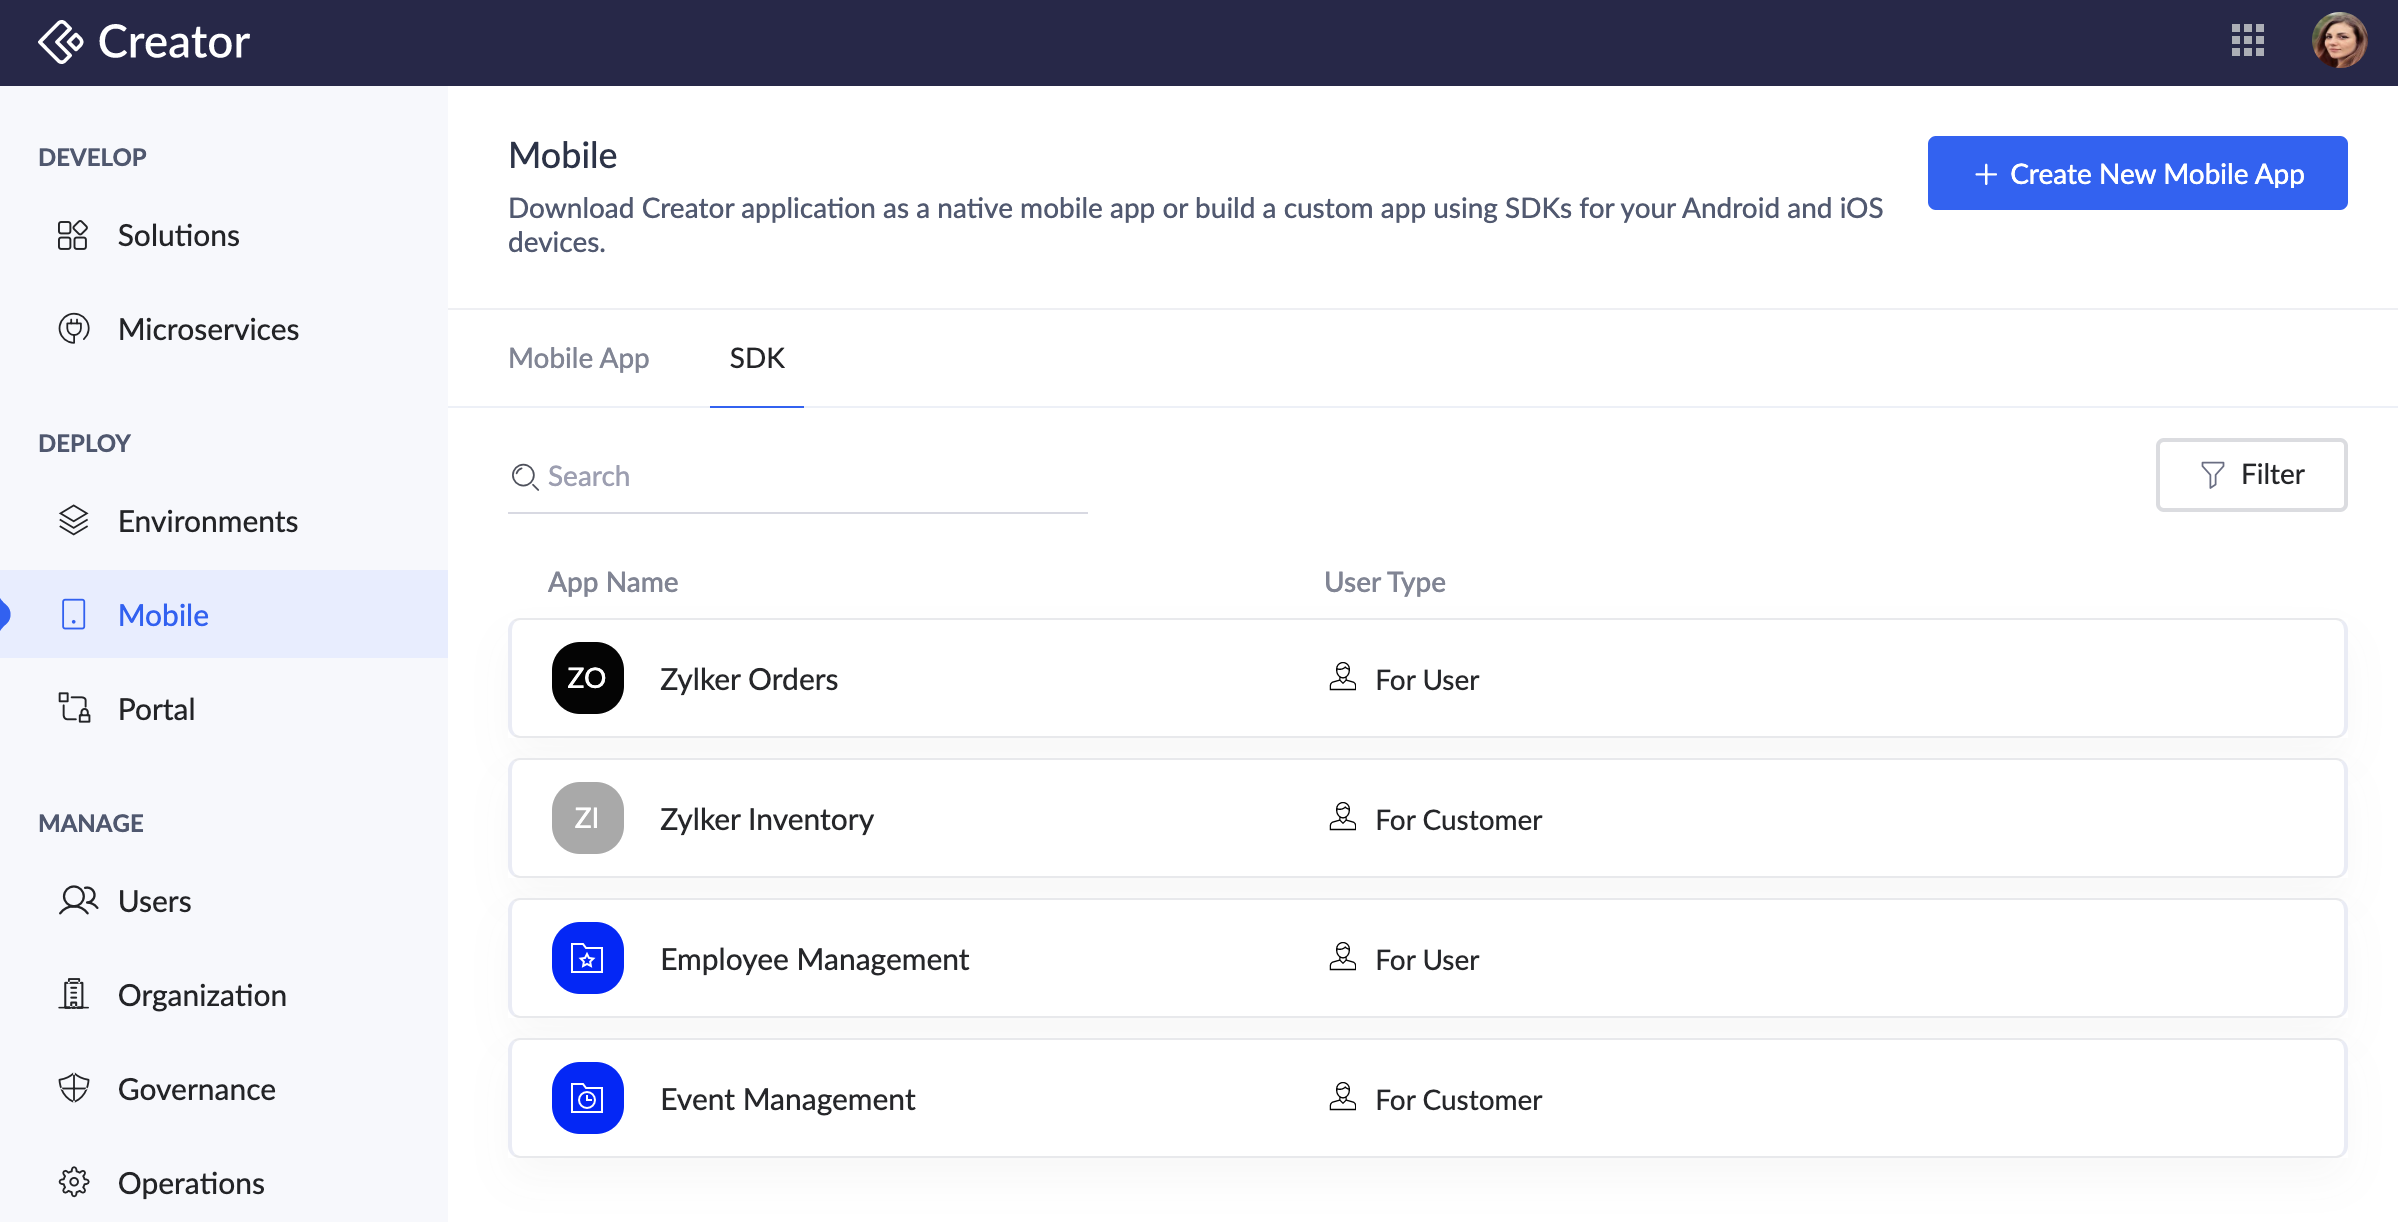
- Click Generate Client .
- This will generate the client ID , client secret , and redirectURI for the Android app that you want to integrate with your Creator application.
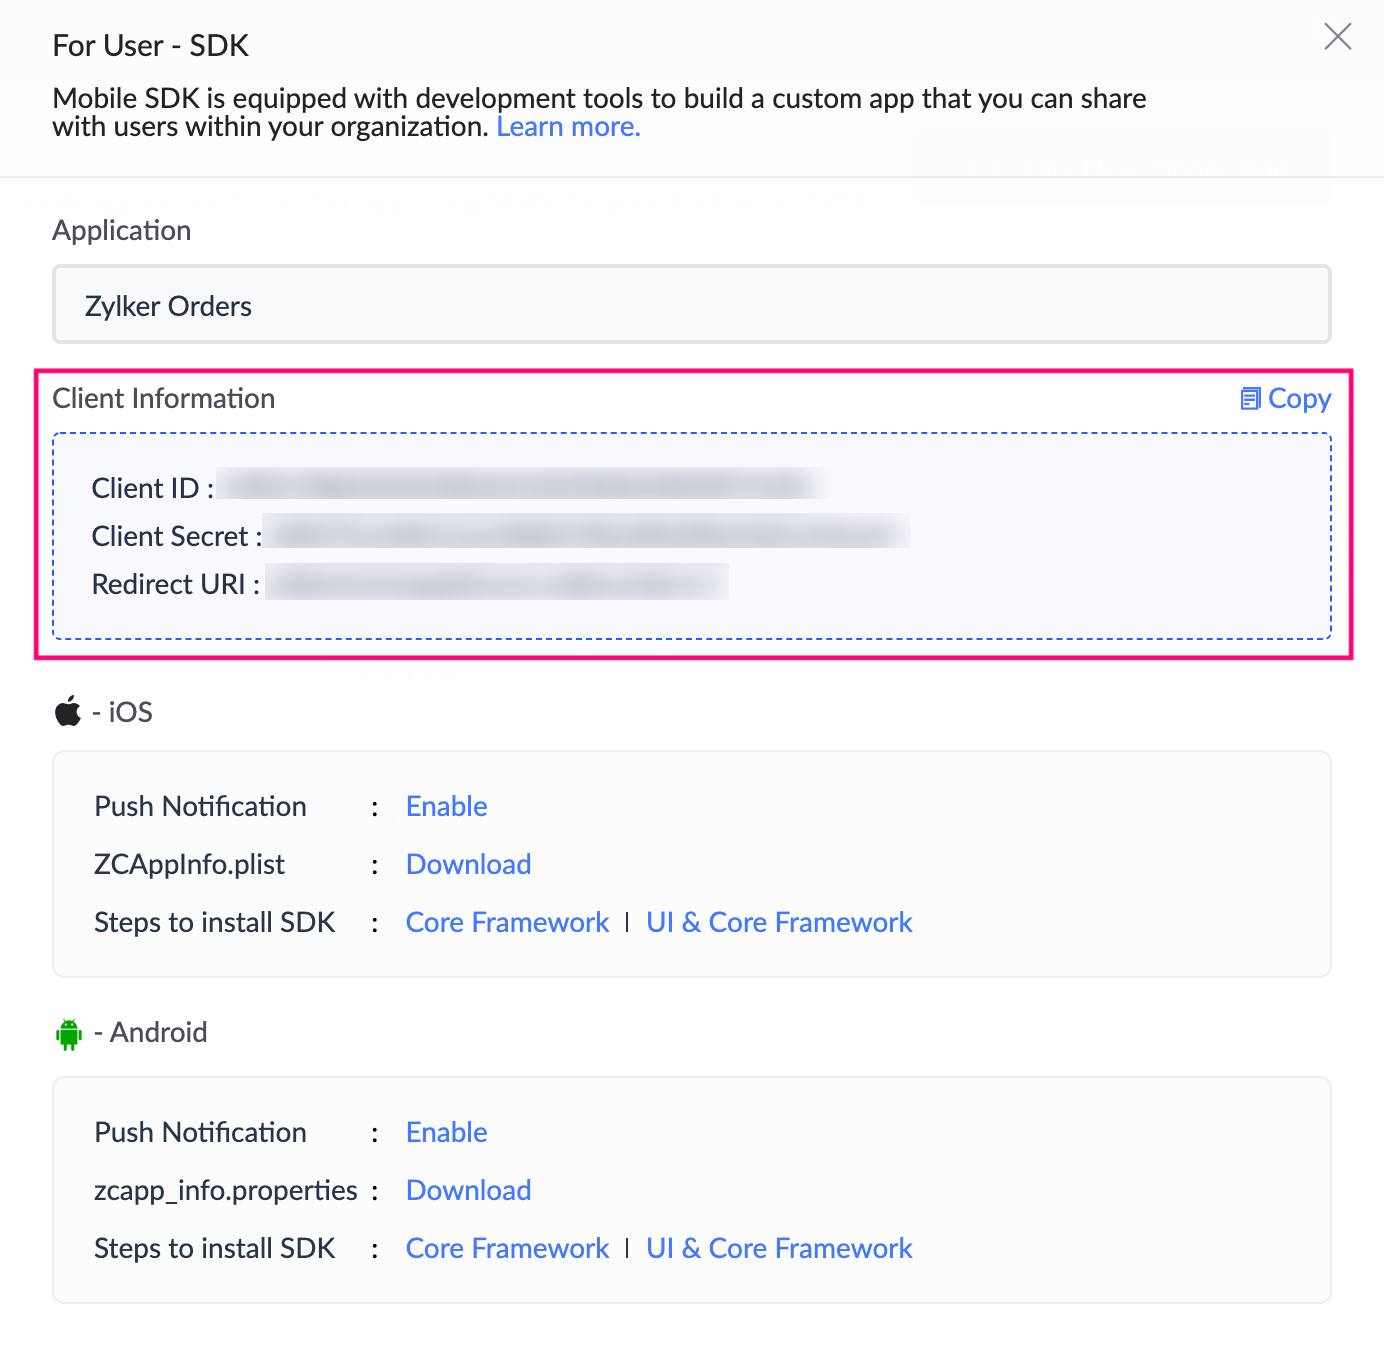
- Downloaded the zcapp_info.properties file, then add it to your project's raw folder: "<your_project_folder>/app/src/main/res/raw" . (Create a folder named raw in this location if it doesn't exist)
Install the Android UI library for the user app using Kotlin
Note: The Android app must have a minimum SDK version 22 or higher.- Integrate SDK in your Android app:
- Add the Zoho maven repository URL in app/build.gradle.
- Integrate Zoho Creator UI Library & Authentication Library in app/build.gradle
- Click Sync Now in the bar that appears in the IDE.
- Configure your project with the following code:
- Add the below string in the strings.xml of your app:
- In the oncreate method in your application / activity class, Initialize the Accounts SDK as follows:
ZohoSDK.getInstance(this).init(scopes, showlogs)where,- scopes - "aaaserver.profile.READ,zohocontacts.userphoto.READ,ZohoContacts.contactapi.READ,ZohoCreator.meta.CREATE,ZohoCreator.meta.READ,ZohoCreator.meta.UPDATE,ZohoCreator.meta.DELETE,ZohoCreator.data.CREATE,ZohoCreator.data.READ,ZohoCreator.data.UPDATE,ZohoCreator.data.DELETE,Stratus.stratusop.READ,ZohoCRM.modules.READ,ZohoCRM.users.READ"
- showLogs - To show debug logs or not
- Create an Activity called HandleRedirectActivity and add the following code in its oncreate method:
ZohoSDK.getInstance(this).handleRedirection(this); - Add the following code to the AndroidManifest.xml file:
- To open the login screen, add the below code snippet:
val sdk = ZohoSDK.getInstance(applicationContext) if (!sdk.isUserSignedIn) { sdk.presentLoginScreen(this, object : ZohoTokenCallback { override fun onTokenFetchInitiated() { } override fun onTokenFetchComplete(zohoToken: ZohoToken?) { // This method will be called after user logged-in successfully } override fun onTokenFetchFailed(zohoErrorCodes: ZohoErrorCodes?) { // This method will be called if any error occurred in the login. You will receive the error code in this callback. } }, null) } else { // Start intent to your first activity } - Implement the Creator Authentication interface ZCOauthHelper as follows:
class ZCAuthImpl(private val context: Context) : ZCOauthHelper { @Throws(ZCException::class) override suspend fun getAccessToken(): String? { return ZohoSDK.getInstance(context).token.token } override fun getInitialScopes(context: Context): String { return "" } override fun isUserSignedIn(): Boolean { return ZohoSDK.getInstance(context).isUserSignedIn
} override fun getUserData(): Any? { return null } override fun getTransformedUrl(url: String): String { return url } override fun checkAndLogout(): Boolean { return false } override fun isEnhanceTokenNeeded(newScopes: String): Boolean { return false } override fun enhanceToken(tokenHelper: ZCOauthHelper.ZCOAuthTokenHelper, newScopes: String) { } override fun enhanceTokenWithOnDemandScope(tokenHelper: ZCOauthHelper.ZCOAuthTokenHelper) { } } - Add the following code to your application's / activity's oncreate method to set the instance of Authentication interface to the Creator SDK:
ZCAPIUtil.setOAuthHelper(ZCAuthImpl(applicationContext)) - Add the following to your AndroidManifest.xml file, under the application tag:
FAQ
- I'm getting merge conflicts while generating a build. How to resolve them?
Please add tools:replace="android:allowBackup,android:label,android:theme" under the application tag in the AndroidManifest.xml file and try again. - I get the "Duplicate class android.support.v4.app" error. What should I do?
To resolve this error, you'll need to add android.enableJetifier=true in gradle.properties file. - I get the "Duplicate class androidx.lifecycle.ViewModelLazy found in modules jetified" error. What should I do?
To resolve this error, please add implementation 'androidx.lifecycle:lifecycle-viewmodel-ktx:2.4.0' to your dependency list
References
- Sample code snippets
- Familiarize yourself with Mobile SDK for Android by trying out our sample application here.
- Android SDK documentation for detailed information about the various SDK methods.