Creating applications with Zia App Builder (supported by Zoho GenAI)
1. What does this page cover
Learn how you can build a fully functional Creator application by configuring Zia with Zoho GenAI and simply describing your app's requirements using conversational prompts. The AI will then design it for you, accelerating application development.
- You also get in-app guidance using Zia (trained in Natural Language Processing [NLP]) to help you build your application's components.
- Before you proceed to learn how to create apps using Zia assistance, click here to know more about Zia's integration with Zoho GenAI.
2. Availability
Zia-assisted applications:
- is available only for paid plans of Creator.
- can only be enabled, created, and managed by the super admin. Admins and developers can create and manage AI-assisted apps, while other users can access those apps.
- Google, Anthropic and OpenAI are supported in all data centers except in CN.
- Zoho GenAI is supported in all data centers except in CN, JP, and SA.
- AI app creation with enhanced features (multimodal, blueprints, user permissions) is supported in US, IN, EU, AU. Usage of AI prompt to create apps with sample data is supported in CA and UAE.
3. Steps to create an application using Zia App Builder
Setting up Zia is a one-time process that grants access to all Zia features, including creating applications and forms, enabling next field suggestions, and generating scripts. Navigate to Operations > Zia, Zoho GenAI will be auto selected from the dropdown. Enable the access to Create Application under Enable features section to start creating apps.

- To know more about the prerequisites of other vendors, click here.
- Learn know how to configure the other vendors.
- Only the super admin and admins can configure Zia in Creator.
1. Navigate to the dashboard of your Creator account. You will land in the Solutions module by default.
2. Click + Create Solution in the top-right corner of the dashboard and select the Applications card to start building an application.
3. Choose the Create using Zia card to open Zia App Builder.
 Note: If you haven't configured Zia integration, click Configure in the Create using Zia card. Click Open Zia Settings in the popup that appears.
4. Specify the application requirements through either or both of the below methods, and click Start Building to receive AI-generated use cases that would address your business problem.
- Text - Describe the application you want to create in detail for optimal results.
- File - Click Upload and attach files that outline the application objectives or pictorially represent the application flow, such as a PRD, BRD, RFP, or any relevant process diagrams.

Note:
- The text input can contain a maximum of 1000 characters.
- The file input can include either 1 document or up to 3 images.
- The supported file formats are:
- Image - PNG, JPG, JPEG, WEBP
- Document - PDF, and TXT
- It is recommended for your prompt to have both a file and text input that covers more specifications to help Zia generate more tailored use cases for you.
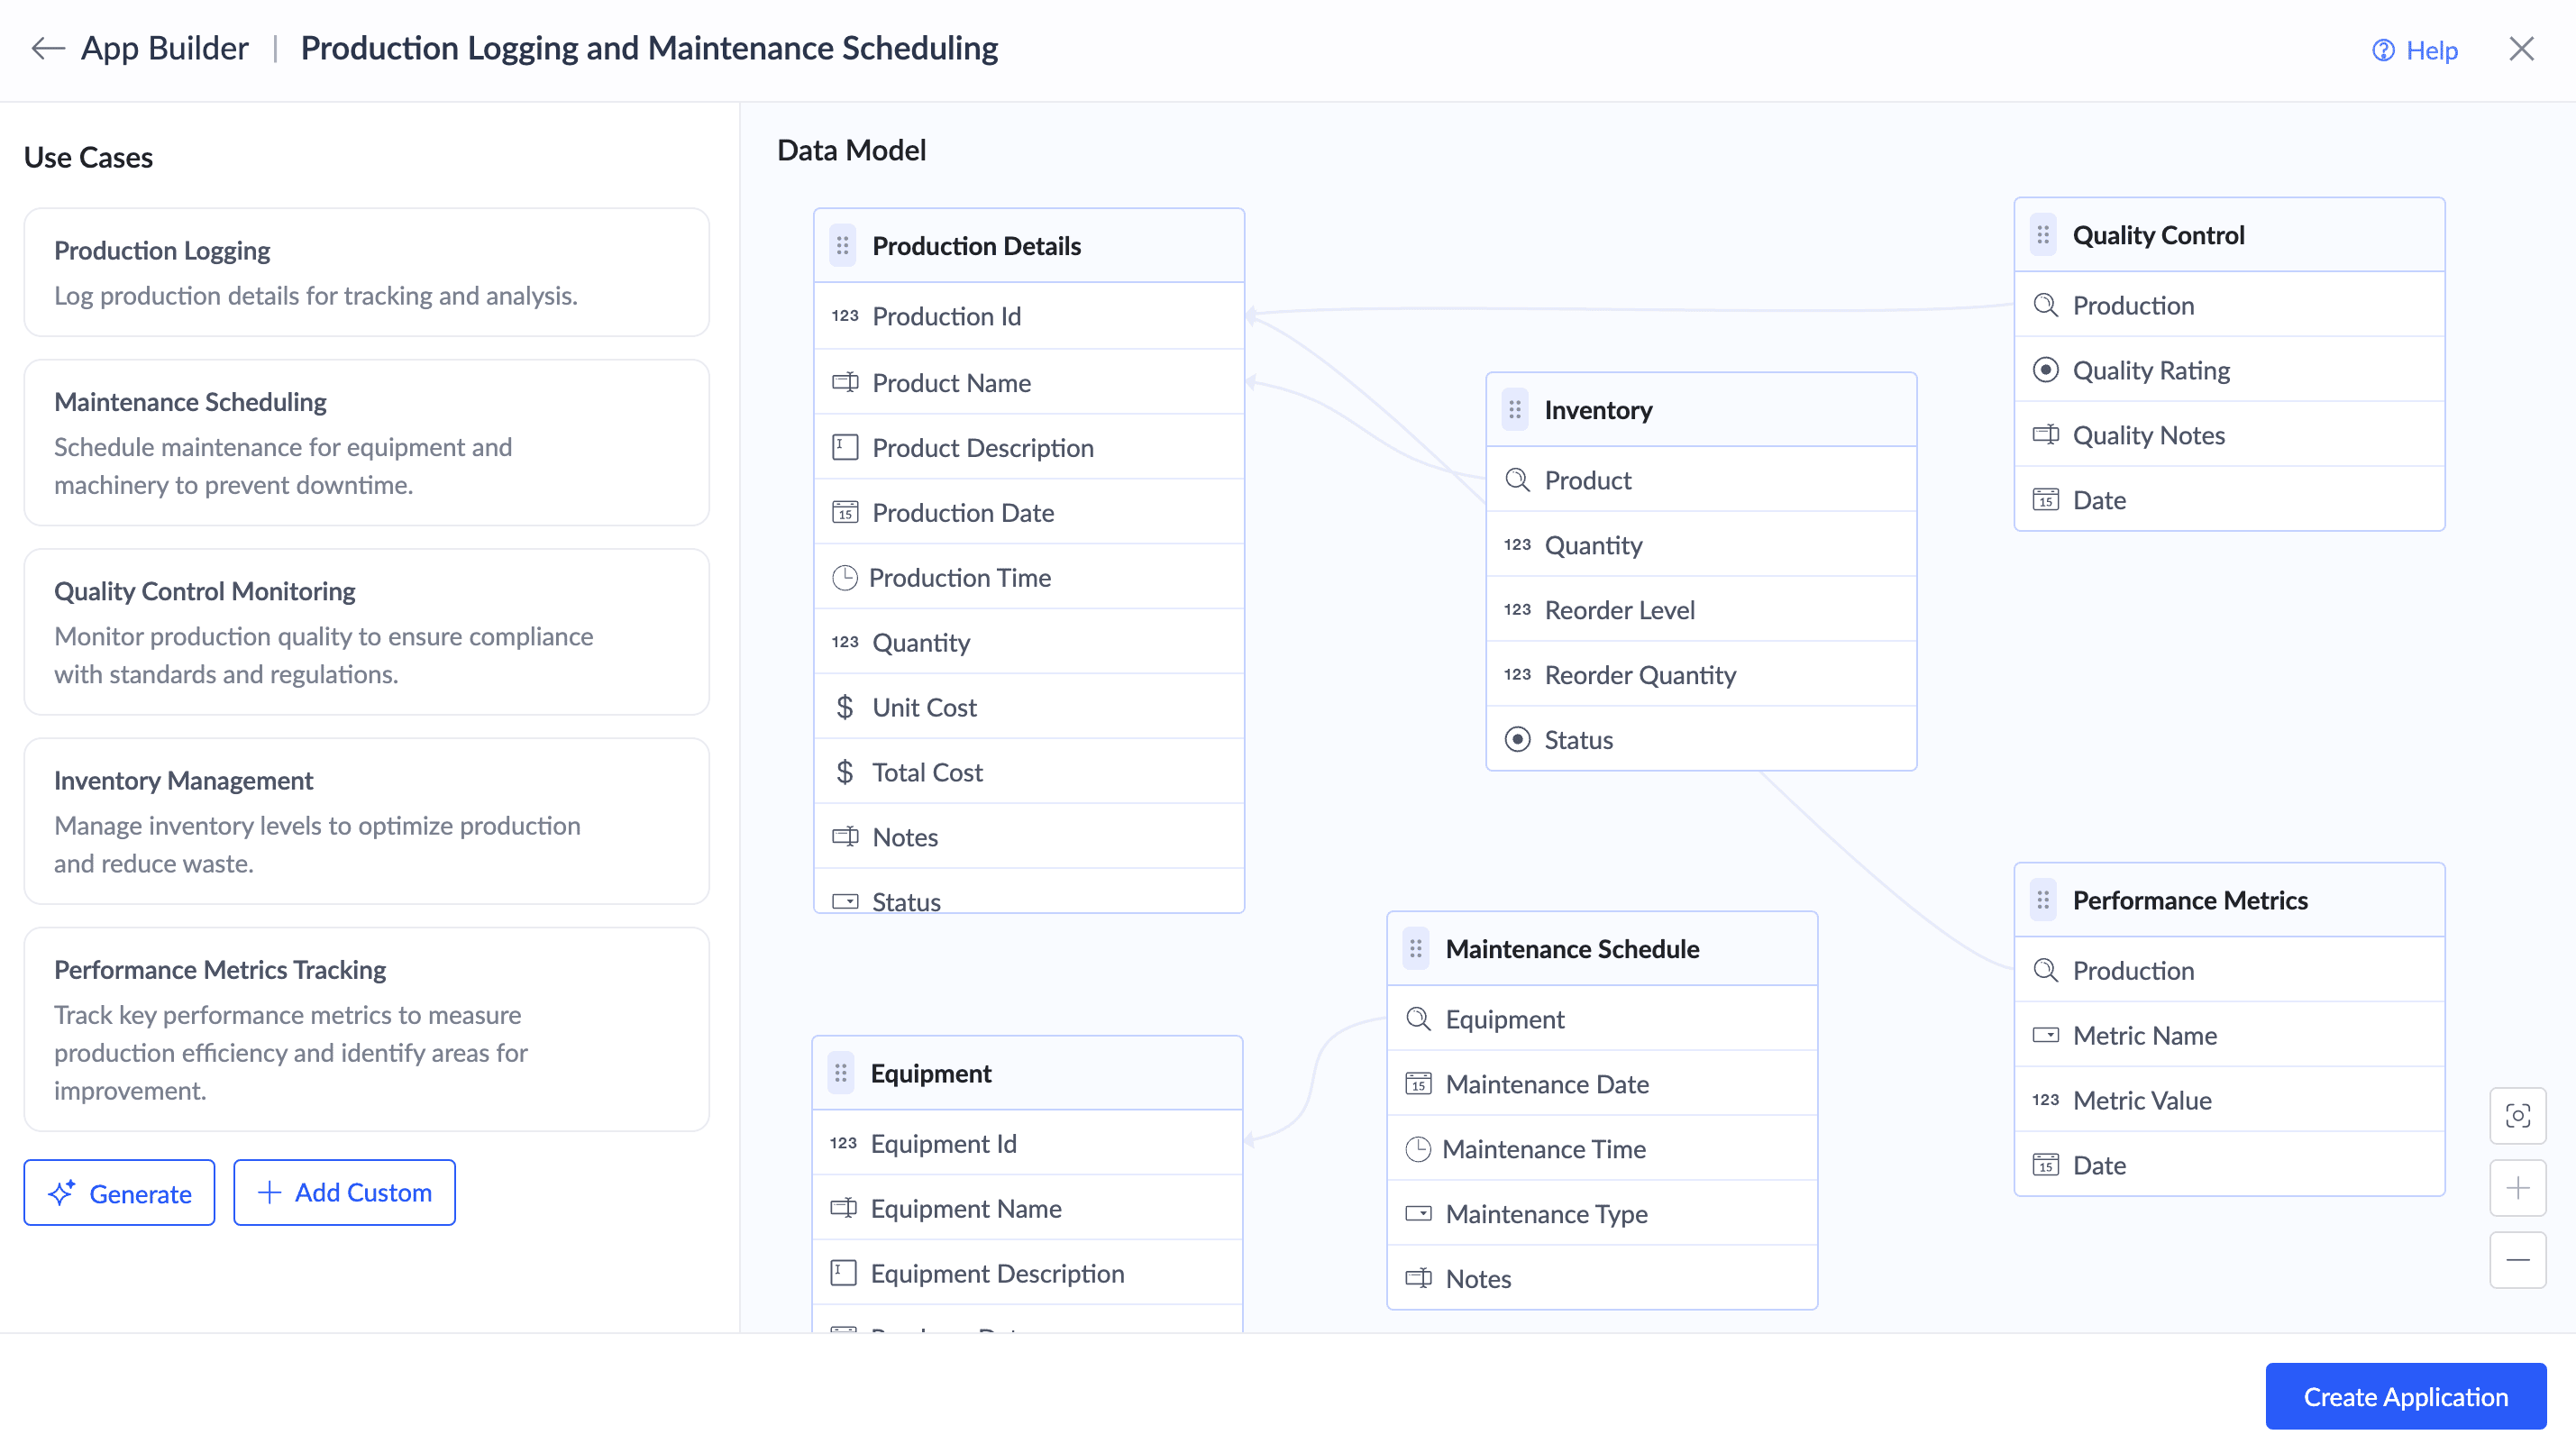
5. Review the AI-generated use cases and the visualized data model, including the necessary tables based on those use cases.

You can:
- Click Generate to add a new AI-generated use case relevant to your application.
- Click Add Custom to type a use case that you have in mind.
- Hover over a use case and click the bin icon (
) to remove a use case that does not align with the application's needs.

Note: By default, five use cases will be generated. You can generate or add more use cases till a maximum count of 10 in total.
6. Click Create Application to initiate the creation process based on the displayed data model. It builds forms that receive and store input data, reports that display this data, dashboards that present key metrics and performance indicators, and designs the application style for a visual appeal.


Note: The number of forms, reports, and dashboards that are created varies according to the use cases.
7. Click Access Application once the creation process is complete to head over to the live mode of the application. You will land on the dashboard of your application.

4. Related topics
- Understand Zia features in Creator
- Create forms using Zia assistance
- Generate field suggestions for AI assisted forms
Zoho CRM Training Programs
Learn how to use the best tools for sales force automation and better customer engagement from Zoho's implementation specialists.
Zoho DataPrep Personalized Demo
If you'd like a personalized walk-through of our data preparation tool, please request a demo and we'll be happy to show you how to get the best out of Zoho DataPrep.
Centralize Knowledge. Transform Learning.
All-in-one knowledge management and training platform for your employees and customers.
New to Zoho Writer?
You are currently viewing the help pages of Qntrl’s earlier version. Click here to view our latest version—Qntrl 3.0's help articles.
Zoho Sheet Resources
Zoho Forms Resources
New to Zoho Sign?
Zoho Sign Resources
New to Zoho TeamInbox?
Zoho TeamInbox Resources
New to Zoho ZeptoMail?
New to Zoho Workerly?
New to Zoho Recruit?
New to Zoho CRM?
New to Zoho Projects?
New to Zoho Sprints?
New to Zoho Assist?
New to Bigin?
Related Articles
Creating applications with Zia App Builder
1. What does this page cover Learn about Zia App Builder and how it leverages AI to assist you in creating functional applications from user prompts by generating practical use cases and building working components. Learn how to connect with various ...Creating applications using Zia App Builder from mobile devices
1. What does this page cover Learn about Zia App Builder for mobile devices to assist you in instantly creating simple, functional apps from user prompts. This is done by leveraging AI to generate practical use cases and build working components to ...Understand Zia features in Creator
1. What does this page cover Learn how you can build functional Creator applications and forms with Zia assistance by simply describing your requirements. Zia will design it for you, thereby accelerating application development and form creation. 2. ...AI capabilities in Creator - powered by Zia
1. Overview - Introduction to Zia In Zoho Creator, we leverage the technologies of machine learning and generative AI to provide cutting-edge artificial intelligence features such as prompt-based application creation, agentic AI capabilities that ...FAQs: Introduction to Applications
This page serves as a comprehensive guide for users new to Zoho Creator covering various aspects such as application theme customization and demonstrates seamless functionalities for edit, delete, and duplicate actions. What is an application? An ...
New to Zoho LandingPage?
Zoho LandingPage Resources


