 Note: Page parameters are now improvized as page variables! All your existing page parameters have been moved to the Page Variables and Script tab at the top-right of the page builder. In this tab, you can continue to use these parameters as variables, create new page variables, and continue to pass values to them similar to page parameters. Additionally, you can configure custom logic in your page scripts to modify and manipulate these variables.
- Panel and button display
- Panel image
- Panel and button actions
- Charts
- Gauges
- Embed
- Search element
- Forms and reports
Pass parameter value to the display of panel and button elements
Using ZML attribute
You can pass parameters to your page using ZML attributes. These attributes specify the parameter name and their values. The display aspect of text and button in a panel can be configured to display the required data using parameters. The below table shows the ZML attributes for panel and button elements and their usage.
| Element | ZML attribute | ZML script |
| Panel text/label | value | |
| Button text/label | text |
Using parameter property
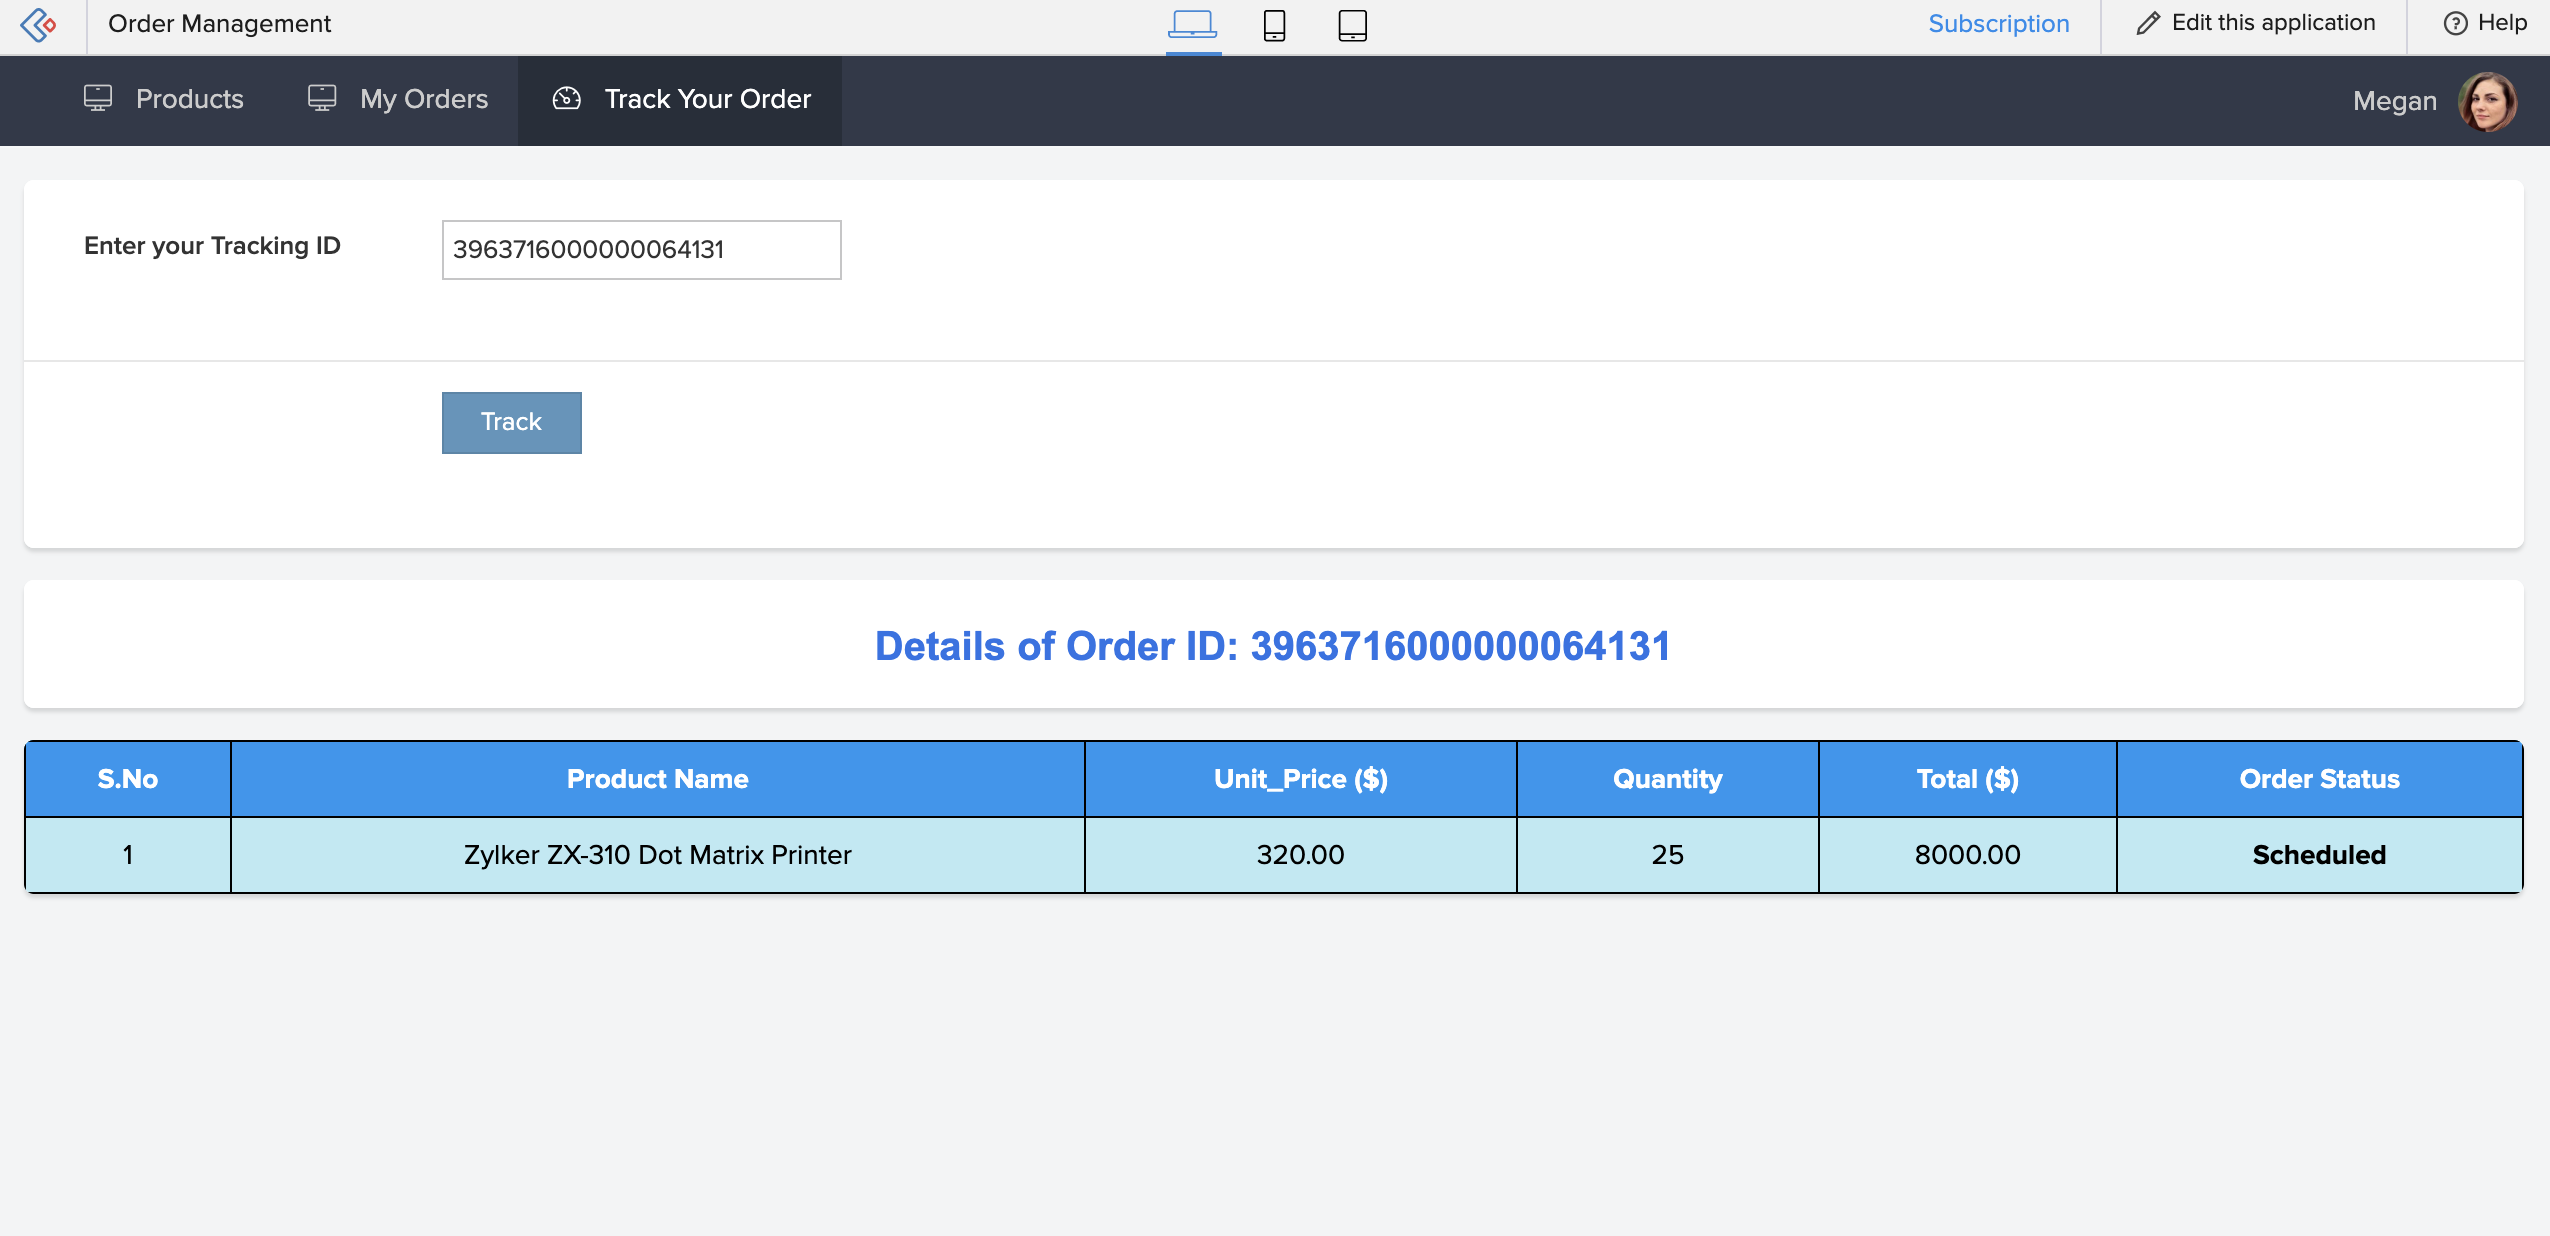
Imagine you've created an application called Order Management . In this application, you have designed a parameterized page titled Track your Order that displays the order details in a HTML snippet upon entering the tracking ID (record ID) in the respective field (inside a stateless form). Upon form submission, this ID is set as the parameter value in the page URL and also in the panel that displays the text " Details of Order No: ${parameter_name} .
- To create the parameterized page, refer here .
- To create the stateless form, refer here .
- To embed the HTML snippet, refer here .
- Drag and drop a panel onto the page. The Page properties pane will slide in.
- In the Display tab, select the Display data as Text and enter the value as below.
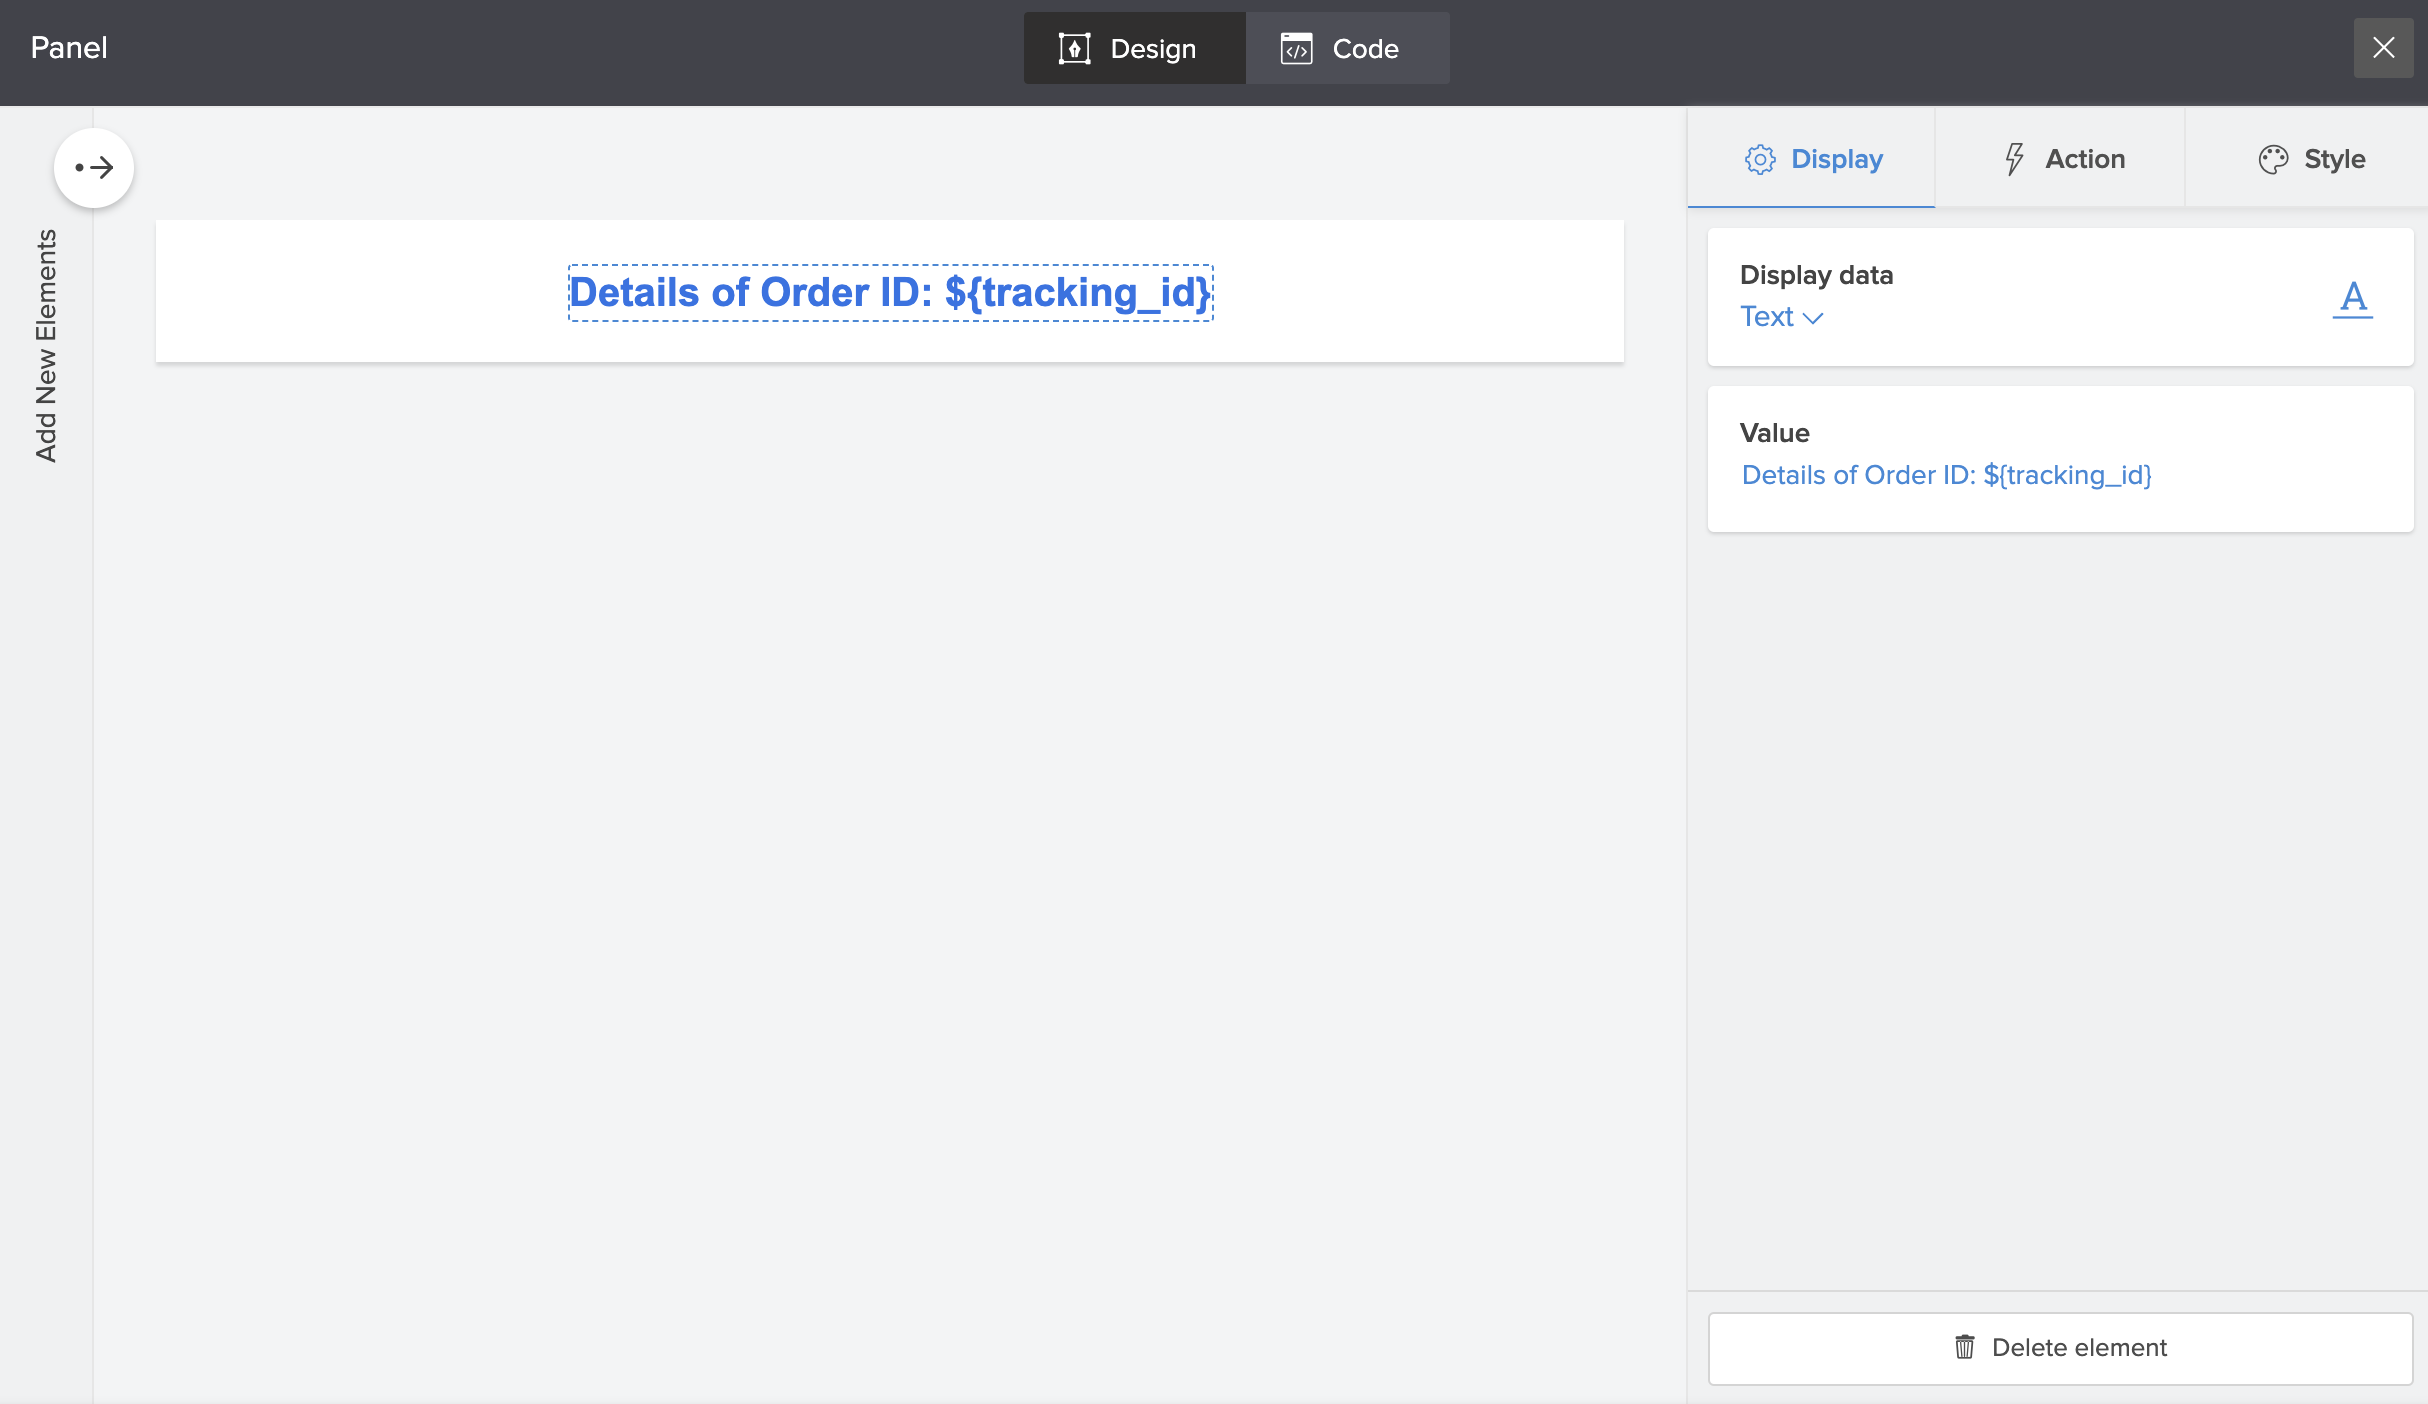
- The changes will be saved automatically. Close the pane at the top-right corner.
Now, you access the Track Your Order page in live mode and enter your tracking ID. Click Track to display the order details. The panel will display the entered tracking ID number and the order details are displayed based on the tracking_id parameter.
Pass parameter value to panel images
You can pass parameters to your page using ZML attributes. These attributes specify the parameter name and their values. The images displayed in a panel can be configured to display the required data using parameters. The below table shows the ZML attributes for panel images and their usage.

| Element | ZML attribute | ZML script |
| Panel Image | Web Url | |
Panel action
You can pass parameters to your page using ZML attributes. These attributes specify the parameter name and their values. The action aspect of text, image and button in a panel can be configured to display the required data using parameters. The below table shows the ZML attributes for panel and button actions and their usage.
| Element | ZML attribute | ZML script |
| Open Form, Report, and Page | Query parameters | |
| For Open Url | Url | |
| Open Form, Report, Page, Url in popup | width (popupWidth), height (popupHeight) |
Pass parameter value to chart elements as a filter
Using ZML attribute
You can pass parameters to your page using ZML attributes. These attributes specify the parameter name and their values. The labels for x and y axes in your chart can be configured to display their respective titles using parameters. The below table shows the ZML attributes for chart element and their usage.
| Element | ZML attribute | ZML script |
Chart Element | X-axis Label (xtitle) Y- axis label (ytitle) |
Using parameter property
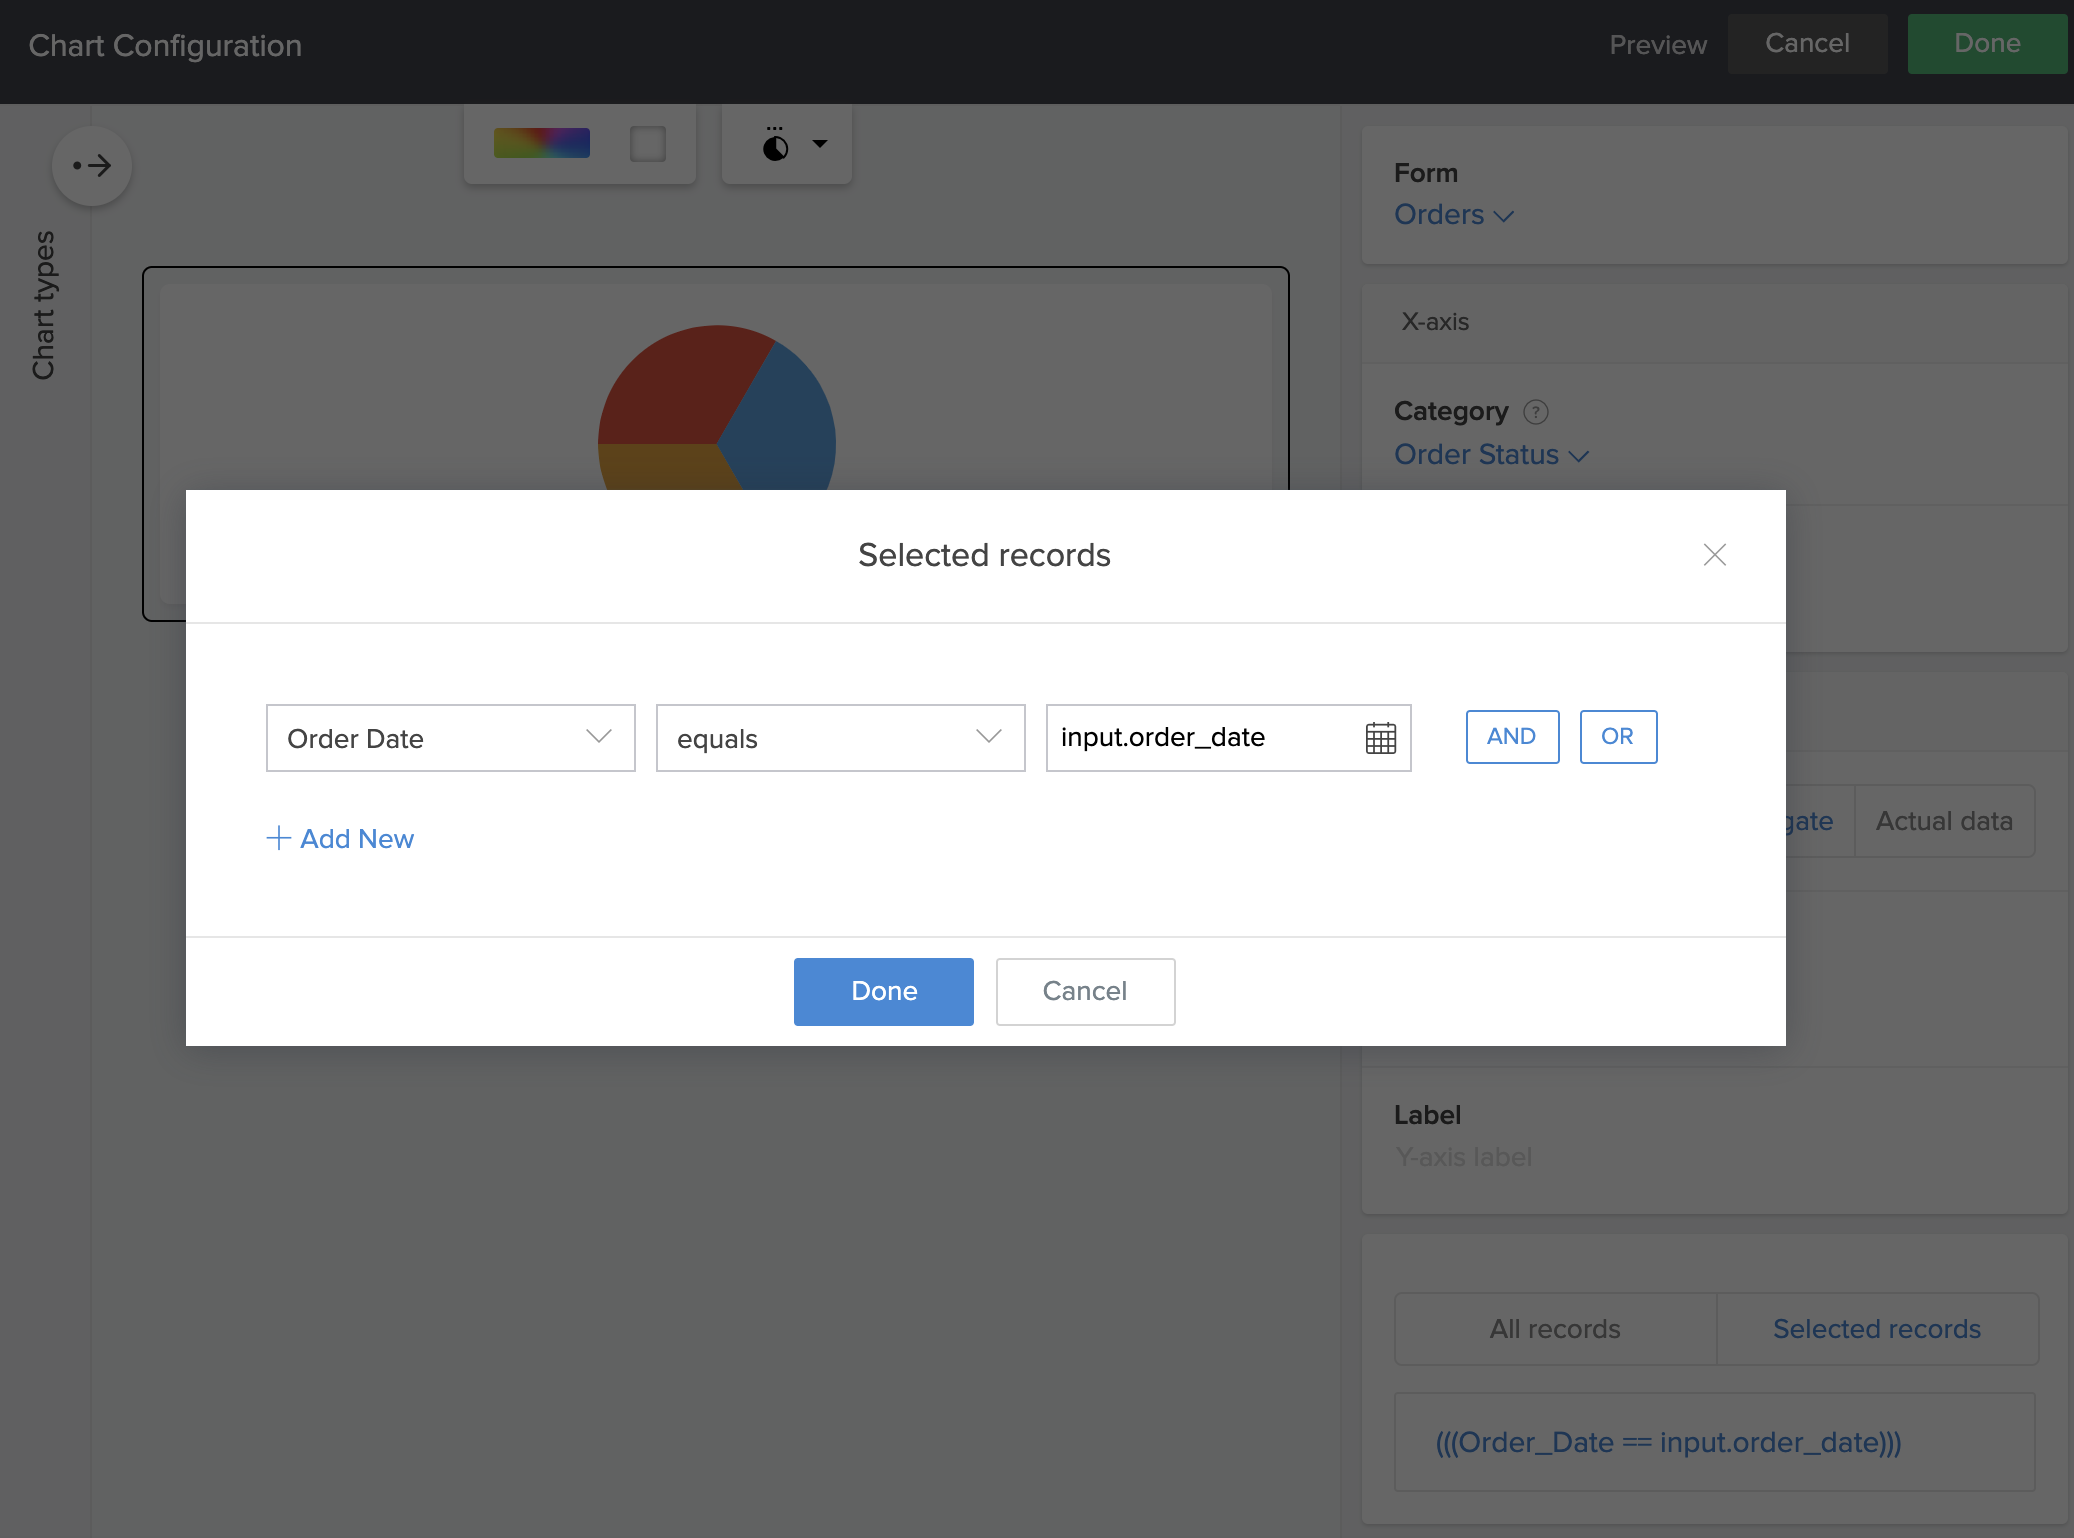
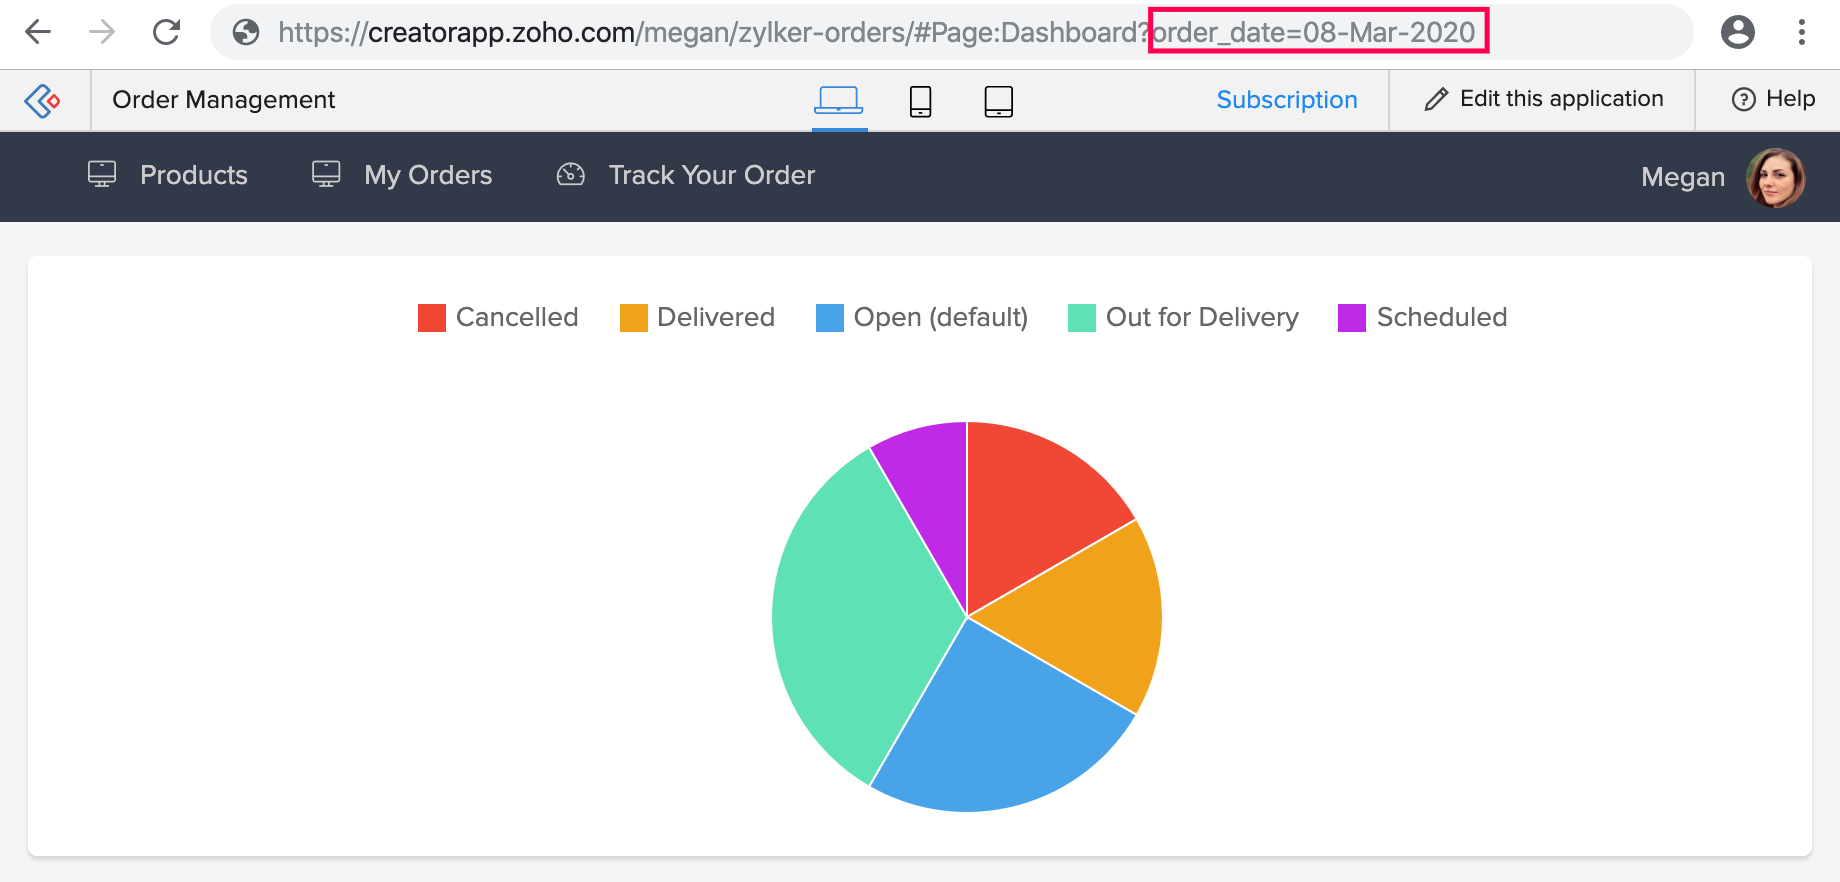
Imagine you've created an application called Order Management . In this application, you have designed a page titled Dashboard and added a pie-chart that is configured to display the status of orders, along with the count of total orders on a particular day. Now, while setting the filter for Selected records , you can specify the parameter name in the place of value. Here, the parameter name is order_date .
When you access the live page and specify the required order date (as per the date format in your app) in the page URL in the format ?parameter_name=value , the pie chart will display the status of all orders on that date.
Pass parameter value to gauge elements as a filter
Using ZML attributes
You can pass parameters to your page using ZML attributes. These attributes specify the parameter name and their values. You can configure the maximum and target values for your gauge using parameters. The below table shows the ZML attributes for gauge element and their usage.
| Element | ZML attributes | ZML script |
| Gauge Element | Maximum value (value attribute inside maximumval tag) | |
| Target (value attribute inside target tag) |
Using parameter property
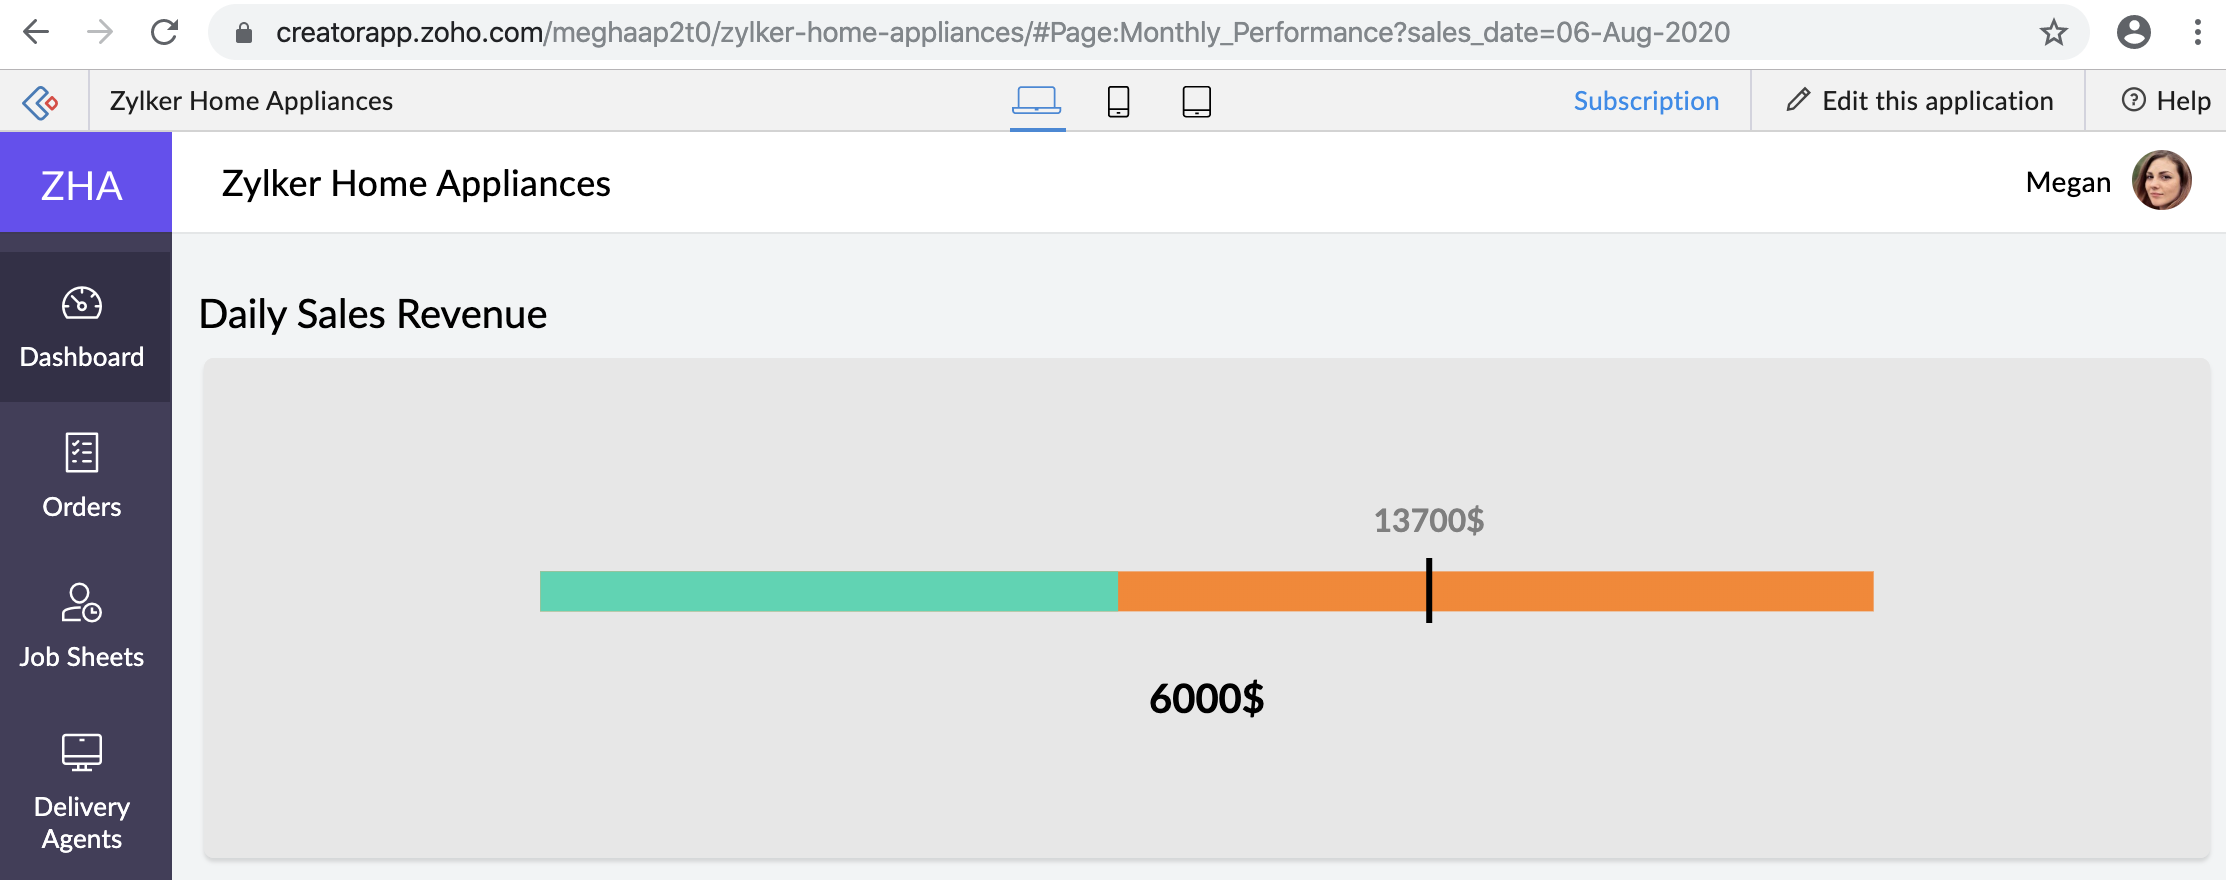
Imagine you've created an application called Order Management . In this application, you have designed a page titled Dashboard and embedded a gauge that is configured to display the sum of total amount of all orders on a particular day. Now, while setting the filter for Selected records , you can specify the parameter name in the place of value. Here, the parameter name is sales_date .
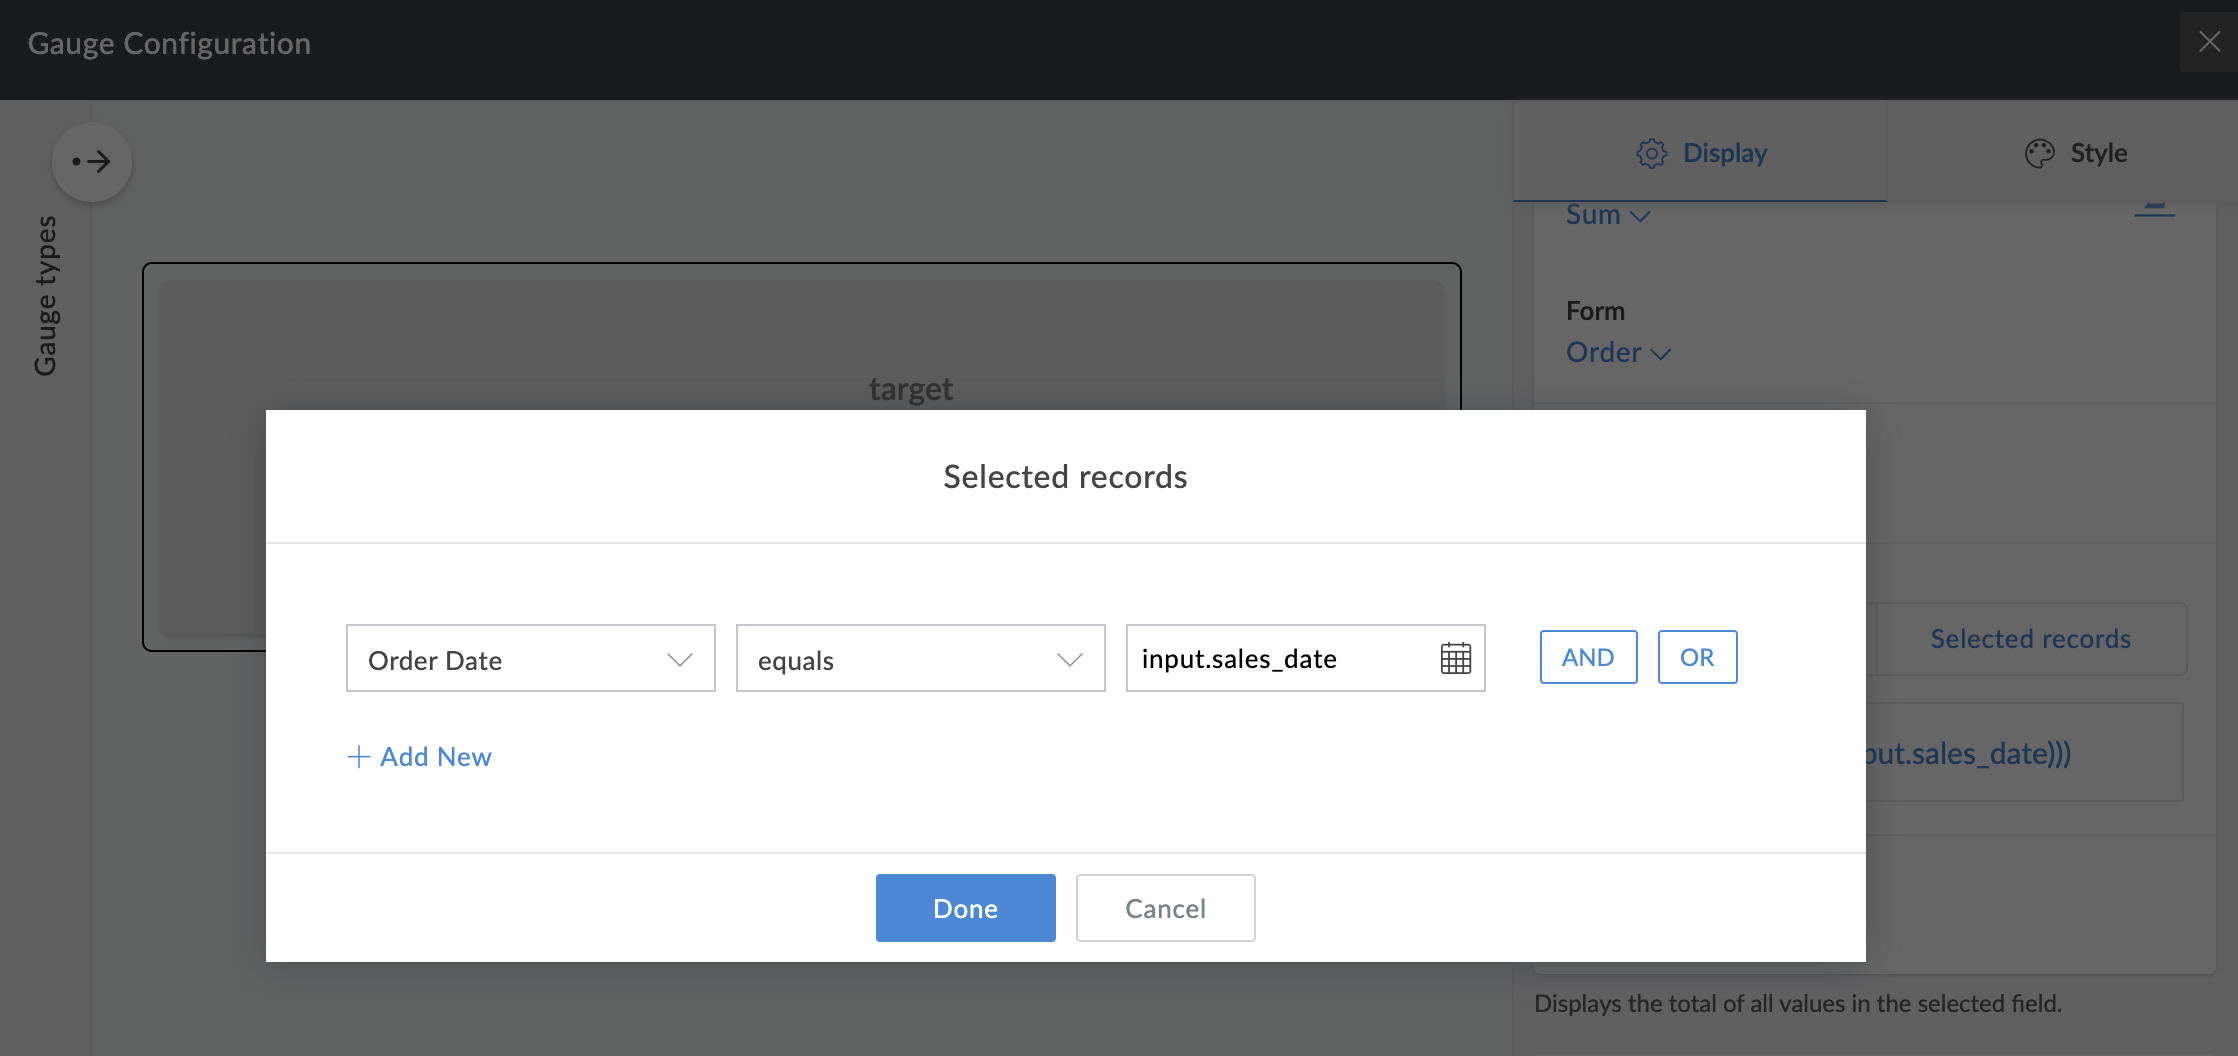
When you access the live page and specify the required date (as per the date format in your app) in the page URL in the format ?parameter_name=value , the gauge will display the sum of all orders on that date.
Pass parameter value to snippets/embed
| Element | ZML attribute | ZML script |
| Embed | src(url), height, width |
where,
domain will be DC specific—for example, you'll need to use creator.zoho.com if your account is in Zoho's US data center, and creator.zoho.eu if in the EU data center.
Pass parameter value to any field in a form/report
Forms
Using ZML attribute
You can pass parameters to your page using ZML attributes. These attributes specify the parameter name and their values. You can pass parameters to certain form specific features. The below table shows the ZML attributes for form element in page and their usage.
| Element | ZML attribute | ZML script |
| Form | Success message (zc_SuccMsg) | |
| Submit button text (zc_SubmitVal) | ||
| Reset button text (zc_ResetVal) | ||
| Redirect to - Website Url (zc_NextUrl) |
Using parameter property
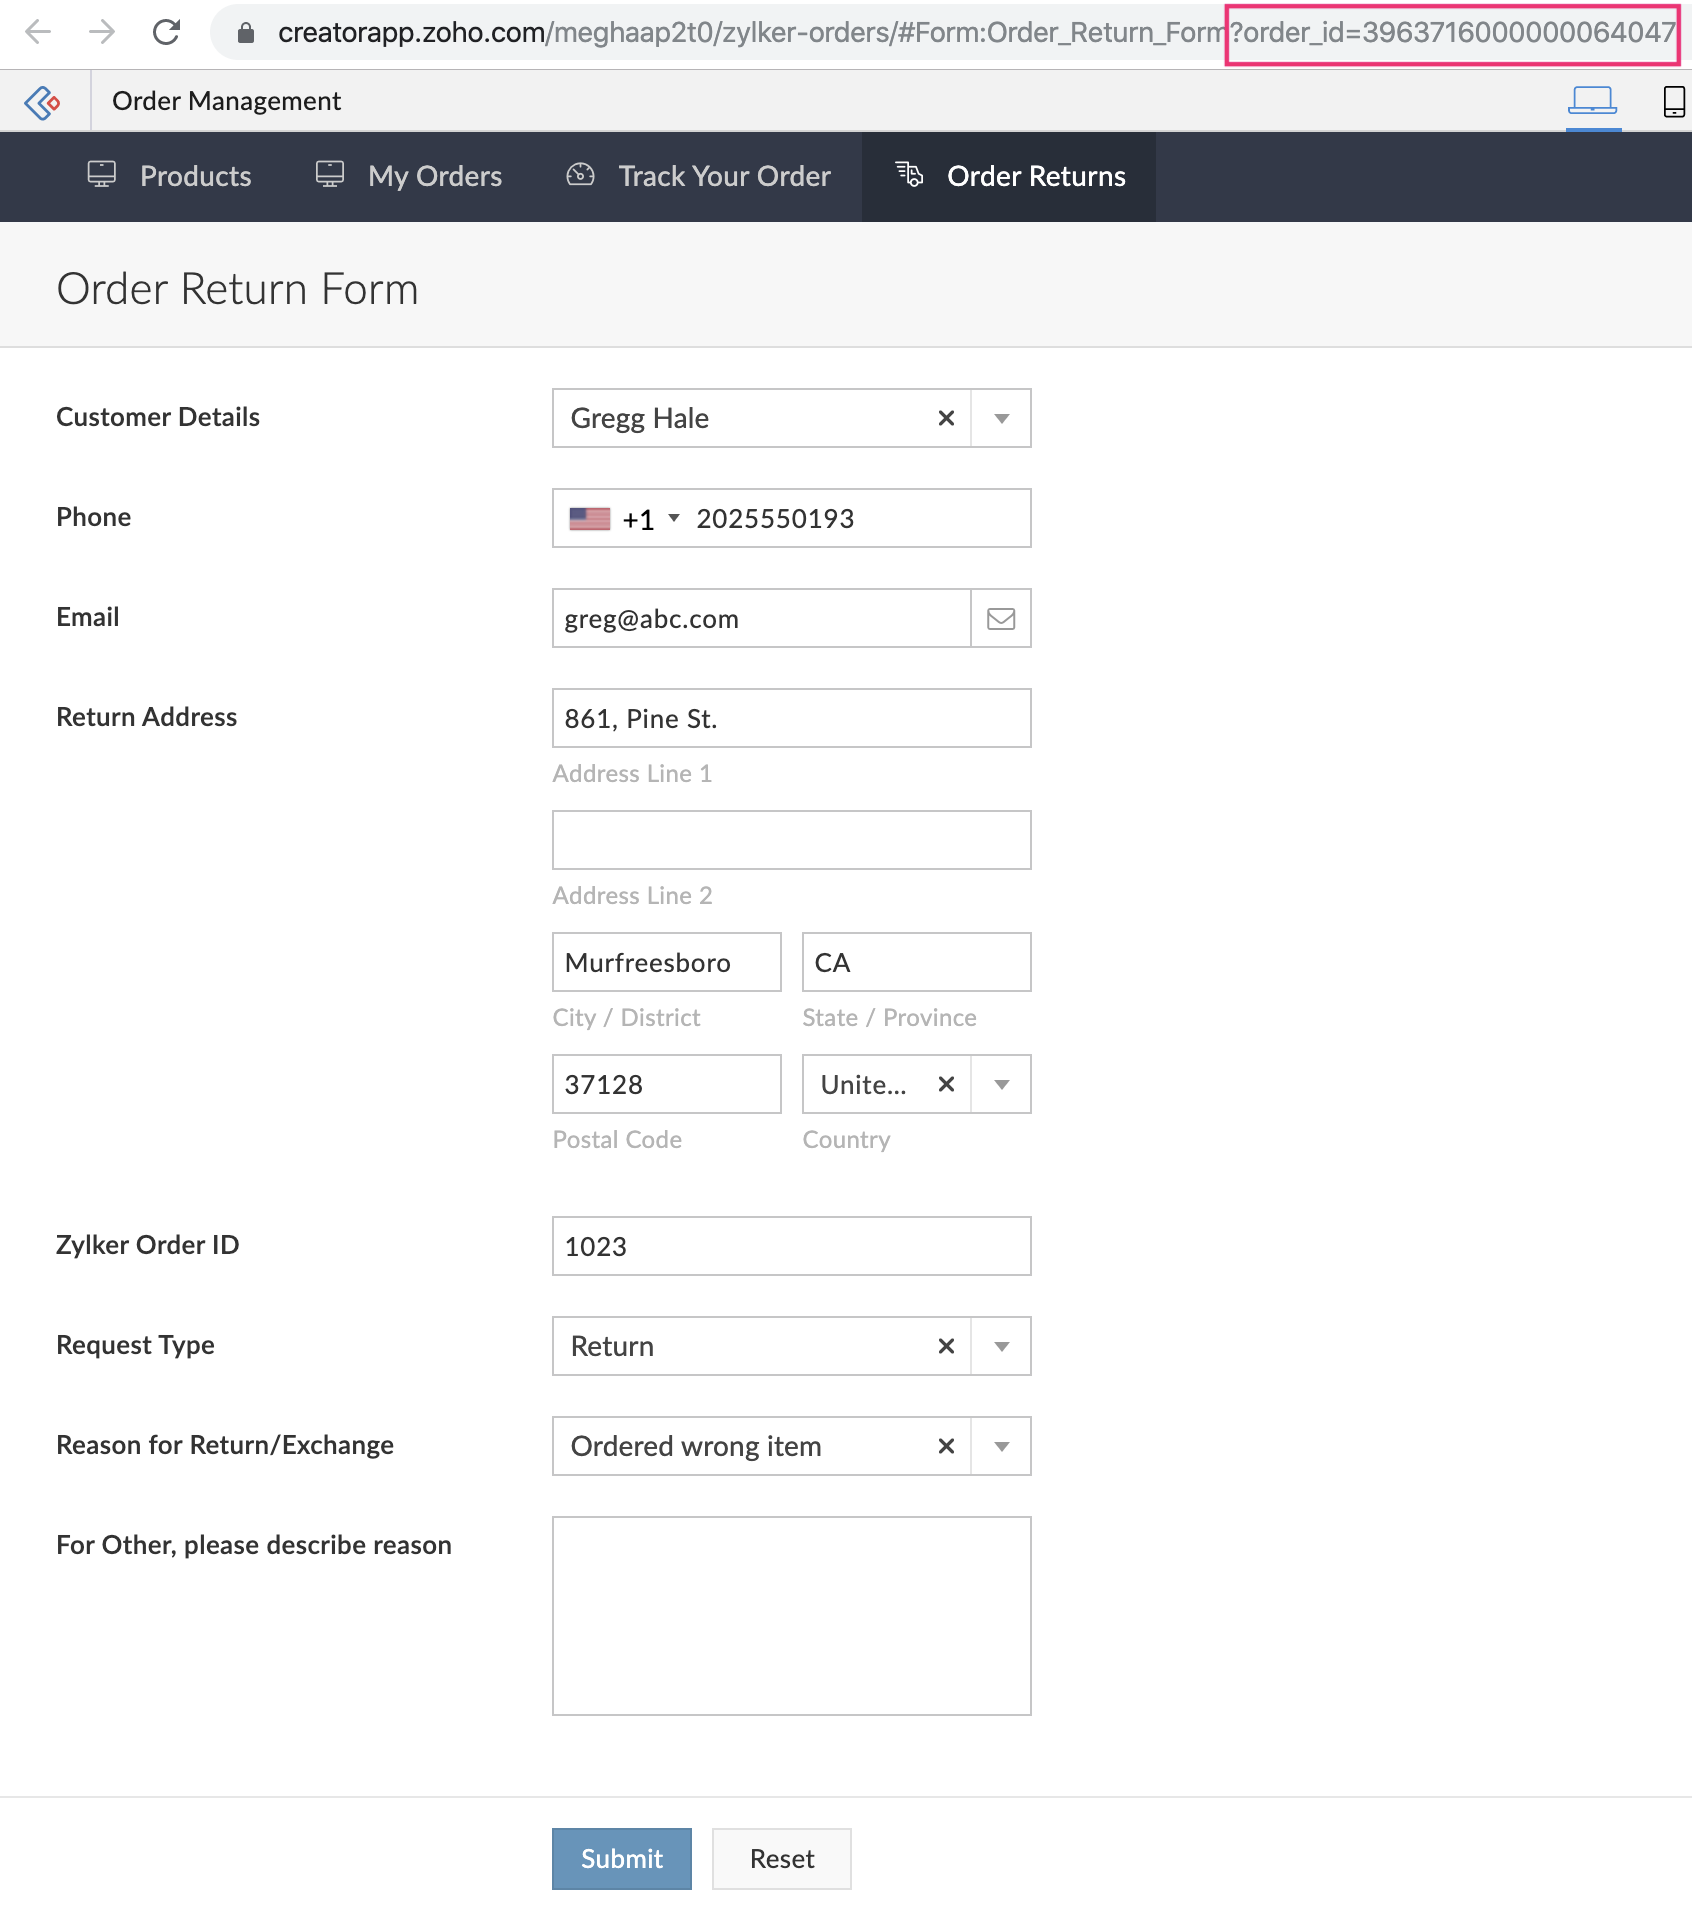
Imagine you've created an application called Order Management . In this application, you have designed a Dashboard page, where you have embedded the Orders report. You have also created an Order Return form, where users enter their order details and their reason for returning/replacing purchased items. The Orders report has a button (action item) named Return/replace items .

Upon clicking this button, the Order Return form opens and the Order ID field and other order details are pre-filled based on the order_id parameter. The user can choose the request type, reason for return/exchange and submit the form.
Reports
Using ZML attribute
You can pass parameters to your page using ZML attributes. These attributes specify the parameter name and their values. You can configure the search component to display the required search results using parameters. The below table shows the ZML attributes for search element and their usage.
| Element | ZML attribute | ZML script |
| Search | Default value (defaultValue) | |
| Placeholder (placeholder) |
Using parameter property
Imagine you've created an application called Employee Management . In this application, you have designed two pages:
- The parameterized page titled Dashboard that has a search element which displays its search results in another page (target) based on the page parameter named department .
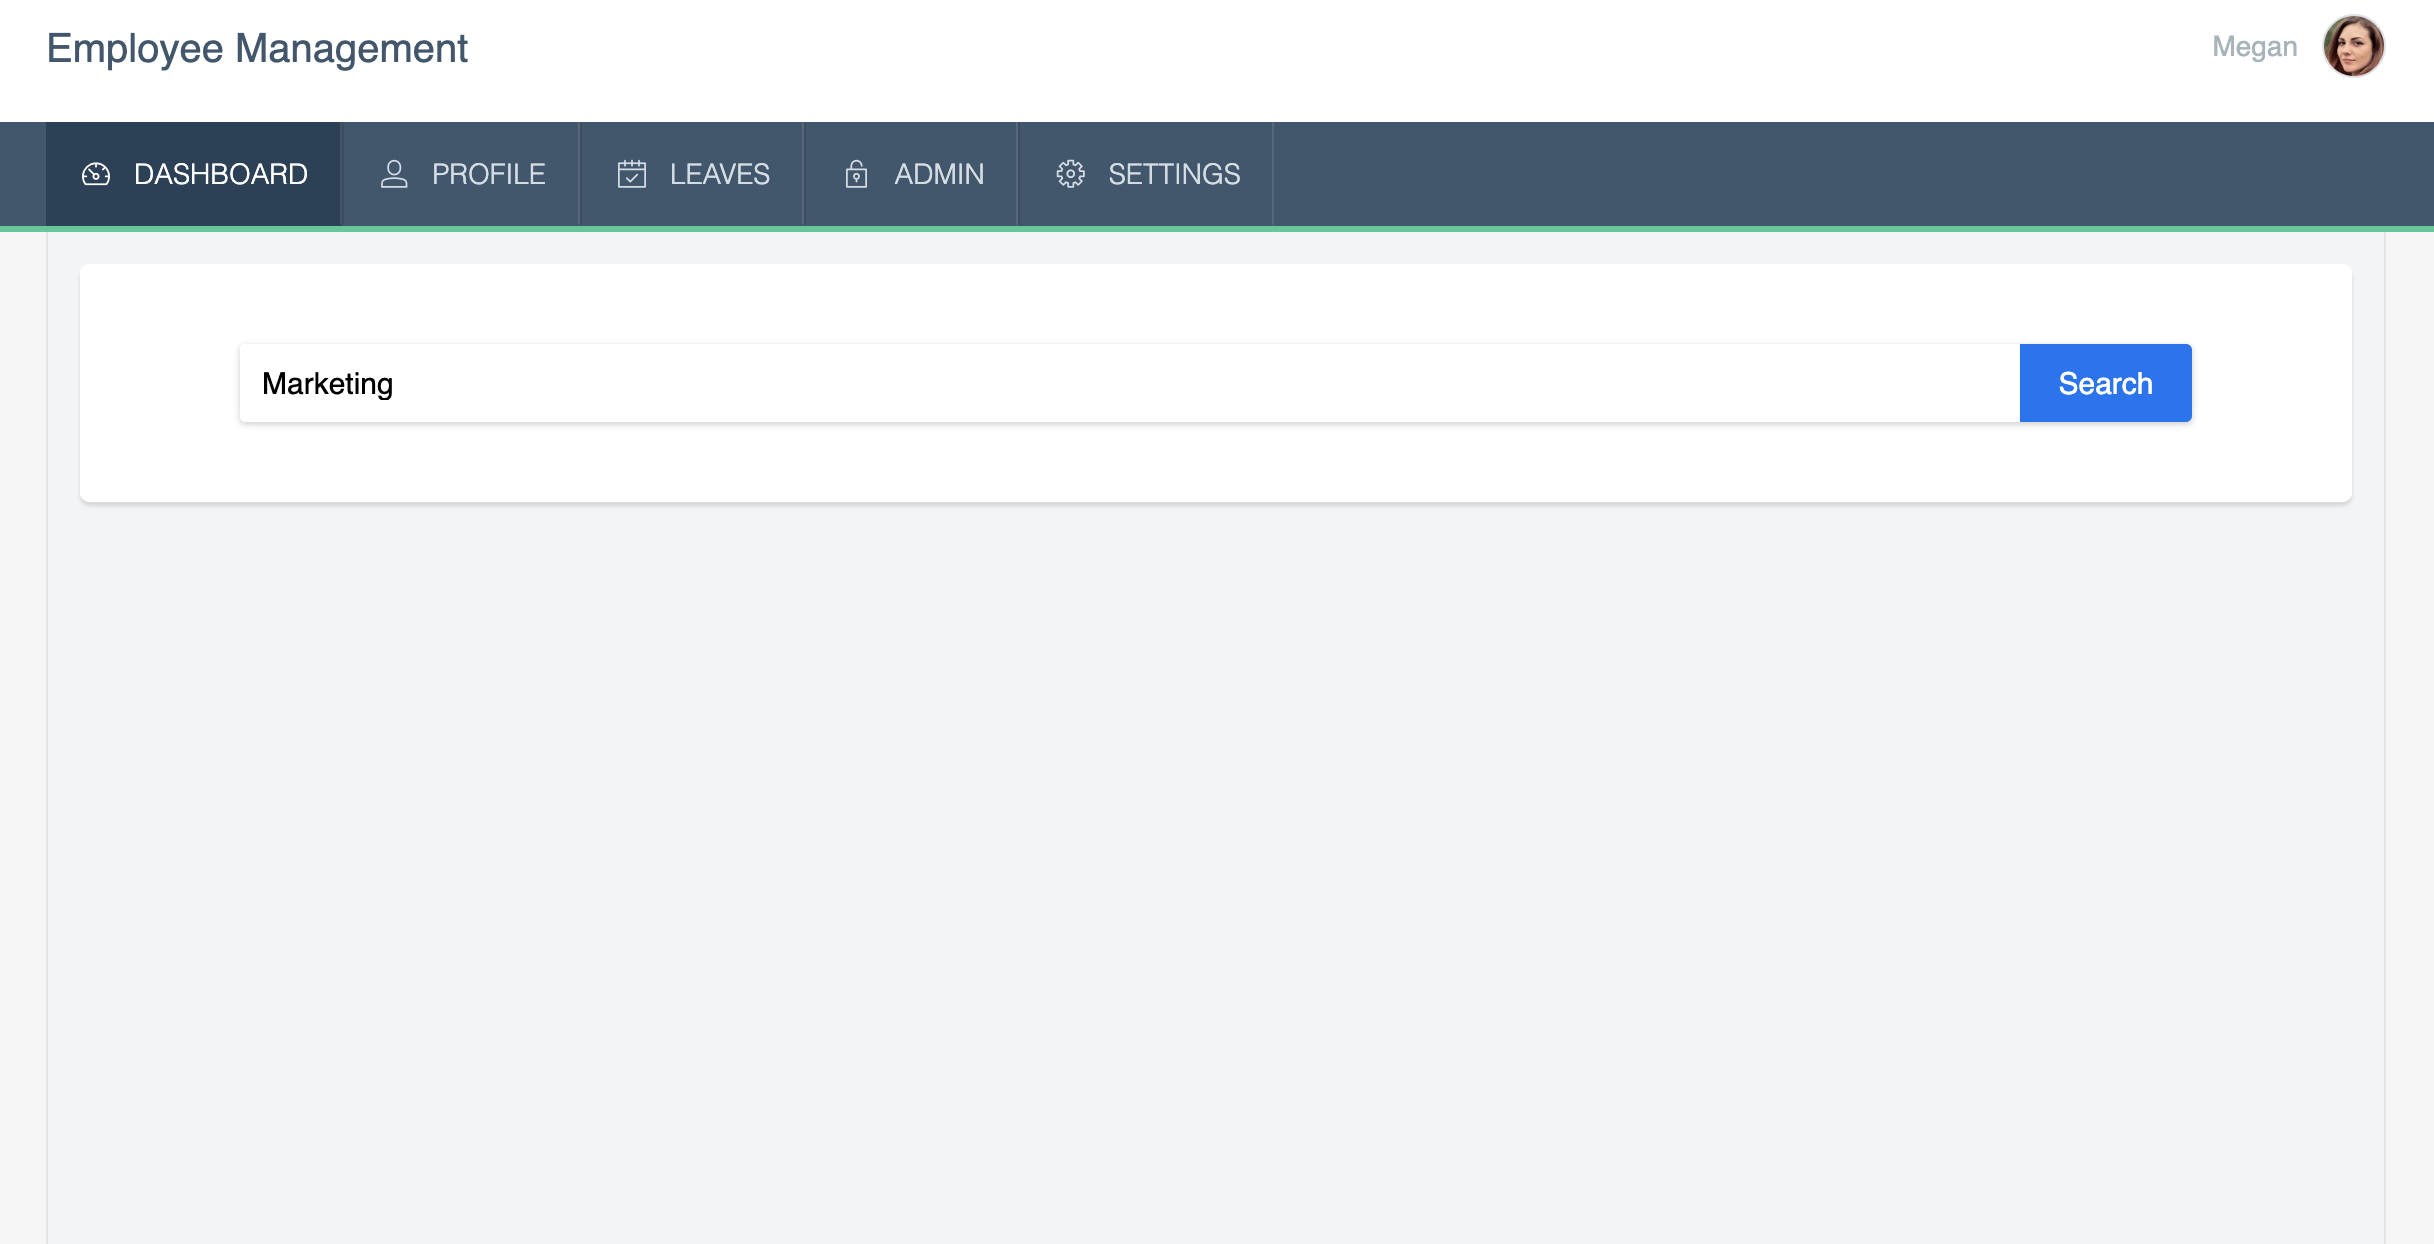
- For the search component, you can select the parameter based on which you want to display the search results. Here, department is the page parameter.
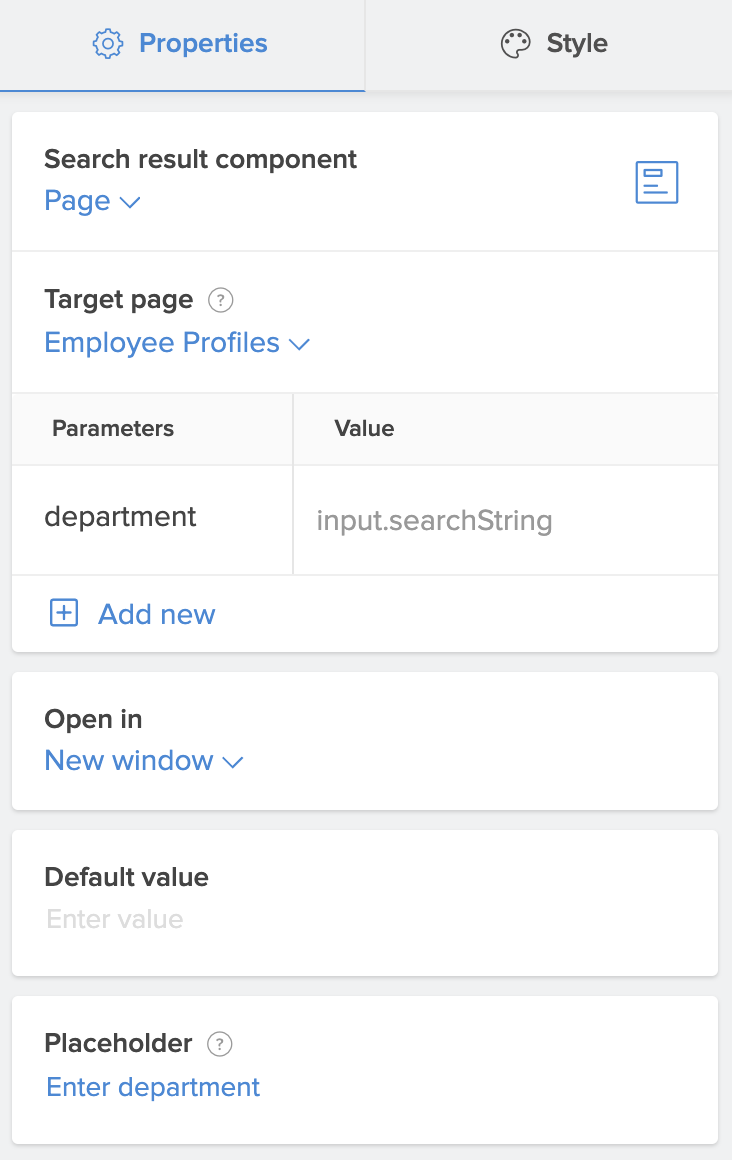
- The target page called Employee Profiles , in which the search results are shown in the form of a table (HTML snippet) that filters and displays employee details based on the chosen department.
