To embed a form as button in a page
- Edit your app.
- Select the required page from the accordion menu on the top-left corner, or from the application preview in the middle. You'll be taken to its Design page.
-
Click on the device icon to navigate to the Design view of the device of your choice.

- Hover in the middle and click Open Page Builder .
- In the page builder, click the Form option from the page elements menu on the left. A menu will slide in.
- Select an Application from the dropdown provided. This dropdown will list all the applications available in your Zoho Creator account.
-
Select a form from the Form dropdown. All the forms in the selected application will be listed here.
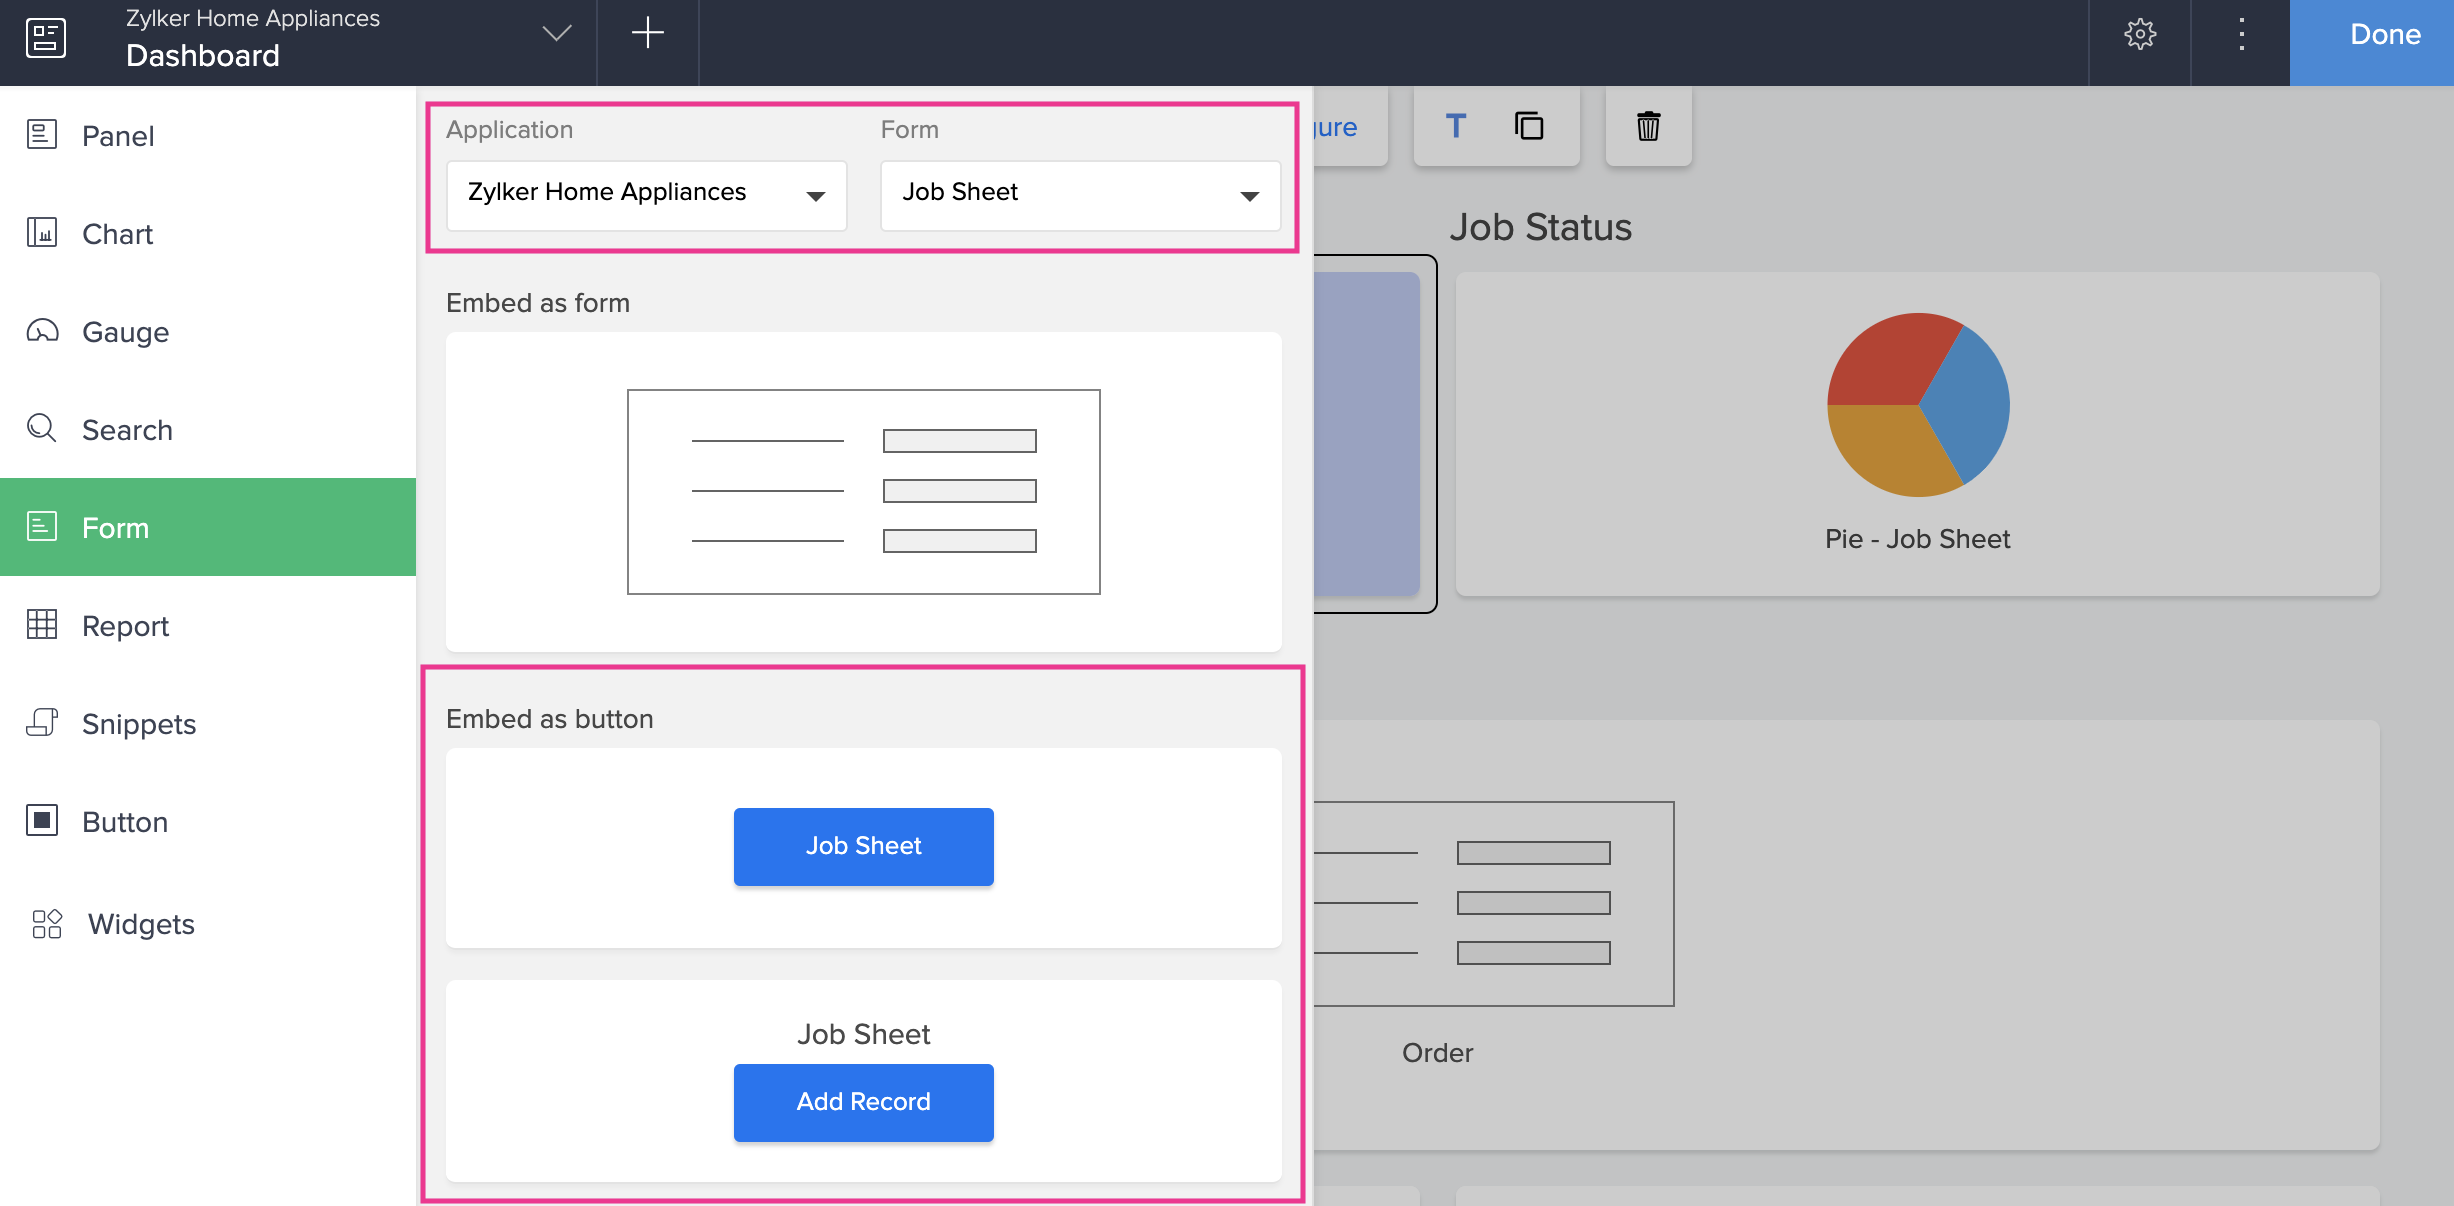
- Click and drag the button under Embed as Button option to embed the form as a button into the page builder. You can also double-click the required button type.
- Once the button is added to the page, you can configure various properties for it.
To configure a form embedded as button
-
Double click the form (button) you want to configure. You can also single click to select the form and then click the Configure option in the toolbar at the top-center of the page builder.
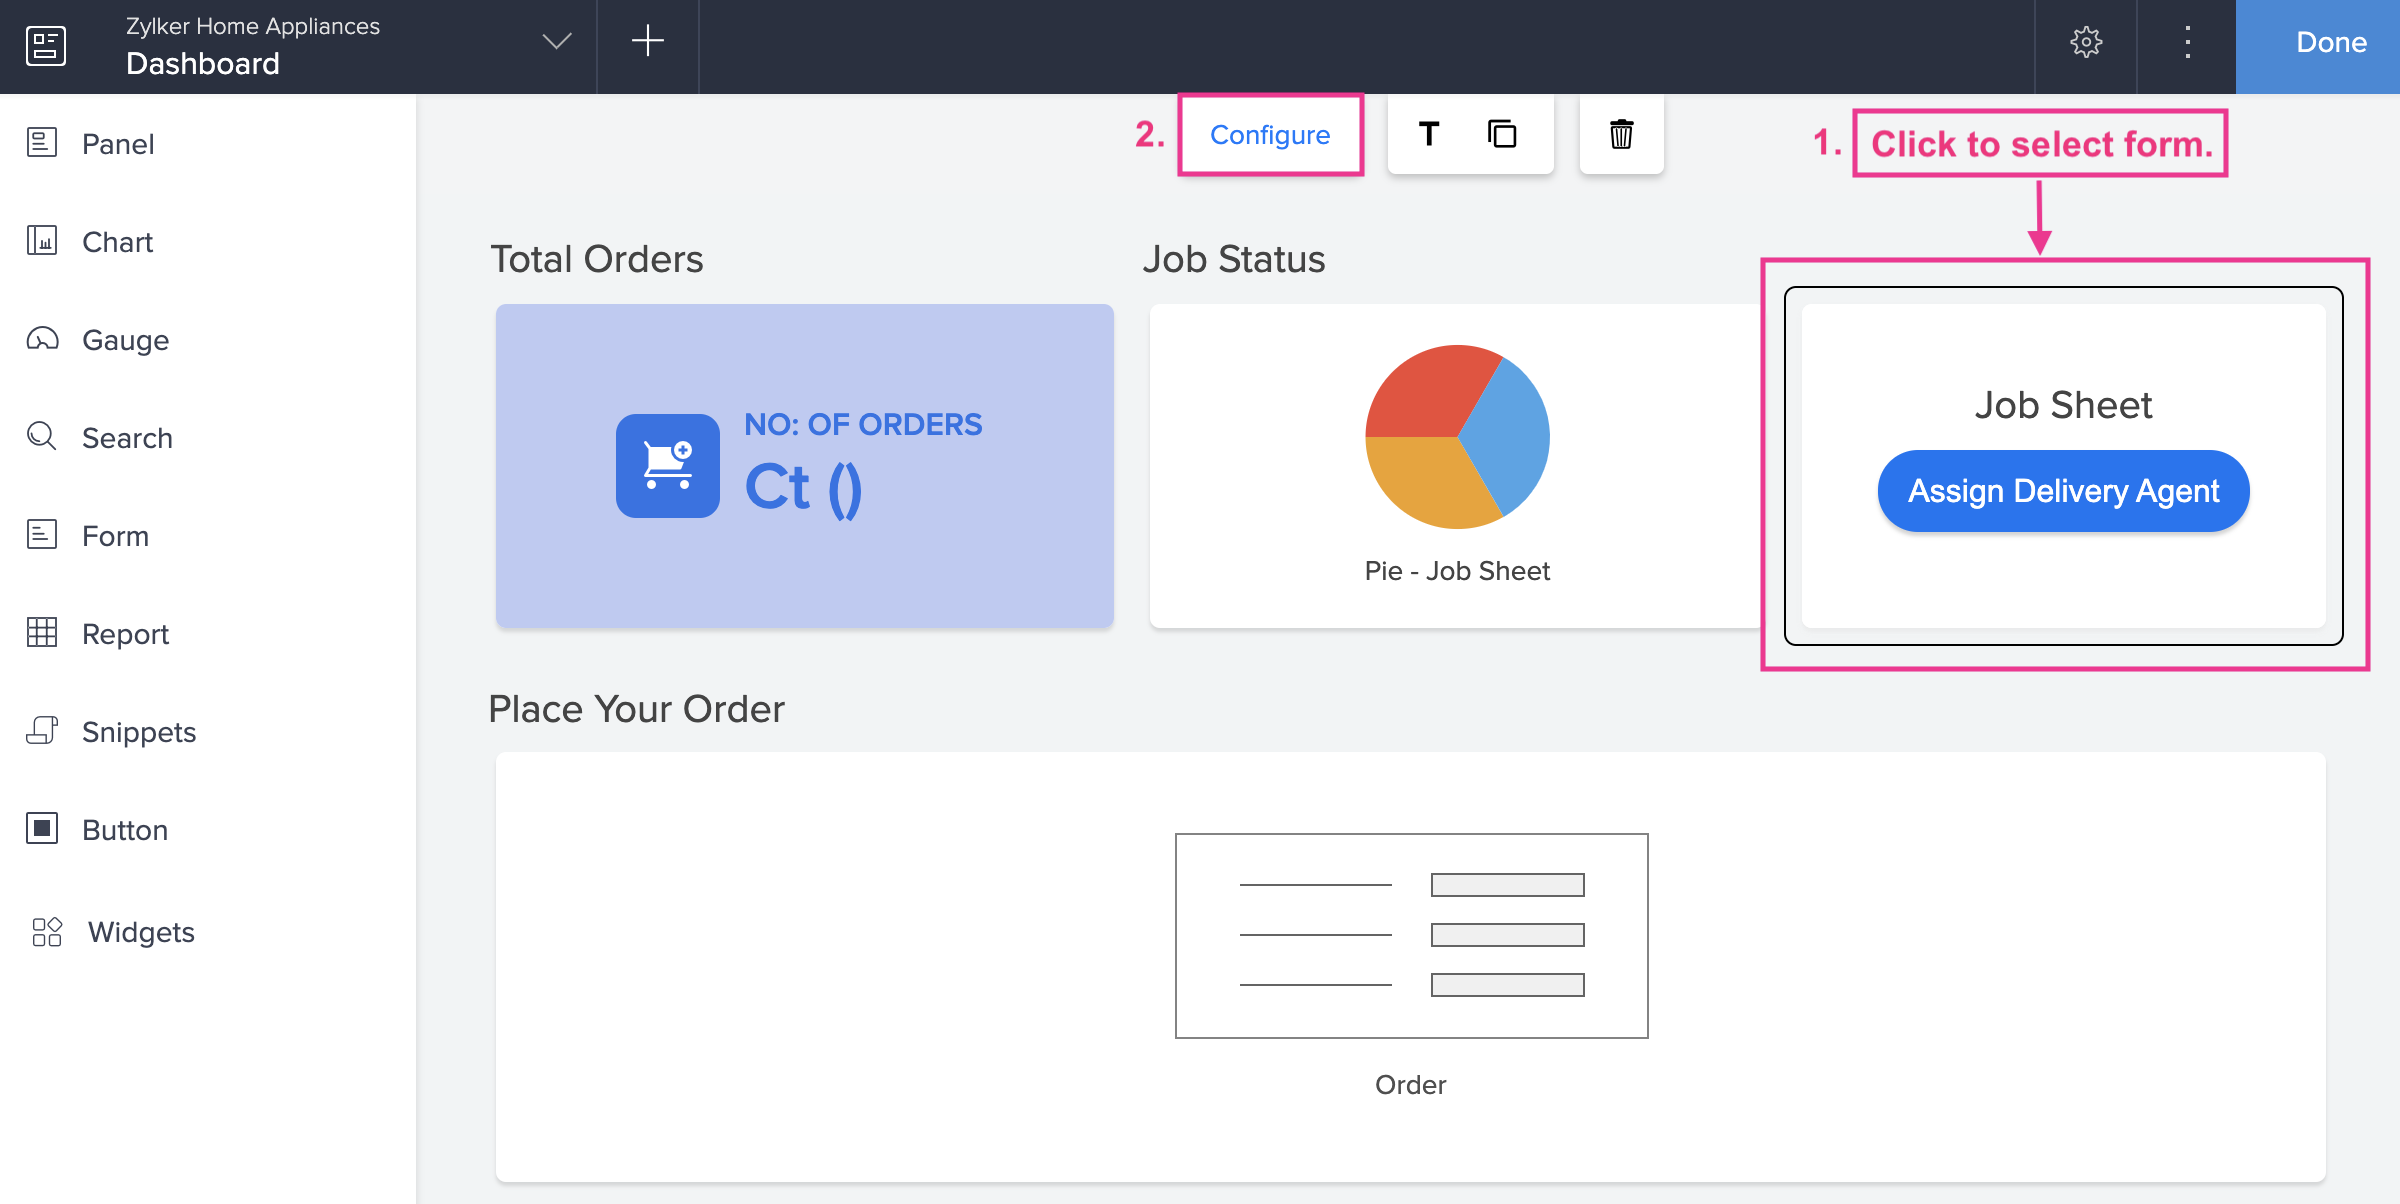
- The Panel Configuration pane will slide in from the right. It has two tabs — Design and Code .
- In the Design tab, you can configure the Display , Action , and Style aspects.
-
The Display tab allows you to edit the display data , action and style aspects of the panel element depending on the button type you have chosen.
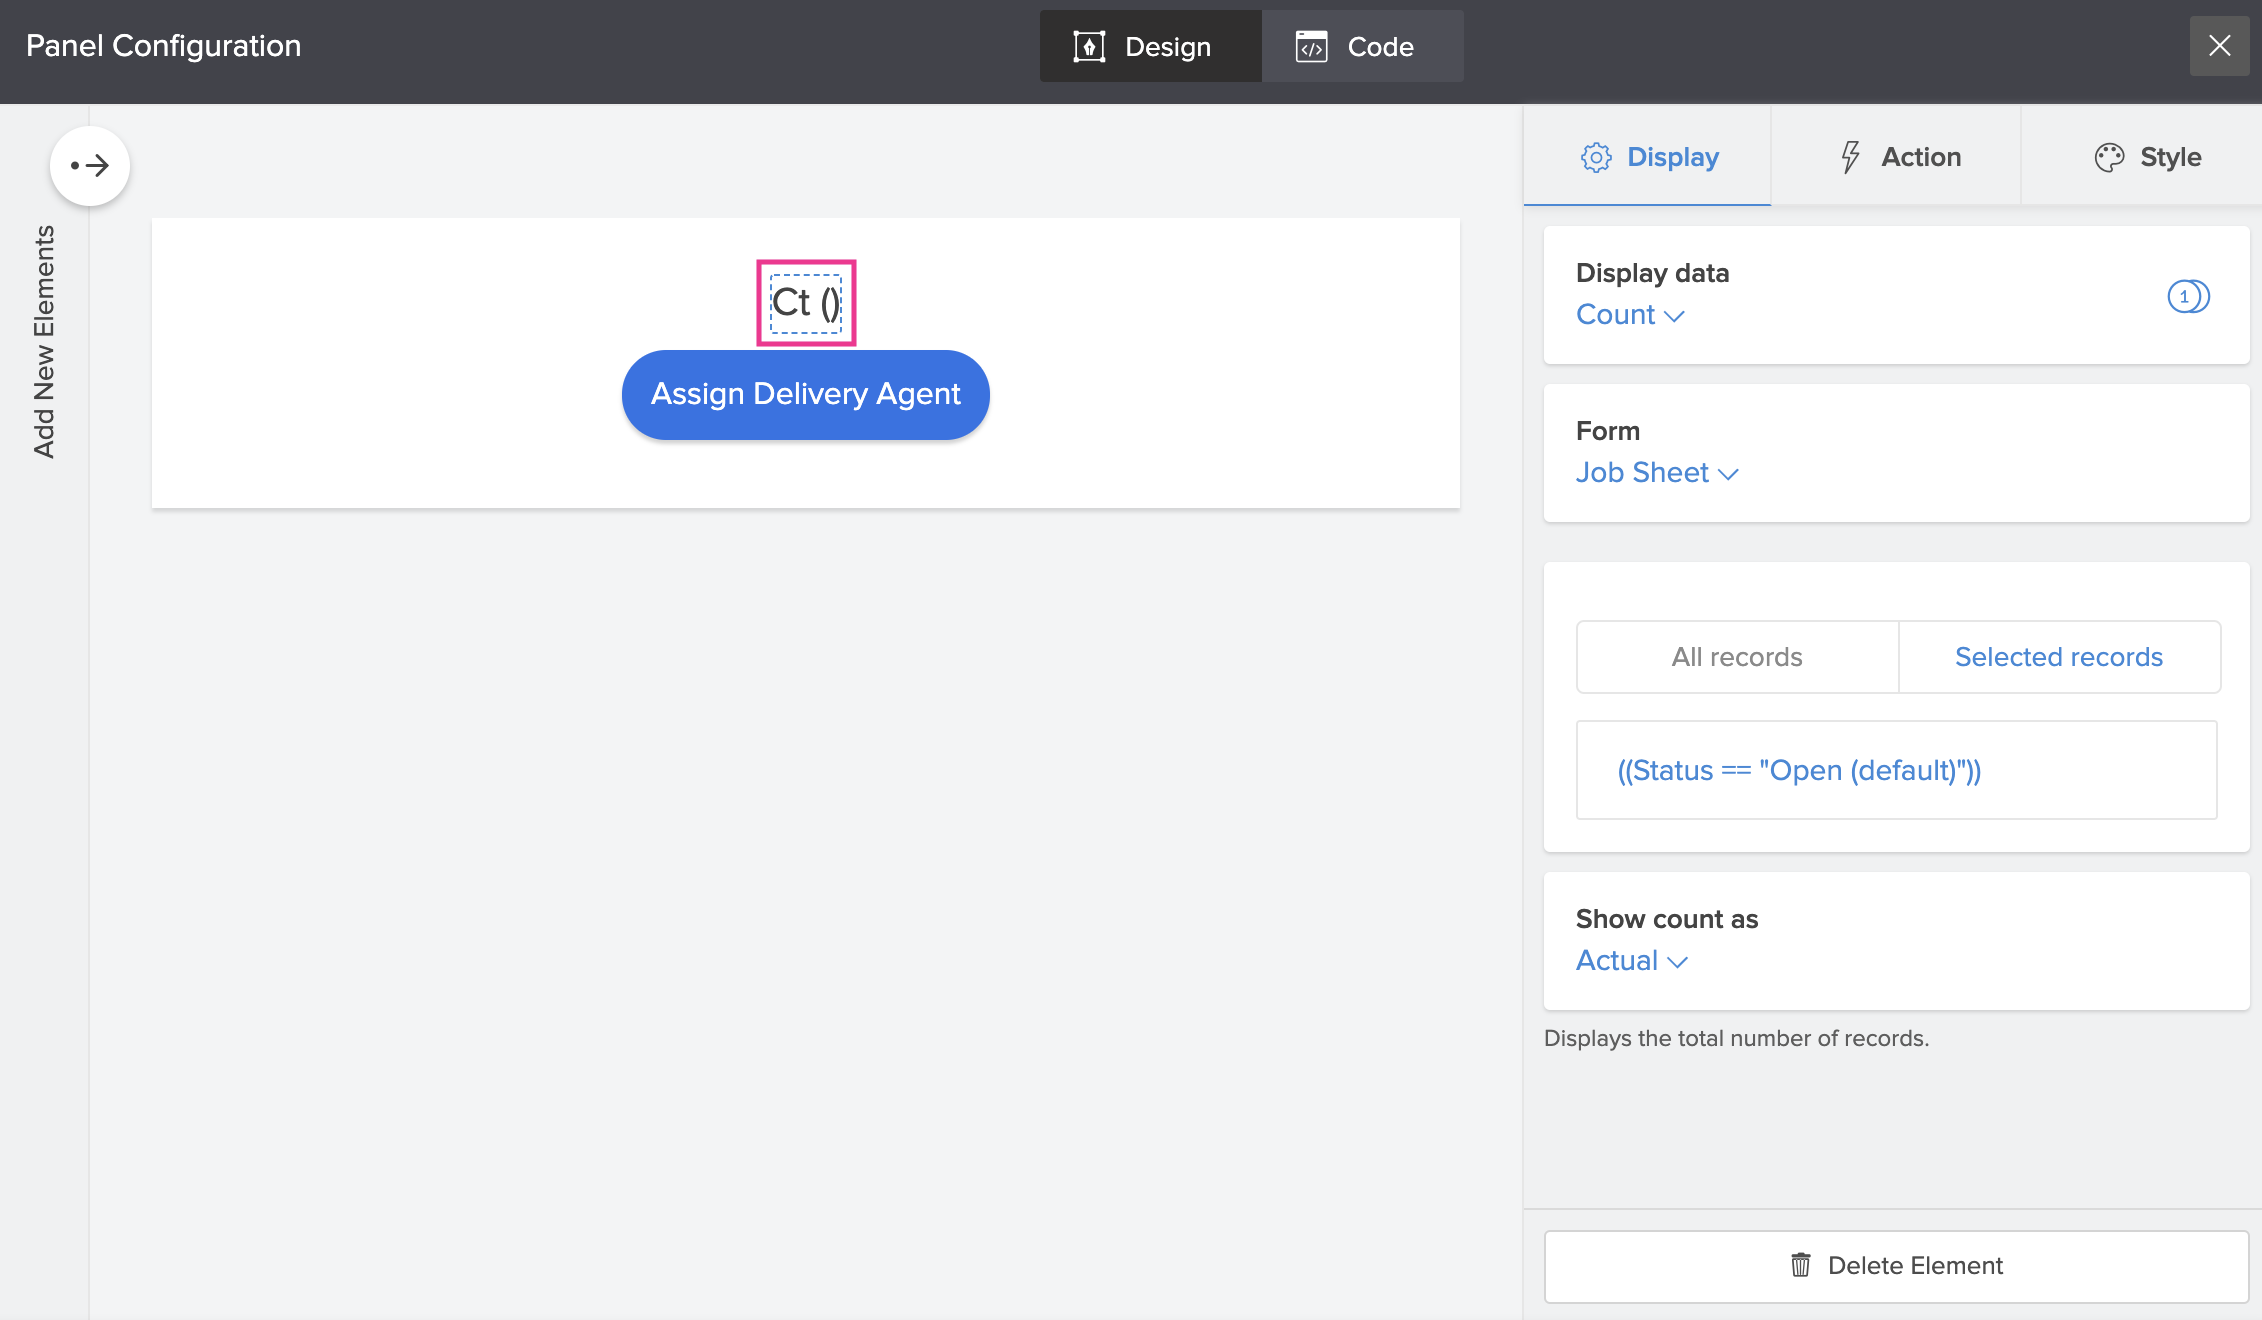
-
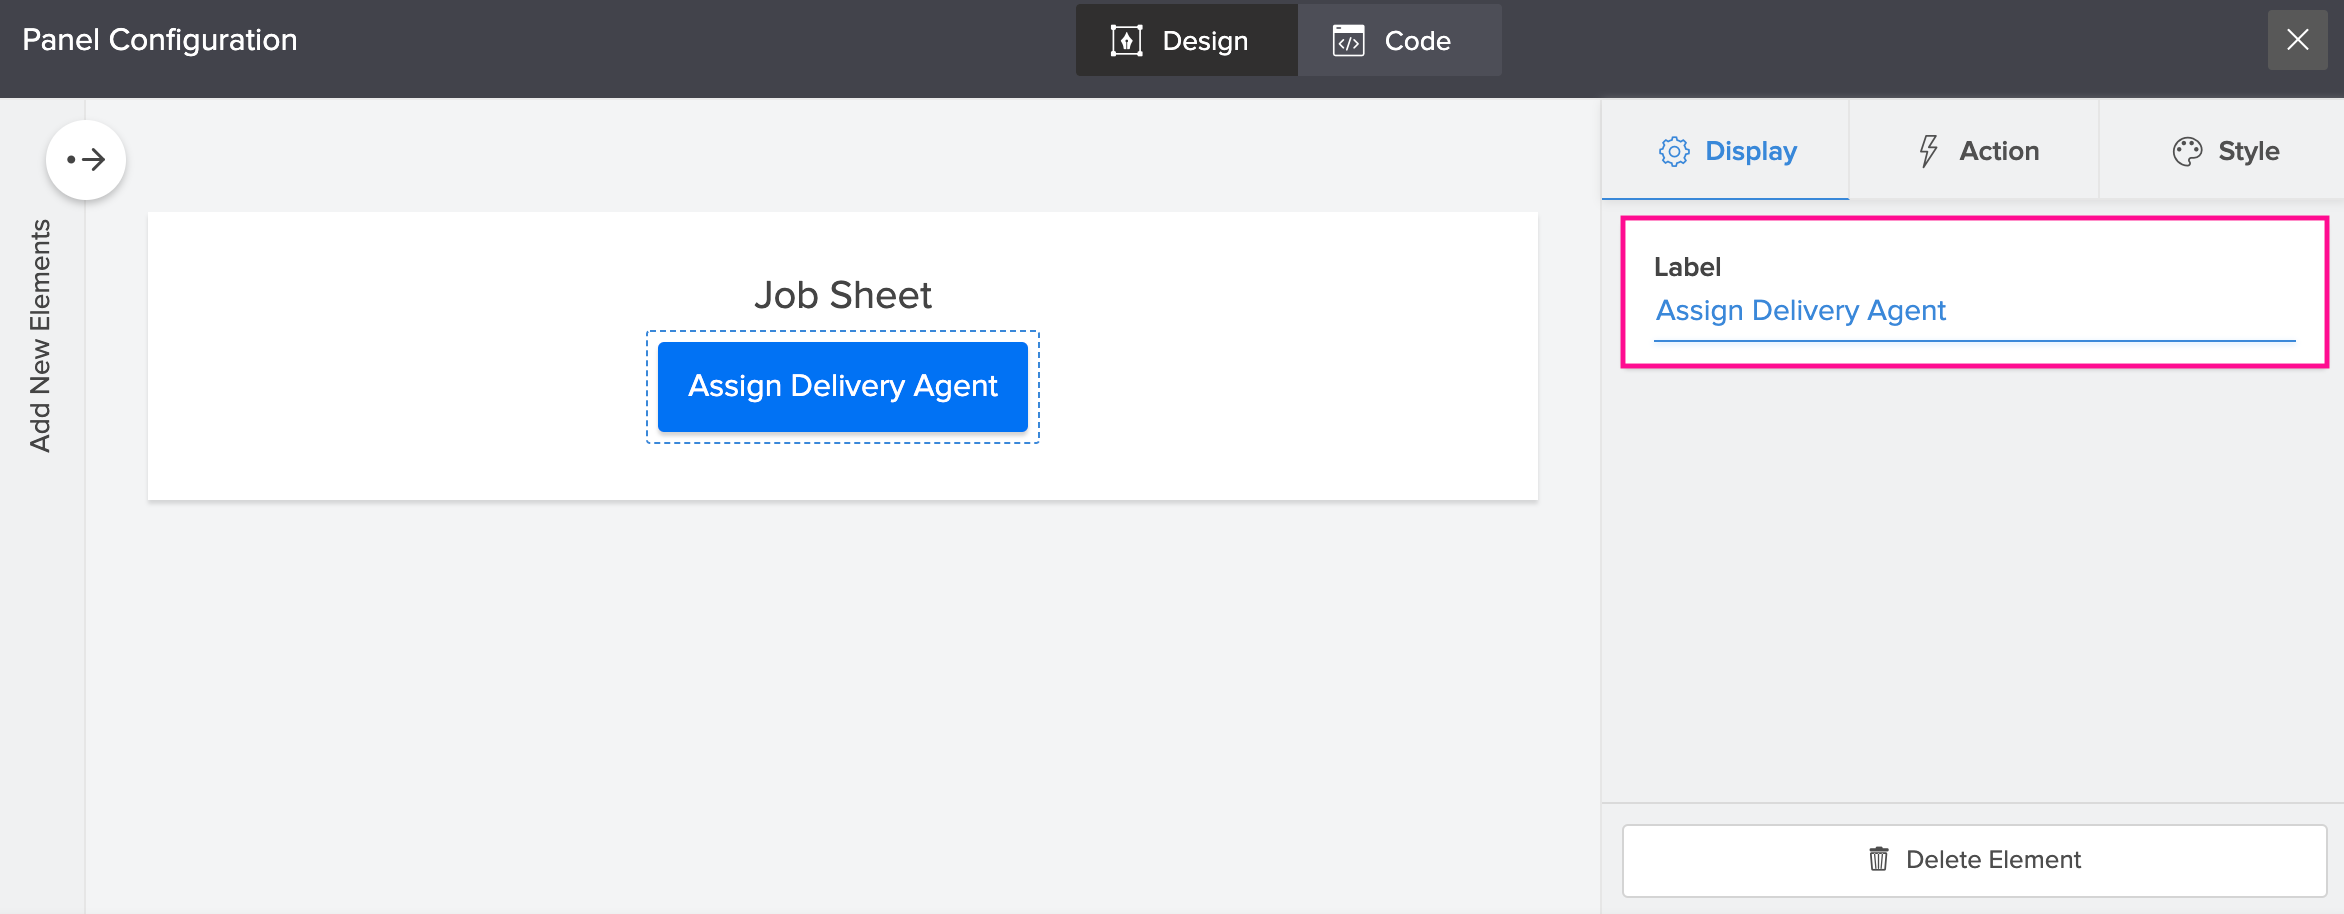
The Display tab enables you to edit the label name of the button.
-
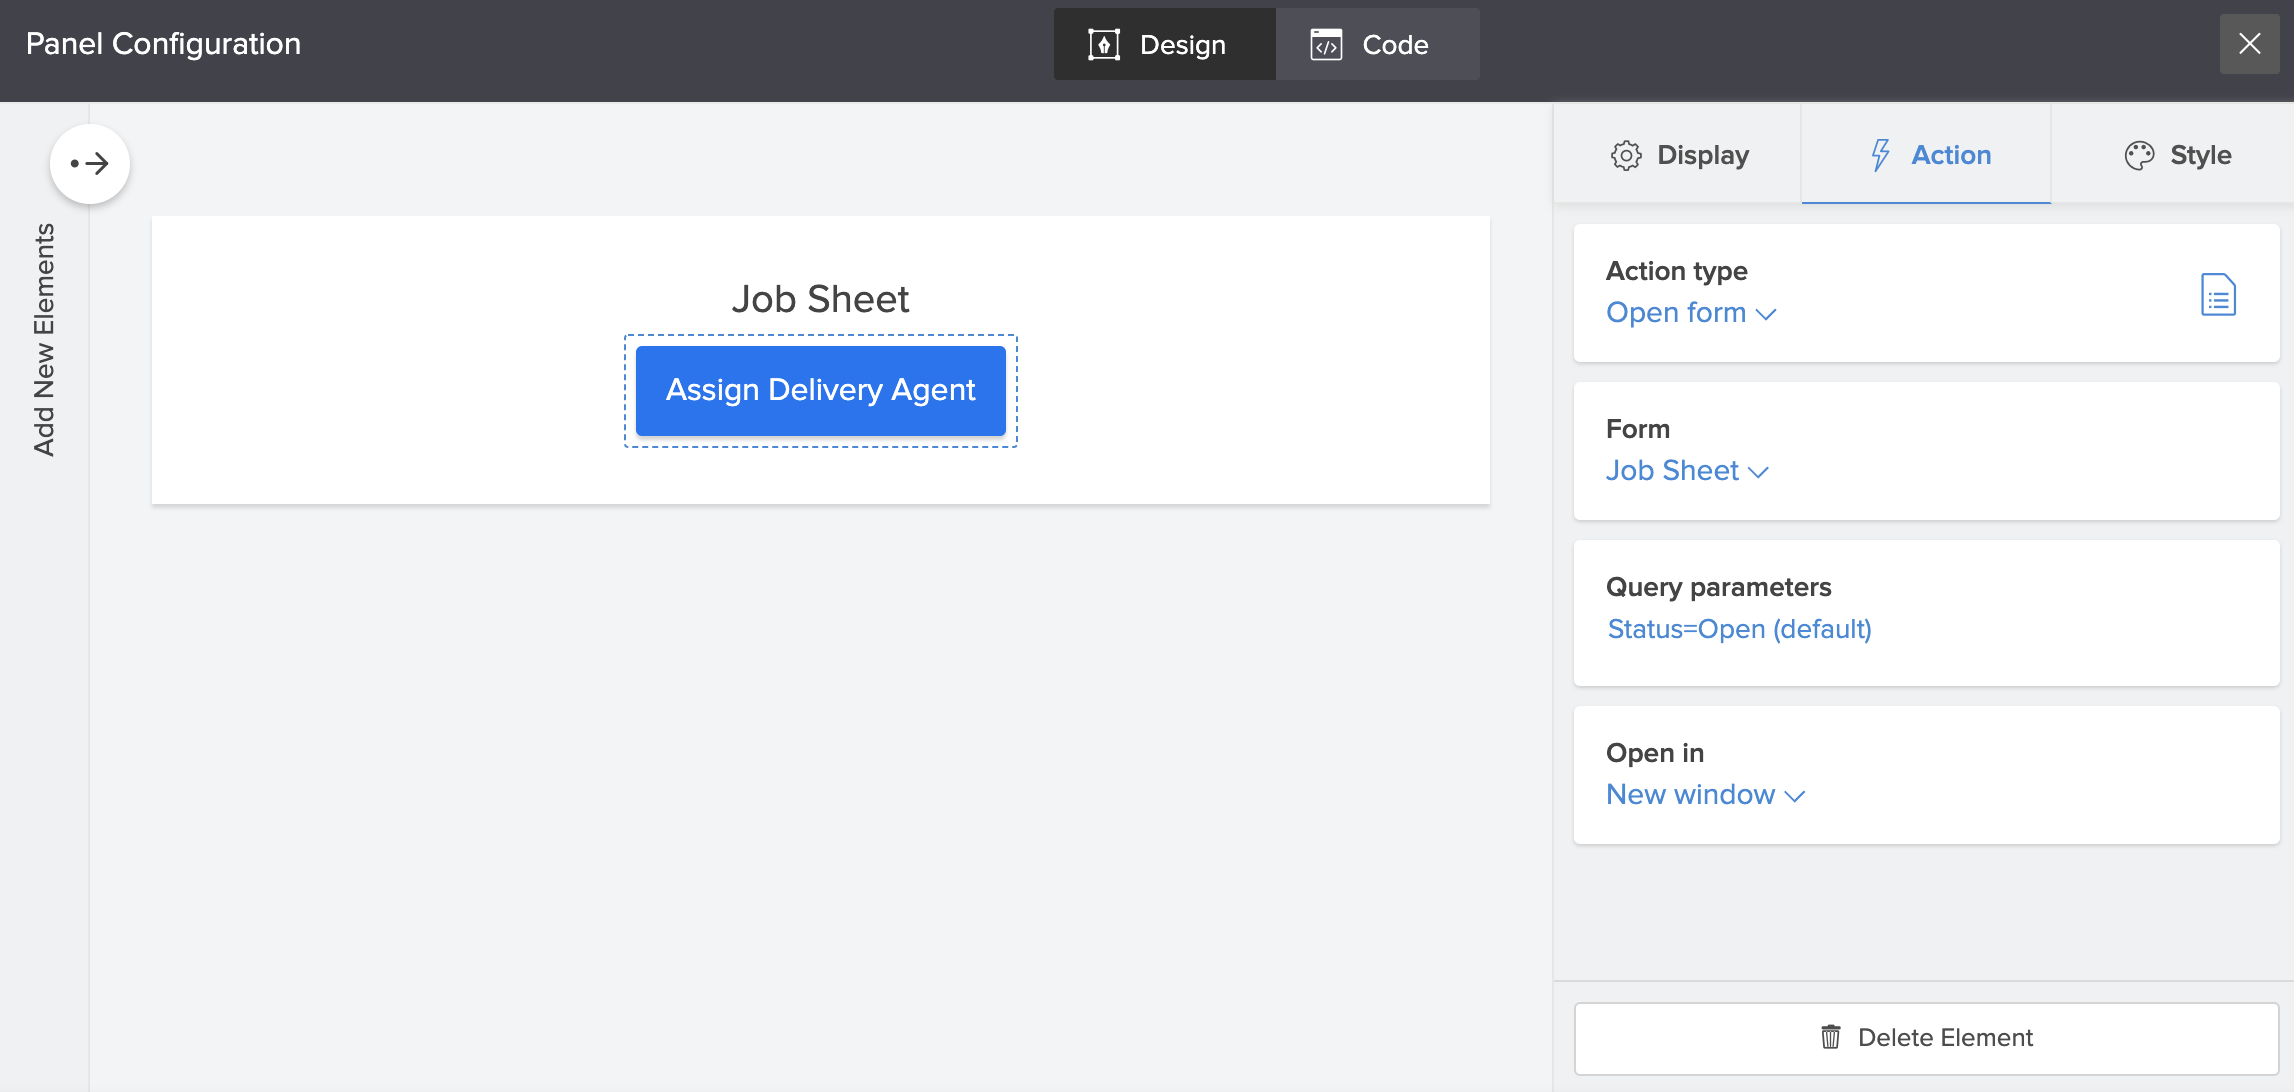
The Action tab allows you to customize the following aspects:
- Action Type : Allows you to specify to open a URL, form, report, page or execute a function when users click the embedded button. Here, the action type is to open a form.
- Form : Enables you to choose a form from any of your Creator applications.
- Query parameters : Specify a query parameter to an Open Form action to load the associated form with pre-filled values, for the fields specified in the parameter string.
-
Open in : Select the required target window in which the redirected entity (form) must be opened.
-
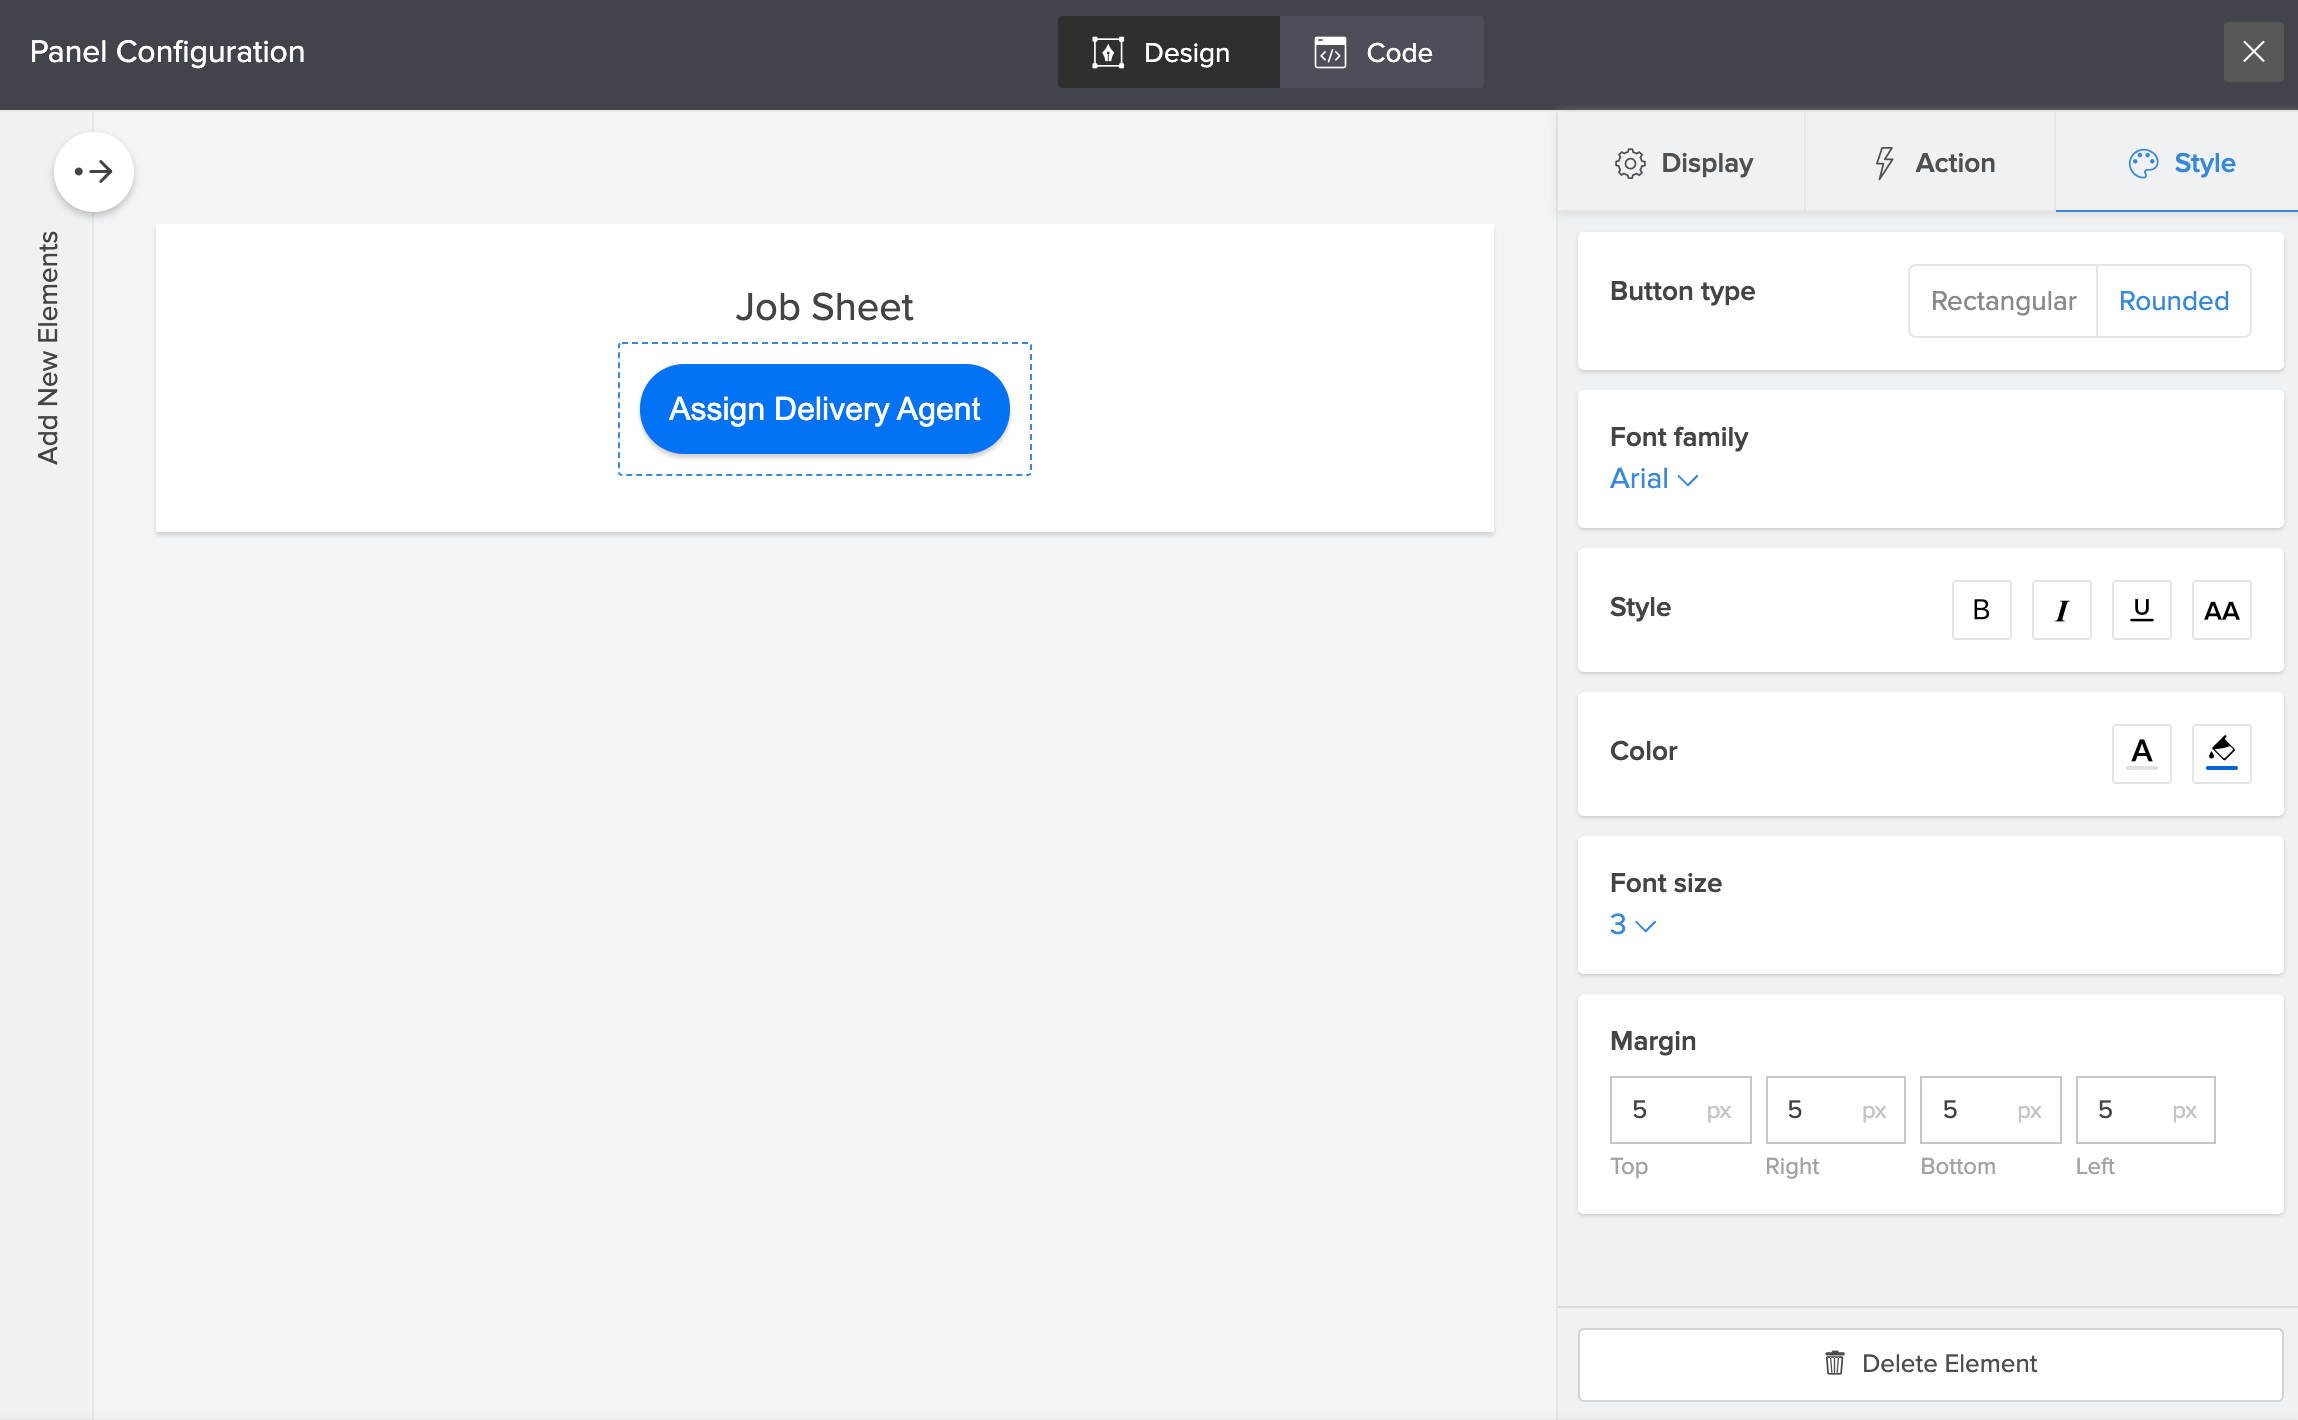
The Style tab enables you to enhance the visual aspects of the embedded form for the end users. From here, you can customize the following,
- Button type : Select the button type as Rectangular or Rounded.
- Font family : Choose the font of the button text.
- Style : Enables you to Bold, Italicize, Underline, and change the case for the button text.
- Color : Allows you to customize the font and background color.
- Font size : Specify font-size for the button text or choose one from the dropdown beside it.
-
Margin : Specify the margin attributes around the button.
-
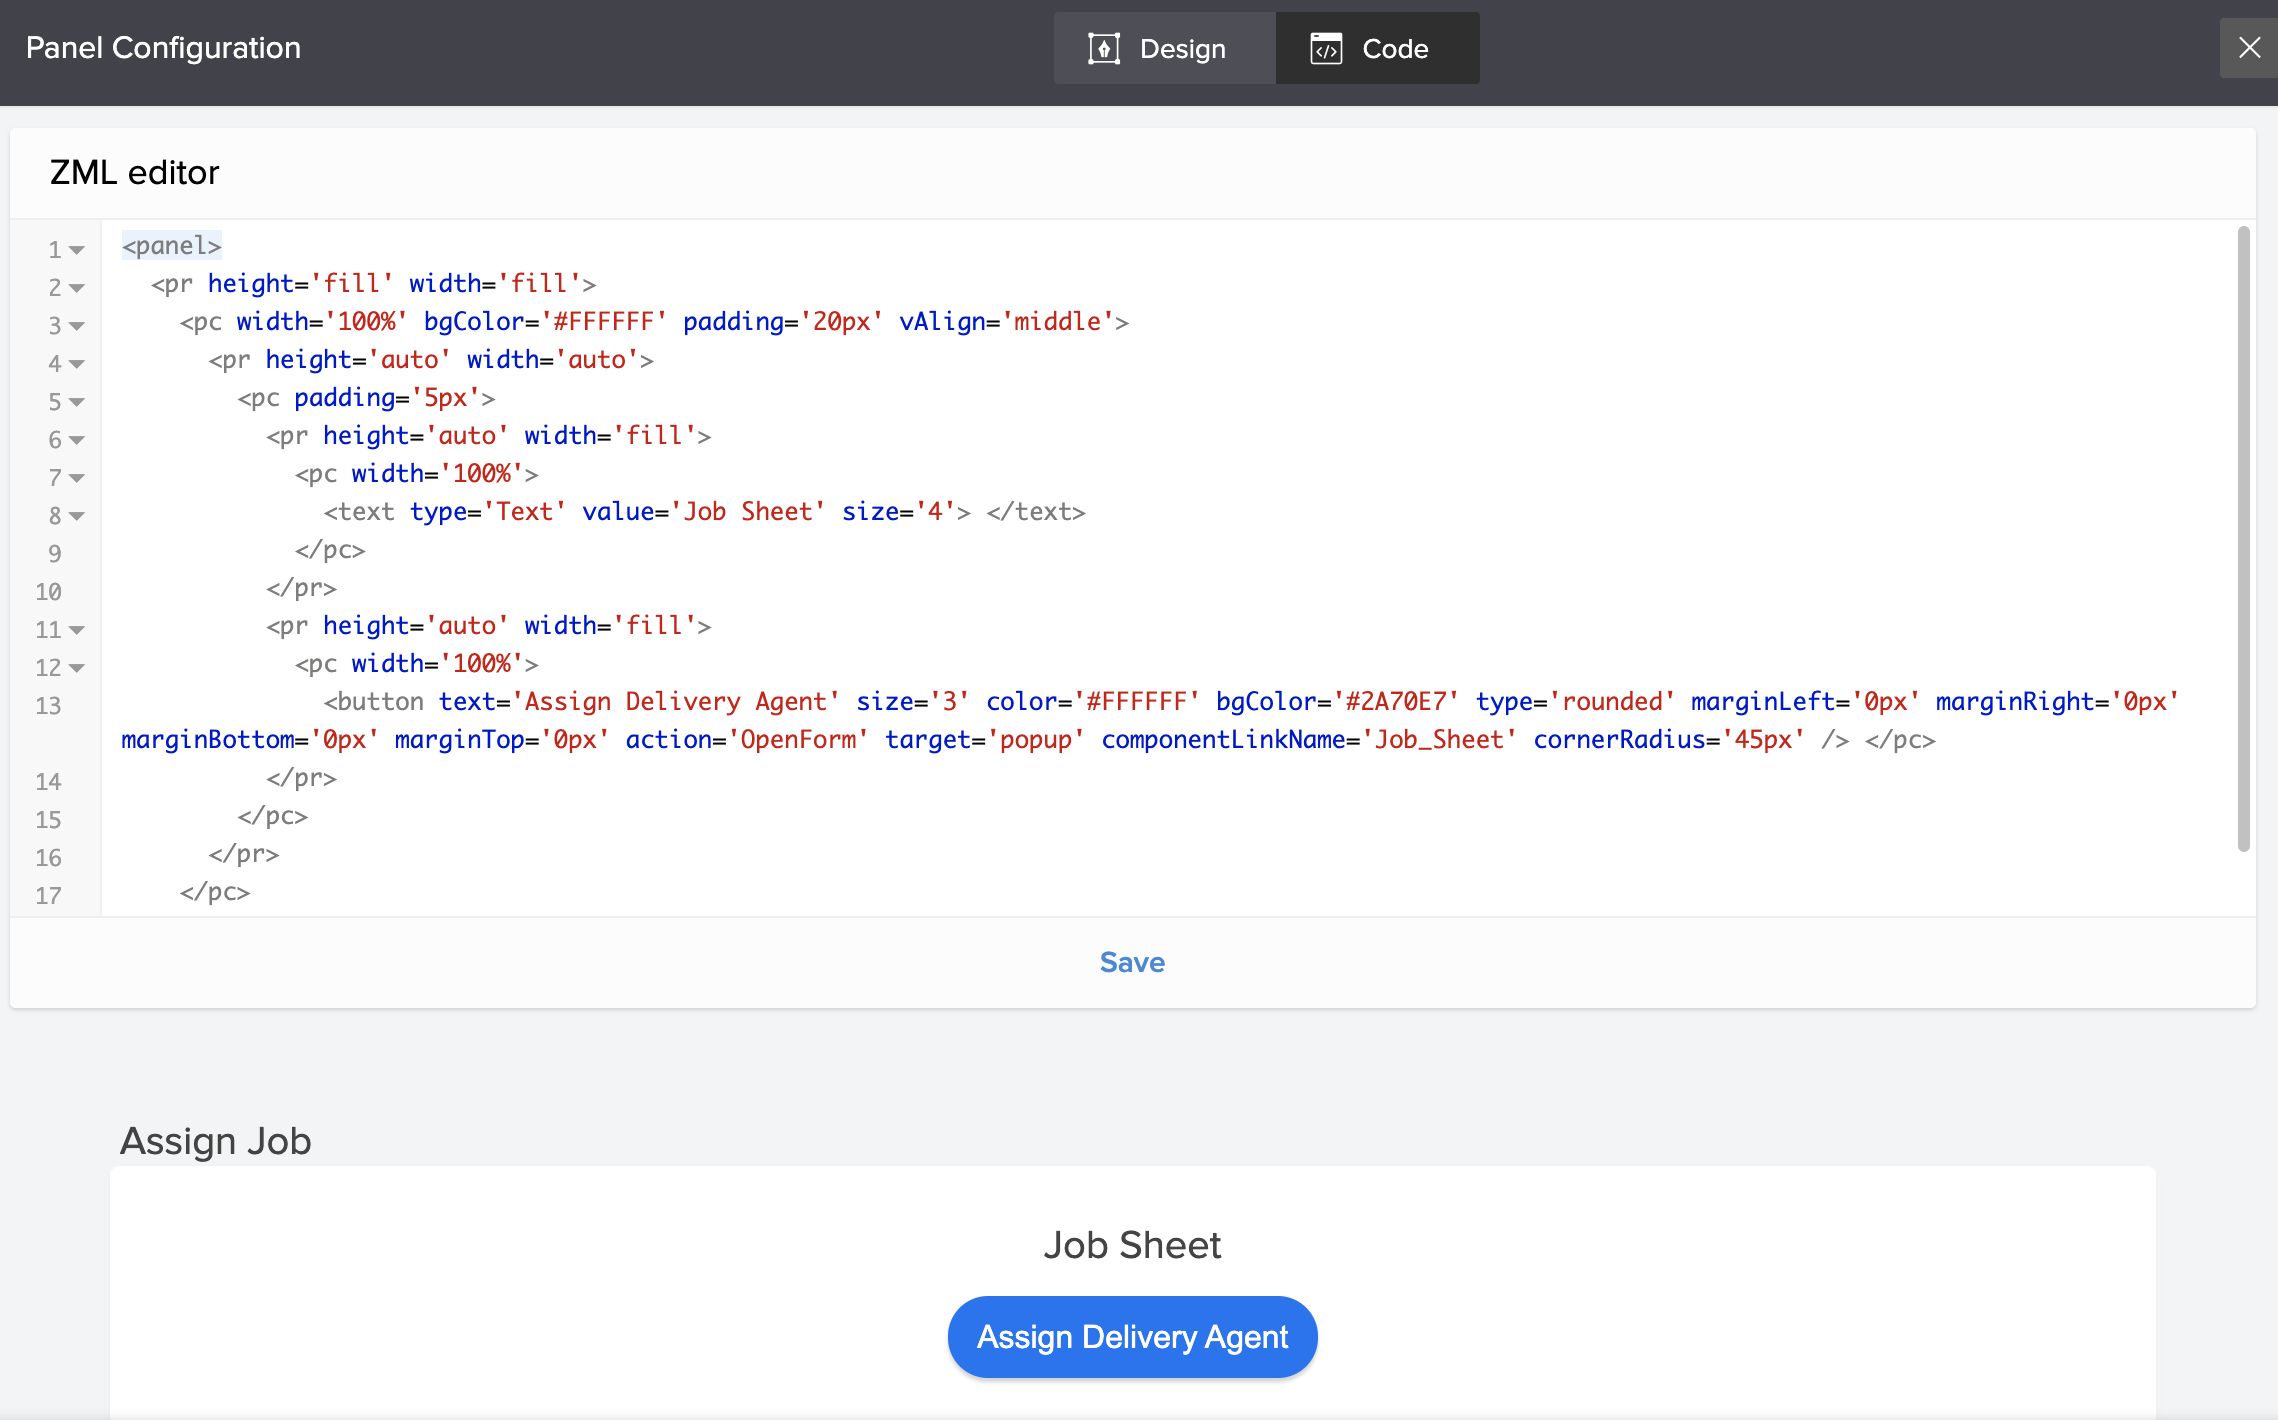
The Code tab opens the ZML editor. From here, you can edit the ZML code that is used to create pages in your Creator application.
-
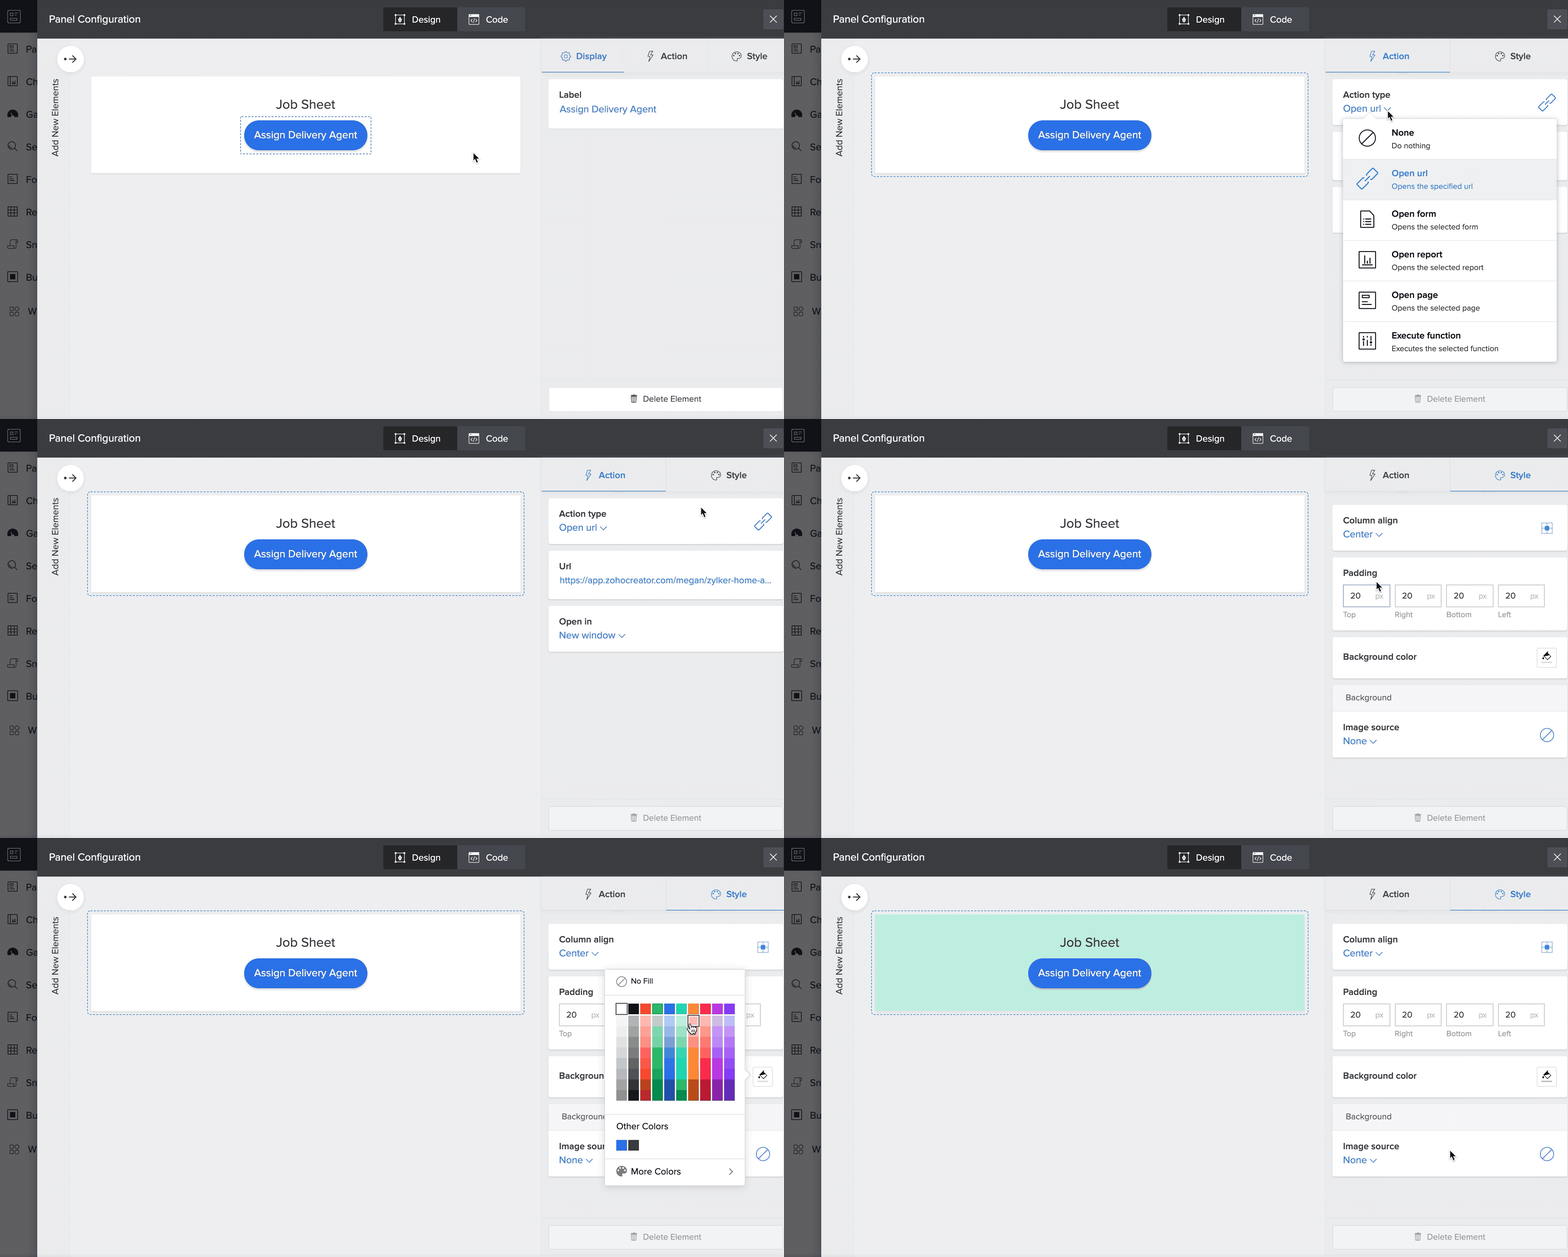
Click on the panel (area around button) to open and customize the Action and Style aspects of the button panel.
- Close the Panel Configuration pane after making changes. The changes will be saved automatically.
-
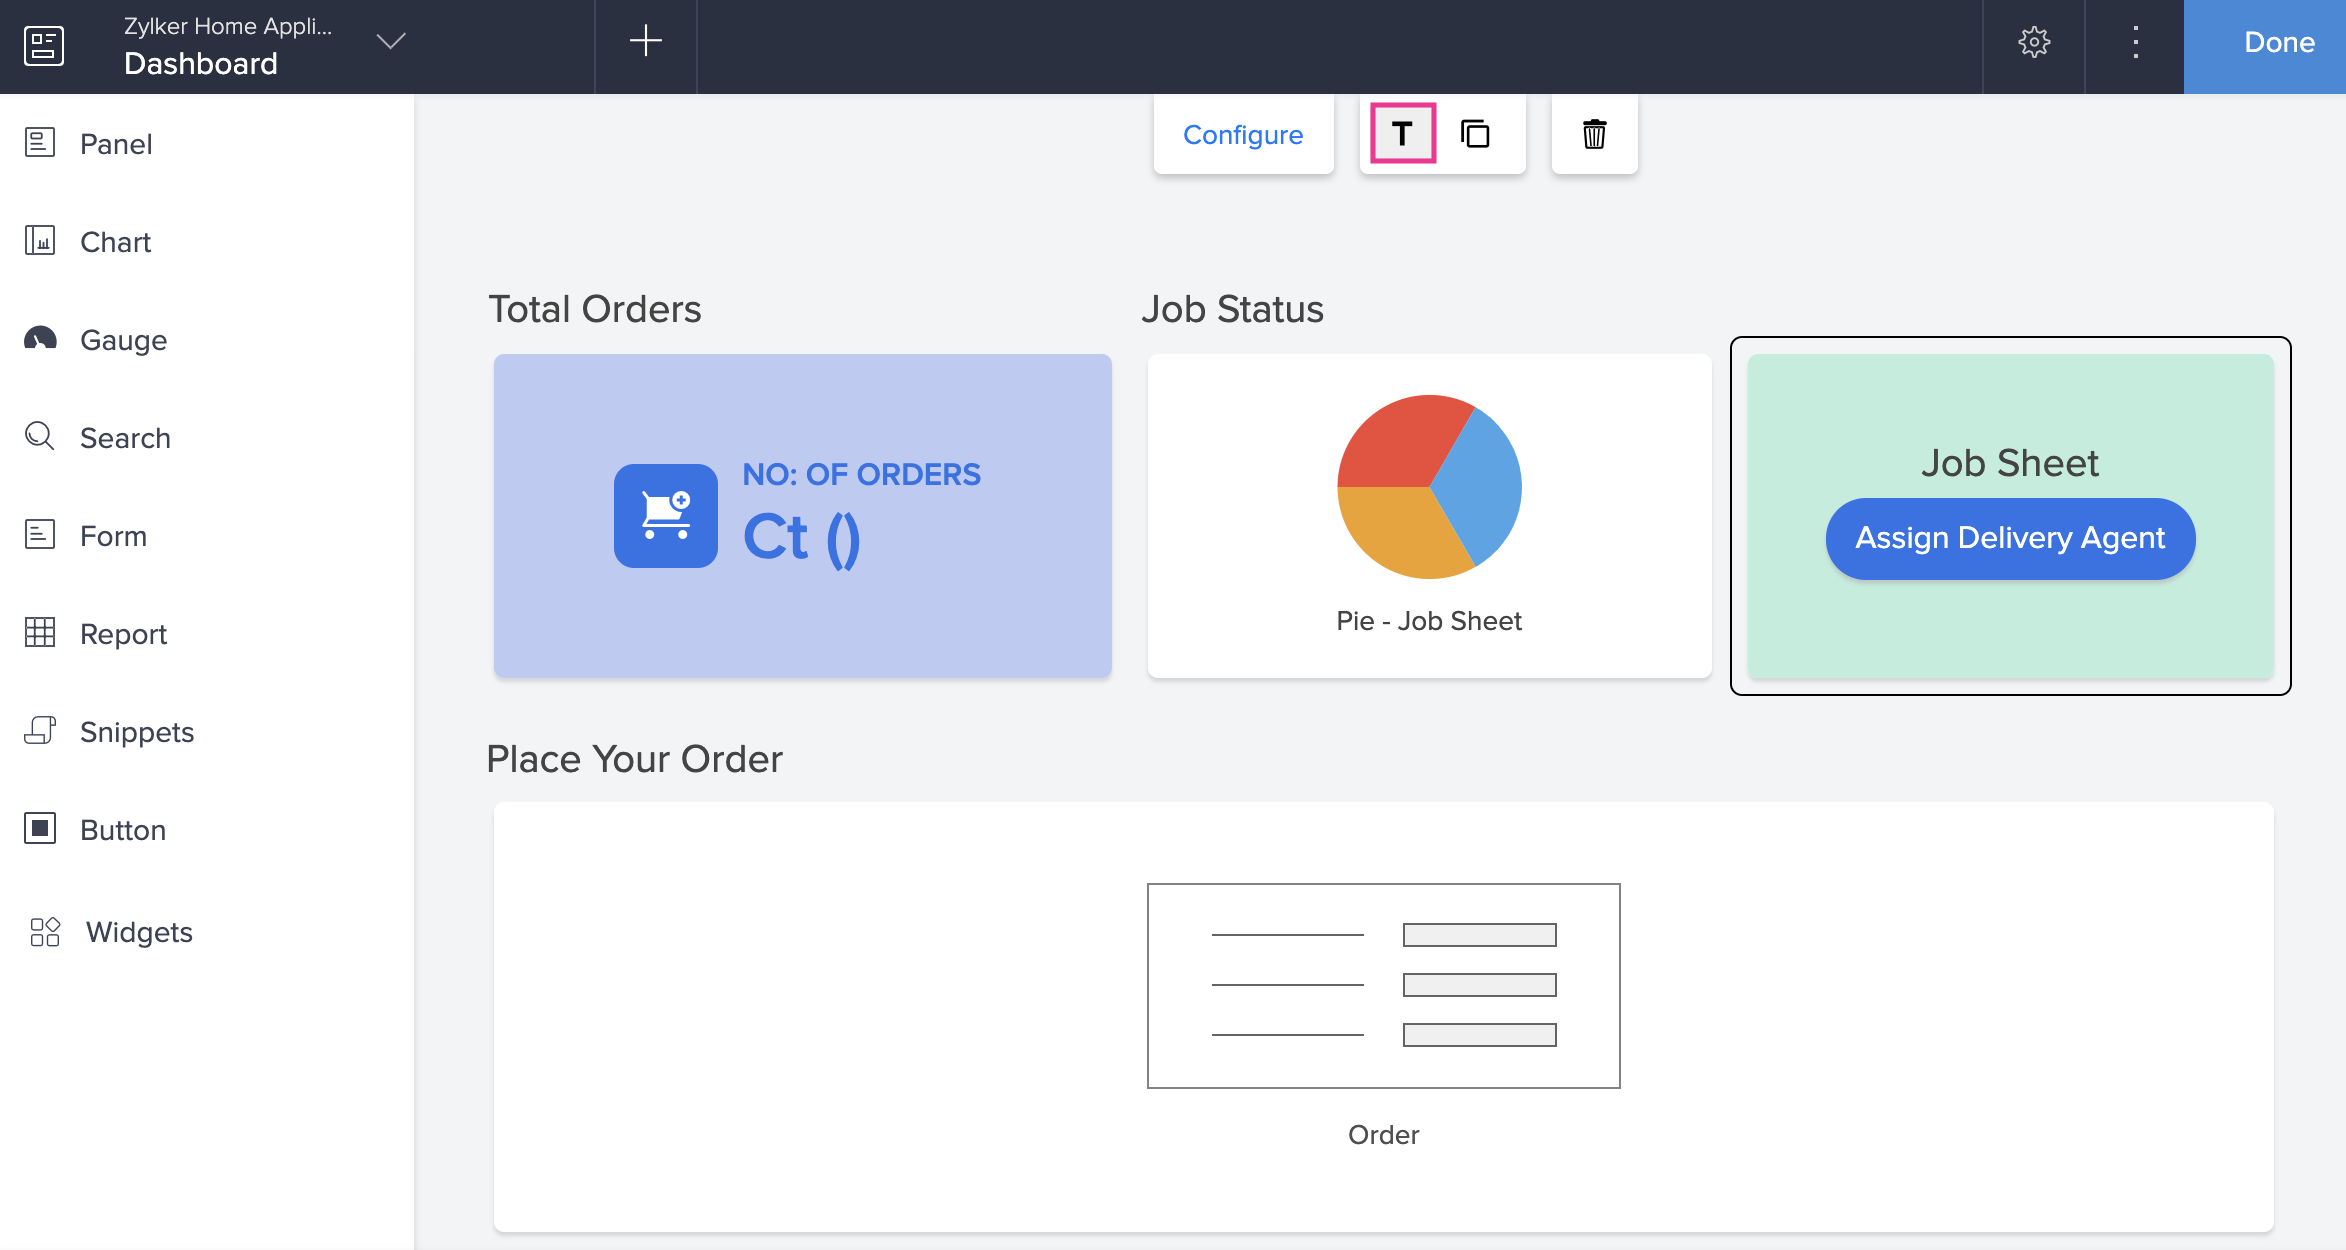
Select the form (button) and click the Title option in the page builder to set a title for your embedded form. A popup window will appear.
-
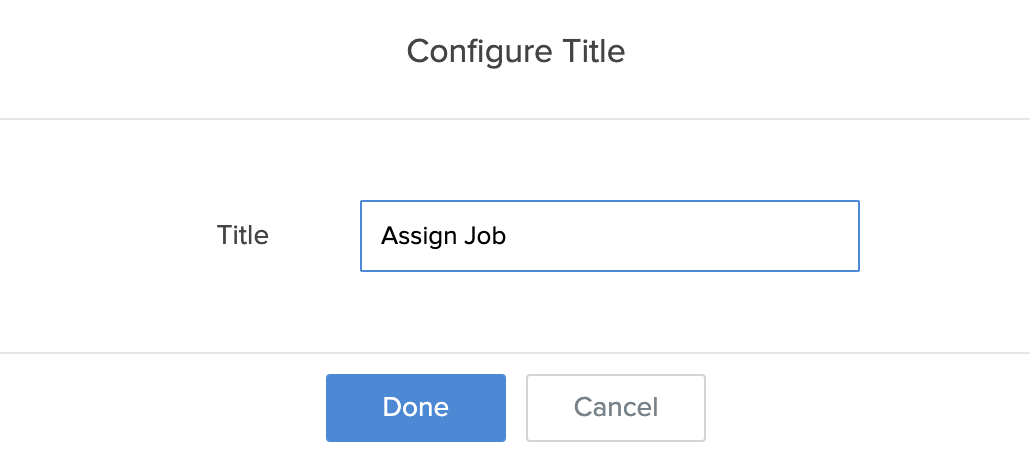
Specify the title and click Done . The title will be displayed above the embedded form. You can click again on the Title icon if you do not want to display the title.
-
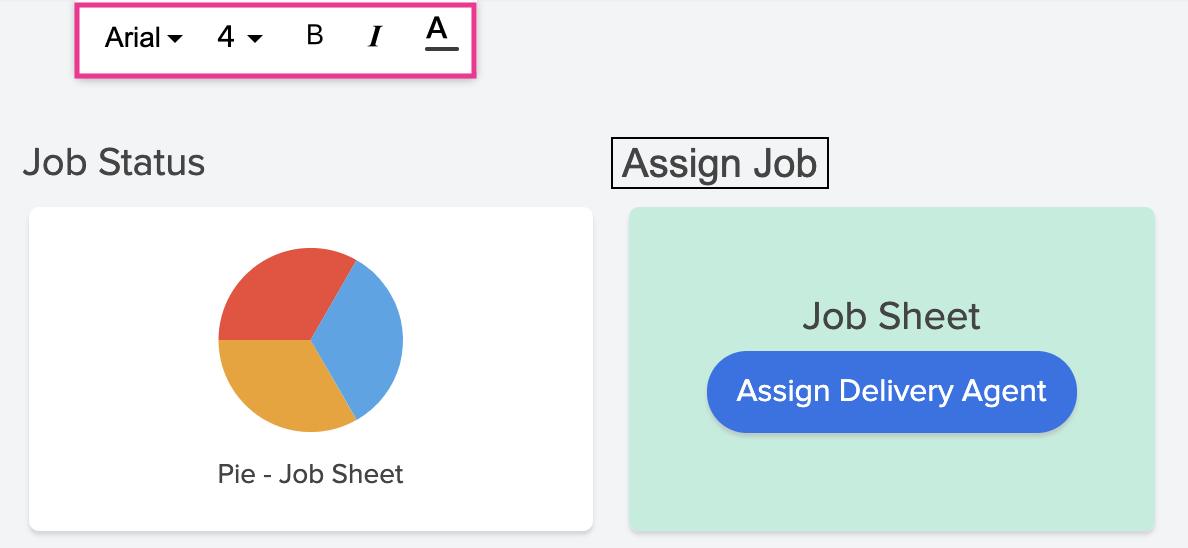
Click on the specified title to edit its font , size , and style .
-
Click the Duplicate panel icon to duplicate the panel containing the embedded form as a button.

- Click the Delete icon to delete the button.
-
Click
Done
at the top-right corner of the page builder once you have finished making changes. The changes are automatically saved.


