Configuring display for panels and panel elements
What does this page cover
Learn to configure the display properties of panels and panel elements to showcase static and dynamic data, visual images and icons, and CTA buttons on a Page component.
Availability
- Panels can be created in all plans of Creator.
- Only the super admin, admins, and developers can create and manage panels.
1. Setting up display for panels
1.1. Steps to configure display
You can configure display properties for specific panel elements and decide what they display on the panel.
1. Navigate to the page builder of the required page and click Panel on the left pane.
2. Drag and drop a panel template from the list that appears alongside onto the building space.

Note: If the panel was previously created, select it from the page builder and click Configure to open the Panel Configuration pane.
3. Click the  icon to view the available panel elements in the Panel Configuration pane.
4. Choose one of the below panel elements and drag any of their sample templates onto the building space. You will land on the Display tab by default.

Note: You can also configure the display value of the panel elements that the panel template comes with, or select them and click Delete element to remove them.
1.1.1. Text
After inserting a panel template, choose a Display data property for a text element from the available options on the Display tab. The available options are:
- Text - Static text can be included along with preconfigured page variables if required. Eg. Welcome back ${page_variable}!
- Presets - Previously saved display configurations (based on the arithmetic operations) can be utilized again or preconfigured page variables can be chosen to display dynamic data.
- Zoho Creator - Arithmetic operations such as sum, average, count, and more can be configured using the data stored in a Zoho Creator form.
- Zoho Sheets - Values from a Zoho Sheets account can be dynamically displayed.
- Zoho Projects - A count of tasks, bugs, or milestones from a Zoho Projects account can be displayed.
A. Text
i) Enter a value to be displayed in the text element. You can also include preconfigured page variables in this text using the format "${<pagevariable>}".
B. Presets
Built-in presets
Follow the below steps to utilize previously saved display configurations:
i) Select a previously saved preset display configuration from the current application under the Select Preset dropdown. The preset's details will be autofilled and can be changed as required.

Note:
- To select a panel preset from another application, click Change App in the footer of the preset dropdown. Select another application and choose a panel preset from there.
- Click the pencil icon near Preset Details to edit the preset's details if required. But the update will be reflected in all the instances where the panel has been used.
- Click the bin icon near Preset Details to remove the panel preset. But, it will be deleted from all other instances where the panel has been used.
- If the preset is based on the Minimum or Maximum operation, you can choose another field from the same application and display its value instead. By default, the actual maximum/minimum value is chosen.
For example, if you choose a panel preset that is based on the Maximum function, you can select and display the top student's name instead of having to display the maximum medal count of "10".
If you've chosen a built-in preset that is configured using a number-based field, you can configure the following properties as well:
i) Select how you want to display the field's value according to the chosen operation:
- Actual (Applicable for all operations) - The actual result of the operation. This is the default value.
- Percentage of total - Say the result of the arithmetic operation is 24 and the sum of all values recorded for that field is 240. Then the displayed percentage will be 10%.
(Applicable for Minimum, Maximum, Median) - Percentage of a number - Say the result of the arithmetic operation is 30 and the specified value under Numeric Value for the percentage is 120. Then the panel will display 25%.
(Applicable for Sum, Minimum, Maximum, Median, Average) - Fraction with the total in denominator - Say the result of the arithmetic operation is 24 and the sum of all values recorded for that field is 240. Then the displayed fraction will be 1/10.
(Applicable for Minimum, Maximum, Median)
ii) Choose a value under the Units dropdown if you want to display them next to the value in the live mode of the panel. The available options are None, K (Thousand), M (Million), and B (Billion).
iii) Select a number format for the numerical values to be displayed. If Default (Locale) is chosen, the format set on the browser in which the Creator account is logged in will be followed.
The configurations are auto-saved and will reflect in the live mode.
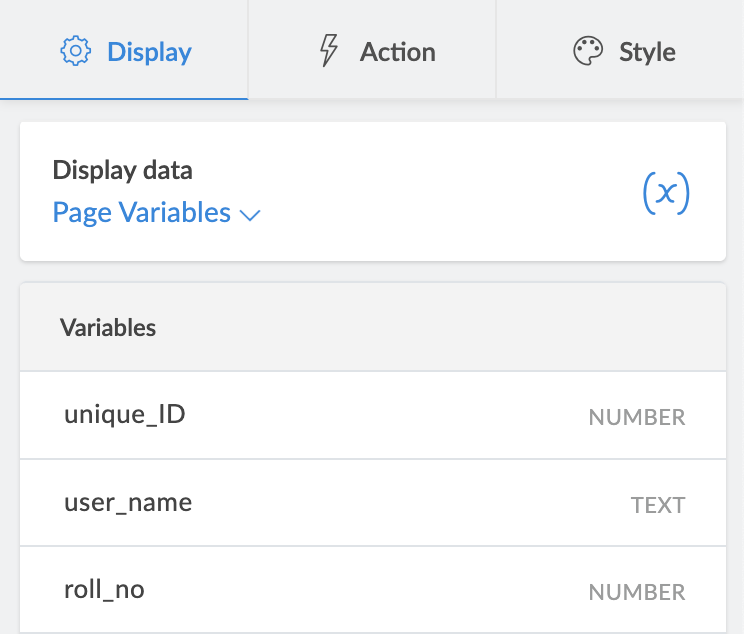
Page Variables
Follow the below steps to display dynamic data using preconfigured page variables:
i) Select a variable that has been preconfigured in the Page Variables and Script pane of the current page component. The value assigned to it through the script will be displayed on the panel's live mode.
C. Zoho Creator
Follow the below steps to perform arithmetic operations such as sum, average, count, and more using the data stored in a Zoho Creator form:
Sum, Minimum, Maximum, Median, Average operations
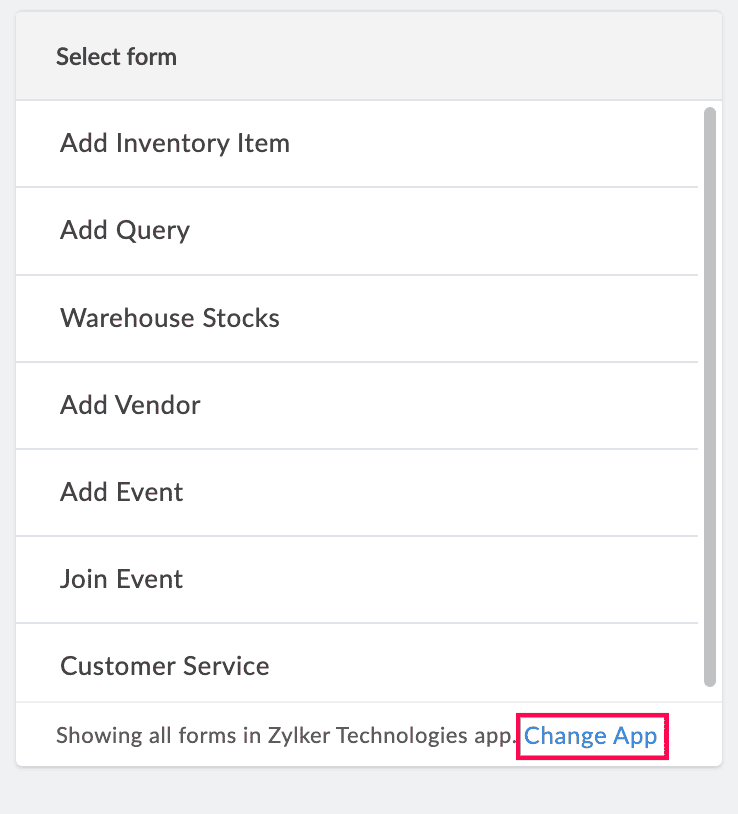
i) Select a form whose data based on which this arithmetic operation needs to be configured.

Note: The Select form dropdown lists all the forms in the application you are currently working on. To select a form from another application, click Change App in the footer of the form dropdown. Select another application and click Done to view all of its forms.
ii) Choose a numeric field from the Select field dropdown whose record data based on which the arithmetic operation will be configured.

Note: If there is only one numeric field available in that form, it will be auto-selected by default.
iii) Choose which records you want to evaluate for the arithmetic operation:
- All records - Evaluate all the records from the selected form
- Selected records - Evaluate a specific set of records that satisfy a criterion, to configure the operation.
If the display value of the panel is of the NUMBER datatype, you can configure the following properties as well:
i) Depending on the chosen operation, choose if you want to show the dynamic panel value as:
- Actual (Applicable for all operations) - The actual result of the operation. This is the default value.
- Percentage of total - Say the result of the arithmetic operation is 24 and the sum of all values recorded for that field is 240. Then the displayed percentage will be 10%.
(Applicable for Minimum, Maximum, Median) - Percentage of a number - Say the result of the arithmetic operation is 30 and the specified value under Numeric Value for the percentage is 120. Then the panel will display 25%.
(Applicable for Sum, Minimum, Maximum, Median, Average) - Fraction with the total in denominator - Say the result of the arithmetic operation is 24 and the sum of all values recorded for that field is 240. Then the displayed fraction will be 1/10.
(Applicable for Minimum, Maximum, Median)
ii) Choose a value under the Units dropdown if you want to display them next to the value in the live mode of the panel. The available options are None (default value), K (Thousand), M (Million), and B (Billion).
iii) Select the number of decimals that need to be displayed after the decimal point of the live mode value. The available options are 0, 1, 2 (default value), 3.
iv) Depending on the chosen number of decimals, select a punctuation format for the numerical values to be displayed in the live mode. If Default (Locale) is chosen, the format set on the browser in which the Creator account is logged in will be followed.
The configurations are auto-saved and will reflect in the live mode.
Count (counts field values) and Distinct Count (counts unique field values) operations
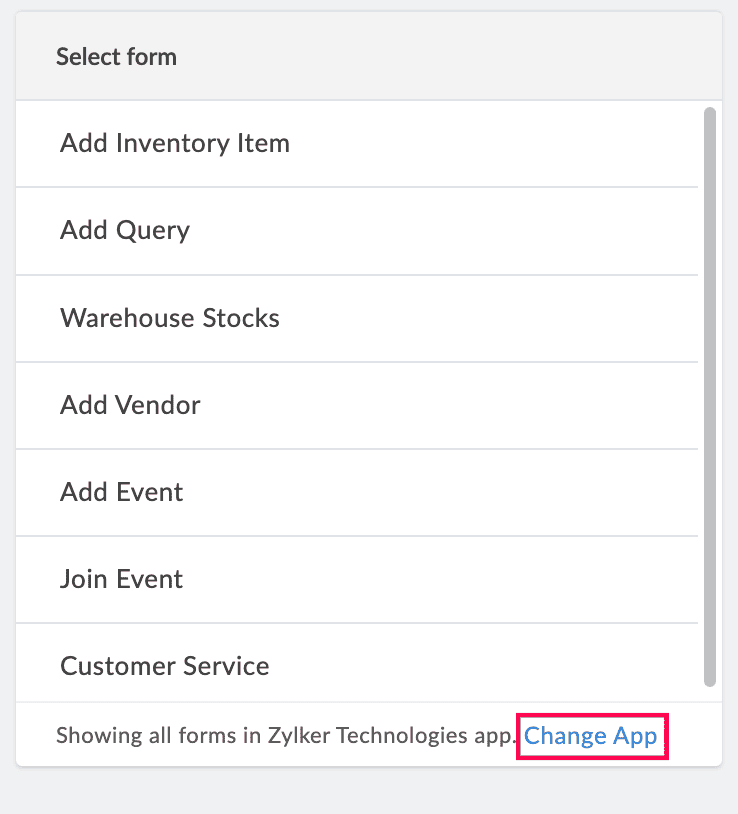
i) Select a form whose data based on which this arithmetic operation needs to be configured.

Note: The Select form dropdown lists all the forms in the application you are currently working on. To select a form from another application, click Change App in the footer of the form dropdown. Select another application and click Done to view all of its forms.
iii) Choose which records you want to evaluate for the arithmetic operation:
- All records - Evaluate all the records from the selected form
- Selected records - Evaluate a specific set of records that satisfy a criterion, to configure the operation.

Note: Once you've configured the Zoho Creator arithmetic operation until this step, you can save this configuration as a panel preset. This panel preset can be reused within your Creator account wherever required.
Click Create Preset -> name and save the preset -> access the preset by choosing the Built-in Presets Display data when required.
iv) Choose if you want to show the dynamic panel value as:
- Actual (Applicable for Count and Distinct Count) - The actual result of the operation. This is the default value.
- Percentage of a number (Applicable for Distinct Count) - Say the result of the distinct count operation is 30 and the specified value under Numeric Value for the percentage is 120. Then the panel will display 25%.
- Percentage (Applicable for Count)
- Choose a field from the Field dropdown whose values need to be evaluated to calculate the percentage.
- Enter the field values which have to be counted and tallied against the total number of records to find the percentage.
- Fraction (Applicable for Count)
- Choose a field from the Field dropdown whose values need to be evaluated to calculate the percentage.
- Enter the field values which have to be counted and tallied against the total number of records to find the fraction.
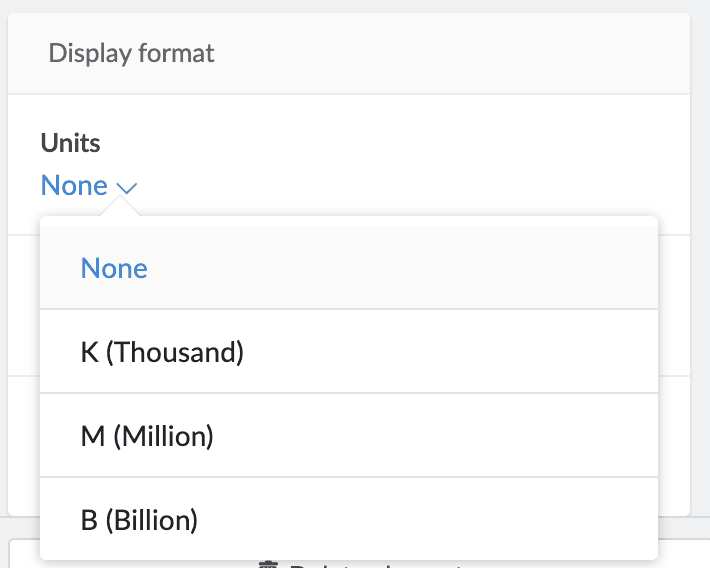
v) Choose a value under the Units dropdown to display it next to the dynamic data in the live mode of the panel. The available options are None (default value), K (Thousand), M (Million), and B (Billion).
vii) If you've chosen Distinct Count and a numeric field for it, select the number of decimals that need to be displayed after the decimal point of the live mode value. The available options are 0, 1, 2 (default value), 3.
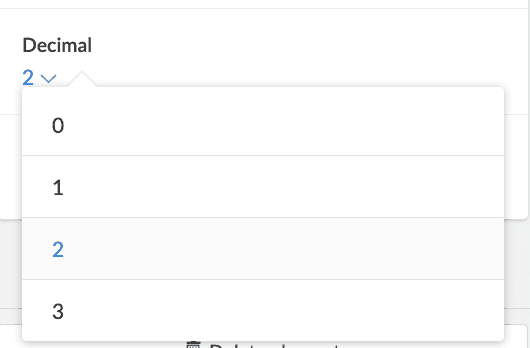
vii) Select a punctuation format for the numerical values to be displayed in the live mode. If Default (Locale) is chosen, the format set on the browser in which the Creator account is logged in will be followed.
The configurations are auto-saved and will reflect in the live mode.
D. Zoho Sheet - Cell value
Follow the below steps to dynamically display values from a Zoho Sheets account:
i) Select a preconfigured connection from the Select connection dropdown.

Note: If there are no available Zoho Sheet connections for the current application, click Add Connection to configure one before proceeding.
ii) Select a sheet from the list of spreadsheets that you have created in the Zoho Sheet account. If there are none listed, create one in that account before proceeding.

Note: If there is only one spreadsheet in the Zoho Sheet account, it will be automatically selected by default.
iii) Select a worksheet from the ones present in the chosen spreadsheet.

Note: If there is only one worksheet in the chosen spreadsheet, it will be automatically selected by default.
iv) Select from the below options to decide what values from the sheet are to be displayed in the panel:
- Cell value - The exact value that is entered in the specified cell
- Named range value
The configurations are auto-saved and will reflect in the live mode.
E. Zoho Projects
Follow the below steps to display a count of tasks, bugs, or milestones from a Zoho Projects account:
i) Select a preconfigured connection from the Select connection dropdown. The portal name that is associated with the Zoho Projects account will be auto-populated in the field below that.
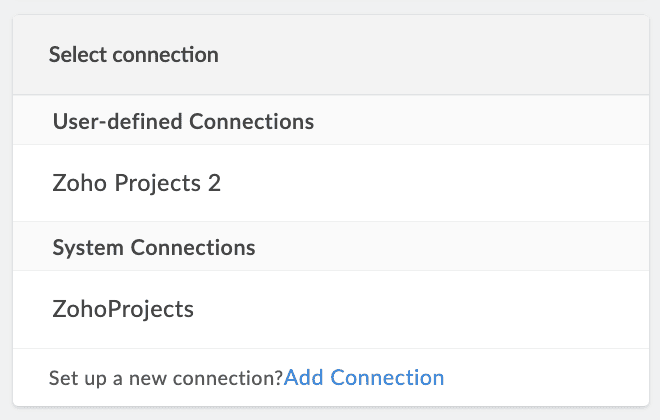

Note: If there are no available Zoho Project connections for the current application, click Add Connection to configure one before proceeding.
ii) Select a project from the list of projects that you have created in the Zoho Projects account. If there are none listed, create one in that account before proceeding.
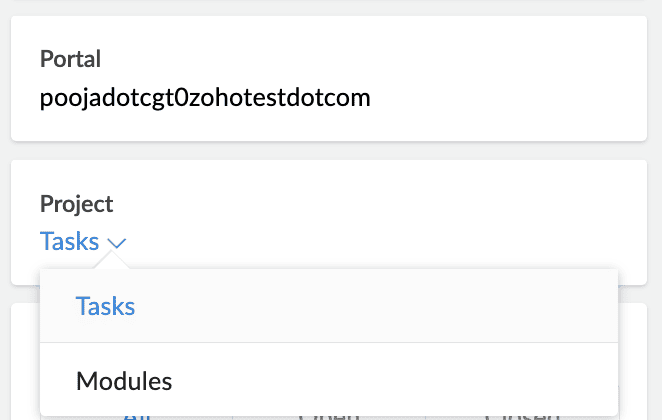

Note: If there is only one project in the Zoho Projects account, it will be automatically selected by default.
iii) Choose how you want to count all the tasks present inside the project or just the Open, or Closed ones.

Note: By default, All is selected.
1.1.2. Image
Choose from where you want to retrieve an image to display on the panel in the Image source dropdown:
- My library - Images from local storage can be uploaded.
- Web link - Images can be inserted using a public URL.
- Profile picture - Logged-in user's profile picture is fetched from their Zoho Account.
- Icons - Builtin icons supported by Zoho Creator can be included.
A. My library
i) Click + Add image to upload an image from your local storage. It will be automatically updated as the image on the panel.

Note:
- The image size should be within 2 MB.
- Once an image has been uploaded, to upload another one, click the + icon.
- The image area must be within 9M square pixels.
- To switch between images, choose the required uploaded image.
- Hover over an uploaded image and click the cross icon to delete it.
B. Web link
i) Enter the public URL address of the target image to display it on the panel.
C. Profile picture
Once the Profile picture option is chosen, the logged-in user's image is automatically displayed on the panel in the live mode.

Note: In the following cases, a placeholder image ( ) will be displayed instead of their profile picture:
- When public users or portal users access the page
- When the page is exported as a PDF
D. Icons
i) Select Outline or Solid to display only a layout or a filled icon respectively.
ii) Choose an icon from the provided library.
The requirements are automatically saved once chosen.
The requirements are automatically saved once chosen.
1.1.3. Button
Once a button has been dragged and dropped inside the panel:
i) Enter a label to be displayed on the button. You can also include preconfigured page variables in this label using the format "${<pagevariable>}".
The configurations are automatically saved and will reflect in the live mode of the application.
2. Related topics
- Understanding panels
- Adding and managing panel elements
- Configuring action for panels and panel elements
- Configuring style for panels and panel elements
What's next
Previous
What's next
Learn to configure an action that will get executed when a panel or panel element is clicked on in the live mode of the application.
Previous
Learn to add and manage panels to display actual and aggregate key metrics in your dashboards.
Zoho CRM Training Programs
Learn how to use the best tools for sales force automation and better customer engagement from Zoho's implementation specialists.
Zoho DataPrep Personalized Demo
If you'd like a personalized walk-through of our data preparation tool, please request a demo and we'll be happy to show you how to get the best out of Zoho DataPrep.
Centralize Knowledge. Transform Learning.
All-in-one knowledge management and training platform for your employees and customers.
New to Zoho Writer?
You are currently viewing the help pages of Qntrl’s earlier version. Click here to view our latest version—Qntrl 3.0's help articles.
Zoho Sheet Resources
Zoho Forms Resources
New to Zoho Sign?
Zoho Sign Resources
New to Zoho TeamInbox?
Zoho TeamInbox Resources
New to Zoho ZeptoMail?
New to Zoho Workerly?
New to Zoho Recruit?
New to Zoho CRM?
New to Zoho Projects?
New to Zoho Sprints?
New to Zoho Assist?
New to Bigin?
Related Articles
Understanding panels
In a nutshell Panels are visual containers embedded in pages and are used to display key information, such as dynamic metrics, statuses, and KPIs in a structured and visually appealing format. They help users grasp critical insights from the ...Configuring style for panels and panel elements
What does this page cover Learn to configure the style properties of your panels to make them look visually appealing and aligned with the branding theme of your application. Availability Panels can be created in all plans of Creator. Only the super ...Understanding buttons
In a nutshell Buttons are interactive CTA elements that trigger custom on-click actions like opening URLs, submitting forms, running workflows, or navigating pages. You can enable automation through functions, enhance user experience, and streamline ...Adding and managing panels
What does this page cover Learn to add and manage panels to display actual and aggregate key metrics in your dashboards. Availability Panels can be created in all plans of Creator. Only the super admin, admins, and developers can create and manage ...Configuring action for panels and panel elements
What does this page cover Learn to configure an action that will get executed when a panel or panel element is clicked on in the live mode of the application. The types of actions include opening an URL, form, report, page, and executing a function. ...
New to Zoho LandingPage?
Zoho LandingPage Resources


