Embedding a report in a page
What does this page cover
Learn to embed Zoho Creator reports in a page component to allow users to view and manage record data from a centralized dashboard.
Availability
- Reports can be embedded in pages in all plans of Creator.
- Only the super admin, admins, and developers can embed and manage reports in pages.
1. Setting up embedded reports in Zoho Creator
1.1. Steps to embed a report in a page
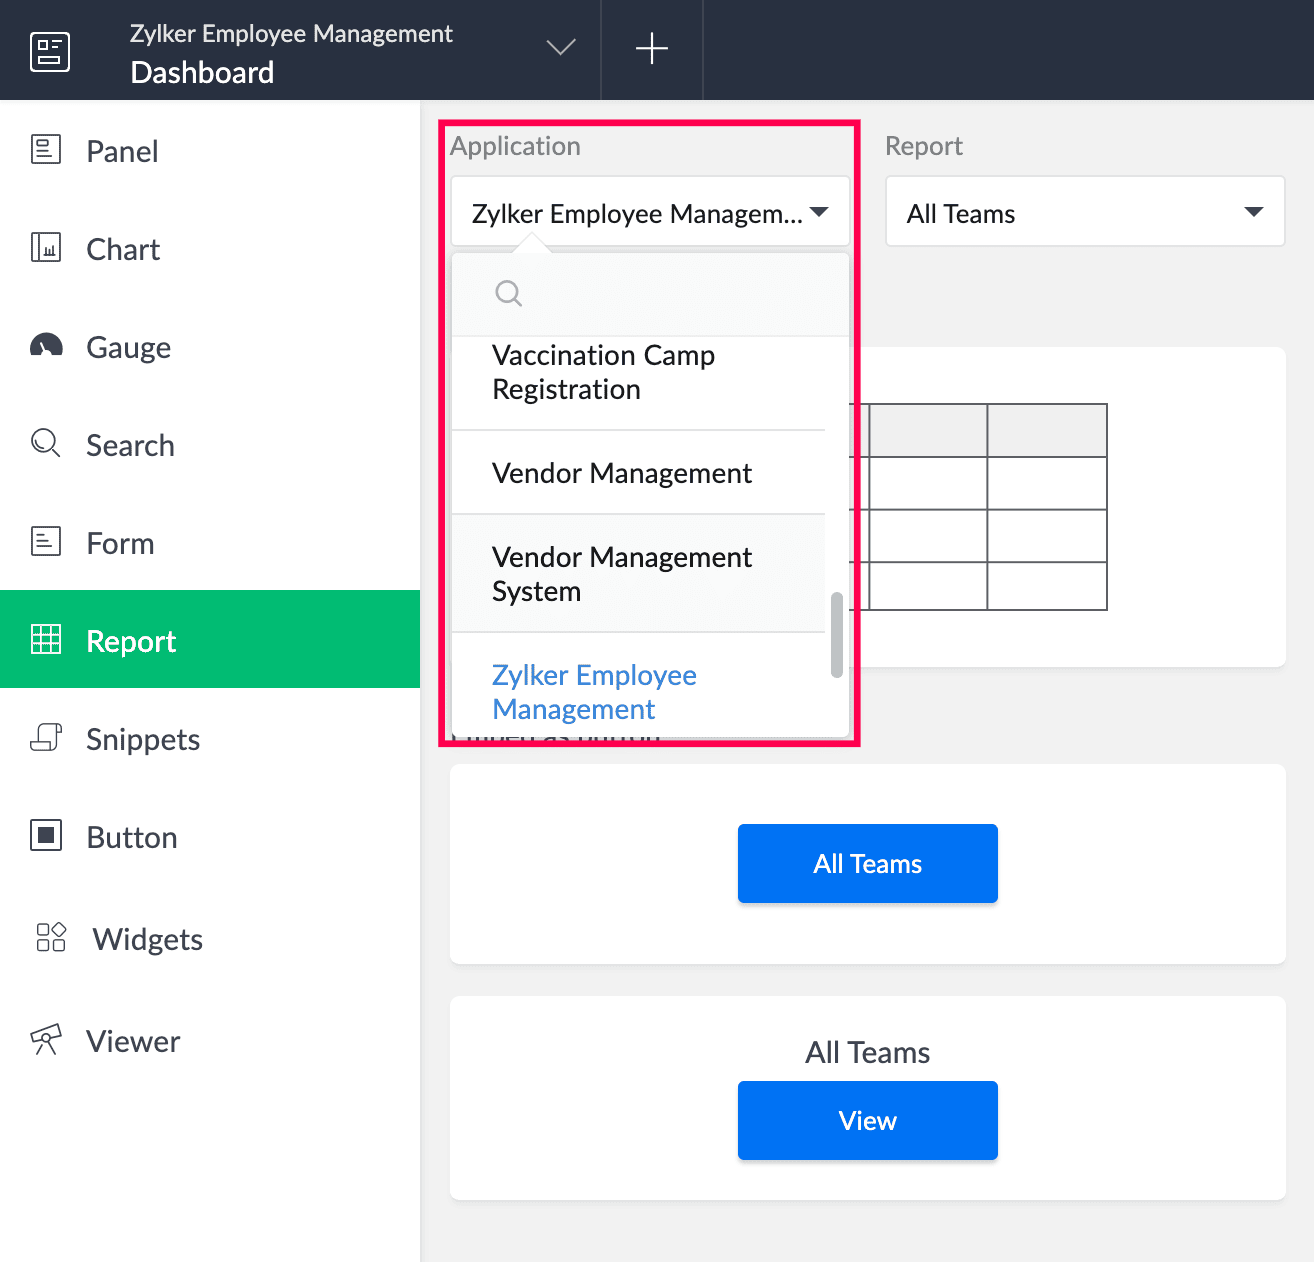
2. Click the Application dropdown and choose the application from which a report needs to be embedded. By default, the current application that contains the page will be selected.
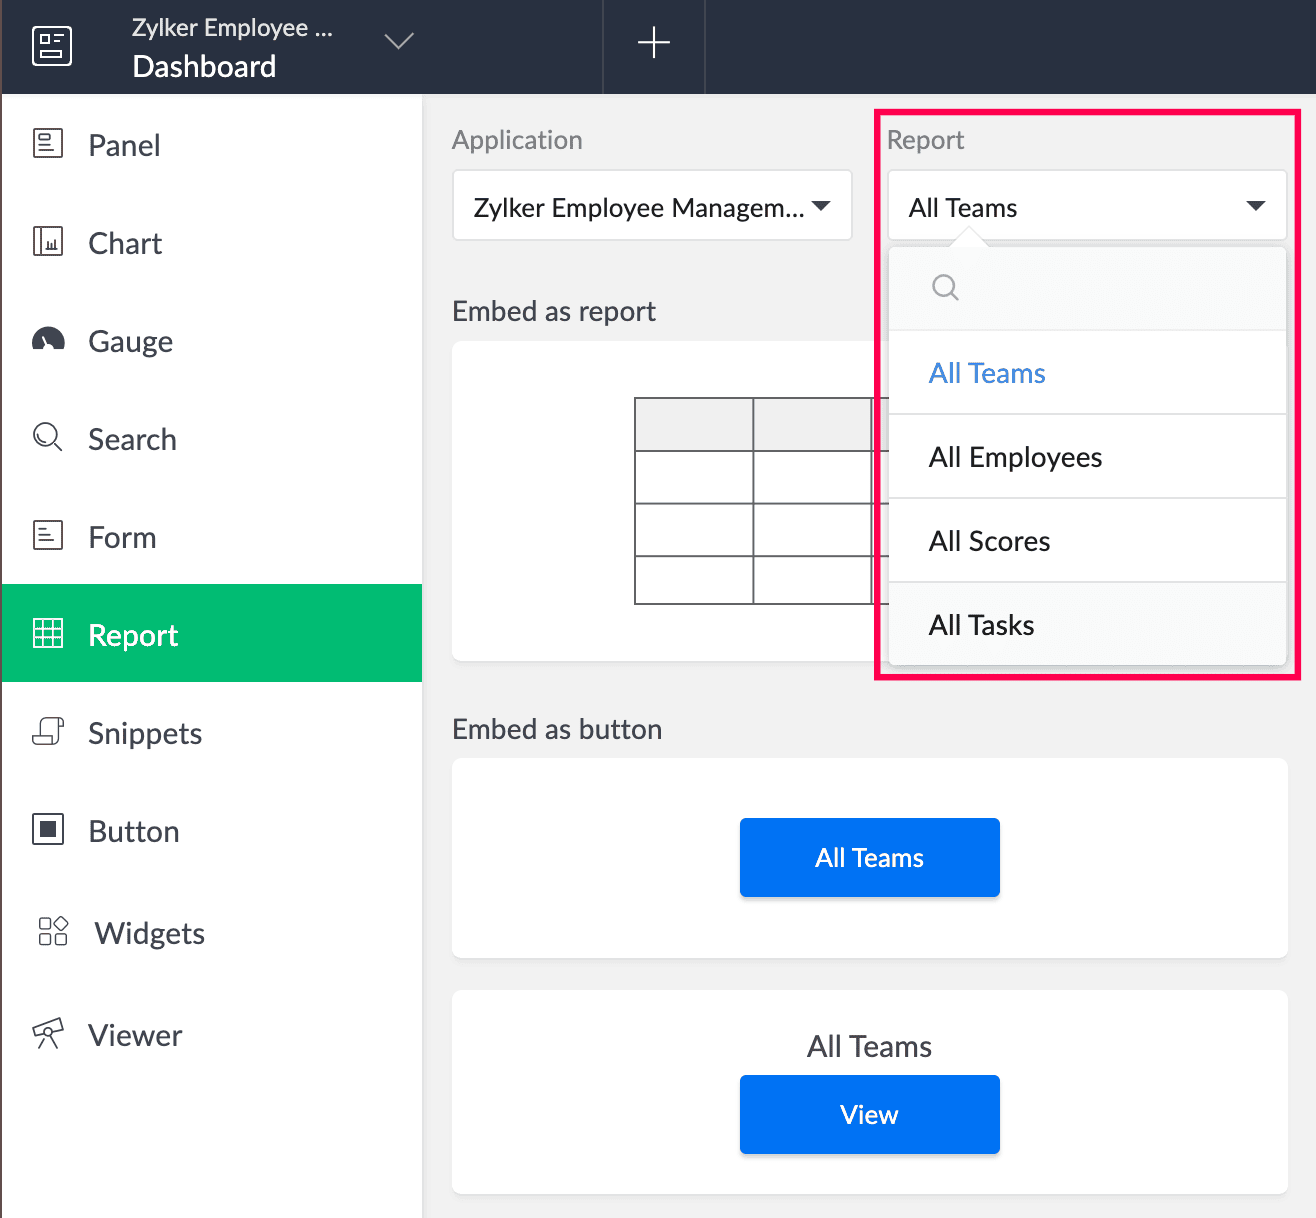
3. Choose the target report that needs to be embedded on the page.
4. Drag and drop a report embed layout from the list that appears onto the building space. The two layouts available to embed are:
- Report as it is - The whole report is embedded on the page.
Click Done in the Report Embed Configuration pane that slides open to embed the report on the page. If required, you can enable further properties and set report filters specific to the embedded report, before clicking Done.
- CTA button that opens up the report - A button is embedded on the page which directs the user to the report when clicked on.
When the Embed as button layout is dropped onto the page builder, the Panel Configuration pane opens as this setup works as a panel containing a button element. The report navigation's configuration can be viewed by navigating to the Action tab.

Note: Once the report is embedded as a button, click the X icon ton the top-right corner to automatically save the configuration and navigate back to the page builder.
Additionally, you can configure display, action, and style properties for the button, and text or image panel elements can be added to give more context. To learn more about the button as a panel element, check out the Understanding panels page.
2. Additional configurations
2.1. Configure properties for the embedded report
Once a report is embedded in its original view (and not as a button) within the page builder, you can enable/disable live mode actions such as bulk actions, advanced search, and more. This can be done from the Report Embed Configuration pane that appears when you add or edit the element.
1. Toggle the relevant buttons to enable or disable the following properties for the embedded report:
- Actions - The individual actions of adding, editing, deleting, and duplicating records.
- Search & Filters
- Search - The advanced search query builder to filter records from the report.
- Retain Changes - This feature allows the end-user to save the filtered records to the current report, create a new report with them, or create a custom filter using the query builder's input.
- Print & Export - The options of printing the records in a list or summary layout, and exporting them in the formats XLSX, PDF, HTML, XML, JSON, CSV, TSV.
- Records count - Once enabled, the number of showing records against the total count is displayed at the bottom of the embedded report element.
- Bulk Actions - The bulk actions of editing, deleting, and duplicating records.
Note: By default, all properties except Retain Changes is enabled.
2. Choose to enable Allow public access for the embedded report. This ensures that the embedded report is visible when the current page is published, given that the report is published as well.
By default, Allow public access will be disabled, which can be switched if required.
Note: If the report is embedded as a button instead, the Open URL action must be configured, referencing the published component’s permalink.
3. Click Done to save the configuration.
Further, you can configure a filter for the embedded report element which will list only matching records in the live mode of the page. The steps to set a filter are mentioned in the next section.
2.2. Show filtered records on the embedded report
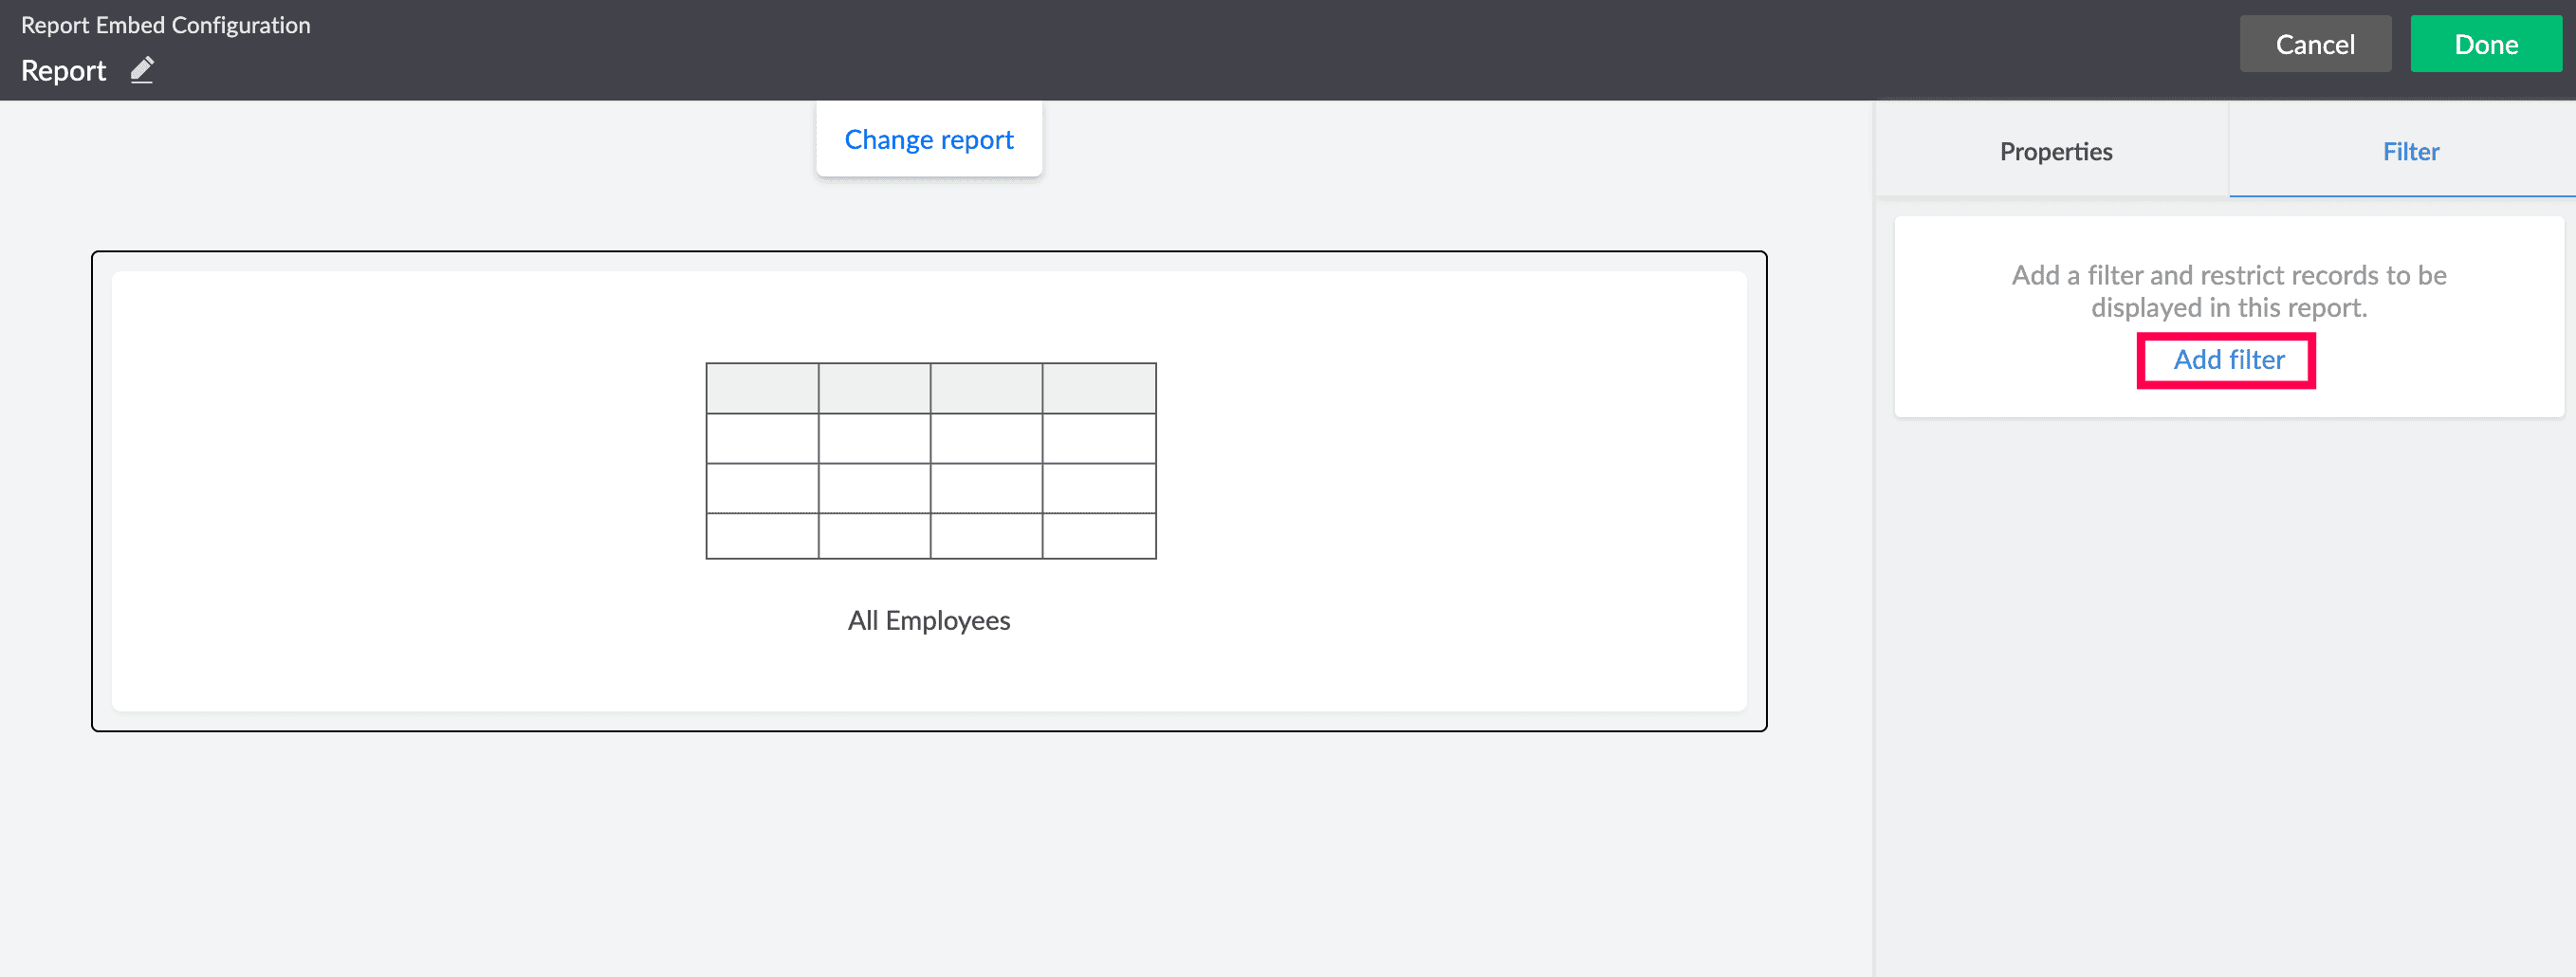
Once a report is embedded in its original view (and not as a button) on a page, follow the below steps in the Report Embed Configuration pane that appears. Alternately, you can also double-click on the embedded report to open its configuration.
1. Navigate to the Filter tab in the Report Embed Configuration pane and click Add Filter.
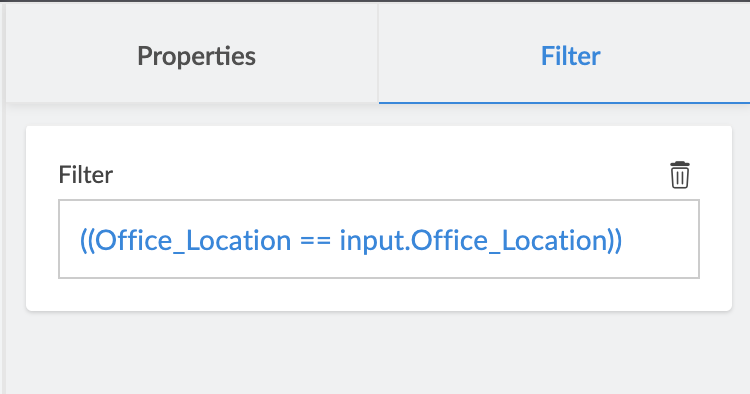
2. Set a condition based on which the records from the embedded report will be filtered.
- Choose a field whose field values will be evaluated from the Select Field dropdown.
- Choose an appropriate operator from the Select Operator dropdown.
- Supply values, choose system variables, or insert page variables using the format "input.<page variable>".
Add more criteria if required and click Done.
Note: Once the condition is saved, click on the Filter box to edit it again.
3. Click Done to save the configuration of the embedded report and land in the page builder.
3. Managing embedded reports
Once an embedded report element has been added to a dashboard, you can perform basic actions to manage them.
From within the Report Embed Configuration pane:
Apart from embedding a report, you can perform the following actions:
- Add Element Name - Click the pencil (
) icon in the top right corner of the Report Embed Configuration pane to edit the element's name. This name can be used to locate the specific element in the page builder among others.
- Click Change report to choose another report from any application in the current Creator account to be embedded instead. The configurations are reset when the report is switched.
Once you're done configuring the embedded report, click the ( ) icon to navigate back to the page builder. You can further manage the embedded report from there, such as relocating its position on the page, giving it a live mode title, and more.
From the edit mode of a page:
Click on an embedded report to perform the actions mentioned below.
- Adding a title - Click the T icon to give a title for your embedded report element. This will appear as a heading above the embedded report in the live mode of the application. Once inserted, click the embedded report's title to format it using the below options:
- Font family - Choose from six different font types in the dropdown.
- Font size - Choose a size from 12 - 40 px in the dropdown. The default value is 20px.
- Bold - Click the B icon to embolden the title.
- Font style - Click the I icon to italicize the title.
- Font color - Click the A icon to choose a matching color for the title.
- Update title - Double click the inserted title to update it.
- Remove title - Select the embedded report element and click the T icon again to remove it.
- Adjusting height of the embedded report - Click the
icon to set the height of the embedded element to Auto or a Custom length.
Note:
- By default, the height of the embedded element is set to Auto.
- If Custom is chosen, the default value mentioned is 150 px which can be altered according to the requirement.
- Deleting embedded report - Click the bin icon to remove the report element from the page.
- Relocating an embedded report - Drag and drop an embedded report elsewhere on the page builder to relocate it.
Edit or configure an existing embedded report element:
If you want to edit a previously inserted embedded report element, select the required one in the page builder and click Configure. Alternately, you can double click on the embedded report to open its configuration.
4. Related topics
What's next
Previous
What's next
Previous
Learn about the embedded reports feature that allows you to insert a report within a page for centralized access.