Creating and managing services | Help - Zoho CRM

Managing services with Zoho CRM

Services such as consultation, home cleaning, repair and maintenance, pickup and delivery, and salon or spa appointments are time-bound activities that take place every day, often with different customers. Customers often re-request the same service every so often, for example, a customer may revisit the salon to take advantage of a new offer you have or you may receive a home cleaning request from a client every holiday season.

Given the likelihood of repeat customers, maintaining a common database to store customer's details like their addresses, past services, membership details, appointments, and the services they select will be a great help to employees so they are fully informed when a customer calls for a repeat appointment.

Preparing a service catalog will help employees handle service-related enquiries. They can quickly browse through the list of available and unavailable services, and refer to notes and other details of the customer when answering their queries.

The Services module in Zoho CRM allows companies to create a database of the services they provide along with the following important details: 
  1. Service details: The service name, service owner, and duration available for a particular service, for example landscaping service can be for 3–6 hours.
  2. Service members: The members (CRM users) who will provide the service or be at the appointment.
  3. Service location: The location where a service will be carried out, for example, a salon service may be available at either the customer's residence or the salon, whereas landscaping will only be performed at the client's residence. Based on the service location that is configured, the appointment is scheduled at either the business address or client's address.
  4. Service availability: The days and times when the service is available. You can also select a date range for services that are available for a limited period. The service time and day must be within the business hours set in your CRM account.
  5. Price: The cost and tax details of a service.
  6. Job sheet: Define whether the employee must submit a job sheet on completion of the service.

Enabling and accessing the service module

Services module is available for Professional or higher editions of Zoho CRM.
Only CRM administrators can enable the service module. They can select the profiles who will have access to the Service module and only those users will be able to view, create, edit, and delete services.

In addition to view, create, edit, and delete, three other granular permissions are also available for the Appointments module:

  • Mark as complete

  • Reschedule

  • Cancel

Administrators can assign these to specific profiles so only the right people can perform these actions.


The service module can be enabled from:
  1. CRM Setup
  2. Modules and Fields
    To enable the Services module from Modules and Fields:
    1. Log in to your CRM account with Administrative privileges.
    2. Go to Setup > Customization > Modules and Fields.
    3. Go to the Service module and enable it.
    Note: Ensure that the Services module is added to the teamspace(s) as needed. To learn more, see: Adding modules to a teamspace.

    To give other profiles access to the Services module:
    1. Go to the Services module and click the More icon and then select Module Permission.
    2. Select the profiles.
    3. Click Save.

    Customizing the Services layout

    The Services module is a system-defined module provided in CRM. The module consists of the following sections:
    1. Service image
    2. Service information
    3. Availability information
    4. Price information
    5. Job sheet information
    6. Description information
    Each section has a set of pre-defined fields, and the properties of some fields can be modified if required.
    You can customize the layout by adding or removing fields as required. For example, a car wash service can add fields like car model or a picklist for washing type with the values water wash and water-less wash.

    To customize the service layout:
    1. Navigate to Setup > Customization > Modules and Fields.
    2. Select the Services module and then select Standard Layout.
    3. Add the required fields from the New Fields section.
    4. Click Edit properties to add values to the fields.
    5. Drag and drop fields to other sections.
    6. Click Save

    Creating services

    Services can be added by users who have permission to access the Services module and the CRM Administrator.
    Note: Ensure that the module is enabled before you create services.
    To create services:
    1. Go to the Services module from the menu and click + Service.
    2. Enter the Service Information, Service Availability Information, Price Information, Job Sheet Information, and Service Description.
    3. Click Save.
    Notes.
    The Service name field has Do not duplicate values enabled by default. This prevents accidental duplicate service entries. For example, if two stylists at Zylker Salon both try to add a Deep Conditioning Treatment service, the second entry is blocked.

    You can create a log for services that were previously offered by your company, but are no longer available. For example, if your company has discontinued its lawn care service, but you still want to enter it in your service catalog, you can create the service and set availability information.


    Setting service availability


    Scheduled status for future availability

    When you set a service's availability to begin on a future date, the Service shows a Scheduled status. This clearly indicates the service is coming up soon, without it appearing as active today or cluttering you current service menu.

    For example, Zylker Salon sets up its Bridal Makeup Package to go live in March. It shows as Scheduled, keeping the current service menu clean and accurate.


    Three custom time slots

    Under Custom Time availability, you can define up to three time slots per service.

    For example, Zylker Salon offers haircuts at 9-11 am, 2-4 pm, and 6-8 pm. All three slots can be set up for the same service in one place.


    Marking services temporarily unavailable

    Some wellness treatments, installations, and or maintenance services may be temporarily unavailable due to various reasons. To prevent employees from booking appointments during that period, you can mark the service as unavailable for a particular period.
    A service can be marked unavailable:
    1. For the rest of the day
    2. Until tomorrow
    3. Until the end of the week
    4. Until the end of month
    5. Until a specific date
    To mark a service temporarily unavailable:
    1. Go to the Services module and select the service.
    2. Click the More icon and select Mark as Temporarily Unavailable.

    3. Select the time from the dropdown list.
    4. Click Save.

    Marking services as not in use

    You can mark a service as not in use so your employees know it is not available. These services will not be listed when appointments are booked.You can mark the service as available again from the record detail page whenever you want. 


    To mark a service as not in use:
    1. Go to the Services module and select the service.
    2. Click the More icon and select Mark as Not in Use.

    3. Click Yes, Mark as not in use in the pop-up.

      NotesNote. You can schedule a service to become not-in-use from a future date, instead of it taking effect immediately. When you do this, you're also prompted to handle any pending appointments - either cancel them or leave them as is - before the de-activation takes effect.
      For instance - Zylker Salon's Summer Keratin Package ends in August. You can mark it as not-in-use from September 1 - August bookings stay intact, and the service disappears from the menu on schedule.

    Cloning services

    You can clone a service and modify it instead of creating a new one from scratch.
    To clone services:
    1. Go to the Services module and select the service you want to clone.
    2. In the record detail page, click the More icon and select Clone.
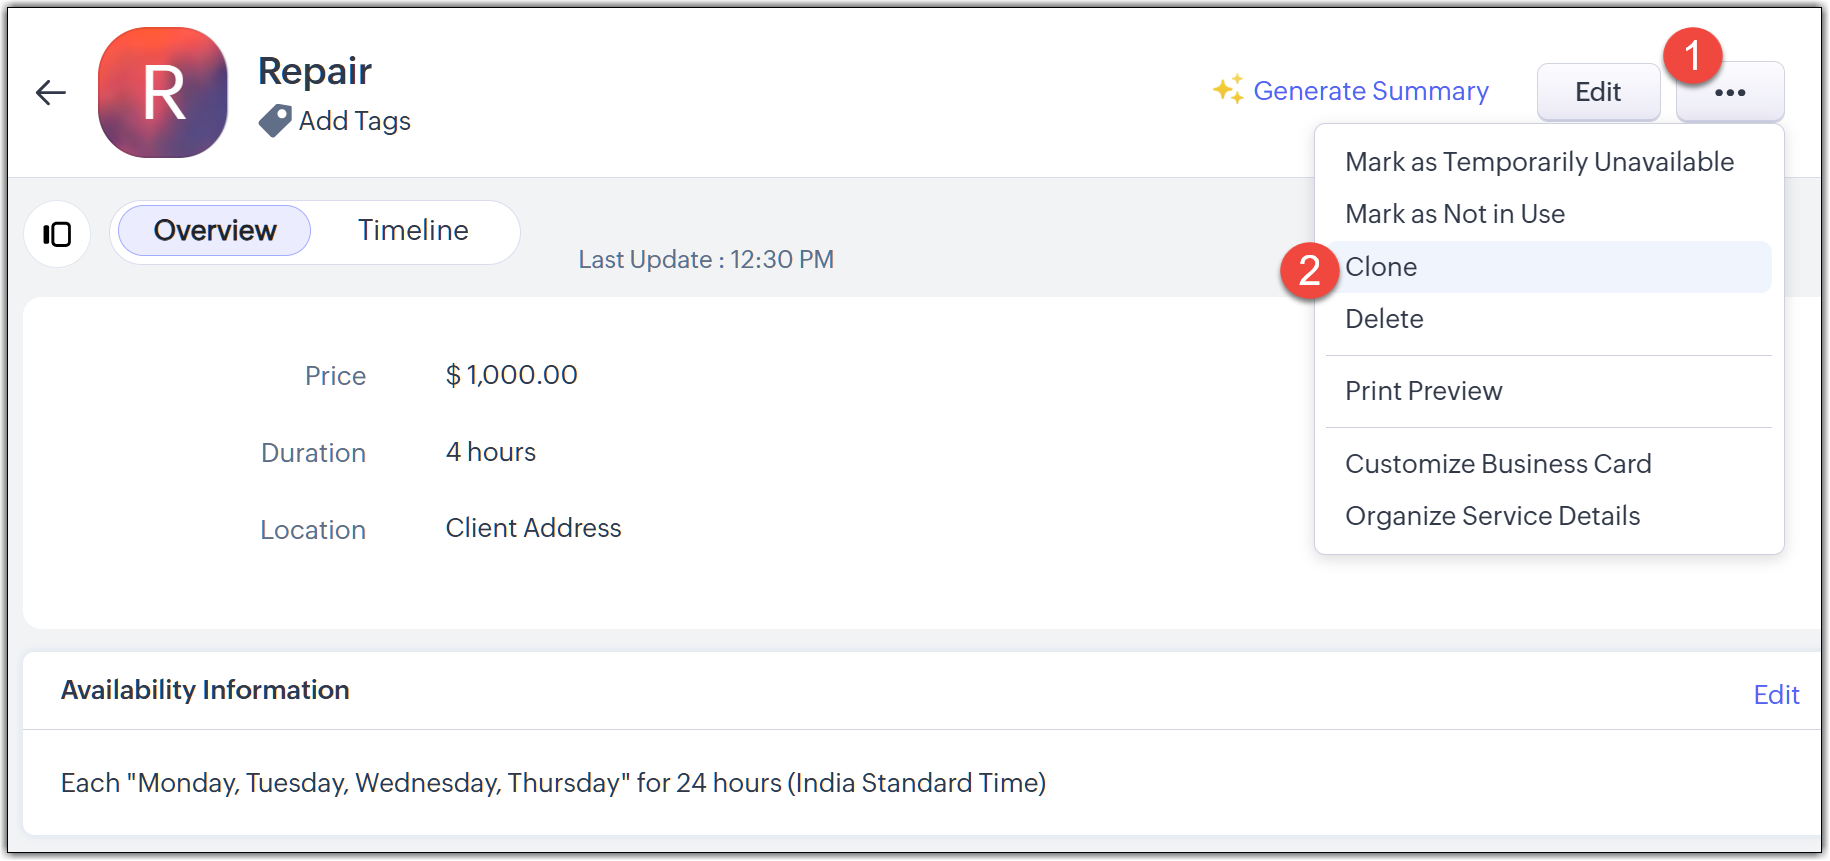
    3. In the Clone service page, modify the information and click Save.

    Managing and filling job sheets

    Job sheets are useful for some services like technical inspection, repair and installation, or pickup and delivery. The agents can document all information required to preserve their lien rights and get paid. Customized job sheets can guide them to record necessary information before marking their appointments as completed.

    Enabling job sheets

    CRM admins and users who have access to the Services module can enable job sheets.
    To enable or disable job sheets:
    1. Navigate to Setup > Customization > Modules and Fields.
    2. Select the Services module and click the Preferences tab.
    3. Select Yes, I want to use job sheet in my organization.
    4. Click No, I don't want to use job sheet in my organization, if you don't want to use job sheets.
    5. Click Save
      Once the job sheet is enabled, it will be associated with all services.

    Customizing the job sheet

    Zoho CRM provides a system-defined job sheet with predefined fields. You can customize it by including fields such as model number, serial number, warranty expiry date, spare parts used, or any other fields that make sense for your business.
    Note: The Job Sheet tab will only be displayed in the Services module if this feature has been enabled.
    To customize the job sheet:
    1. Go to Setup > Customization > Modules and Fields > Services.
    2. Click the Job Sheet Layout tab.
    3. Click More and then Edit Layout in the Standard layout.
    4. Add the required fields from the New Fields section.
    5. Click Save.

    Service members' access to the appointment's linked record

    You can automatically share the Appointment For record (for example, a contact's profile) with the service members assigned to that appointment - as read-only.

    This share gives assigned members visibility into just that specific record, without opening up access to the rest of that module's records. The share is created the moment the appointment is booked, and updates automatically if the assigned member or the linked record changes. 


    For users on a Service Member profile, this access is always read-only, regardless of how the preference is set.

    For example, when client Priya books a hair spa at Zylker Salon and is assigned to stylist Meera, Meera can view Priya's contact details - including past service notes and preferences - without needing access to every contact in the system, and without being able to edit anything. 

    Record locking for Services

    Record locking is supported for the Service module so you can prevent unauthorized edits to records once they reach a certain stage.

    The record's detail view page lists all restricted actions for that record, so you can see at a glance what's locked.

    Using Services as lookups in other modules

    Services can also be added as lookup fields in other modules, standard or custom. This lets you connect a Service record directly to any other module, rather than working around the limitation with workflows or manual entry.

     
    For instance, Zylker Salon creates a custom module called Feedback Forms to track client reviews after each visit, and adds an Appointment lookup field to it - so every feedback form links straight back to the specific appointment it is about. 

    Renaming the Services module

    You can rename the Services module to better match how your business refers to them.

    For example, Zylker Salon prefers the term Bookings over Appointments in client-facing conversations and internal reports, and renames the module accordingly. This doesn't affect any underlying data, permissions, pr configurations already set up.