Configure a Partner Program
Step 1. Access Partner Programs
Step 2. Enter Program Details
- Program badge: Upload an image to represent the program.
- Program name: Enter a name for the partner program.
- Description: Add a brief description explaining the purpose of the program.
- Partner program type: Select Tiered or Non-tiered from the drop-down list. If you select Tiered, you will be prompted to define tiers for the program.
Click Save.
Once saved, the partner program page opens. The Program Information section displays the details you just entered.
Step 3: Configure Program Requirements
Note: Enabling Requirements activates performance tracking for partners in this program. Requirements cannot be enabled until Review Settings, Requirement Details, and Eligibility Criteria are all configured.
1. Switch to the Requirements tab to define how partners qualify and continue in the program.
a) Program Review Settings: Control the timing of evaluation
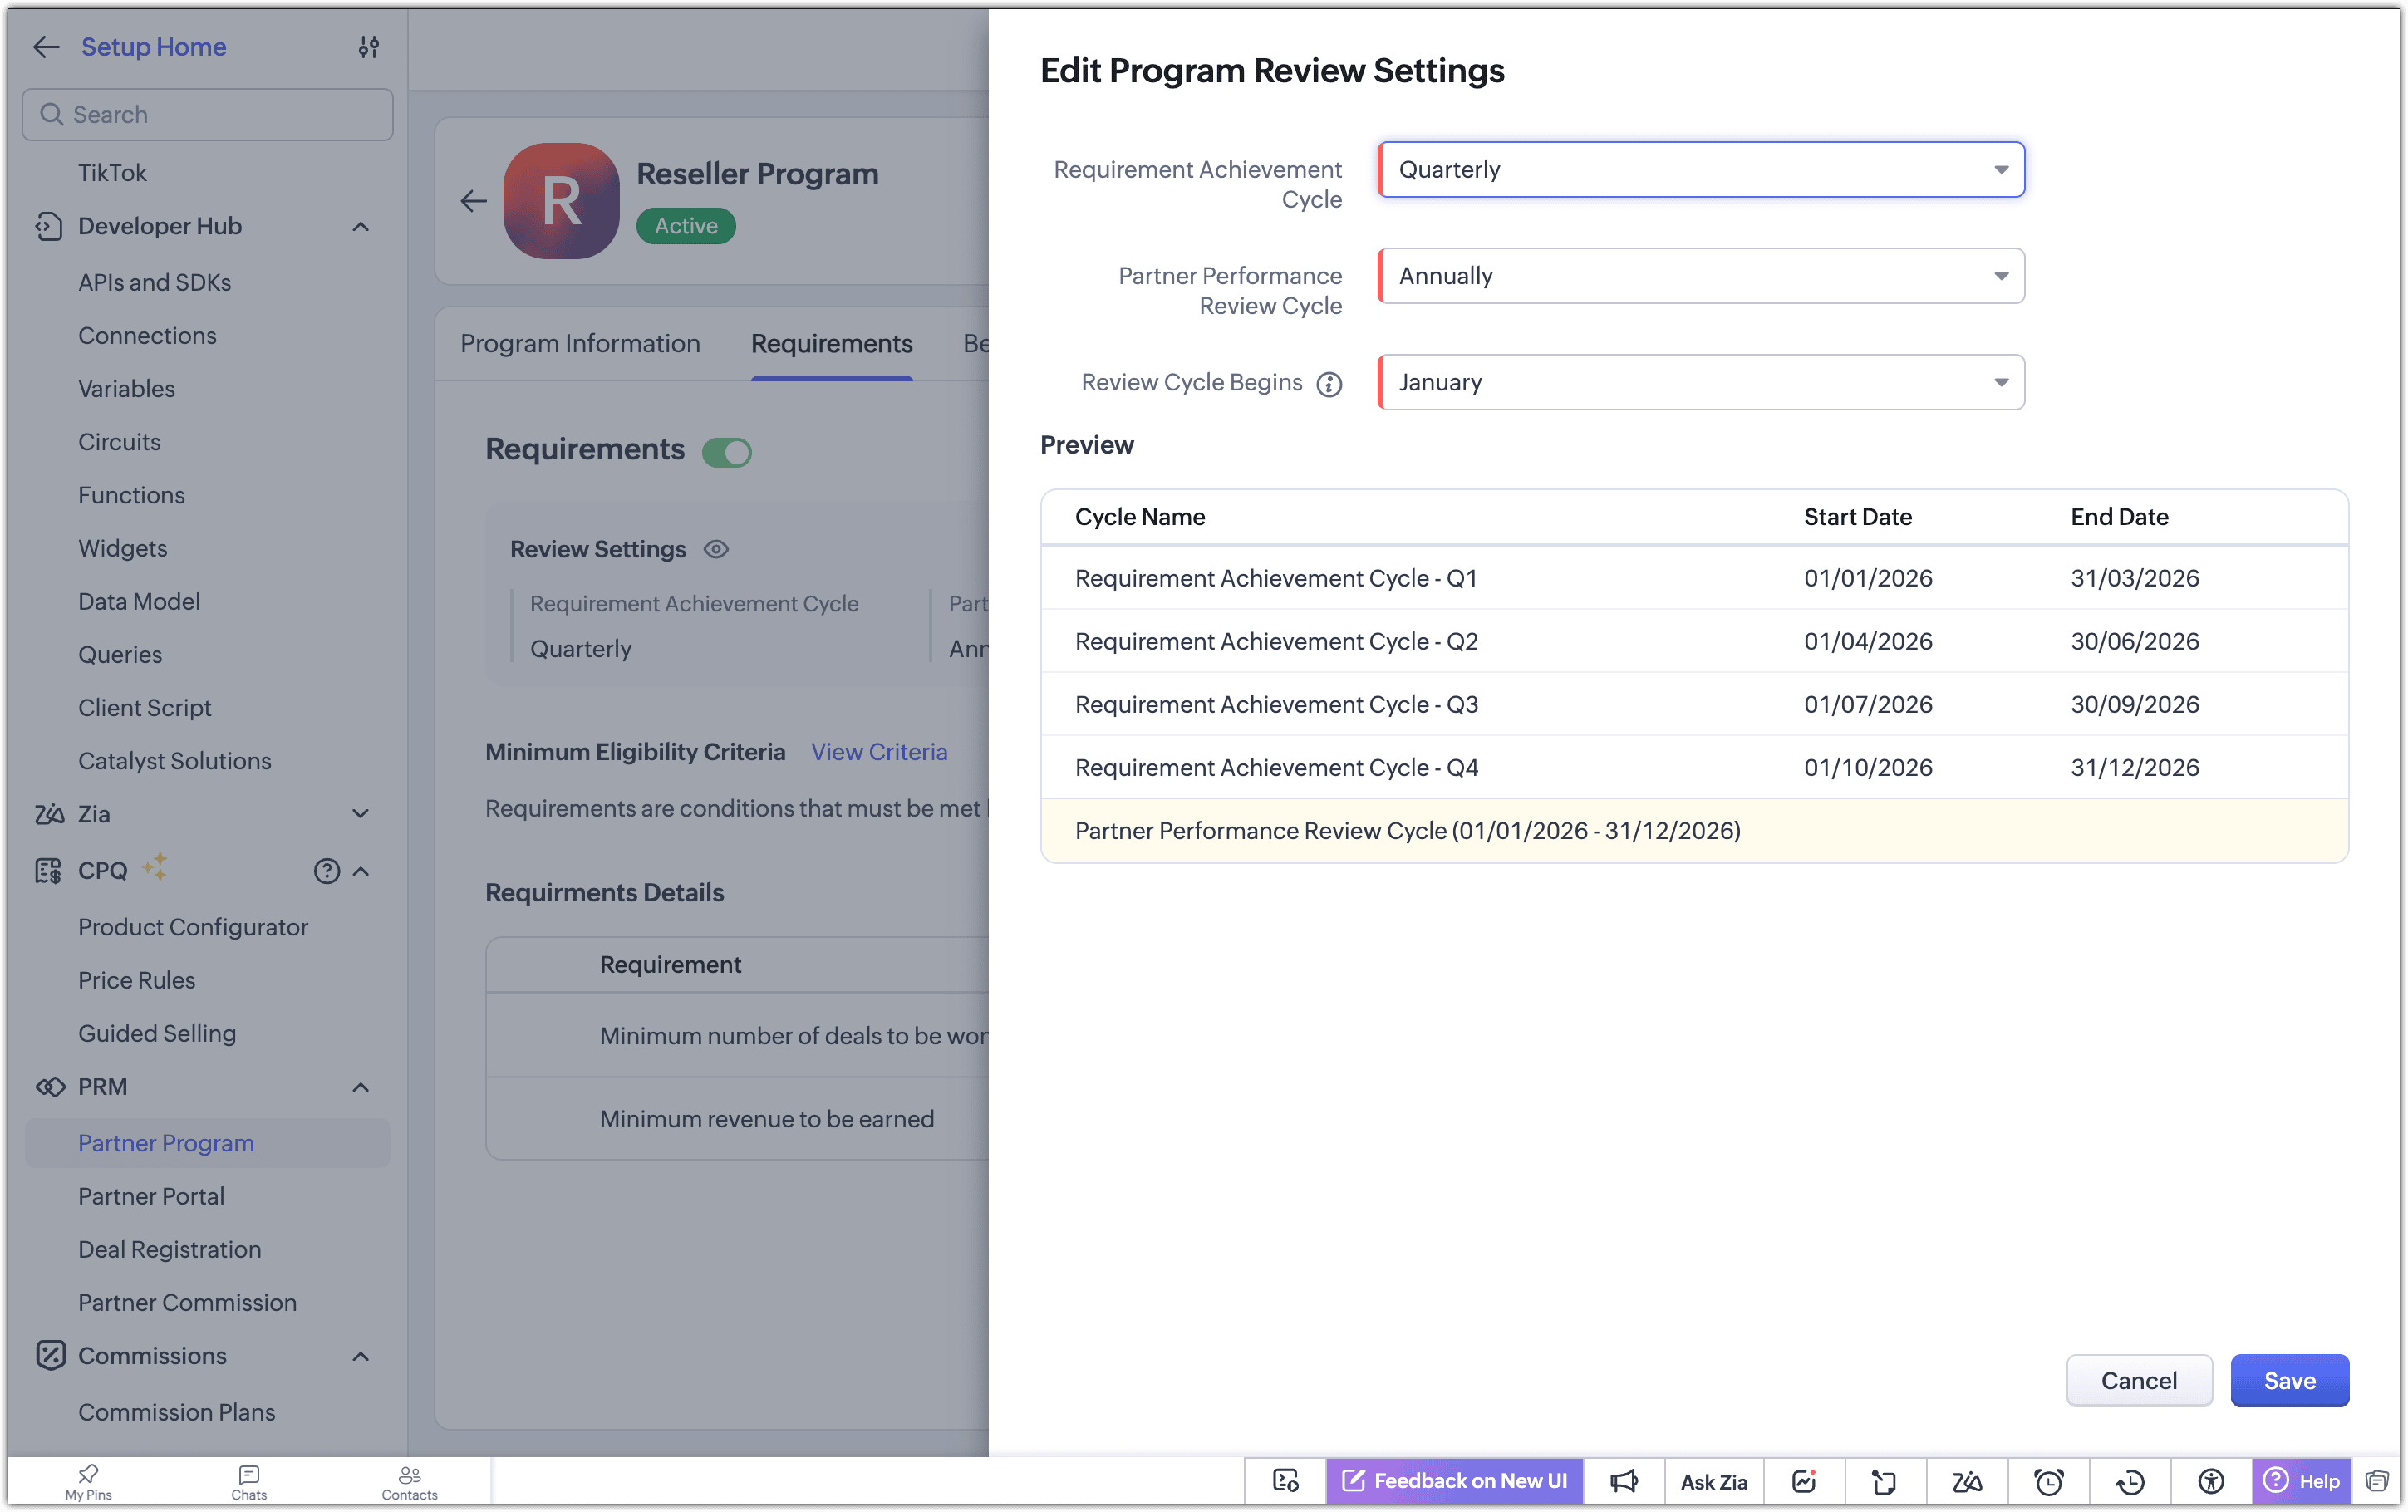
i. Requirement Achievement Cycle: Define how often partner performance is measured for the requirement.
Select how frequently partners must meet the requirement:
- Monthly
- Quarterly
- Half-yearly
- Annually
ii. Partner Performance Review Cycle: Define how often partner performance is formally reviewed.
Select how frequently performance reviews are conducted:
- Quarterly
- Half-yearly
- Annually
iii. Review cycle begins: Define when the review cycle starts.Choose the starting month from the list. This sets the reference point for calculating review periods and aligning evaluations with your business calendar.Requirements are evaluated within each defined cycle, and performance is assessed based on records that fall within that cycle.
The preview displays:
- The requirement cycle name
- The start date and end date of the cycle
- The time range within which records are considered for evaluation
b) Set Minimum Eligibility Criteria : Decide which partners qualify for evaluation
1. No of Requirement Cycles needed to stay in the program: Enter the number of consecutive requirement cycles a partner must meet to remain in the program. Enter a numeric value. Up to 19 digits are allowed.
2. Program Eligibility Criteria: Select one or more of the defined program requirements that partners must satisfy to qualify for the tier or program (for non-tiered programs).
3. If you have more than one program requirement set, you can add additional criteria, click the plus (+) icon.
4. Choose the logical operator:
- And
- Or
You can click the operator to switch between them.
c) Add Program Requirements - To define the performance that is measured
1. Requirement name: Enter a clear name to identify the requirement for this partner program.2. Description: Add a brief explanation describing what the requirement measures and how it is evaluated.3. Based on module: Select a module from the drop-down list. Once a module is selected, additional fields appear.4. Requirement Formula Function - Define how partner performance should be calculated by choosing one of the following calculation methods:
- Count of records: Used to measure quantity. Example: Number of deals registered by a partner.No additional field is required.
- Sum: Used to measure total value.Example: Total revenue generated by a partner.Select a numeric formula field such as Deal Amount or Revenue.
- Average: Used to measure average value per record.Example: Average deal size. Select a numeric field similar to the Sum option.
5. Date field used for record selection in requirement calculation: Select the relevant date field from the chosen module. This date is used to calculate requirement performance and determine which records fall within the requirement cycle.6. Requirement value specified - Minimum or Maximum value required to qualify for the program.7. Required Value: Enter the value the partner must meet to continue participating in the program.
Step 4: Defining Benefits
- Switch to the Benefits tab
- Provide a clear and recognizable name for the benefit.
Example: Marketing support, higher commission, priority lead access.
- Description - Add a short explanation describing what the benefit includes and how it helps the partner. This helps partners understand the value of the benefit clearly.
- Specify the value associated with the benefit. This can be entered as:
- Text, such as “Dedicated account manager” or “Early access to campaigns”
- Numeric value, such as a commission percentage or credit amount.

How benefits work in tiered programs
In tiered partner programs, benefits are defined per tier.
Each tier can have its own set of benefits
Higher tiers typically receive additional or enhanced benefits
Partners receive the benefits associated with their assigned tier
This allows you to differentiate partner benefits as partners move up tiers.
Step 5: Invite Partners
- Click the Add Partners button.
Select the Partner accounts you wish to add and then click Next.
Select the partner status as Active or Inactive to onboard them into the program.
Click Save.
 Note: You cannot add Partners who are already onboarded to a different program.
Managing Partner Programs
- Partners in the program are no longer evaluated
- Existing data and configurations are retained
- You’ll be prompted with the deactivation details.
- Then, choose whether to deactivate the program immediately or schedule it for later.
- If you choose to schedule deactivation for later, select a date from the calendar in the next field.
- Then choose when to cut off portal access. You can set it to be the same as the deactivation date or choose a later date.
If you choose a later date, enter the number of days after deactivation when access should be cut off. - The Deactivation Date and Portal Access cutoff Date will be updated automatically based on your selections.
Deactivating a program means it will no longer be available for partners to enroll. However, it will still appear in the Partner Account module with its status marked as Inactive.
Reactivate a partner program
- Requirements and review cycles continue as configured
- Partners are again evaluated based on the program rules
To reactivate a deactivated program, go to the Partner Program page, click More Options, and select Activate.
You’ll see that activation is in progress. After a few minutes, the program status will update to Active.
Delete a partner program
- Remove the program from the settings page
- Delete its corresponding partner portal user group
- Revoke portal access for all associated partners
Note: Ensure the program is no longer in use before deleting it.
Adding tiers (for tiered programs)
1. On the Program Details page, under Tiers Information, click Add Tier.
2. To add a tier before or after an existing one, hover over the tier, click More Options, and select Add Before Tier or Add After Tier.
- Each tier can have its own requirements and benefits
- Tiers help differentiate partners based on performance
Note: A partner program can have up to three tiers.Delete tiers
You can remove tiers that are no longer required.
On the Program Details page, under Tiers Information, hover over the tier, click More Options, and click Delete.
Note: Ensure that no active partners are associated with the tier before deleting it. If the tier has associated partners, you will be prompted to move them to another tier.
Promote or demote partners across tiers
- Promotion occurs when partners meet higher-tier requirements
- Demotion may occur if partners fail to meet required performance
- On the Partner Program page, go to the Requirements tab, then click the Edit icon next to Promotion and Demotion.
- Under Mode, choose whether partners move between tiers automatically or are managed manually.
Partner Program Timeline
What happens after program configuration
- Partner performance is tracked based on defined requirements
- Performance is measured over the defined requirement cycles
- Results are reviewed according to the review cycle
- In tiered programs, partners may move between tiers based on performance
- Benefits are applied based on the partner’s current tier or program status
This ensures that partner progression, evaluation, and rewards are handled consistently over time.