Marketo for Zoho CRM
Marketo is a marketing automation tool that allows you to score your leads based on specified criteria and determine which prospects are most likely to convert. A tight-knit integration between your CRM and Marketo helps you plan sales and marketing activities to nurture these high-value leads and maximize the amount of new business your team can win.
The Marketo extension for Zoho CRM not only helps you synchronize leads from Marketo but also helps you manage them within Zoho CRM. You can easily synchronize leads on a daily or weekly basis with a built-in scheduler.
Installing the extension
You can either go to the Zoho Marketplace and install the extension, or log in to your Zoho CRM account to install.
To install the extension from Zoho CRM:
- Navigate to Setup > Marketplace > All.
- Under All Extensions, browse for and click Marketo.
The details about the extension will be available. - Click Install.
- Agree to the terms of service and click Install.
- In the following screen, confirm the login user, agree to the terms of service, and click Continue to Install.
- Choose one of the following, then click Confirm:
- Install for admins only - The extension will only be installed in CRM for users with administrator profiles.
- Install for all users - The extension will be installed in CRM for all users.
- Choose profiles - The extension will be installed in CRM for manually chosen users. Choose this option, click Confirm, then select the desired profiles.
The extension will be installed automatically for the specified users. - In the pop-up, enter the Base URL, Client ID and Client Secret to authorize with your Marketo account.

Note:
To obtain the Marketo Client ID and Client Secret
- Log in to your Marketo account and click Admin > Integration > Launch Point.
- In the Installed Services page, select the service that needs to be integrated with Zoho CRM, or create a new service by following the instructions provided by Marketo.
- Click View Details.
The Client ID and Client Secret for that particular application will be displayed. Copy this detail and paste them in the Extensions Details page.
To obtain the Marketo Base URL
- Log in to your Marketo account and click Admin > Integration > Web Services.
- In the Web Services page, go to REST API.
- Copy the URL present in Endpoint and paste that in the Extensions Details page.
Configuring extension settings
Once the extension is installed, you will need to set up the extension configuration based on your business requirements. Configuration involves defining the synchronization settings to sync Marketo contacts with Zoho CRM's Leads or Contacts modules and Marketo campaigns with Zoho CRM's Campaigns module respectively. These configurations are made in the Marketo webtab.
To configure the synchronization settings:
- Go to the Marketo module.
The Setup page will open. - In Sync Settings, select Bulk or Selective.
Bulk sync synchronizes all of your contacts, while selective sync allows you to choose particular contact lists to synchronize. - In Sync Type, select One Way or Both Ways.
One-way sync brings Marketo contacts into your Zoho CRM modules or vice versa, but not both. Both-ways sync simultaneously moves data between Zoho and Marketo. - In Sync Behaviour, select Marketo to Zoho CRM or Zoho CRM to Marketo.
- In Conflict Behaviour, select CRM always wins or Marketo always wins.
If CRM Always wins is chosen, new Marketo records that are already existing in Zoho CRM will not synchronize, preventing Marketo data from overwriting existing CRM records. - If you enable scheduled sync, choose whether you want the sync occurrence to be daily or weekly.
- Click Next.
- In the Marketo Mappings section, select where you want the Marketo data to be housed in Zoho CRM. Choose between Contacts or Leads module of Zoho CRM to which the Marketo contacts must be stored in.
- In the Merge Fields section, you can add Marketo fields and its corresponding Zoho CRM fields to define where the data needs to be placed after sync. The default fields will be synced even if merge fields are not chosen, and they cannot be altered.
- Click Sync Now.
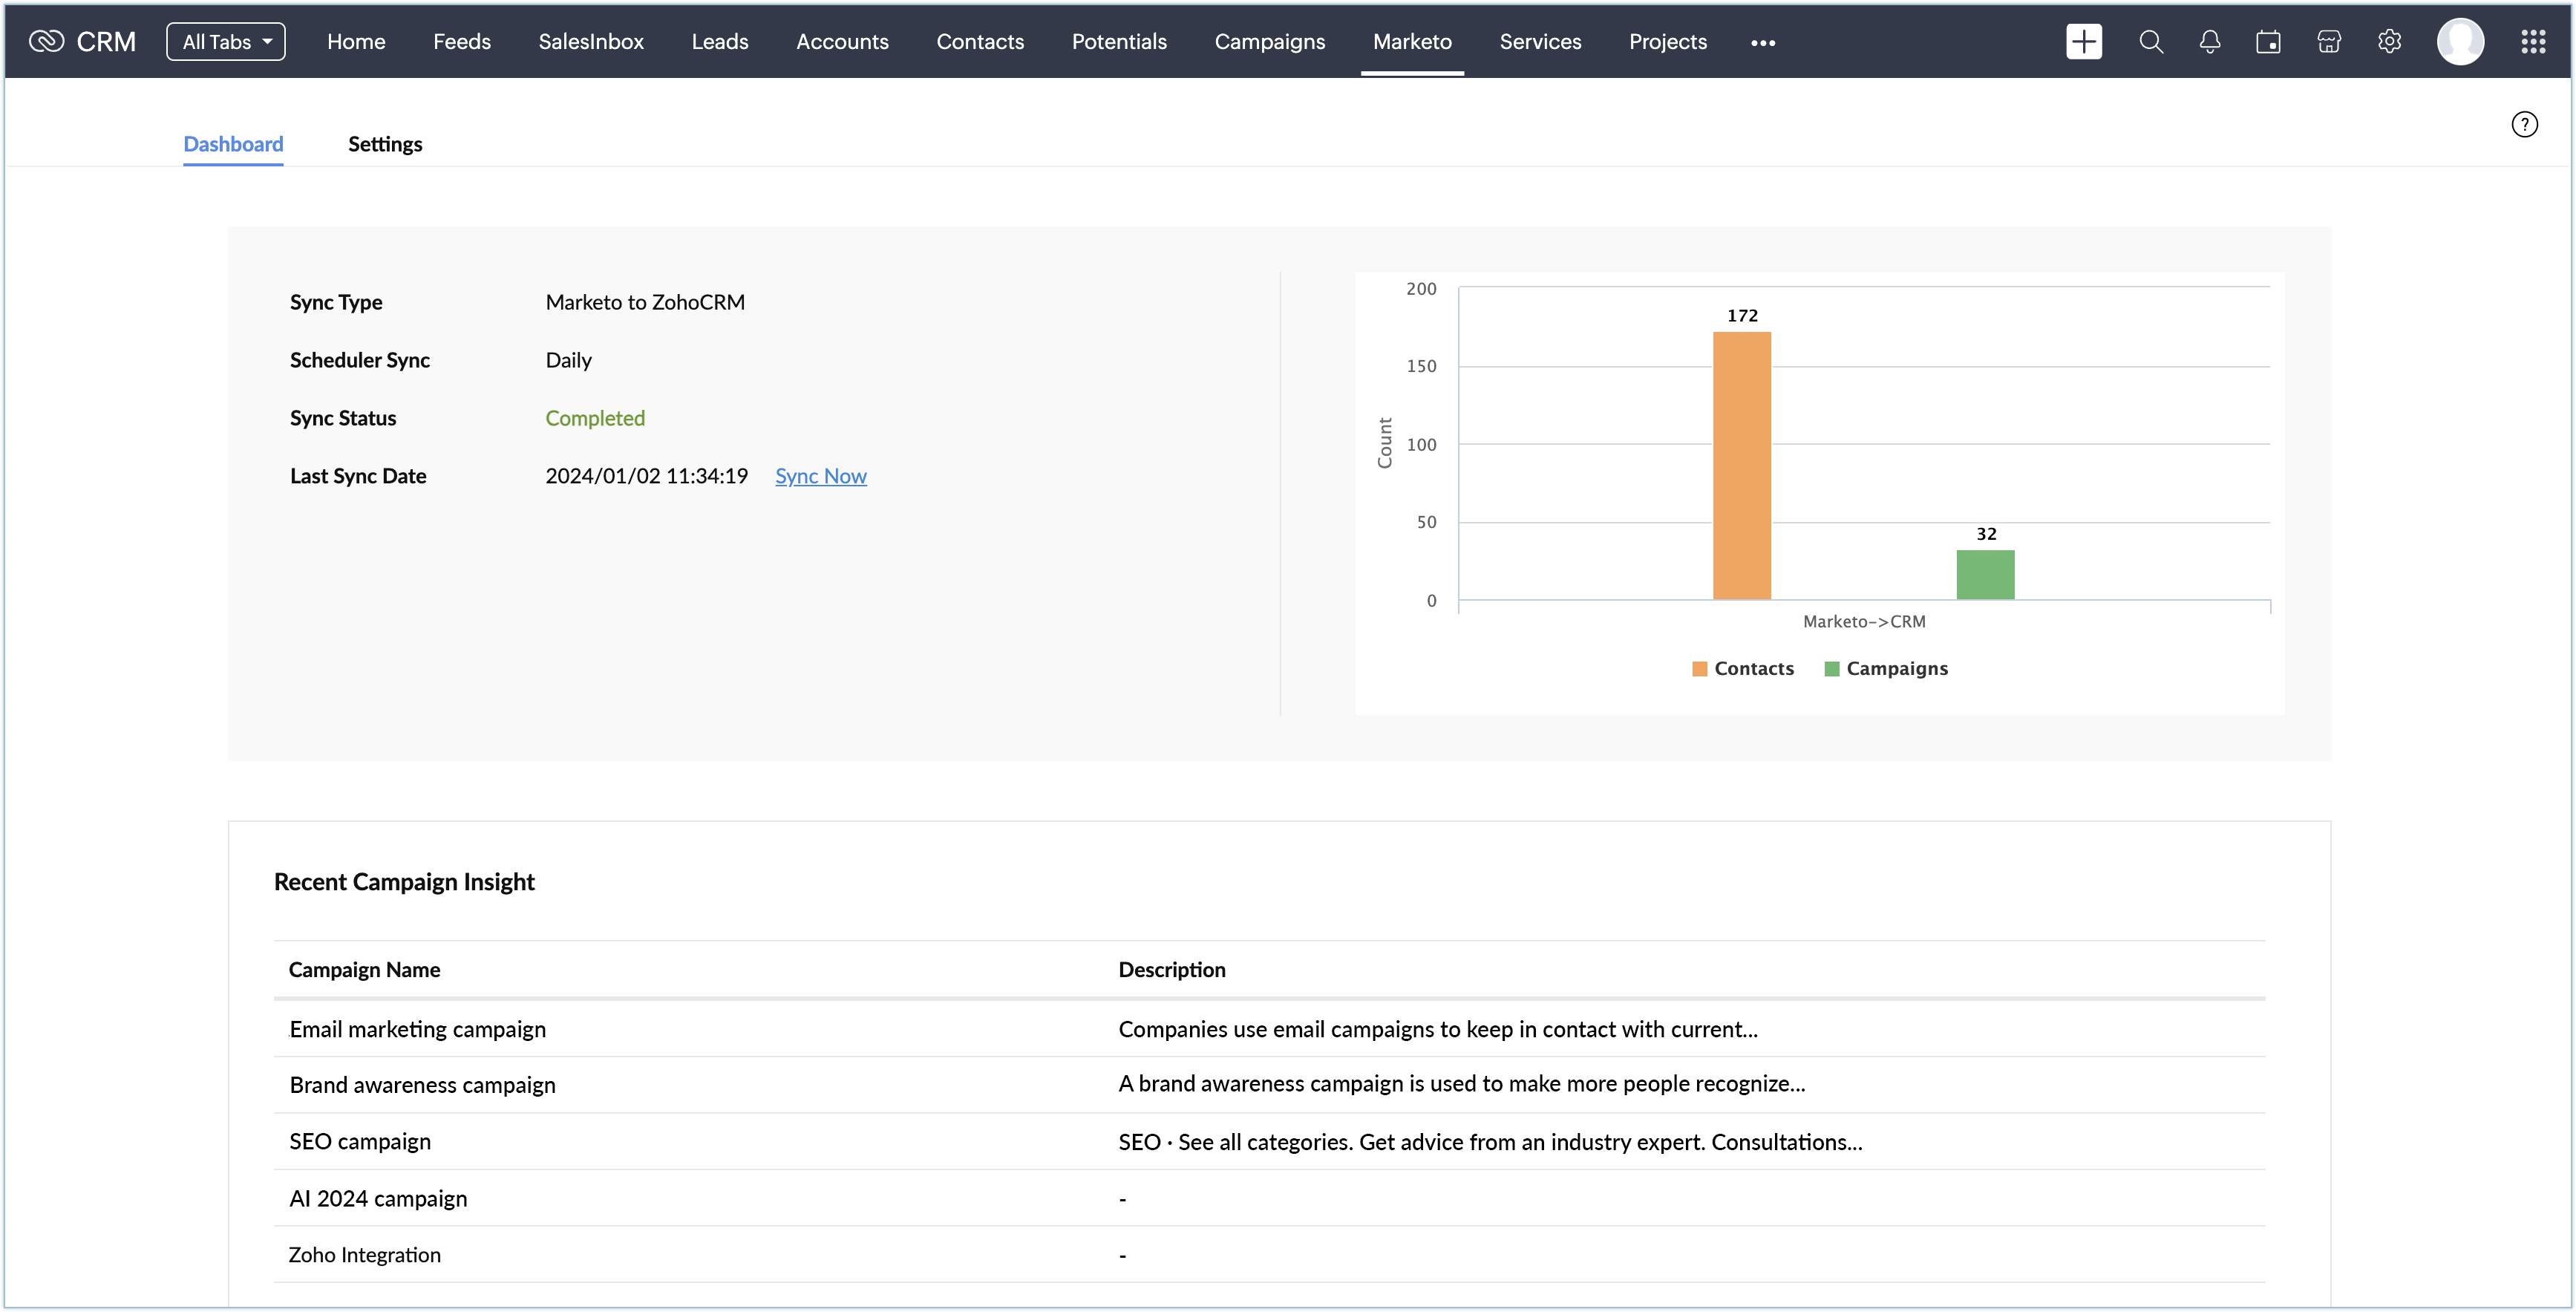
Once the synchronization is done, all the details of the synchronization happened will be displayed on the Dashboard. You can even synchronize manually by clicking Sync Now on the dashboard.

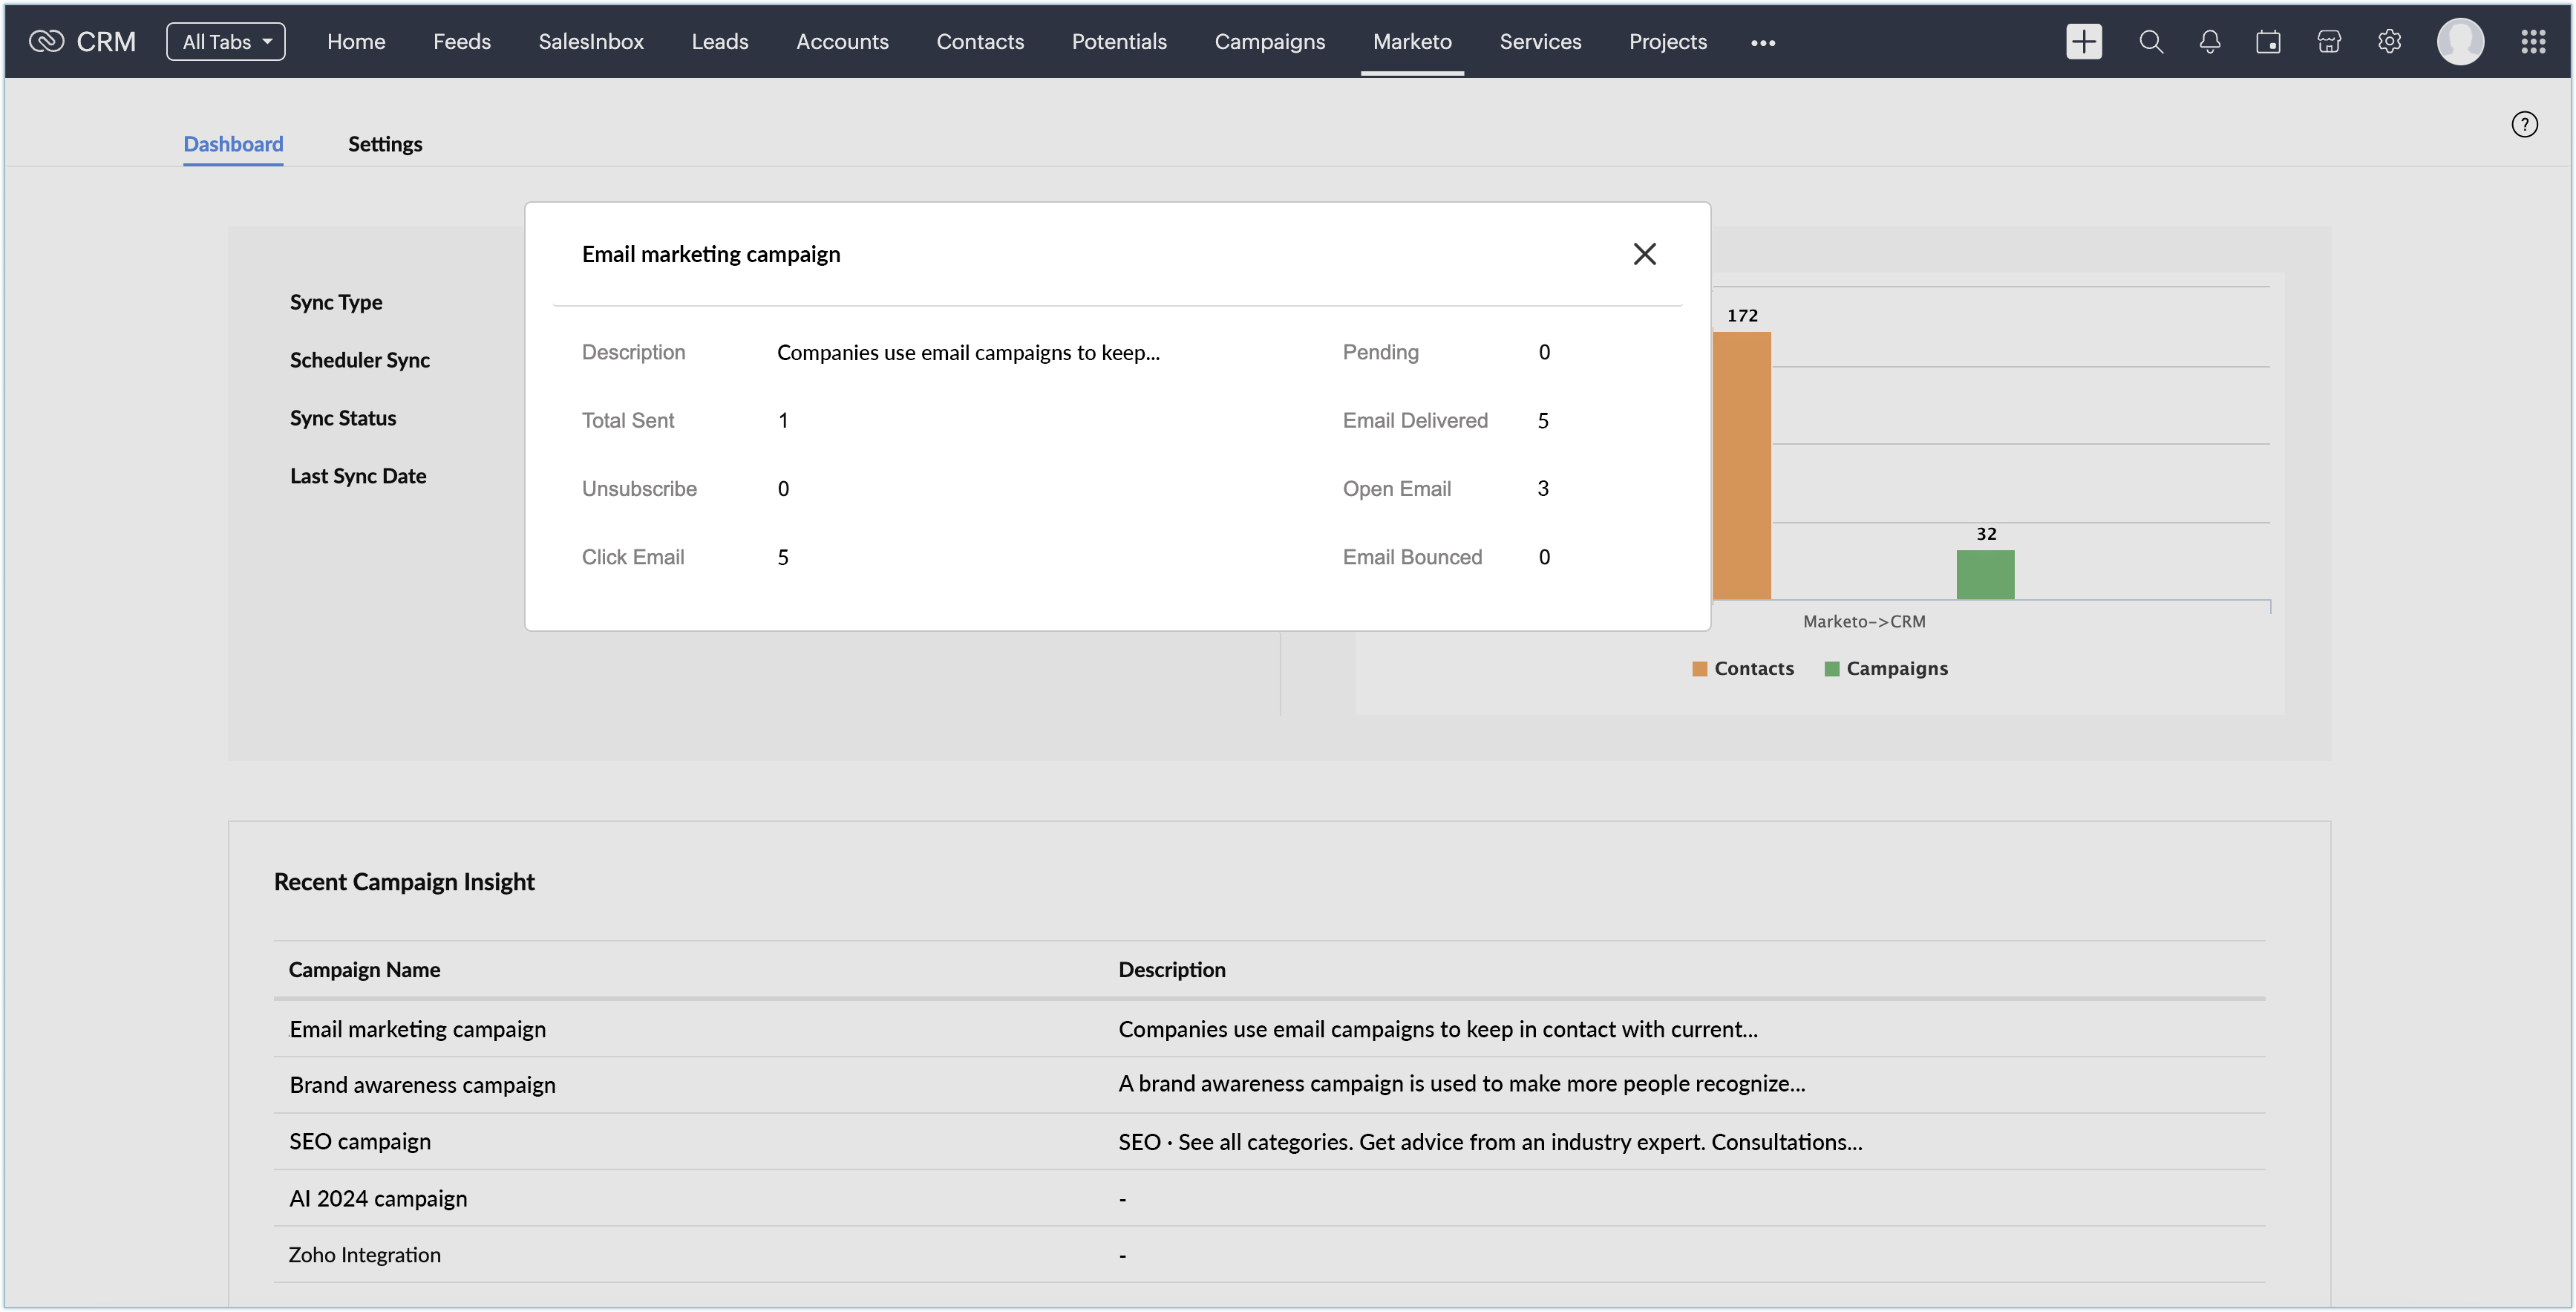
Under Reports, all the campaigns sent using your Marketo account will be listed along with their details. When you click on a campaign listed, a pop-up will show up with details of that specific campaign like sent, opened, and clicked, etc. The sync settings can be altered in the Settings tab.

Accessing synchronized data in Zoho CRM
You can track the campaigns of every contact in Zoho CRM associated with Marketo in their Marketo Recent Activities related list. Similarly, the email activities of all the contacts in every campaign can be tracked individually in the Campaigns module.
To track campaigns of a contact:
- Go to the Contacts or Leads module in Zoho CRM.
- Open the desired contact whose campaign activity needs to be tracked.
All the campaigns that this contact is associated with for the latest 7 days will be listed in its Marketo Recent Activities related list.
The activity count of the campaigns listed will be displayed. When we click on the count, the details of the actions done, such as sent, opened, clicked, and bounced, will be shown.
To track a campaign:
- Go to the Campaigns module in Zoho CRM.
All of your trigger campaigns from Marketo will be listed. - Open a campaign.
- In its Email Activities related list, all the contacts associated with this campaign will be listed.
The activity count of the campaigns listed will be displayed. When we click on the count, the details of the actions done like sent, opened, clicked, and bounced will be shown.
Uninstalling the extension
You can uninstall the Marketo Extension extension whenever you wish to. Remember that deleting this extension will delete all its associated data.
To uninstall the Marketo Extension
- Click Setup > Marketplace > All.
All the installed extensions are listed. Under All Marketplace, you can view all the extensions supported in CRM. - Browse for Marketo and click the corresponding Uninstall link.
- Click OK to confirm.
The extension will be uninstalled.
Zoho CRM Training Programs
Learn how to use the best tools for sales force automation and better customer engagement from Zoho's implementation specialists.
Zoho DataPrep Personalized Demo
If you'd like a personalized walk-through of our data preparation tool, please request a demo and we'll be happy to show you how to get the best out of Zoho DataPrep.
Centralize Knowledge. Transform Learning.
All-in-one knowledge management and training platform for your employees and customers.
New to Zoho Writer?
You are currently viewing the help pages of Qntrl’s earlier version. Click here to view our latest version—Qntrl 3.0's help articles.
Zoho Sheet Resources
Zoho Forms Resources
New to Zoho Sign?
Zoho Sign Resources
New to Zoho TeamInbox?
Zoho TeamInbox Resources
New to Zoho ZeptoMail?
New to Zoho Workerly?
New to Zoho Recruit?
New to Zoho CRM?
New to Zoho Projects?
New to Zoho Sprints?
New to Zoho Assist?
New to Bigin?
Related Articles
Campaign Monitor for Zoho CRM
Campaign Monitor is an email marketing software that is equipped with automation tools to build emails and run campaigns. With the Campaign Monitor extension for Zoho CRM, you can synchronize all your campaigns from your Campaign Monitor account to ...Your Guide to Zoho CRM Email Tools
Introduction to Email Efficiently nurturing potential customers and building strong relationships is a core function of CRM. While email serves as a primary customer interaction channel, using separate email and CRM systems can lead to challenges in ...Marketing Attribution
Marketing Attribution feature to be discontinued The Marketing Attribution feature has been discontinued for new users as of July 21 and will be retired for existing users by January 31. Why do Businesses Need Marketing Attribution? Marketing ...FAQs: Leads Management
What are Leads? Leads are the unqualified contacts or sales opportunities in your business. They are the raw details gathered about individuals or representatives of organizations collected from trade shows, seminars, advertisements and other ...Marketing Automation - An Overview
As part of the marketing automation, Zoho CRM provides Campaign management, Email marketing, and Web Forms (to generate leads, contacts, and cases) which are useful for integrating your organization's sales and marketing activities. With the Zoho CRM ...
New to Zoho LandingPage?
Zoho LandingPage Resources


