ServiceNow for Zoho CRM
ServiceNow is cloud-based workflow automation software that helps large enterprises increase their operational efficiencies by streamlining and automating routine operations. It offers a range of features to help businesses manage their customer data and workflows.
With the ServiceNow extension for Zoho CRM, you can sync the contacts, vendors, purchase orders, products, and cases with Zoho CRM, and get them mapped within the Contacts or Leads modules. The extension supports bidirectional synchronization, which occurs in real time.
Installing the extension
You can install the ServiceNow extension from Zoho Marketplace, or install it from within your Zoho CRM account using following steps:
- Go to
in the top-right corner of your Zoho CRM.
- Select All under Marketplace.
- Navigate to the All Extensions tab to view the extensions supported by your CRM edition.
- Browse for and click ServiceNow.
- Click Install.
- Agree to the terms of service and click Install.
- Choose one of the following options:
- Install for admins only: The extension will only be installed in CRM for users with the administrator profile.
- Install for all users: The extension will be installed in CRM for all users.
- Choose profiles: The extension will be installed in CRM for the users you select. If you choose this option, click Confirm, then select the desired profiles.
- Click Confirm.
Once the extension is installed, the ServiceNow web tab will be created in your Zoho CRM account. You'll need to authorize the extension in this web tab.
Authorizing the extension
Before starting, make sure you have a client application created in your ServiceNow account.
To create a client application in ServiceNow:
- Log in to your ServiceNow account.
- Navigate to All.
- Search for and click on Application Registry.
- Click on New in the top-right corner.
- Click on Create an Oauth API endpoint for external clients.
- Provide a name of your choice.
- The Client ID and Client Secret will be auto generated.
- In the Redirect URL field, provide the URL listed in the Note section of the setup page in the ServiceNow web tab.
- Click Submit.
Your client application will be generated and listed under Application Registries.
To authorize the ServiceNow extension:
- Click on the ServiceNow web tab to open the Setup page.
- Enter the Client ID, Client Secret, and ServiceNow Instance of your ServiceNow account.
- Click Save.
- Click Authorize.
- Enter your ServiceNow username and password, and click Log In.
The extension will be authorized and you will be redirected to the extension's setup page, where you can configure the synchronization settings.
Configuring the synchronization settings
Once the extension is authorized, you will need to set up the extension configuration based on your business requirements. Configuration involves defining the synchronization settings to sync ServiceNow contacts, vendors, purchase orders, products, and cases with Zoho CRM's Leads or Contacts modules. These configurations are made in the ServiceNow web tab.
To configure the synchronization settings:
- Go to the ServiceNow web tab to view the Setup page.
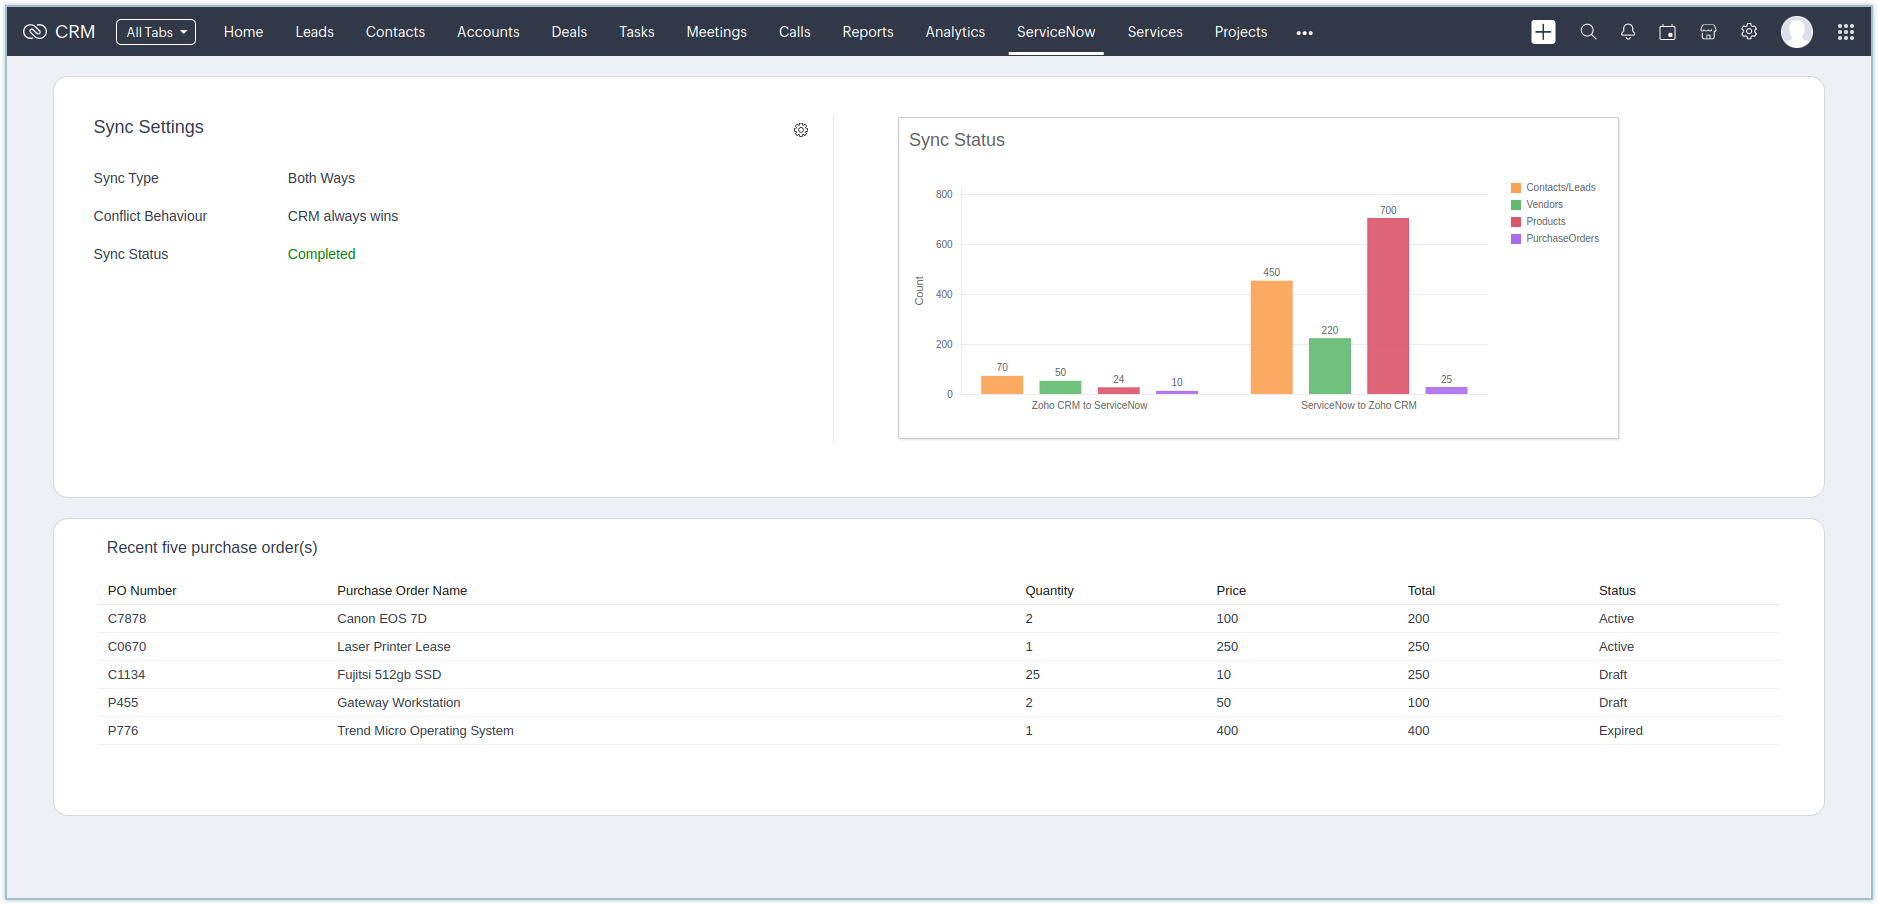
- Select One Way or Both Ways next to Sync Type.
One-way sync brings ServiceNow data into your Zoho CRM modules or vice versa, but not both. Both-ways sync simultaneously moves data between Zoho and ServiceNow. - Select ServiceNow to Zoho CRM or Zoho CRM to ServiceNow next to Sync Behavior.
- Select CRM always wins or ServiceNow always wins next to Conflict Behavior.
If CRM always wins is chosen, new ServiceNow records that are already existing in Zoho CRM will not synchronize, preventing ServiceNow data from overwriting existing CRM records. - Select where you want the ServiceNow data to be housed next to CRM Module.
Choose between the Contacts or Leads modules of Zoho CRM. - Click Sync Now.
All the synced details will be displayed using a bar chart on the Dashboard. The latest five purchase orders will be listed along with their details.

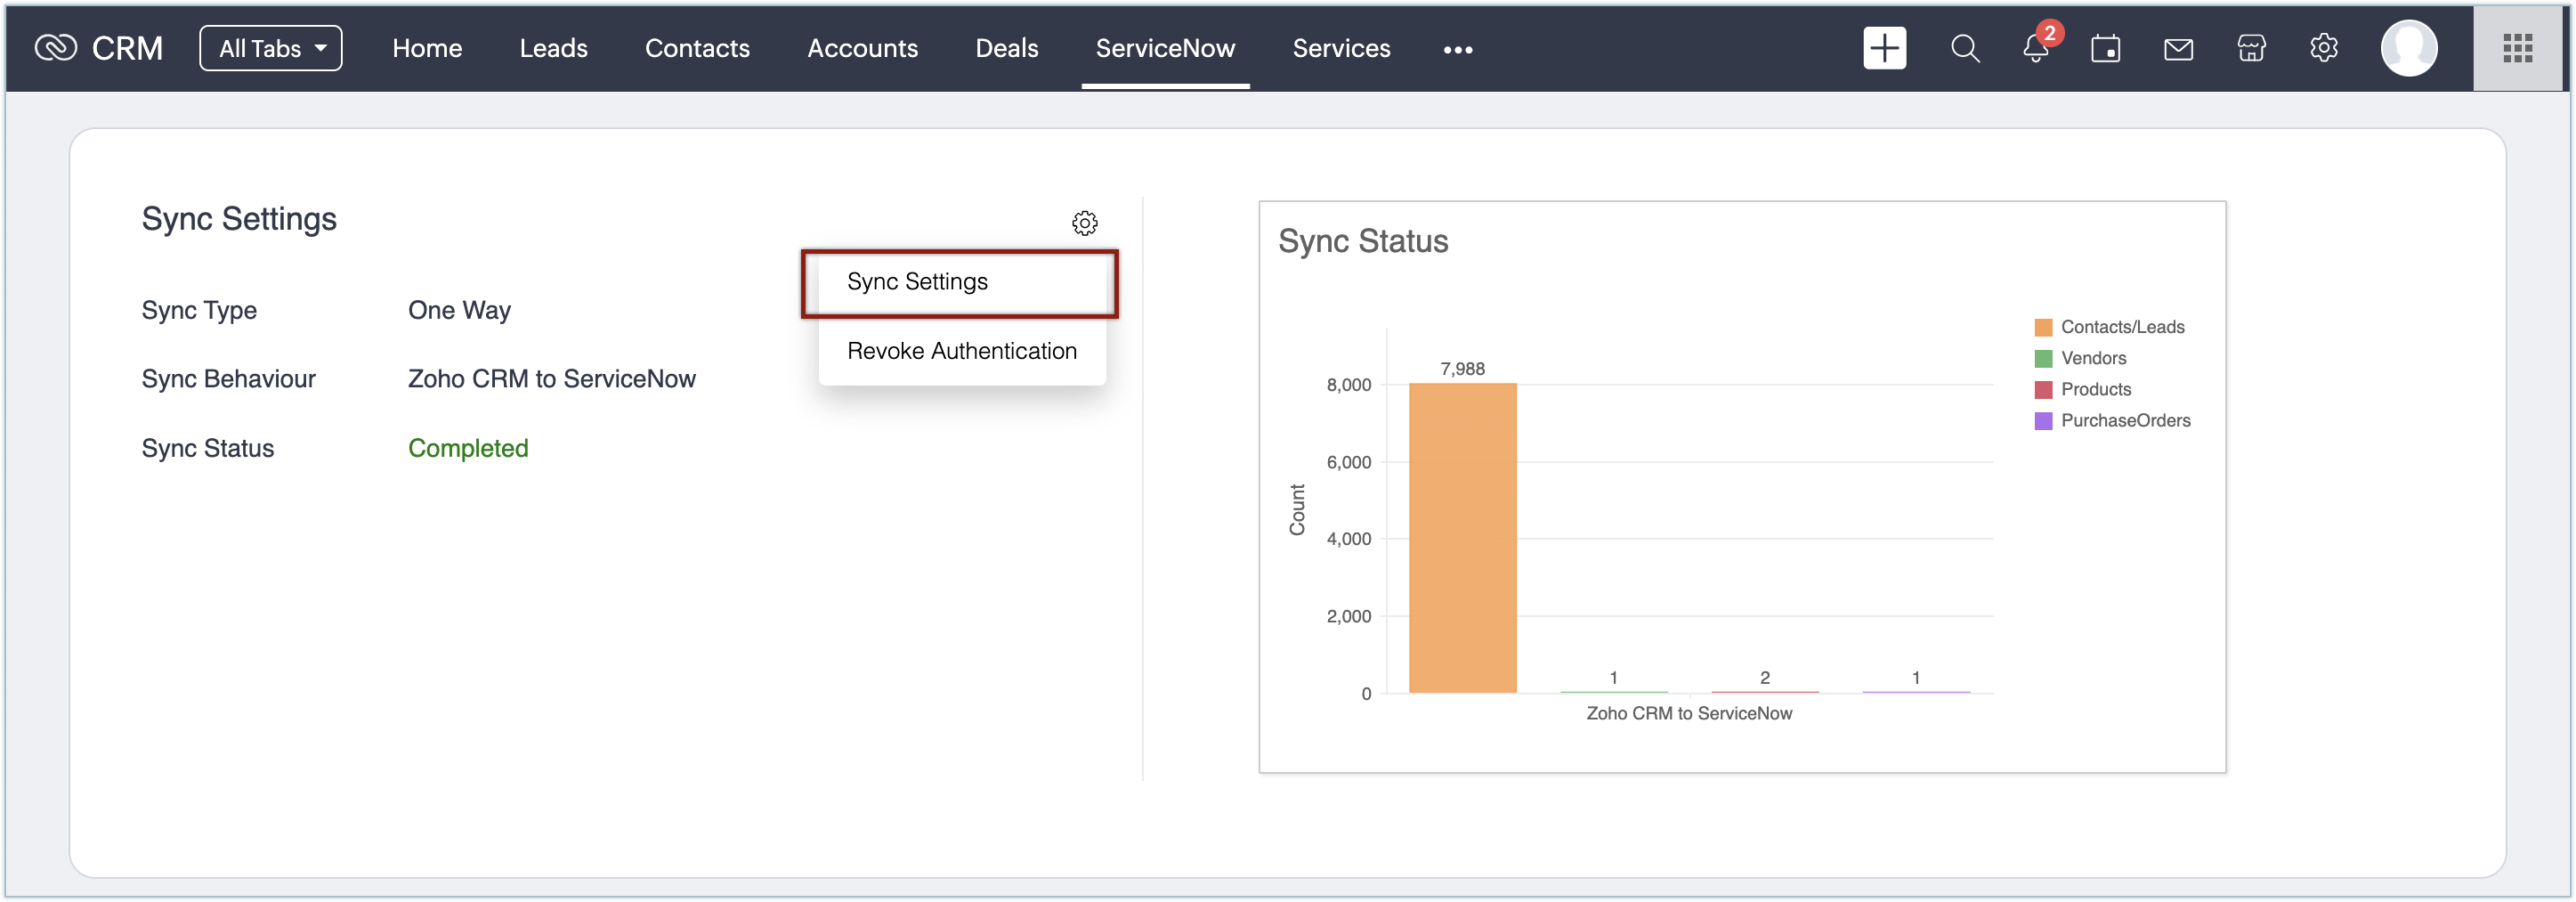
You can alter the sync settings anytime by clicking on the  icon followed by the Sync Settings option available in the Dashboard.

Revoking the authentication
If the extension is no longer used or you want to change the authentication credentials, you can revoke and reauthorize the extension anytime in Zoho CRM.
To revoke the authentication:
- In Zoho CRM, click the ServiceNow webtab.
- Click the
icon and select Revoke authentication.
- Click Revoke.
The authentication will be revoked and you will be redirected to the login page, where you can authorize again.
Uninstalling the extension
You can uninstall the ServiceNow extension at any time. Remember that deleting this extension will delete all its associated data.
To uninstall the extension:
- Go to
in the top-right corner of your Zoho CRM.
- Select All under Marketplace.
- Navigate to the All Extensions tab to view the extensions supported by your CRM edition.
- Browse for ServiceNow and click the corresponding Uninstall link.
- Click OK to confirm.
Zoho CRM Training Programs
Learn how to use the best tools for sales force automation and better customer engagement from Zoho's implementation specialists.
Zoho DataPrep Personalized Demo
If you'd like a personalized walk-through of our data preparation tool, please request a demo and we'll be happy to show you how to get the best out of Zoho DataPrep.
Centralize Knowledge. Transform Learning.
All-in-one knowledge management and training platform for your employees and customers.
New to Zoho Writer?
You are currently viewing the help pages of Qntrl’s earlier version. Click here to view our latest version—Qntrl 3.0's help articles.
Zoho Sheet Resources
Zoho Forms Resources
New to Zoho Sign?
Zoho Sign Resources
New to Zoho TeamInbox?
Zoho TeamInbox Resources
New to Zoho ZeptoMail?
New to Zoho Workerly?
New to Zoho Recruit?
New to Zoho CRM?
New to Zoho Projects?
New to Zoho Sprints?
New to Zoho Assist?
New to Bigin?
Related Articles
Zoho Contracts for Zoho CRM
The Zoho Contracts extension for Zoho CRM lets you work on contracts and contract templates from within Zoho CRM. It helps contract administrators, legal users, and other customers streamline the process of creating and maintaining contracts. Users ...FAQs: Zoho CRM Integration with Zoho Projects
How is the integration between Zoho CRM and Zoho Projects helpful? The integration between Zoho CRM and Zoho Projects works as a bridge between sales data and team collaboration data—all in one place. Since you can associate projects directly with ...Managing Calendar in Zoho CRM
Planning and scheduling is important when it comes to business meetings. A well conceived plan goes a long way in bringing positive results whereas, properly scheduled meeting can complement your planning.Businesses attend meetings for various ...Modules supported in Zoho CRM iOS app
In your mobile app, you can access standard modules, custom modules and team modules created in CRM web version. Standard modules - These are the default modules provided by Zoho CRM, such as Leads, Contacts, and Deals. Custom modules - These are ...Why Switch to Zoho CRM's New UI
In a tough business world, a CRM is key for businesses to handle customer relations, boost sales, and run things smoothly. The tool needs to evolve to keep up with user expectations, enhance productivity, and improve the overall experience. But the ...
New to Zoho LandingPage?
Zoho LandingPage Resources


