Domain Mapping
Provide customer support from your own domain with Zoho Desk. By default, the web address of your Help Center is a Zoho Desk subdomain such as "portalname.zohodesk.com/portal". However, you can personalize this so that your customers can submit their tickets from a subdomain, such as 'support.mycompany.com'. This feature is called domain/host mapping.
Here is an example: You have a company called Bay & Co., and are using Zoho Desk for customer support. By mapping your subdomain (of www.bayandco.com ) with Zoho Desk, customers can access your help desk at 'support.bayandco.com' instead of 'bayandco.zohodesk.com/portal'. This way, your agents can also access their support portal at ' support.bayandco.com/support '.

Note
- The domain mapping instructions in this document will apply only to your agent interface and the default Help Center .
- Wildcard or other SSL certificates purchased from third-party vendors cannot be installed in Zoho Desk.
- Make sure you enable third-party cookies (especially on Safari) to have a trouble-free experience on your web browser. Learn more
Availability
 Permission Required
 Users with the Support Administrator permission profile can access this feature.
Check Feature Availability and Limits
Prerequisites
Before providing your domain in Zoho Desk, there are a few settings that must be configured in your domain registrar's control panel .
- Add a Subdomain: Create a subdomain (e.g., support.zylker.com) under your main domain to serve as your customer support address. You can refer to your hosting provider’s website for instructions on adding a subdomain.
- Next, configure the created subdomain as a CNAME record and point it to Zoho Desk. This will create an alias for your default Zoho Desk address. For details on where to point the CNAME record, see the "Create a CNAME" section below.
Create a CNAME
To create CNAME and point it to Zoho Desk
- Sign in to your domain registrar's control panel .
- Access the ' DNS Management ' settings to change the DNS records. If you can't locate DNS Management, look for options like 'Advanced Settings' or 'Name Server Management'.
- Create or edit a CNAME (or Canonical Name) record and point it to " desk.cs.zohohost.com ".
If you are accessing help desk at "desk.zoho.eu", point your CNAME to " desk.cs.zohohost.eu ".
If you are accessing help desk at "desk.zoho.in", point your CNAME to " desk.cs.zohohost.in ".
Changes to the DNS system are not immediate; it may take some time for them to take effect.
Configure your domain address
Now that you've completed the prerequisites, you must move on to Zoho Desk to specify the new domain address. The workflow for changing the domain address consists of the following 3 steps:
- Add Domain Address
- Verify Domain Ownership
- Get SSL
STEP 1: Adding Domain Address
The first step is to specify the domain address that you would like to configure in Zoho Desk.
 Do not proceed with this step unless you've created a CNAME entry and pointed it to Zoho Desk as instructed above.
To add your domain address
- Log in to Zoho Desk with Administrator privileges.
- Go to Setup (
) > Organization > Rebranding.
- Click Domain Mapping under the Rebranding sub-menu.
- Click Map Domain on the Domain Mapping page.
This will launch the Setup Wizard to map your domain. - Enter your Domain URL for customer support.
From the example above, this would be where you'd enter 'support.bayandco.com'.
Note : The total length of your domain URL should not exceed 46 characters. - Click Next .
STEP 2: Verifying Domain Ownership:
You must now verify your domain before you can apply it in Zoho Desk. The domain can be verified in one of the following ways, depending on which is most convenient.
- CNAME Method
- HTML Method
CNAME Method
The CNAME method requires you to add the unique code displayed in Zoho Desk in your DNS Manager. Once you add the CNAME entry, click "Verify" displayed below the "CNAME method" option on the Setup Wizard.
To verify domain ownership using CNAME
- Sign in to your domain hosting service and locate the DNS management page. For help, contact your domain host directly.
- Create your new CNAME record by entering the following details:
- In the Name/ Host/ Alias/ CNAME field add the code generated in Zoho Desk (i.e., zb********).
- In the Value/ Points To/ Destination field add desk.cs.zohohost.com. For EU hosted accounts add desk.cs.zohohost.eu.
For India hosted accounts add desk.cs.zohohost.in. - Click Save or Add Record to save the CNAME record.
- Return to the Setup Wizard page in your Zoho Desk account.
- Click Verify displayed below the "CNAME" option.

Note:
- Zoho Desk will not be able to validate the CNAME if your sub-domain is enabled for Cloudflare . We recommend that you disable Cloudflare (
) until you verify the domain in Zoho Desk. Once verified you can re-enable it (
) again to continue with the security protections.
HTML Method
The HTML method requires you to add the verification file we provide in the root folder of your website page. When you click "Verify," we will look for the particular file in your website, and verify your domain based on its availability.
To verify domain ownership using HTML
- Select the HTML method on Zoho Desk's Setup Wizard page.
- Click the zoho-domain-verification.html file within the wizard to download the verification file.
- Upload the file to the root folder (top-level folder) of your domain's website. For example, http://bayandco.com/zoho-domain-verification.html
- Open any browser window and go to the address of the uploaded file on your website. If the file uploaded correctly, you'd see the string of characters that you uploaded to your webpage.
- Return to the Setup Wizard page in your Zoho Desk account.
- Click Verify displayed below the "HTML" option. This prompts Zoho Desk to check for this HTML file at the same address you viewed it. Once we find the file, your domain will be updated as verified.
STEP 3: Get SSL:
You must now get an SSL certificate installed for your domain through us. The certificate is used to establish a secure, encrypted connection between your browser and our servers. The installation may take up to 3 business days and will be taken care of by Zoho, at no cost to you. To get an SSL, click GET SSL within the wizard.
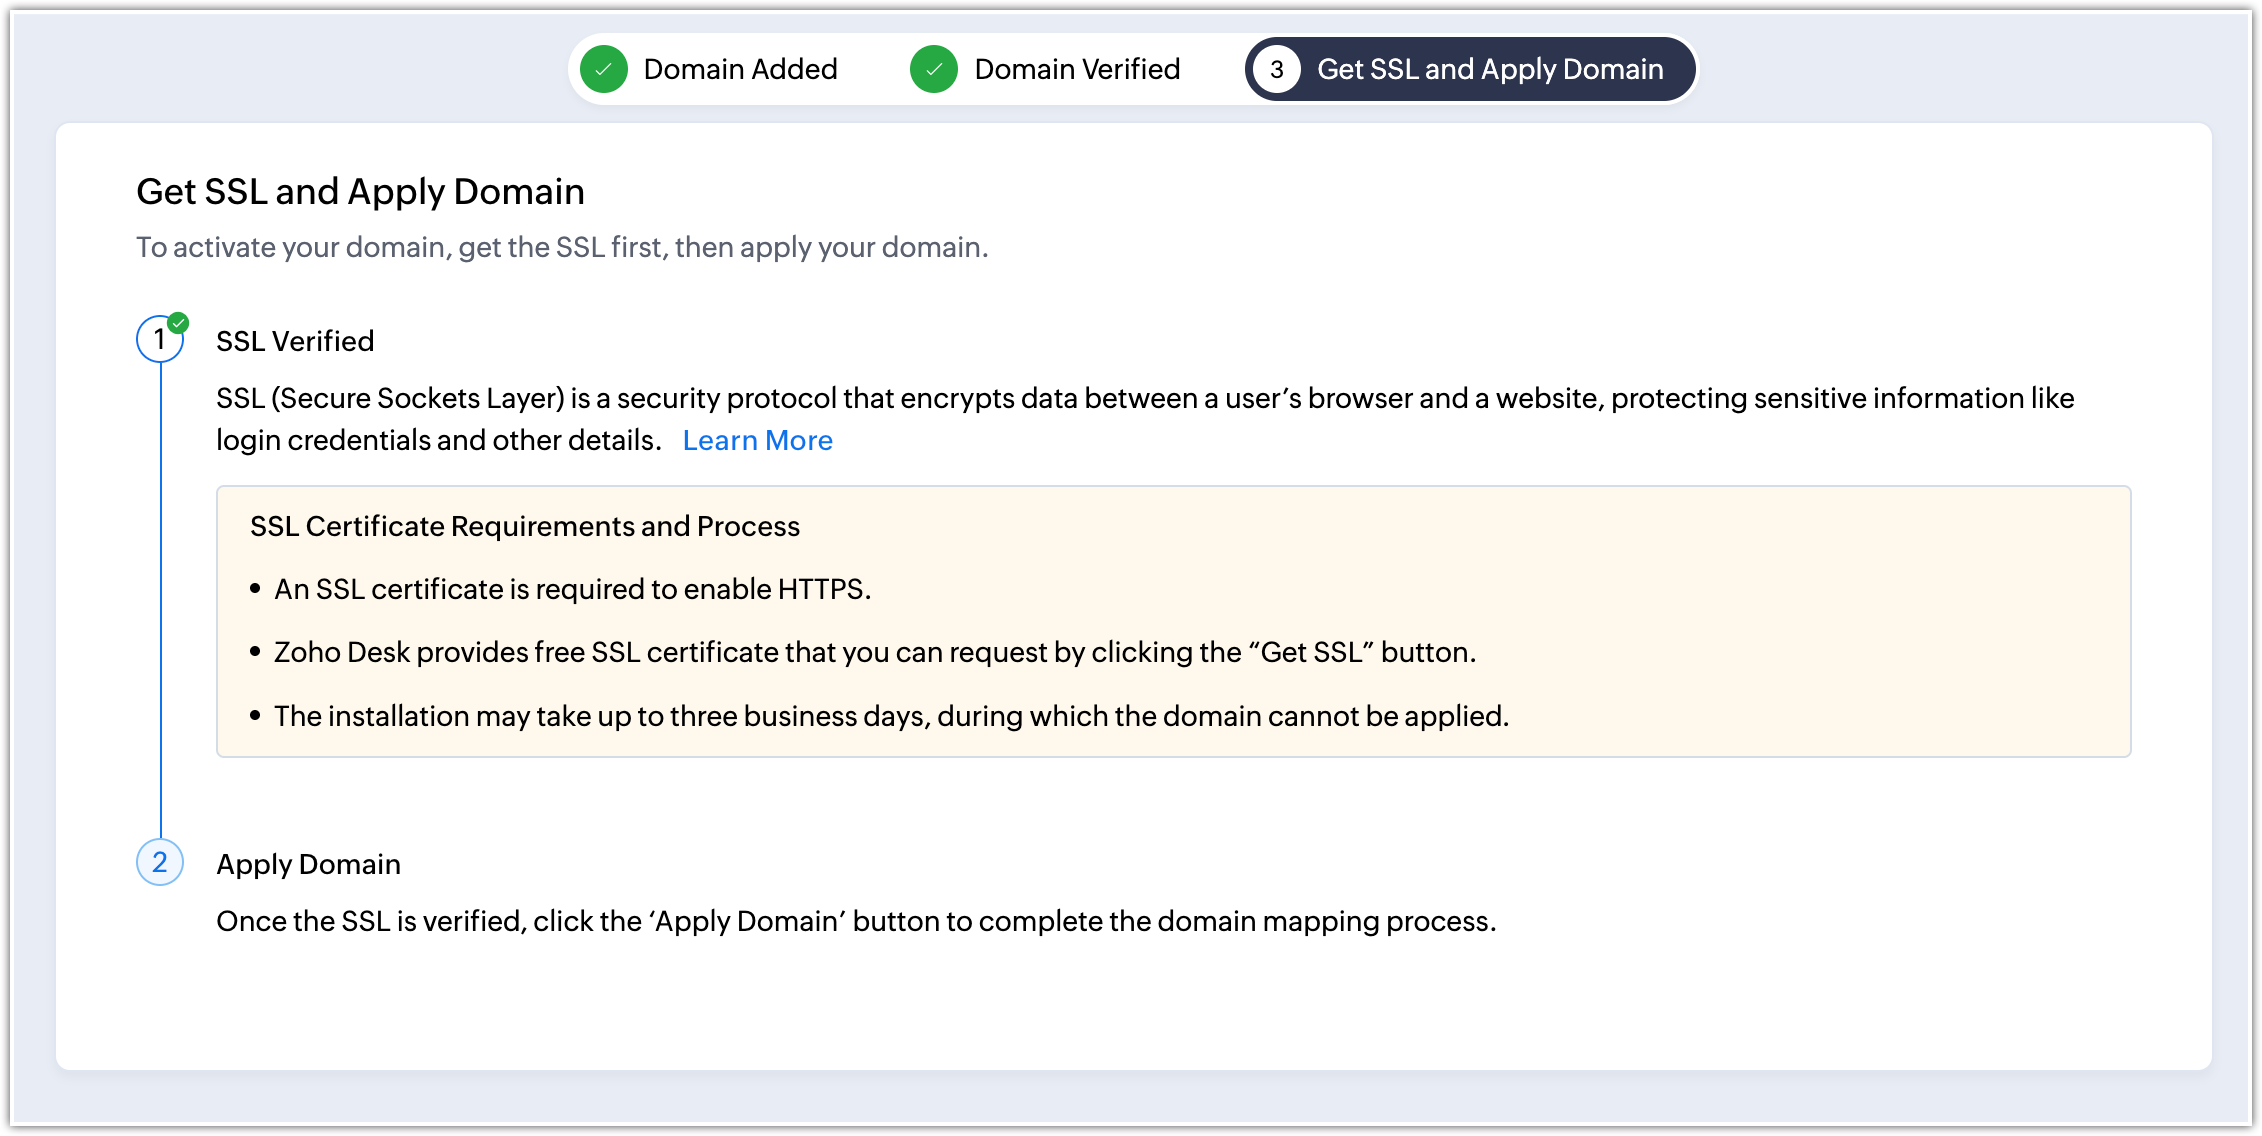
Apply Domain
Once we have installed an SSL certificate for your domain, you can apply it to your Zoho Desk. Please keep in mind that you are allowed to apply only one domain unless you have enabled the multi-branding feature.
To apply a domain
- On the Domain Mapping page, click Apply Domain corresponding to the verified domain you want to apply.
- Click Apply within the Setup Wizard.
The new domain will be successfully mapped to your Zoho Desk. - Click Visit Domain to open the domain on a new tab.
- If everything is fine, click Reload on the original tab.
You can now access Zoho Desk at the new domain.
Reset Domain
You can reset the domain mapping if you want to access Zoho Desk at its default URL, i.e., desk.zoho.com.
To reset domain mapping
- Go to Setup (
- Click Domain Mapping under the Rebranding sub-menu.
- On the Domain Mapping page, hover your mouse pointer over an applied domain and click the Reset icon (
).
- Click Reset on the confirmation screen.
You can now access Zoho Desk at the default URL.

Note:
- The domain mapped to a multi-brand Help Center cannot be reset.
Delete Domain
You can delete both the verified and the unverified domains that you've added to your Zoho Desk.
To delete a domain
- Go to Setup (
- Click Domain Mapping under the Rebranding sub-menu.
- On the Domain Mapping page, hover your mouse pointer over a domain and click the Delete icon (
).
- Click Delete on the confirmation screen.
Note:
- The domain applied to Zoho Desk cannot be deleted until you reset it.
- The domain mapped to a multi-brand Help Center cannot be deleted until you unlink their domain or delete the Help Center.
Frequently Asked Questions
1. I had configured an incorrect domain in my help desk and got locked out of my account.
Visit this URL: http://zohodesk.com/support/ <portalname>/DomainMapping.do to access your Zoho Desk account. Please make sure to enter the correct domain URL and save your settings.
2. Once I map my domain, can agents and customers access our help desk at https://zohodesk.com/portal/ ?
Yes. When users access "desk.zoho.com", their browser will be automatically redirected to your mapped domain.
3. Can I use the parent domain's already authenticated tokens?
No. The reason users can't use the parent's already authenticated tokens is that destination email servers will not ask the parent to resolve tokens for a sub-domain, the servers will treat the sub-domain as its own entity, therefore they must bear their own tokens - something that cannot be done with a host pointer, it can only be provided by a subzone.
4. Why is the verification step needed?
The authentication is only partly for Zoho Desk. The purpose of verification is to enable other servers to verify whether they have permission to send on the user's behalf. Other servers don't know whether the user had access to the domain in the first place, so they assume the user didn't have access unless tokens are present.