Integrating Google Forms using Zoho Flow
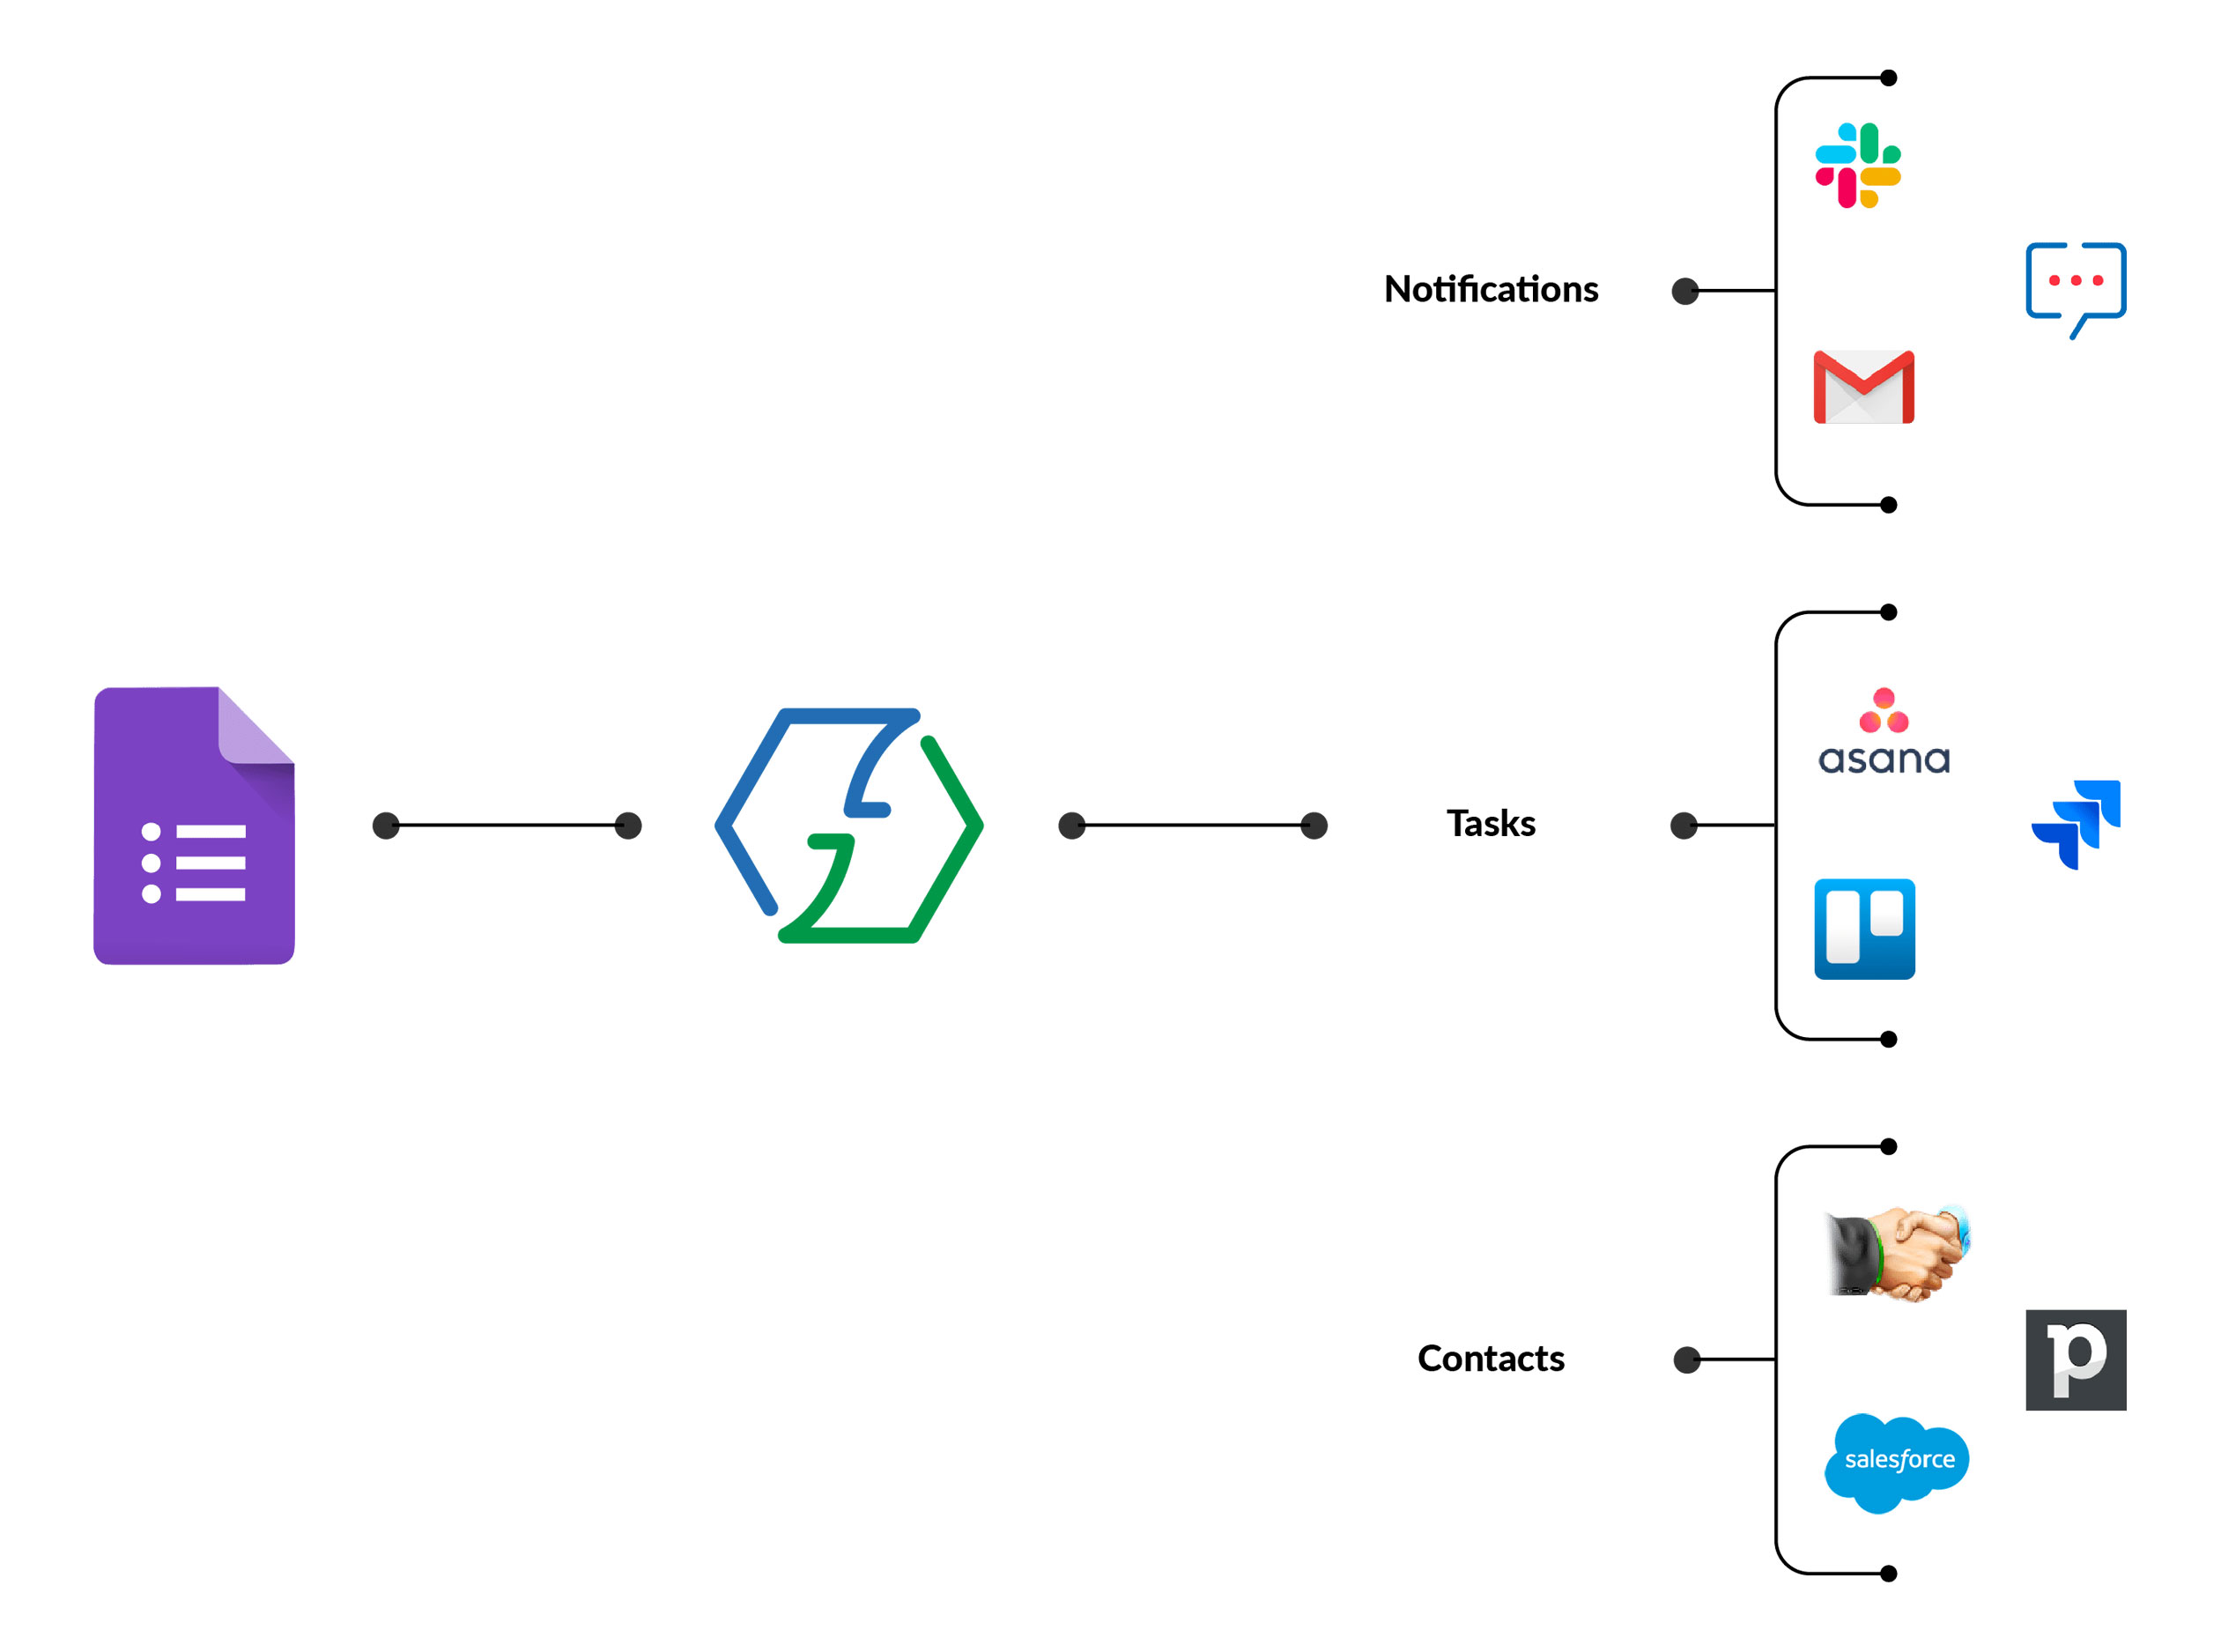
Google Forms has become a popular web-form tool for collecting contacts, surveys, and quizzes. Creating a form and consolidating the responses in a spreadsheet is a straightforward process and takes only a few minutes. However, what if you need to use the collected data more effectively, for tasks such as sending automated emails for each new response, notifying your team in Slack, and adding leads to your CRM application?
Manually converting your form's responses into useful tasks is a waste of your valuable time. With automation, your workflow can detect a form submission, decide what to do with the response data, and distribute it to the apps of your choice. The possibilities are endless.
How do you automate such workflows?
Workflow automation can be implemented in many ways. Using code is one way of achieving it, but this can be tricky for most practical applications. A workflow automation platform like Zoho Flow can be incredibly useful in circumventing this. It allows you to automate tasks by integrating your favorite apps, controlling and manipulating data that flows between them.

What you will need
- A Google account
- A Zoho Flow account
Getting started: Creating your Google Form
Once you have logged in to your Google account, you can go to docs.google.com/forms to start creating your new form. Even better, you can create a sheet in Google Sheets, click on Tools > Create a form to create one. All the responses that it collects get saved automatically in that spreadsheet.
Work with the title, form fields, and other options to create the form that you would like to use.
Adding a Form Project: Google Forms Script editor
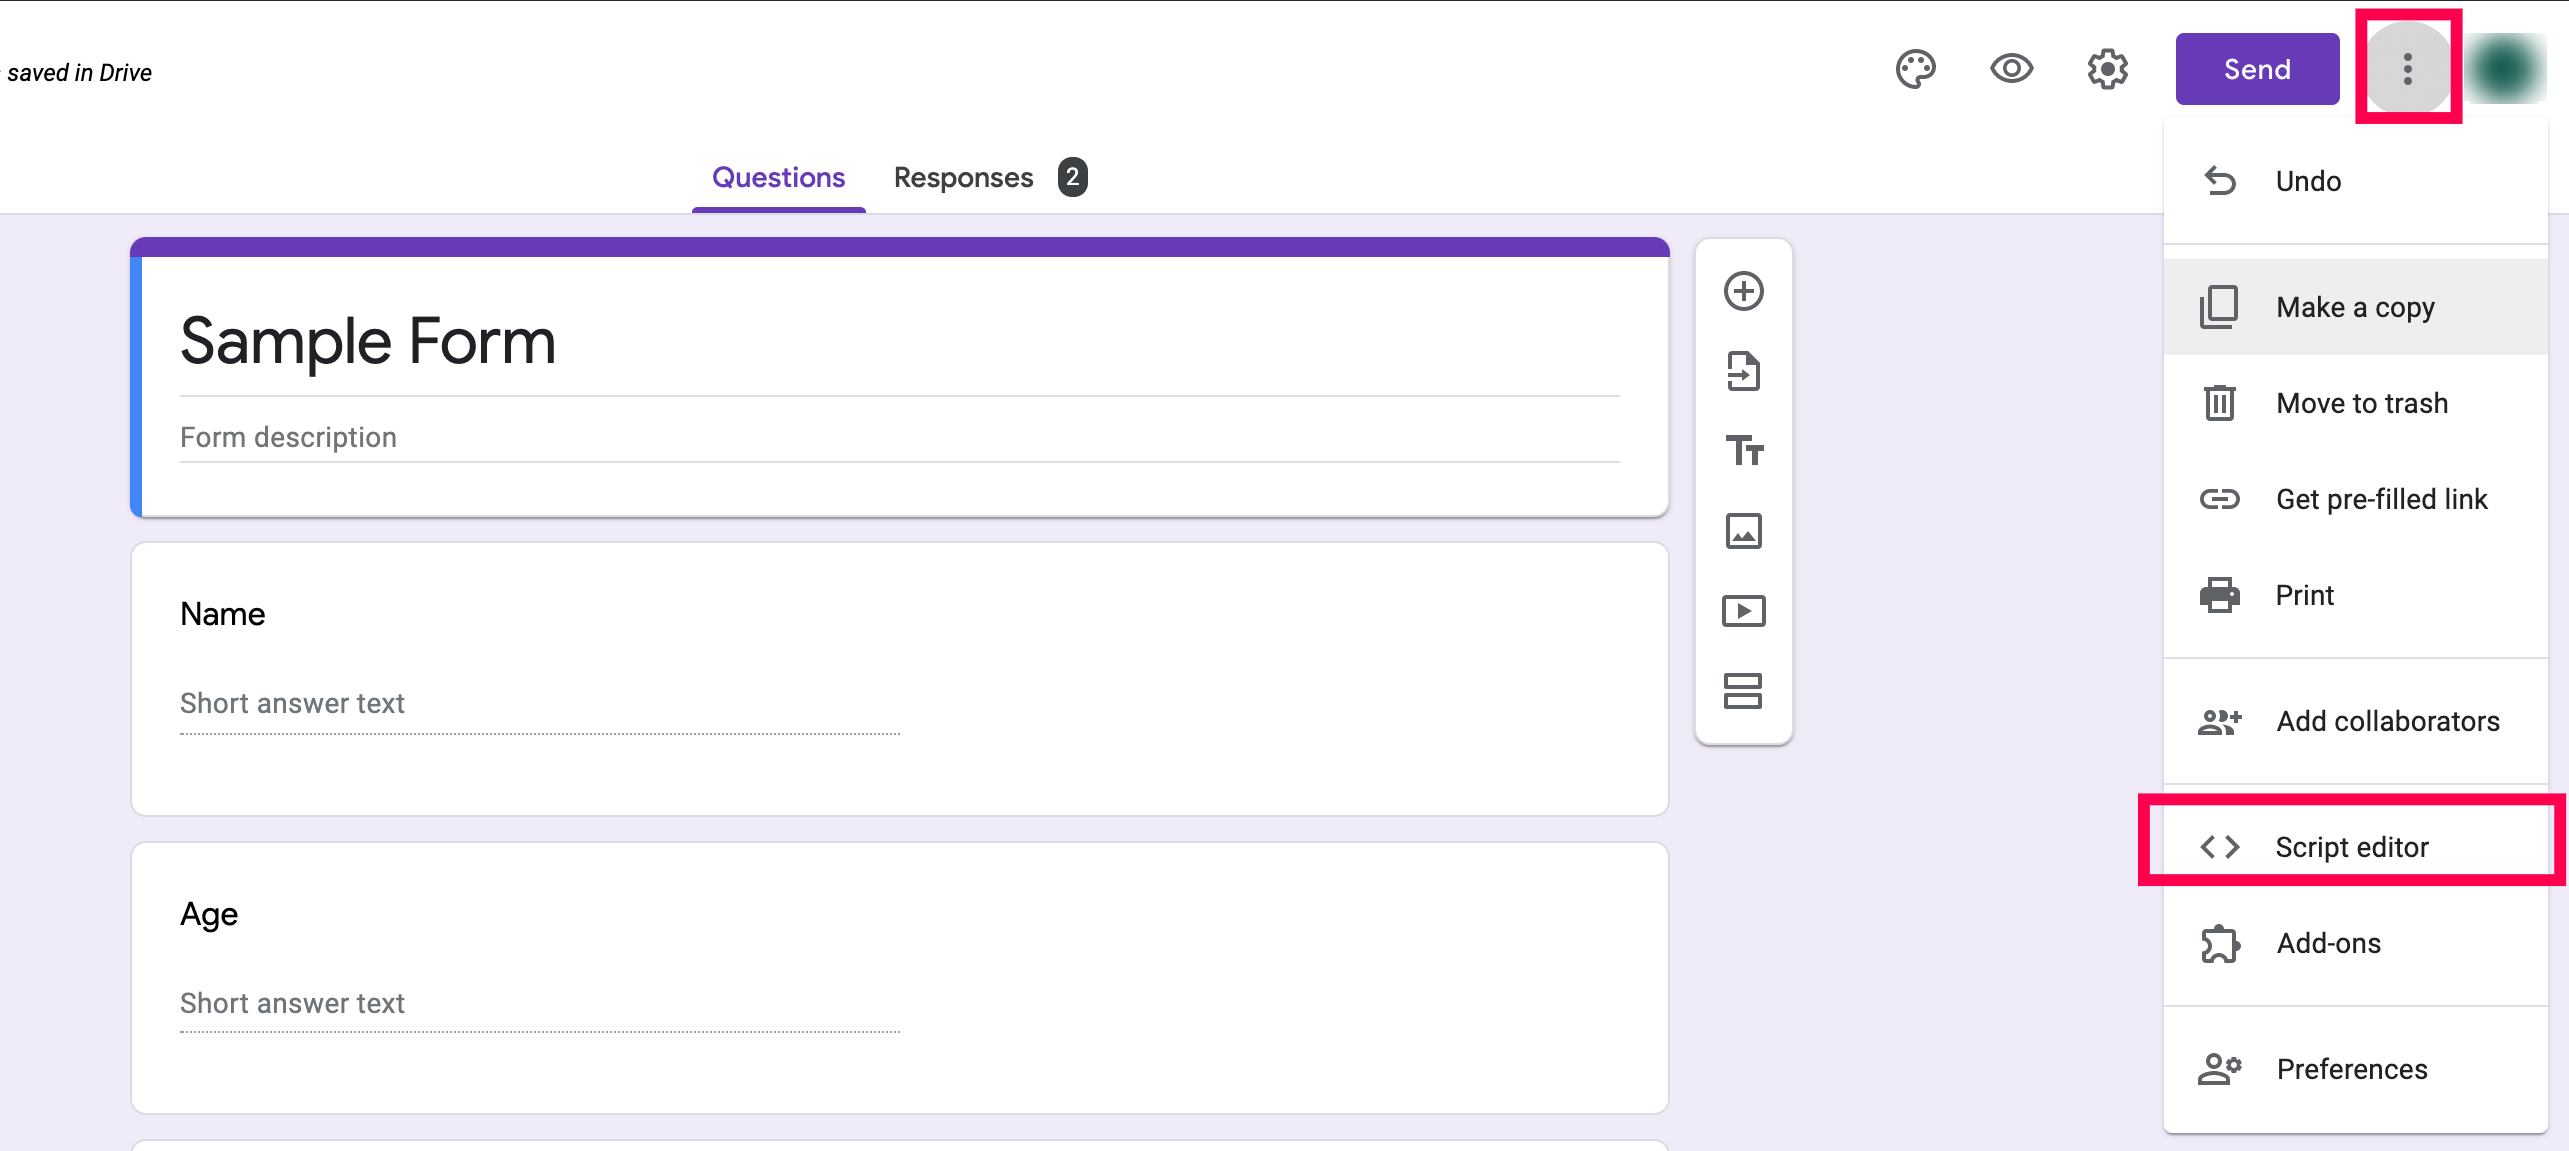
- Navigate to the More menu (the 3 dots) on the top right corner, adjacent to the SEND button. Click Script editor. This will open a new tab containing a console.
-
Clear the existing contents in that console and copy the following content into it.
function onFormSubmit(form) {
	var formResponses = form.response.getItemResponses();
	var responsePayload = new Object();
	for (var i = 0; i < formResponses.length; i++) {
		responsePayload[form.response.getItemResponses()[i].getItem().getTitle()] = form.response.getItemResponses()[i].getResponse();
	}
	console.log(responsePayload);
	var url = "WEBHOOK URL";
	var options = {
		"method": "post",
		"headers": {},
		"payload": responsePayload
	};
	var response = UrlFetchApp.fetch(url, options);
}
- Save your project by clicking the Save button.
- Navigate to the left panel, then click Triggers.
- Click Add Trigger. In the follow dialog box, select the Event type as On form submit, then click SAVE.
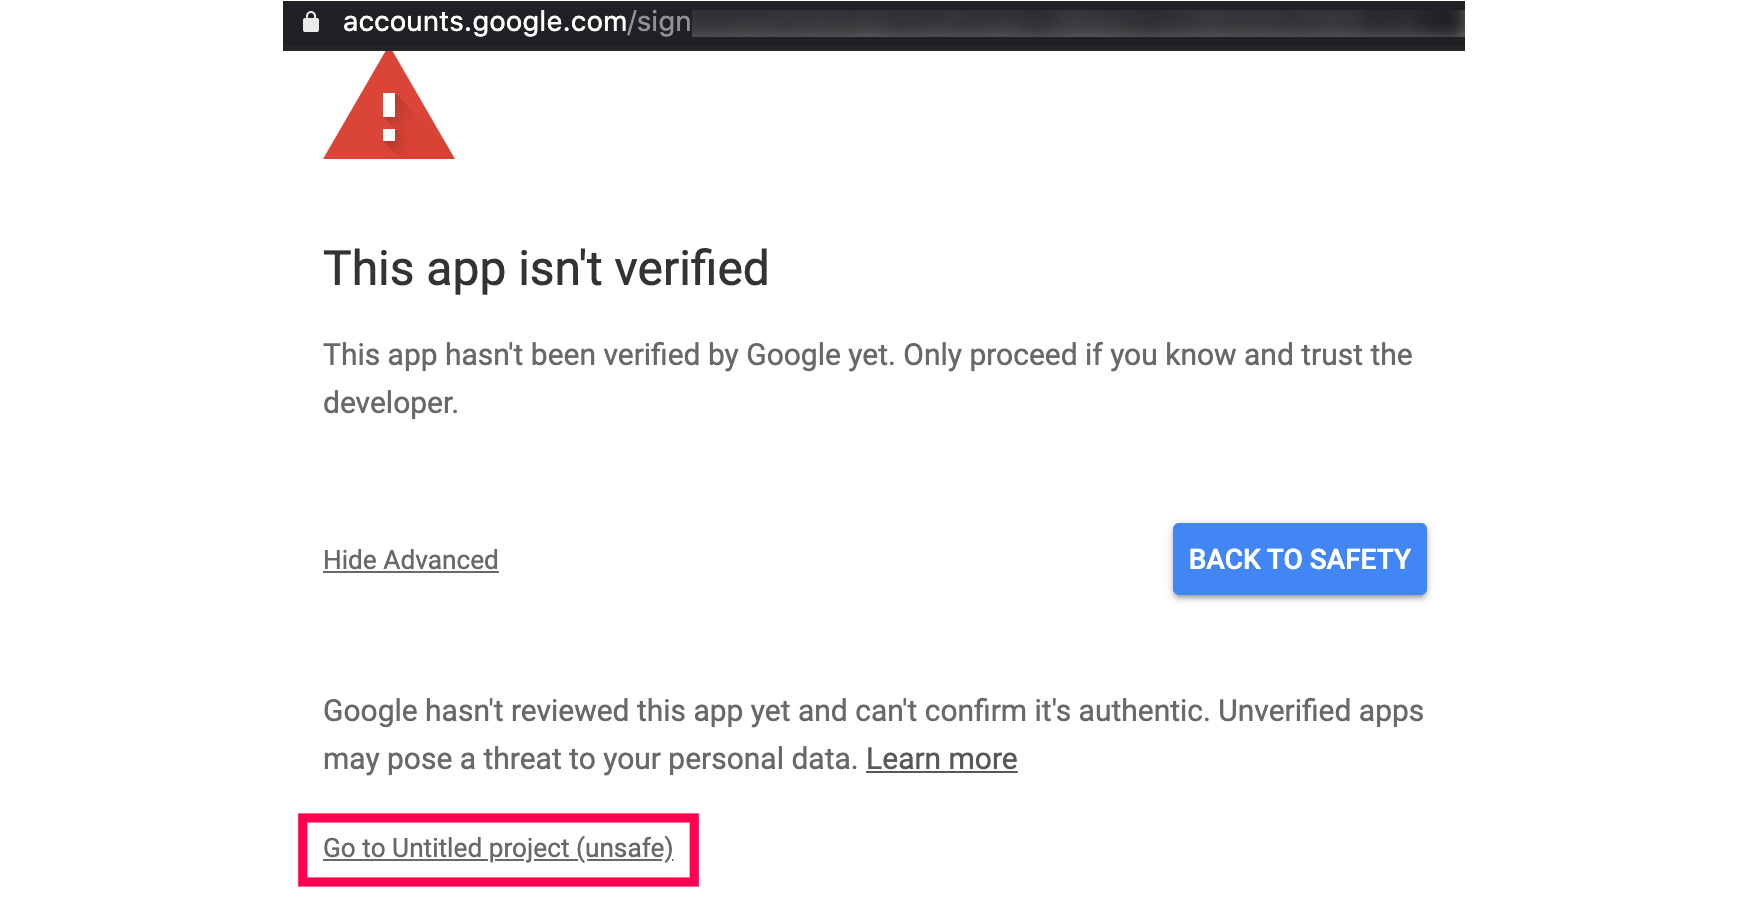
- You will be asked to select your Google account. Since you are inserting a code, it will ask you to proceed only if you trust the developer. Do not worry. Click Advanced, then click Go to <your project>.
- Click Allow in the next step.
Adding automation : Using Zoho Flow's Webhook trigger
A trigger in Flow refers to an event that activates your flow. In this case, the trigger will be a webhook. The webhook trigger in Zoho Flow generates a unique URL, which can be used in third party applications (like Google Forms in this scenario) to send data to Flow in real time whenever a form submission has been made. Once the data reaches Flow, you can move it to other applications of your choice.
Setting up the trigger
To set up a webhook trigger, follow these steps:
- Log in to Zoho Flow in a new tab and create a new flow.
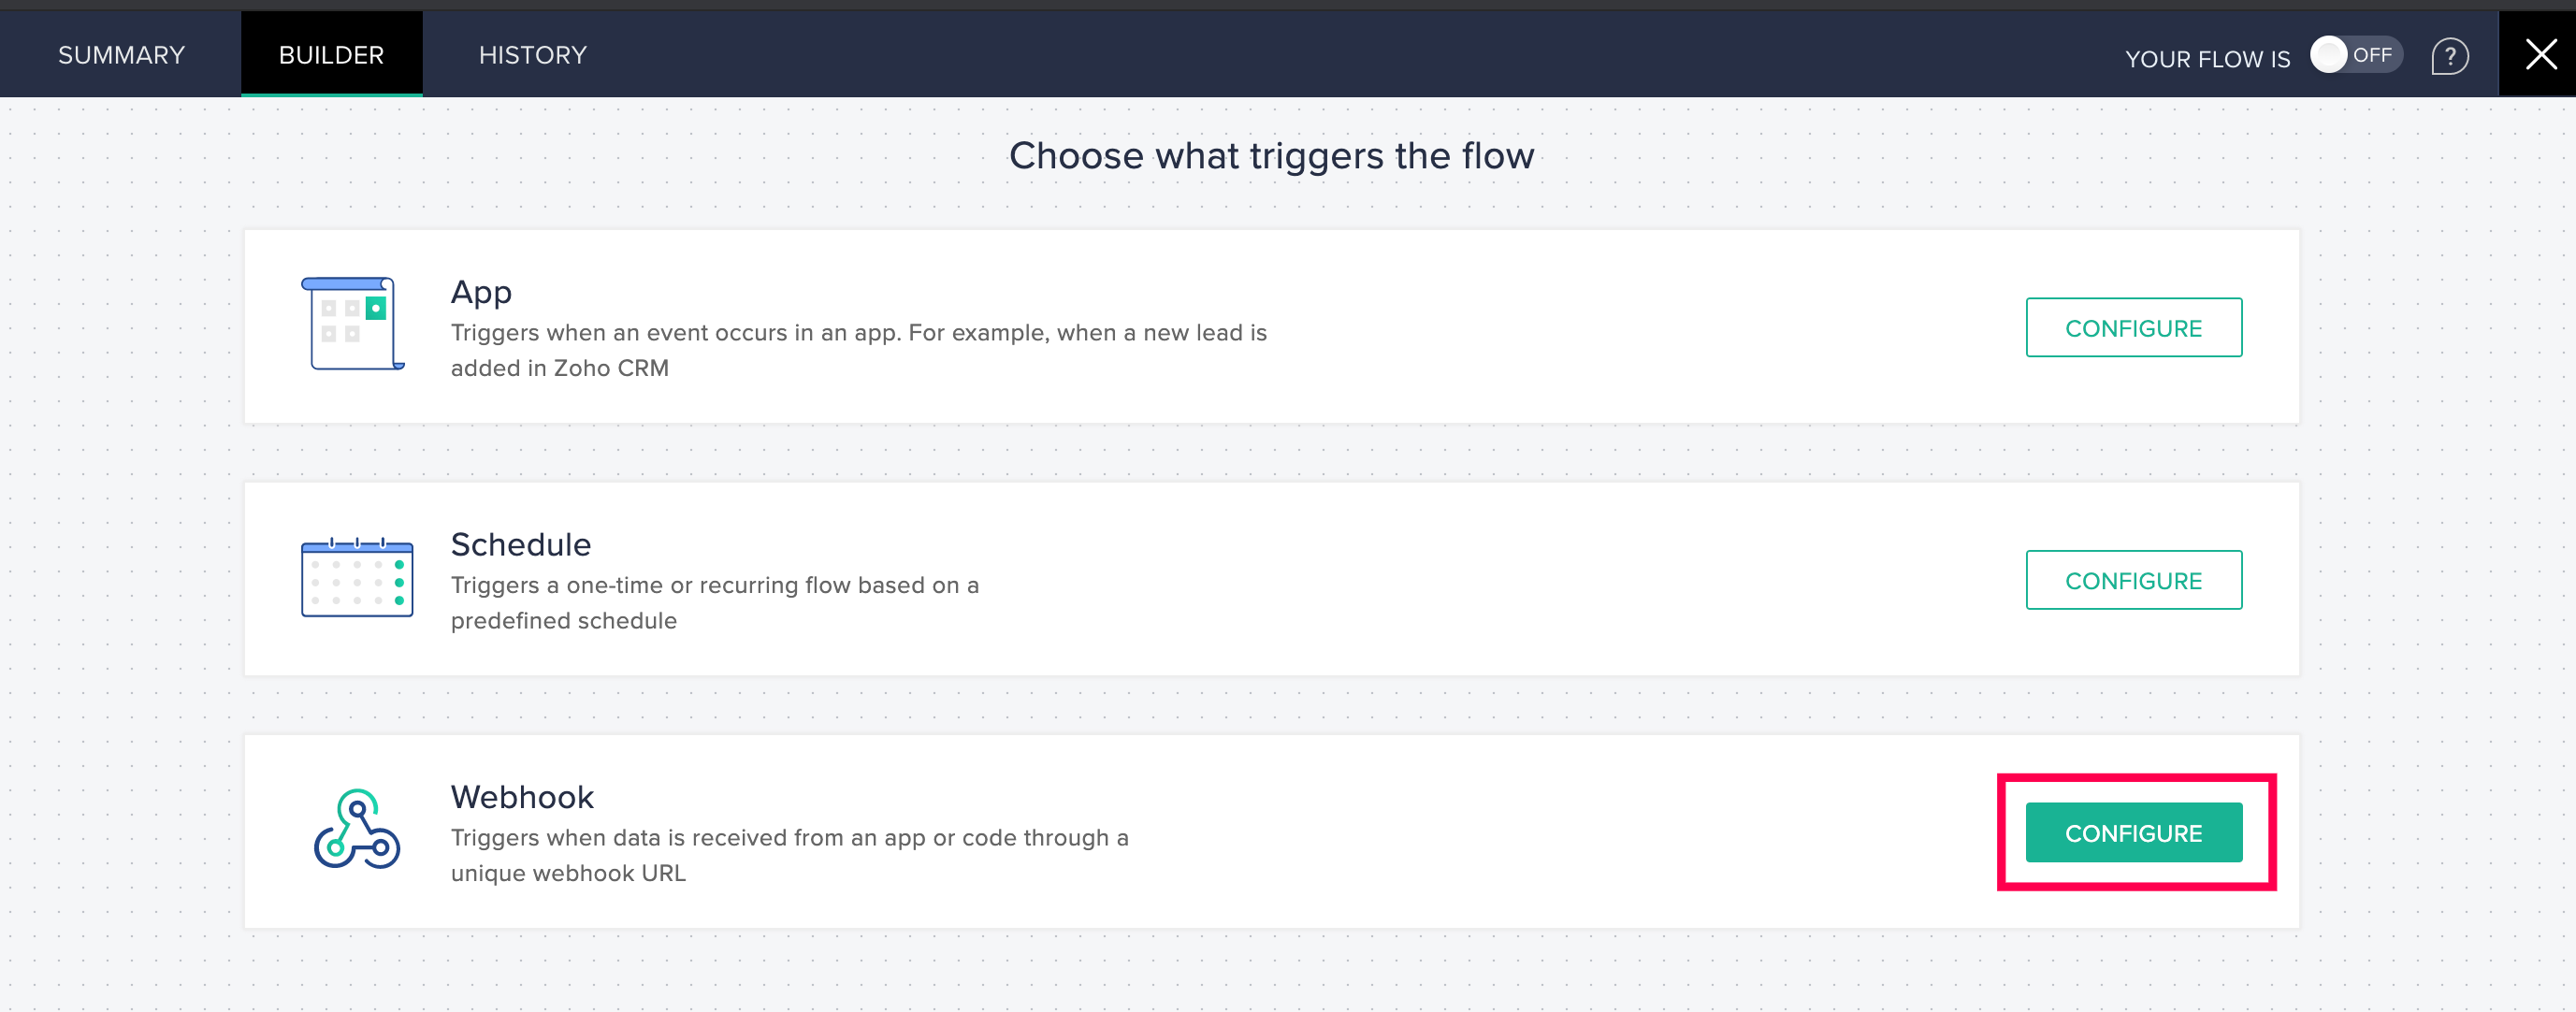
- Click Configure in the webhook trigger box.
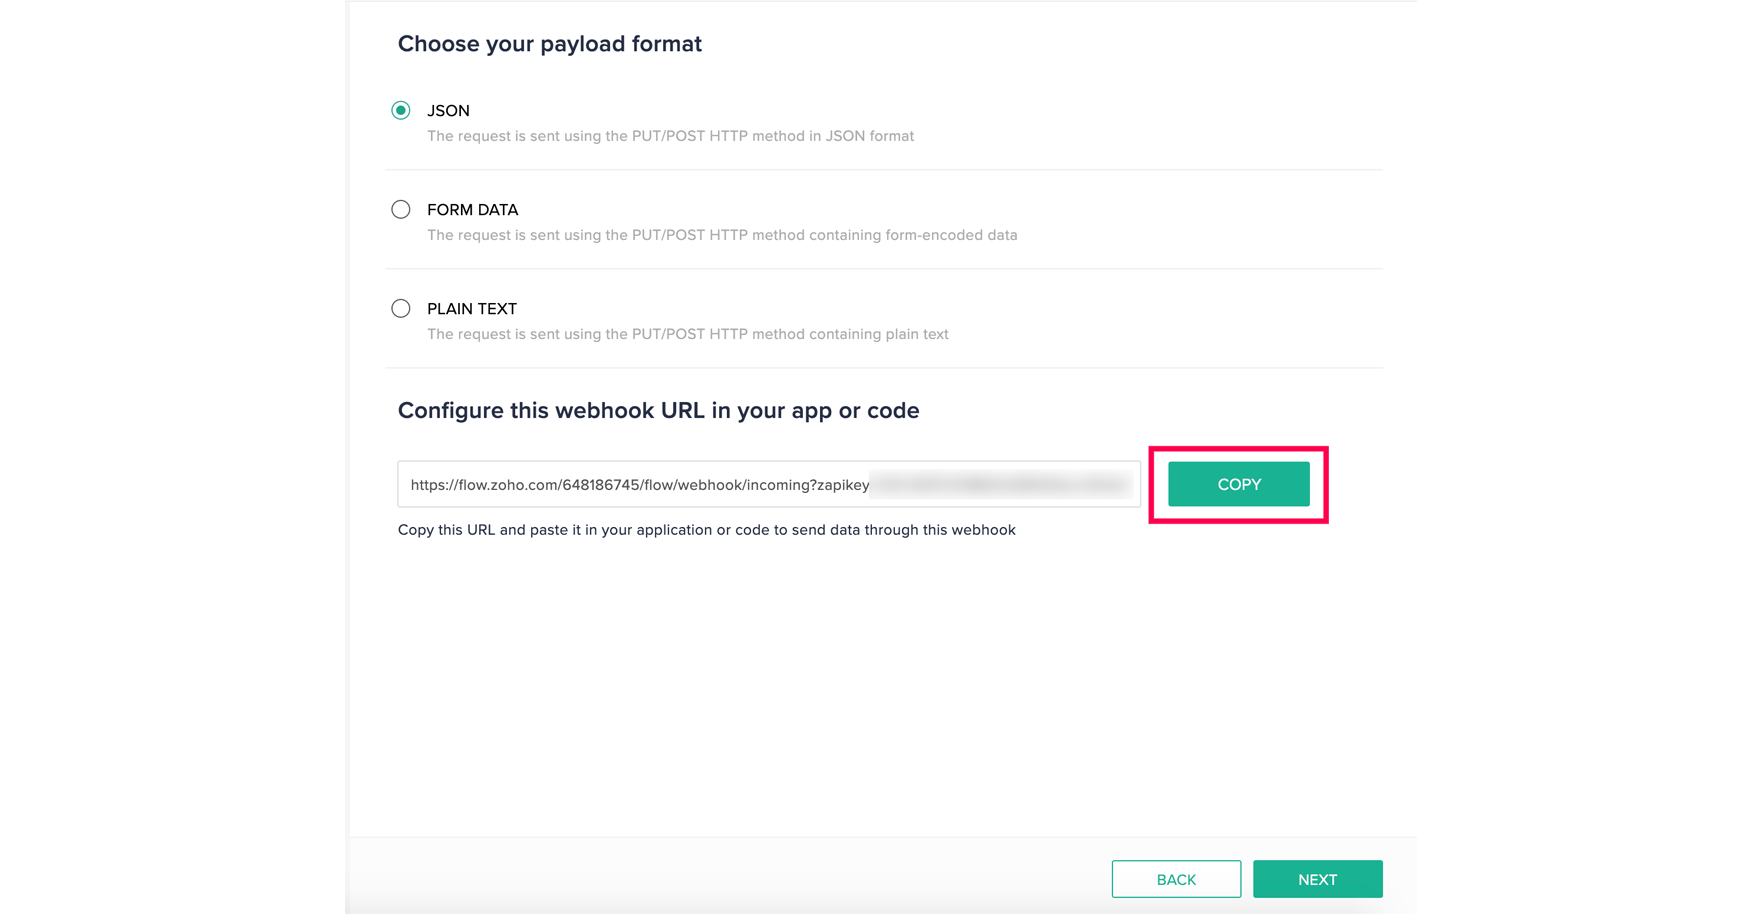
- Copy the generated URL from the configuration window that opens, then click NEXT.
- Go back to Google Forms Script editor tab and replace WEBHOOK URL with the copied URL within the quotes. Do not remove the quotes.

- Navigate to File > Save.
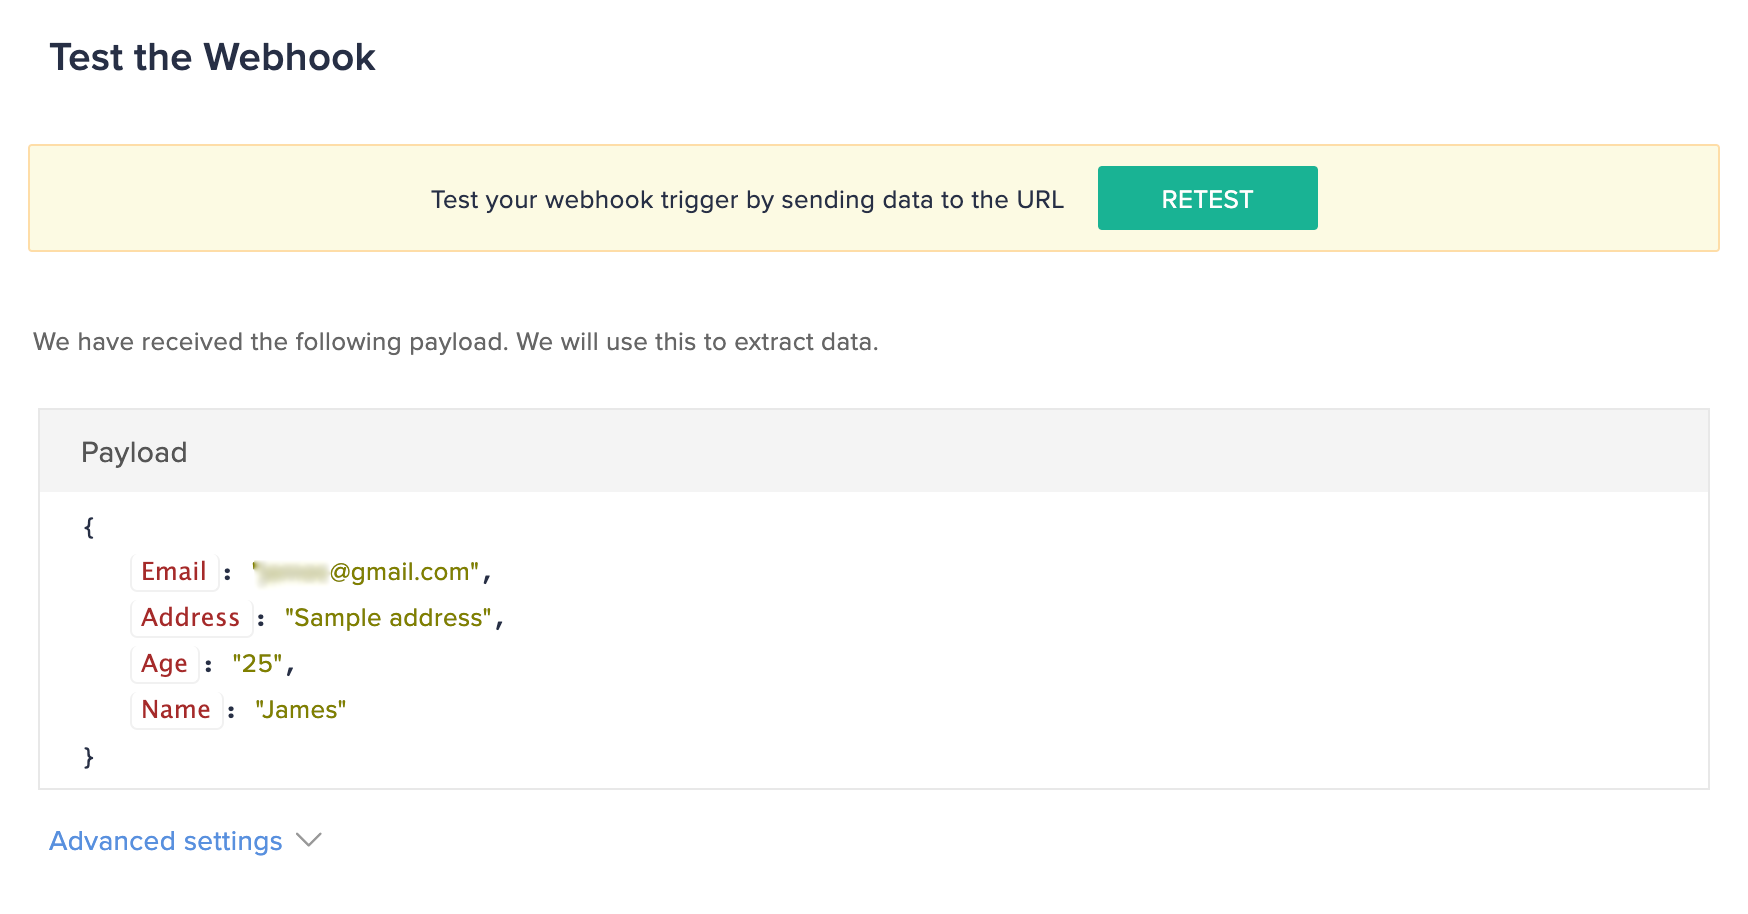
- Return to Zoho Flow and click TEST. You have the option of making a sample form submission to test if it is working perfectly. Click DONE.
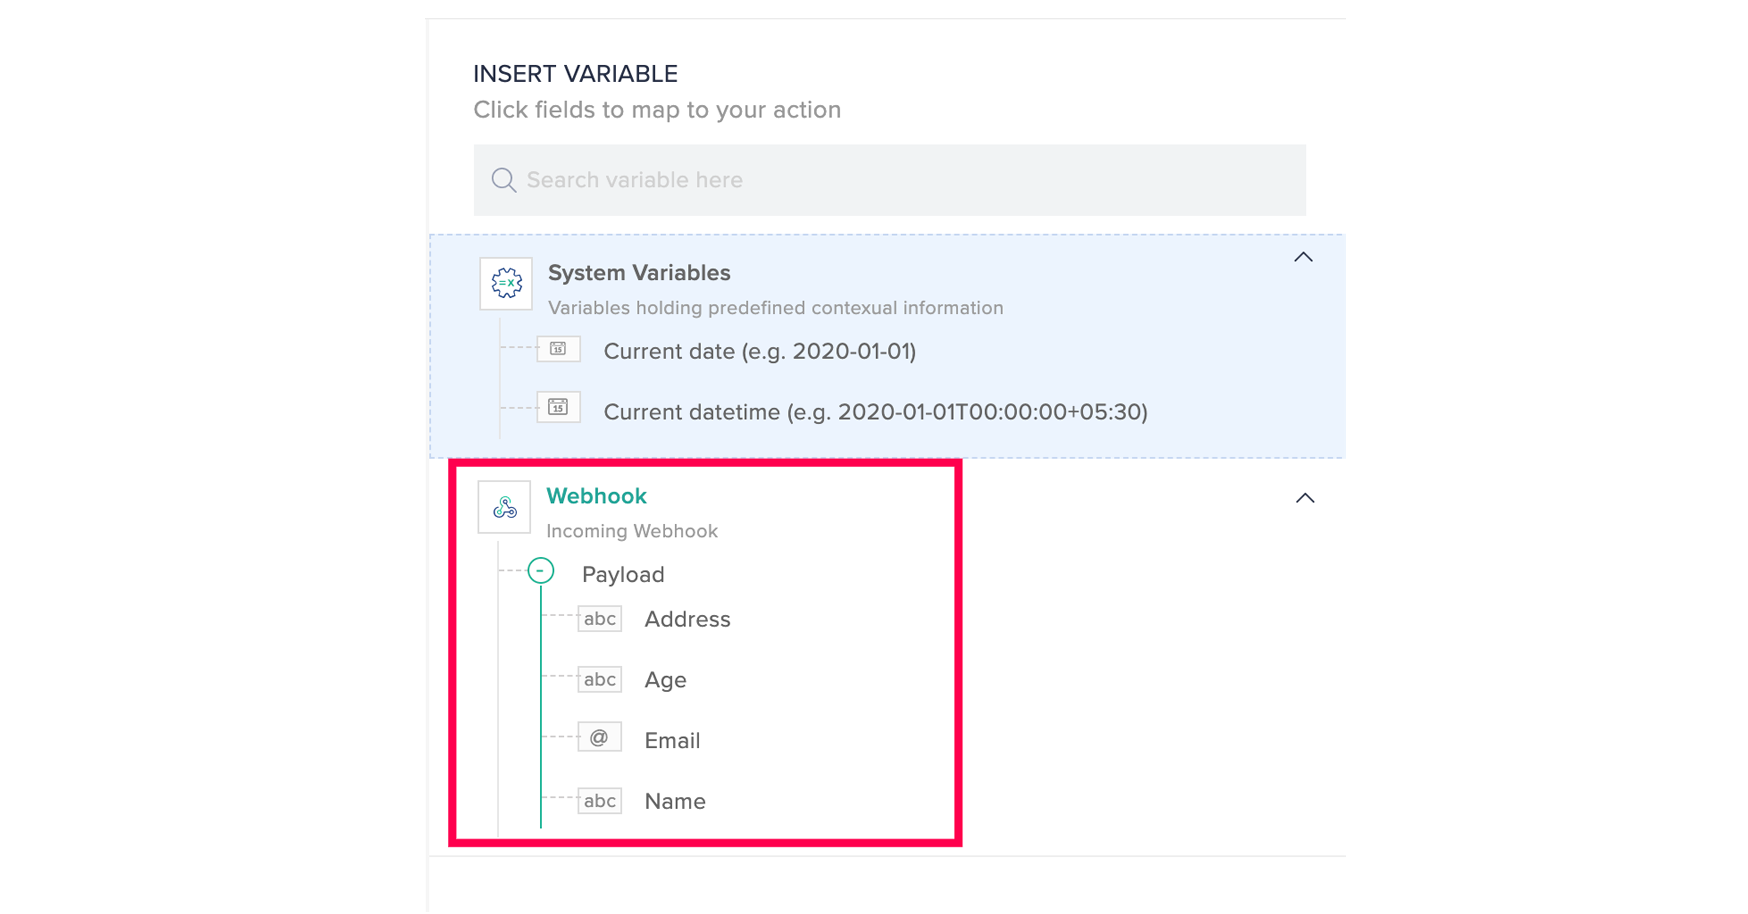
- Connect actions or decisions to the Webhook trigger in the Flow Builder. All responses in your form will be available as Variables in the INSERT VARIABLE panel.