Create a flow from scratch
Create a flow from scratch
Create and customize a flow from scratch to solve your automation needs.
- In the My Flows section, click Create Flow in the top-right corner. Alternatively, click the + button on the left panel.
- Enter the flow name and a description (optional). Click Create to be directed to your builder screen.
Once you land on the builder screen, follow these steps to configure your flow:
Configure trigger
When you land on the builder, you will be asked to select the trigger type. A trigger is the event that starts a flow execution.
Zoho Flow currently supports six types of triggers:
App trigger (with Trigger criteria)
App trigger - Triggers when there is a data update in an app. For example, when a new lead is added in Zoho CRM. To configure the app based trigger:
- Click Configure in the App trigger box.
- Pick an app to trigger your flow and click Next.
- Choose the event in the app to trigger your flow and click Next.
- If you have created any connections already, choose one from the list of connections in the dropdown, then click Done.
If there are no existing connections, you can choose to create a new one by clicking +New. Once you create a connection, it can be used for various flows in your organization. Note that different apps have different authentication methods. - After configuring or selecting a connection, the variable name will be autofilled. You can edit the name if needed. When renaming the variable, note that:
- All names must start with a letter. Variable names can contain alphanumeric characters and underscores.
- Other characters, such as spaces, are not accepted. Names must be unique to avoid naming clashes.
- If you use the same variable name for multiple actions, the result of the action executed last will be stored in the variable. E.g: new_deal, createTask
- Enter data in the fields that appear.
- Click Done.
Note: There are two types of trigger that various apps support. These are polling and realtime (webhook). The polling trigger checks for data updates at regular intervals and triggers the flow. The realtime trigger initiates the flow when the trigger app pushes update data to Zoho Flow.
Trigger criteria
You can configure your trigger in such a way that your flow executes only when certain conditions are met. This avoids the extra step of adding a Decision logic following the trigger. While setting up your trigger, navigate to Filter criteria and configure the test conditions. The first dropdown is the list of variables from the trigger. The second dropdown is the condition to be applied. The text field is what the variable should be compared with.
Add Actions
An action is a task that the workflow executes based on the trigger. Once you have configured the trigger, you need to add actions. You will find these actions (app and logic-based) to the left of your builder under the App and Logic sections.
App-based actions - These are tasks that the workflow executes in an app, such as sending an email or adding a record. To configure app-based actions:
- Click each app on the left of the builder to view the actions available. Drag the required action to the builder, and an indication to drop will appear.
- If there are no existing connections, you can choose to create a new one by clicking +New. Once you create a connection, it can be used for various flows in your organization. Note that different apps have different authentication methods.
If you would like to choose an existing connection, pick from the dropdown. - Enter data in the fields that appear. You can map data from the previous steps to move information from one app to another in the flow. Learn how to map data
- Click Done.
- The action can be edited, cloned, or deleted using the icons in the right of the action.
- You can add links between the trigger and actions to modify the sequence of events. Click the small dot on the trigger or action and drag to the other action.
- To remove a link, hover over it until a scissors icon appears and click on it.
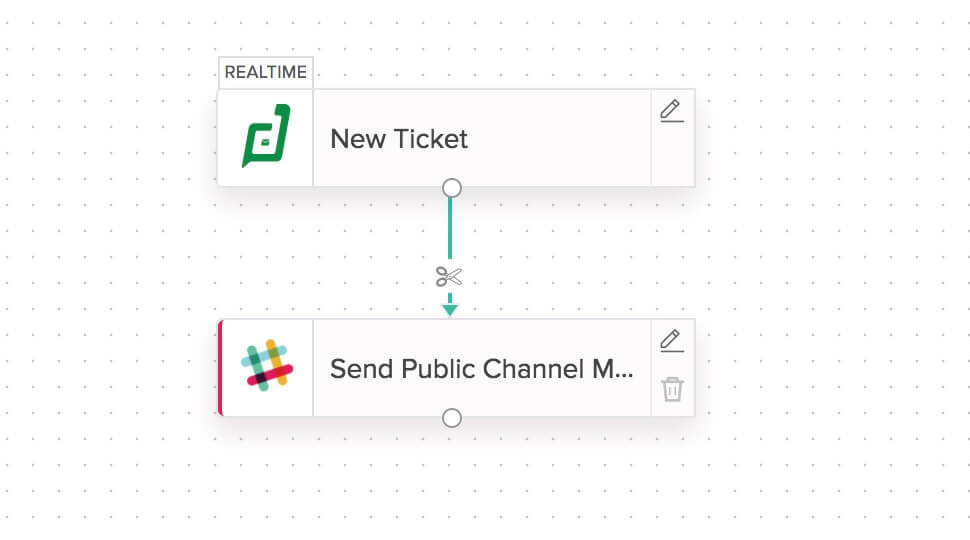
You can add as many actions as you need.
Logic-based actions - If you wish to automate detailed tasks, you can add logic elements to perform different actions for different filter rules, delay part of the workflow, or introduce your own function. Learn more
Note:
- If you edit a trigger or action, modify the mapped data in the next steps accordingly. Otherwise, the flow will fail.
- If you add fields in an app while configuring your flow, they may not be reflected as variables in the next step. To solve this, click edit on the Zoho Flow builder for the app you modified, and click Done.
Test and debug
Testing and debugging your flow ensures that it is error-free. This is an optional step to check if the flow is working correctly.
Click the Test & Debug icon. Learn how to test and debug
Switch on
To switch on your flow and let it work with actual data, click the slider at the top.
Schedule trigger - Triggers a one-time or recurring flow to a predefined schedule. For example, you can configure this trigger when you want to schedule a weekly meeting with your team or send emails and notifications to the attendees automatically. You can also choose when to execute your flow: daily, weekly, monthly, yearly, or just once. Learn how to configure
Note: Once configured, you can change the triggers but can't delete them unless you delete the flow. You can reconfigure a trigger by clicking the edit icon. Click the trigger type in the top-left corner to change it.
Email trigger - The email trigger parses data from incoming formatted emails to automate workflows. It activates a flow when you receive emails that follow a predefined template, such as cab receipts, payslips, etc. Once you configure the email trigger with a sample email template, the flow will be triggered everytime an email with a similar template reaches the inbox. The email parser will extract data from the email, and this data can be used as variables in the flow. Learn how to configure