Creating Reports
Configuring Reports
With reports, you can sort and consolidate form data by applying filters on the received entries. This way, you can analyze the data collected better and get your team involved in managing them. You can share the reports publicly, or with specific users, and print and export the reports. You can also embed the report into any webpage.
You can access the Reports section of your form in two ways:
- On the homepage (Forms listing page), click the Reports link below your form's name. A list of all the reports created for that particular form will be displayed.
- To create a new report, click New Report in the top-right corner of the page.
- Choose the type of report you wish to create. Zoho Forms provides two different ways to present your data. They are
List View
In List View, all entries are consolidated and presented in tabular format similar to spreadsheet. Using list view, you get a comprehensive view of your entire data set on a single screen.The field names are displayed as column header and each record occupies a row. This allows you to see all your information at once glance.
Steps to Configure List View Report
If you have chosen List View, provide the Report Name and click Create to see the report builder.
Kanban View
Kanban view reports offer a visually engaging way to represent your data. It uses selection fields like Dropdown or Radio fields to categorize entries. The selections made in your dropdown or radio buttons become the column headers. This creates a clear visual distinction between different categories within your data set. Each record in your report is transformed into a visual card. This card can display relevant information about the entry, making it easy to scan and understand. Entries are automatically grouped under the relevant column based on the selection made for that specific record. This allows you to see how many entries fall into each category at a glance.
Let's assume you're hosting a series of webinars on various digital marketing topics. You want to understand which webinars are attracting the most interest from registrants. Using kanban view report you can instantly categorise entries based on their selected webinar topic. This allows you to gauge audience interest and identify the most popular topics.
Steps to Configure Kanban View Report
- If you have chosen Kanban View, provide the Report Name and select a field to group entries in Group Columns By and click Next.
 Note: Only Dropdown and Radio choice fields will be displayed for you to choose from.
 - Select the fields that has to be displayed in the report. Click
to add more fields.
Note: You can add a maximum of four fields. Matrix and subform fields are not supported in Kanban view. - Click Create to see the report builder.
Note :
- Kanban view can only display upto 20 columns in a report. If your grouping field has more than 20 choices, by default the first 20 choices will be displayed in columns. To edit the choices displayed in the report, click Modify view in the report.
- Each column can display a maximum of 1000 entries.
Alternatively,
- Click the Reports tab on the home page. A list of all the reports created will appear.
- To create a new report, click the New Report button in the top-right corner of the page.
- Choose the view type of your report and configure it.
- Click Create once done.
You will have the following Report Options while creating a new report:
Note: Auto Filters option is available only in List view report builder.
General Settings
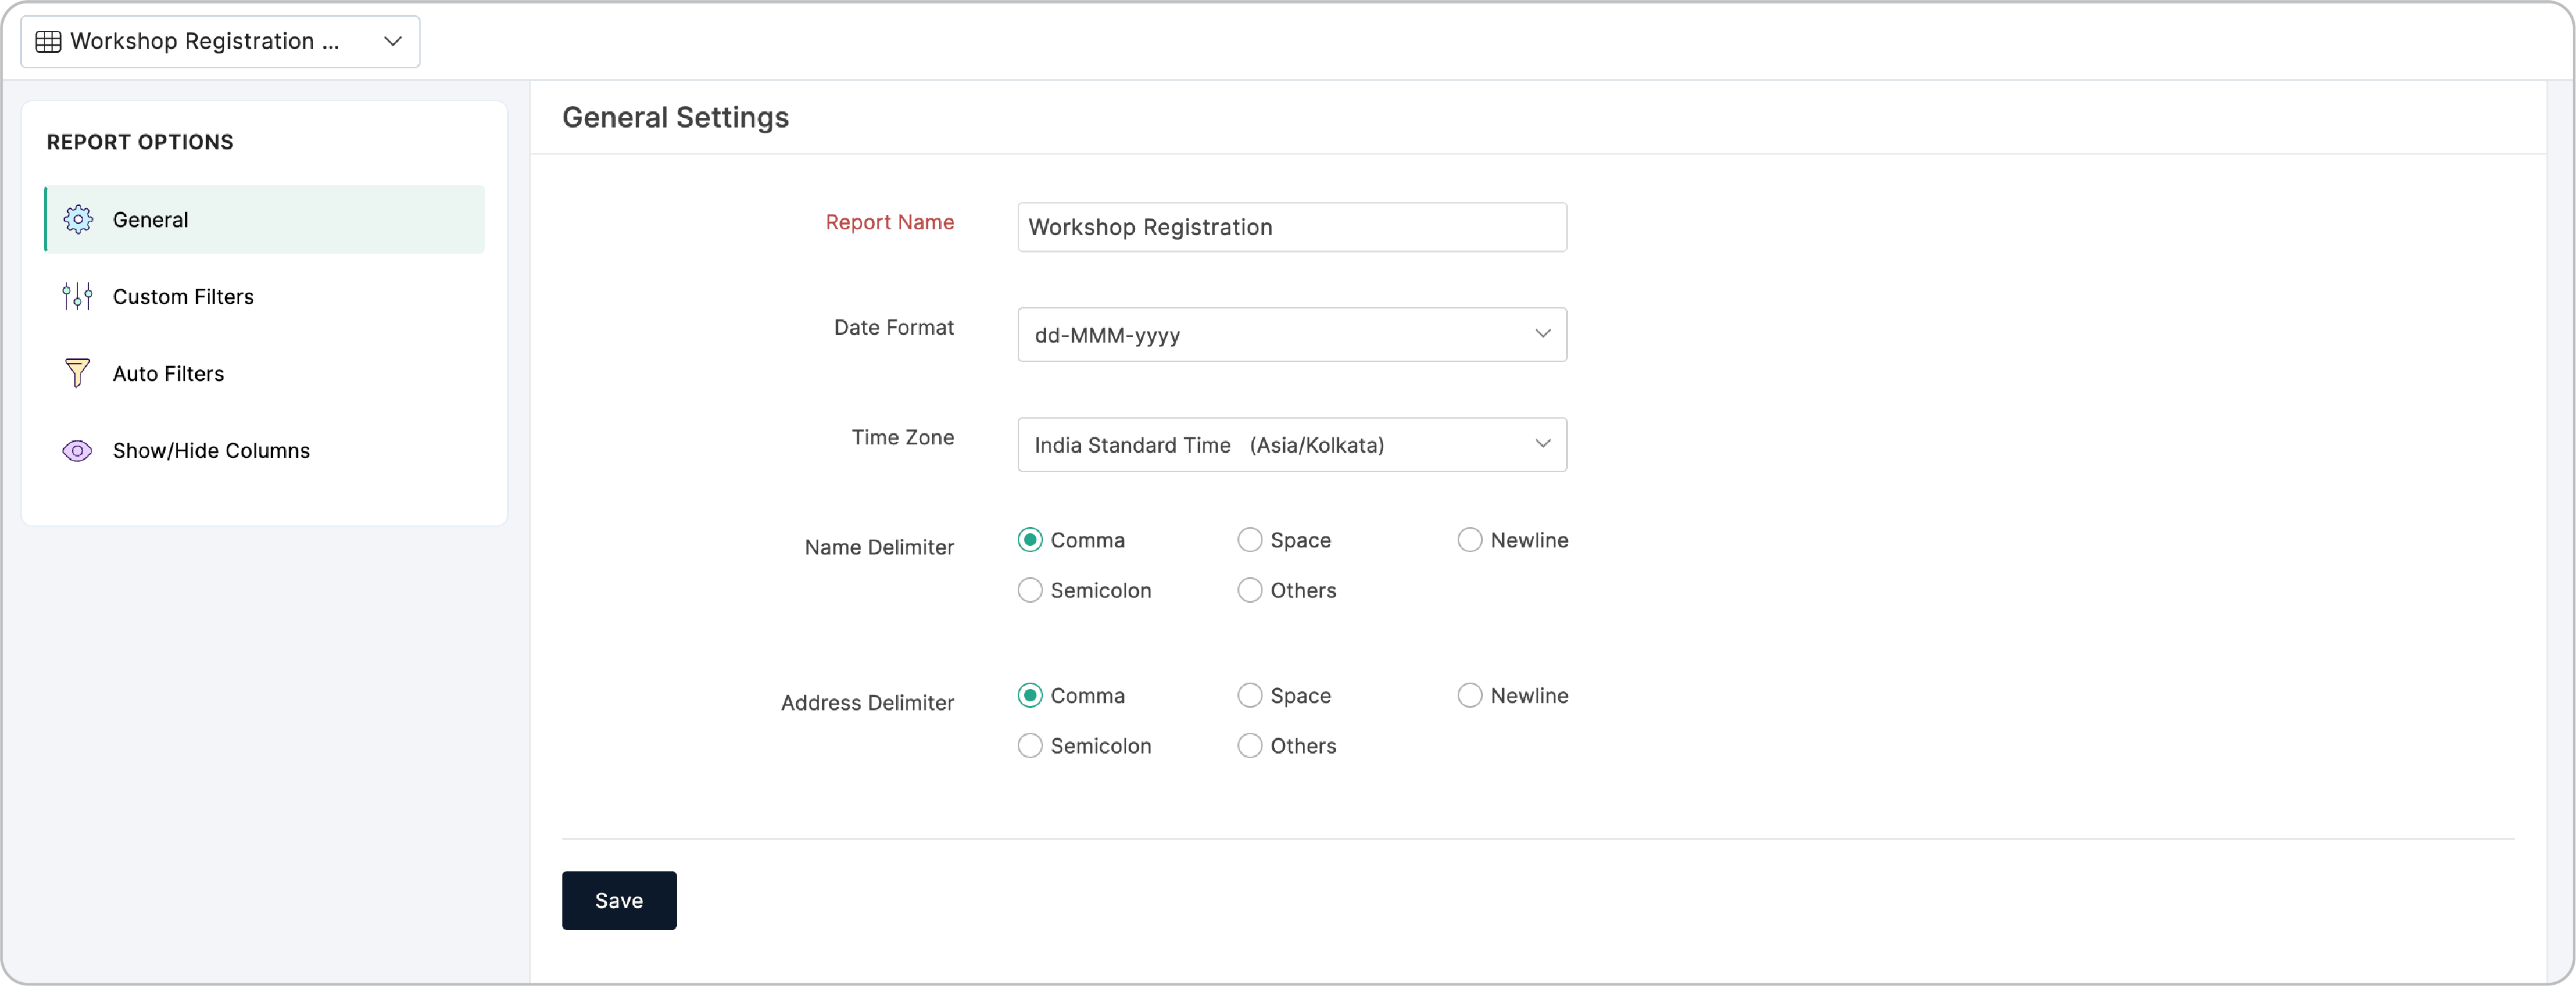
Report Name : You can change the name of your report here. You can rename your report at any time.
Date Format : Date in the report will be displayed in the format selected here.
Time Zone : Under the Date-Time column in your report, the time will be displayed based on the selected time zone.
Serial Number: This option allows you to display serial numbers for each record in the report. When you select Show, a column with serial numbers will be added to the report, providing an identifier for each entry based on its position in the list. By default, the serial number option might be hidden
Name Delimiter : You can choose the delimiter that you wish to use between the First and the Last name elements of the Name field entries.
Address Delimiter : You can choose the delimiter that you wish to use between the entries of the Address field elements.
Custom Filters
Use this option to filter out entries that match the conditions you specify. Entries that match the set conditions will automatically be added to the report.
To do so,
- Click the Custom Filters tab, then click Configure Filter
- Here, you can give multiple conditions to filter out only those entries that you wish to include in your report. Select the Field Name and the condition it has to satisfy by choosing a Comparison from the drop-down list and the Value it has to match.
- To add a condition or delete a condition, click the + and - icons respectively.
- If you want your entries to satisfy two or more conditions, select the Match All option. For the entries to satisfy any one condition from the multiple conditions specified, select the Match Any option.
- Click Save.
To view your report, click the Entries tab.
Auto Filters
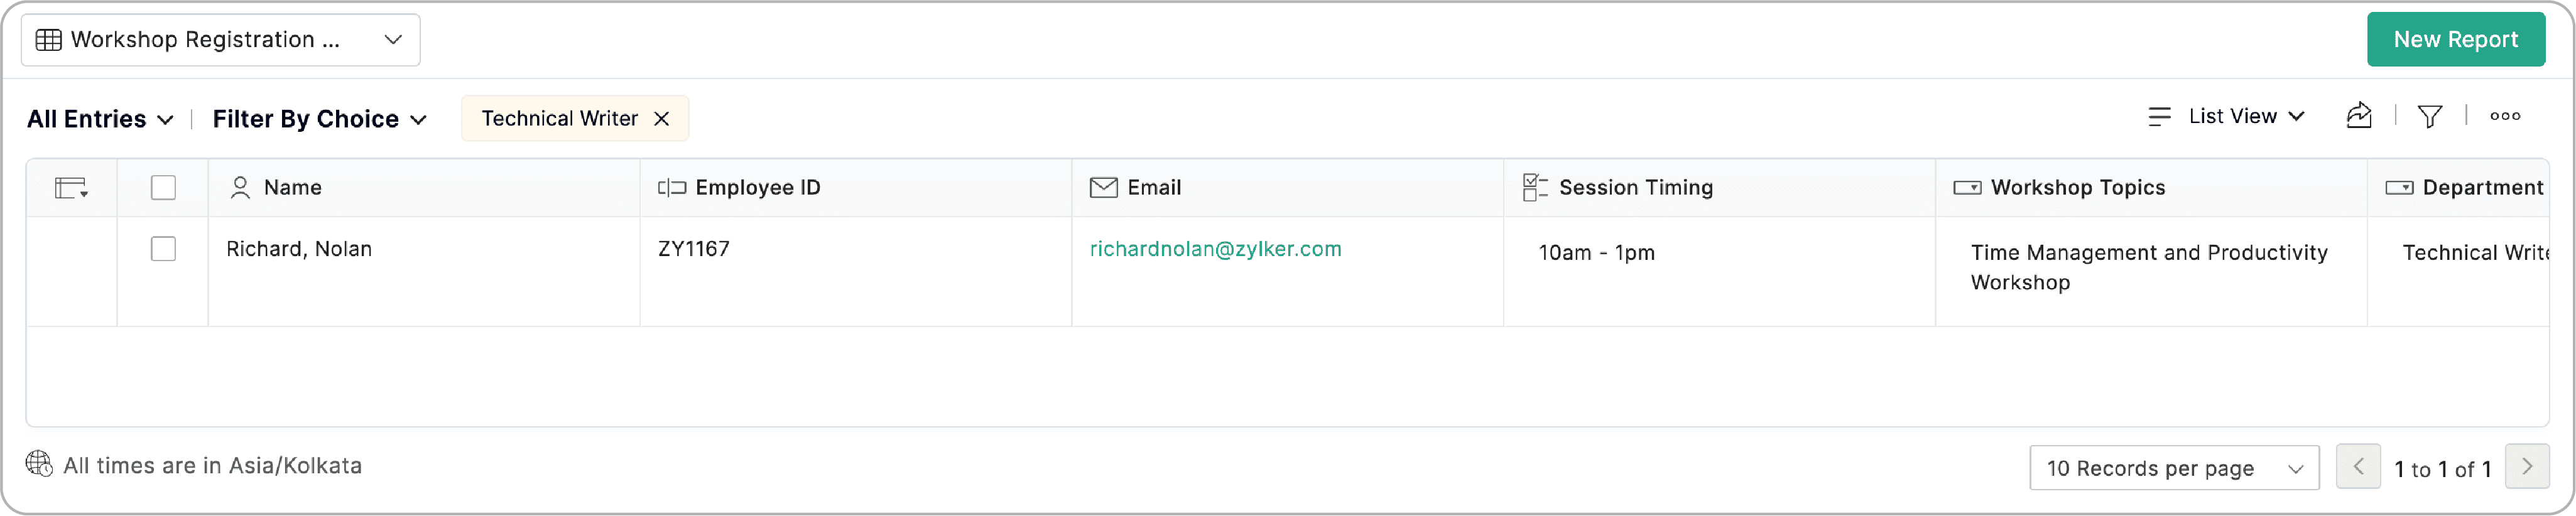
Enable Auto-Filter to display the Filter by Choice option in report searches. All form fields linked to the form's radio buttons and dropdowns will be listed in the Auto-Filter.
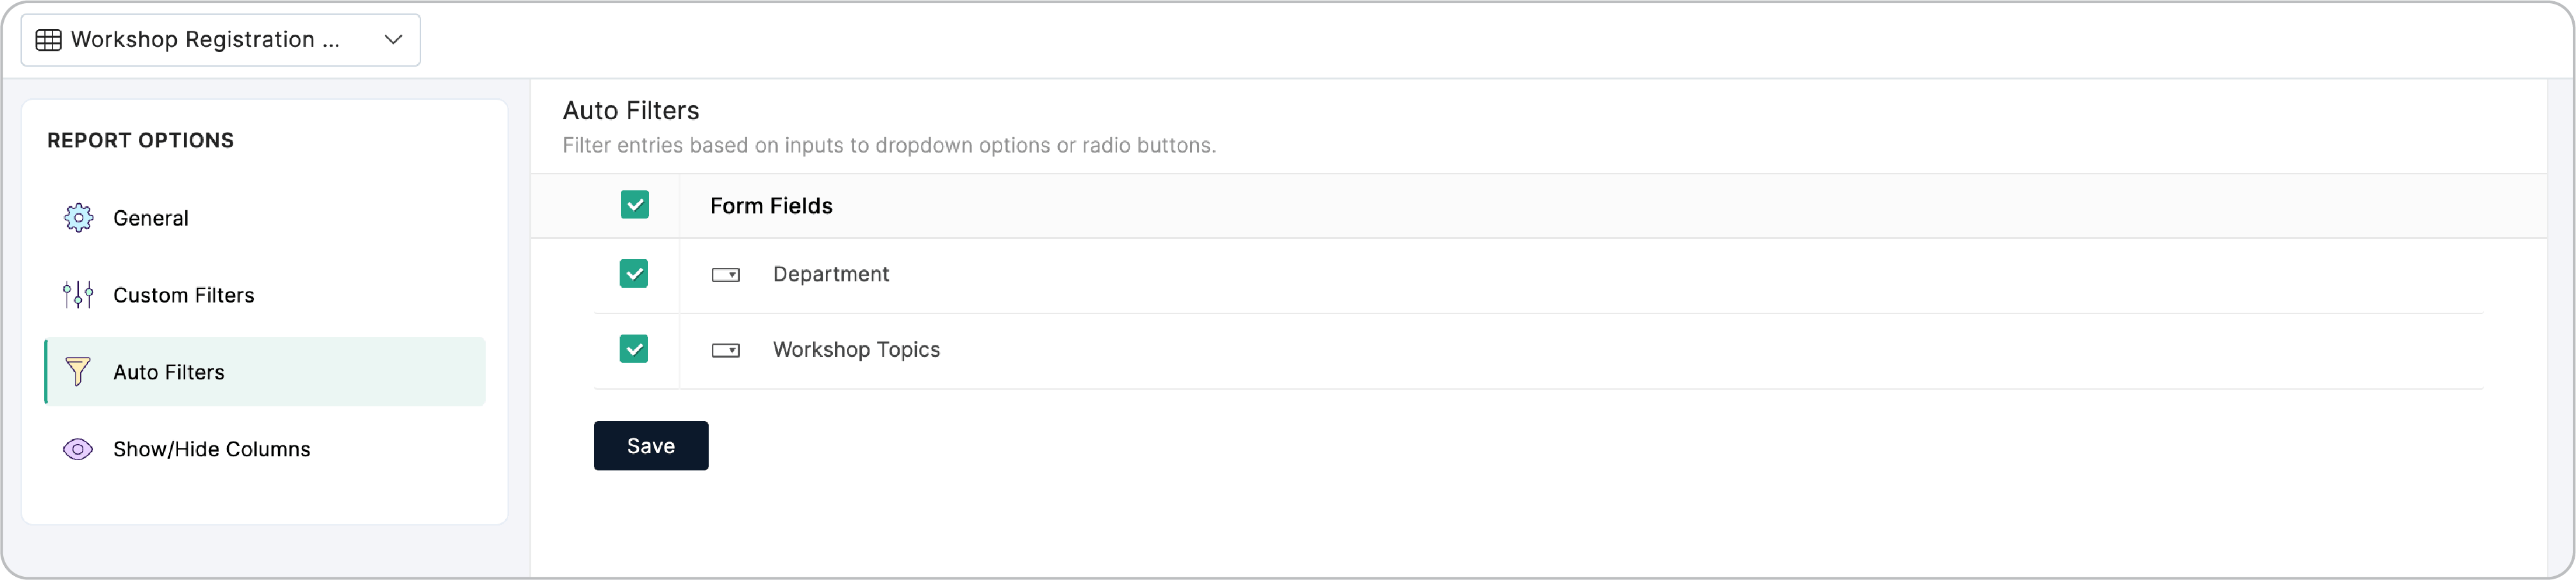
Use the Filter by Choice option on the report entries tab later to view data based on the selected choices.
Note: This option is available only in List view report builder.
Show/Hide Columns
Under Show/Hide columns,
- You can choose to show or hide the form fields from a report.
- You can modify the display names of the fields.
- To change the order of the fields in your report, drag and rearrange the fields.
Note :
- Show/Hide Column in kanban view only affects how information is displayed in the Record Summary. These changes won't be reflected in the reports you generate.
- The fields used for configuring the Kanban view report will be pre-selected by default in Show/Hide column and cannot be hidden. This ensure that the Record Summary always includes the necessary information.