How to create a custom theme in Zoho Forms?
Zoho Forms lets you customize your themes according to your brand's custom color, design or theme. Updating a custom background with an image or a color theme to make it look more credible to the respondents is possible with Zoho Forms.

Let's now see how to create a custom theme in your form!
Pre-designed themes
Right after building your form with all the fields required, head to the Themes tab. You will find many pre-designed themes like Plain, Gray, Classic etc., out of which you can choose the one that it fits your need.
Check out the new pre-built themes added!
Want to customize a unique theme for your form?
Under Themes tab, Click Customize Form. You can set custom fonts, background, effects and more on your form with this option. Let's look at how you can customize the background of your form.
Background Customization
Under Form Customization > Forms tab, you will see a drop-down field where you can set a custom background for the form.
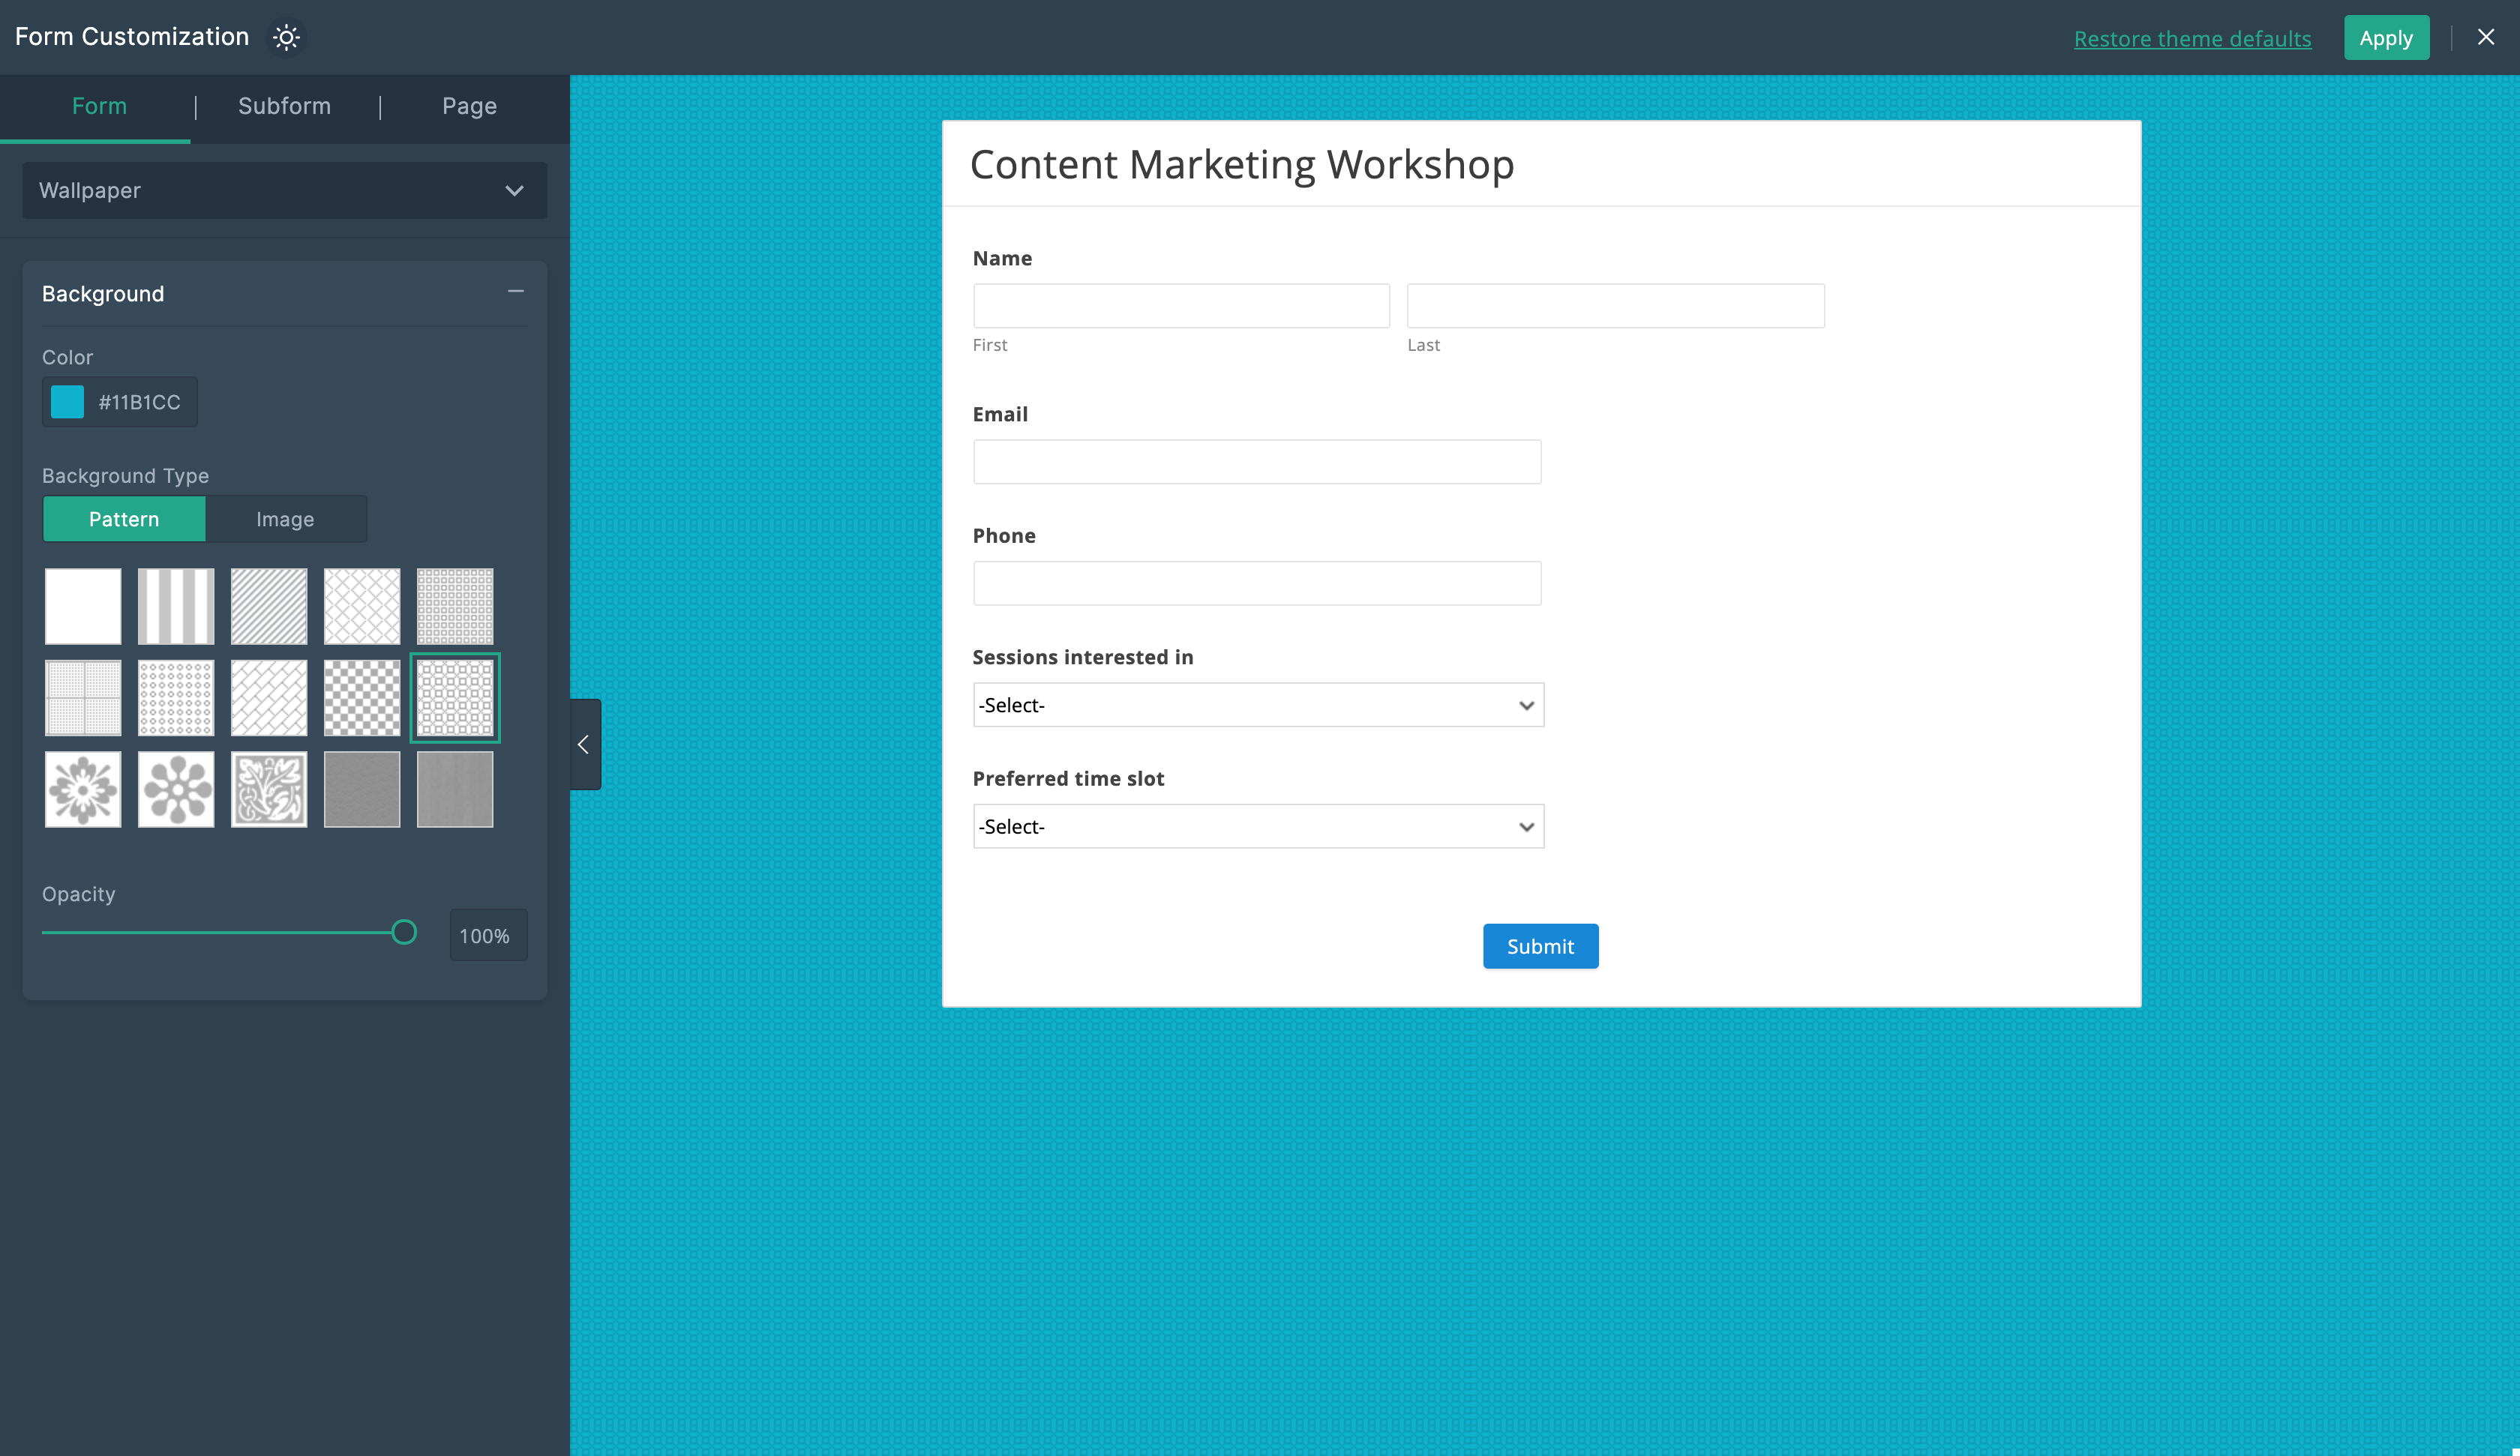
To set a wallpaper as the background of the form, choose Background > Wallpaper.
You will be able to choose the color, opacity and pattern of your form's wallpaper under this option.

If you'd like to upload an image as the wallpaper, go to Image under Background Type. Here, you can upload an image or search for a high resolution image from Pixabay.
The recommended formats to upload images are Jpeg, Jpg, PNG, BMP or GIF . You can set the alignment and fit the image to suit your form after uploading it.
To include a banner (typically logos) for your form, choose Background > Banner. You can upload the image in Jpeg, Jpg, PNG, BMP, and GIF formats. You can also set the alignment of the image post uploading.


Looking to customize your form components too?
Container Customization
Under Form Customization > Form tab > Container in the dropdown, you will find options to alter various features of the form container like Background, Border, Edges, Alignment, Form width, Spacing and Shadow.
You can alter the color,opacity and pattern of the container background, alter the width, style, opacity, and color of the Border and the Edges of the container, and control the alignment at which the containers are present in the form under the Alignment option.
The width of the form, the spacing present in between the containers and Shadow effects if any needed can also be customized as required.
Header Customization
Under Form Customization > Form tab > Header in the dropdown, you will find options to alter various features like Background, Border, Edges, Alignment, Form width, Spacing, and Shadow of the Header.
Additionally, you can upload your company Logo as a header to the form in recommended formats.
Form Body Customization
Under Form Customization > Form tab > Body in the dropdown, you can alter the features of your form body as per your choice to fit your requirements.
Field Customization
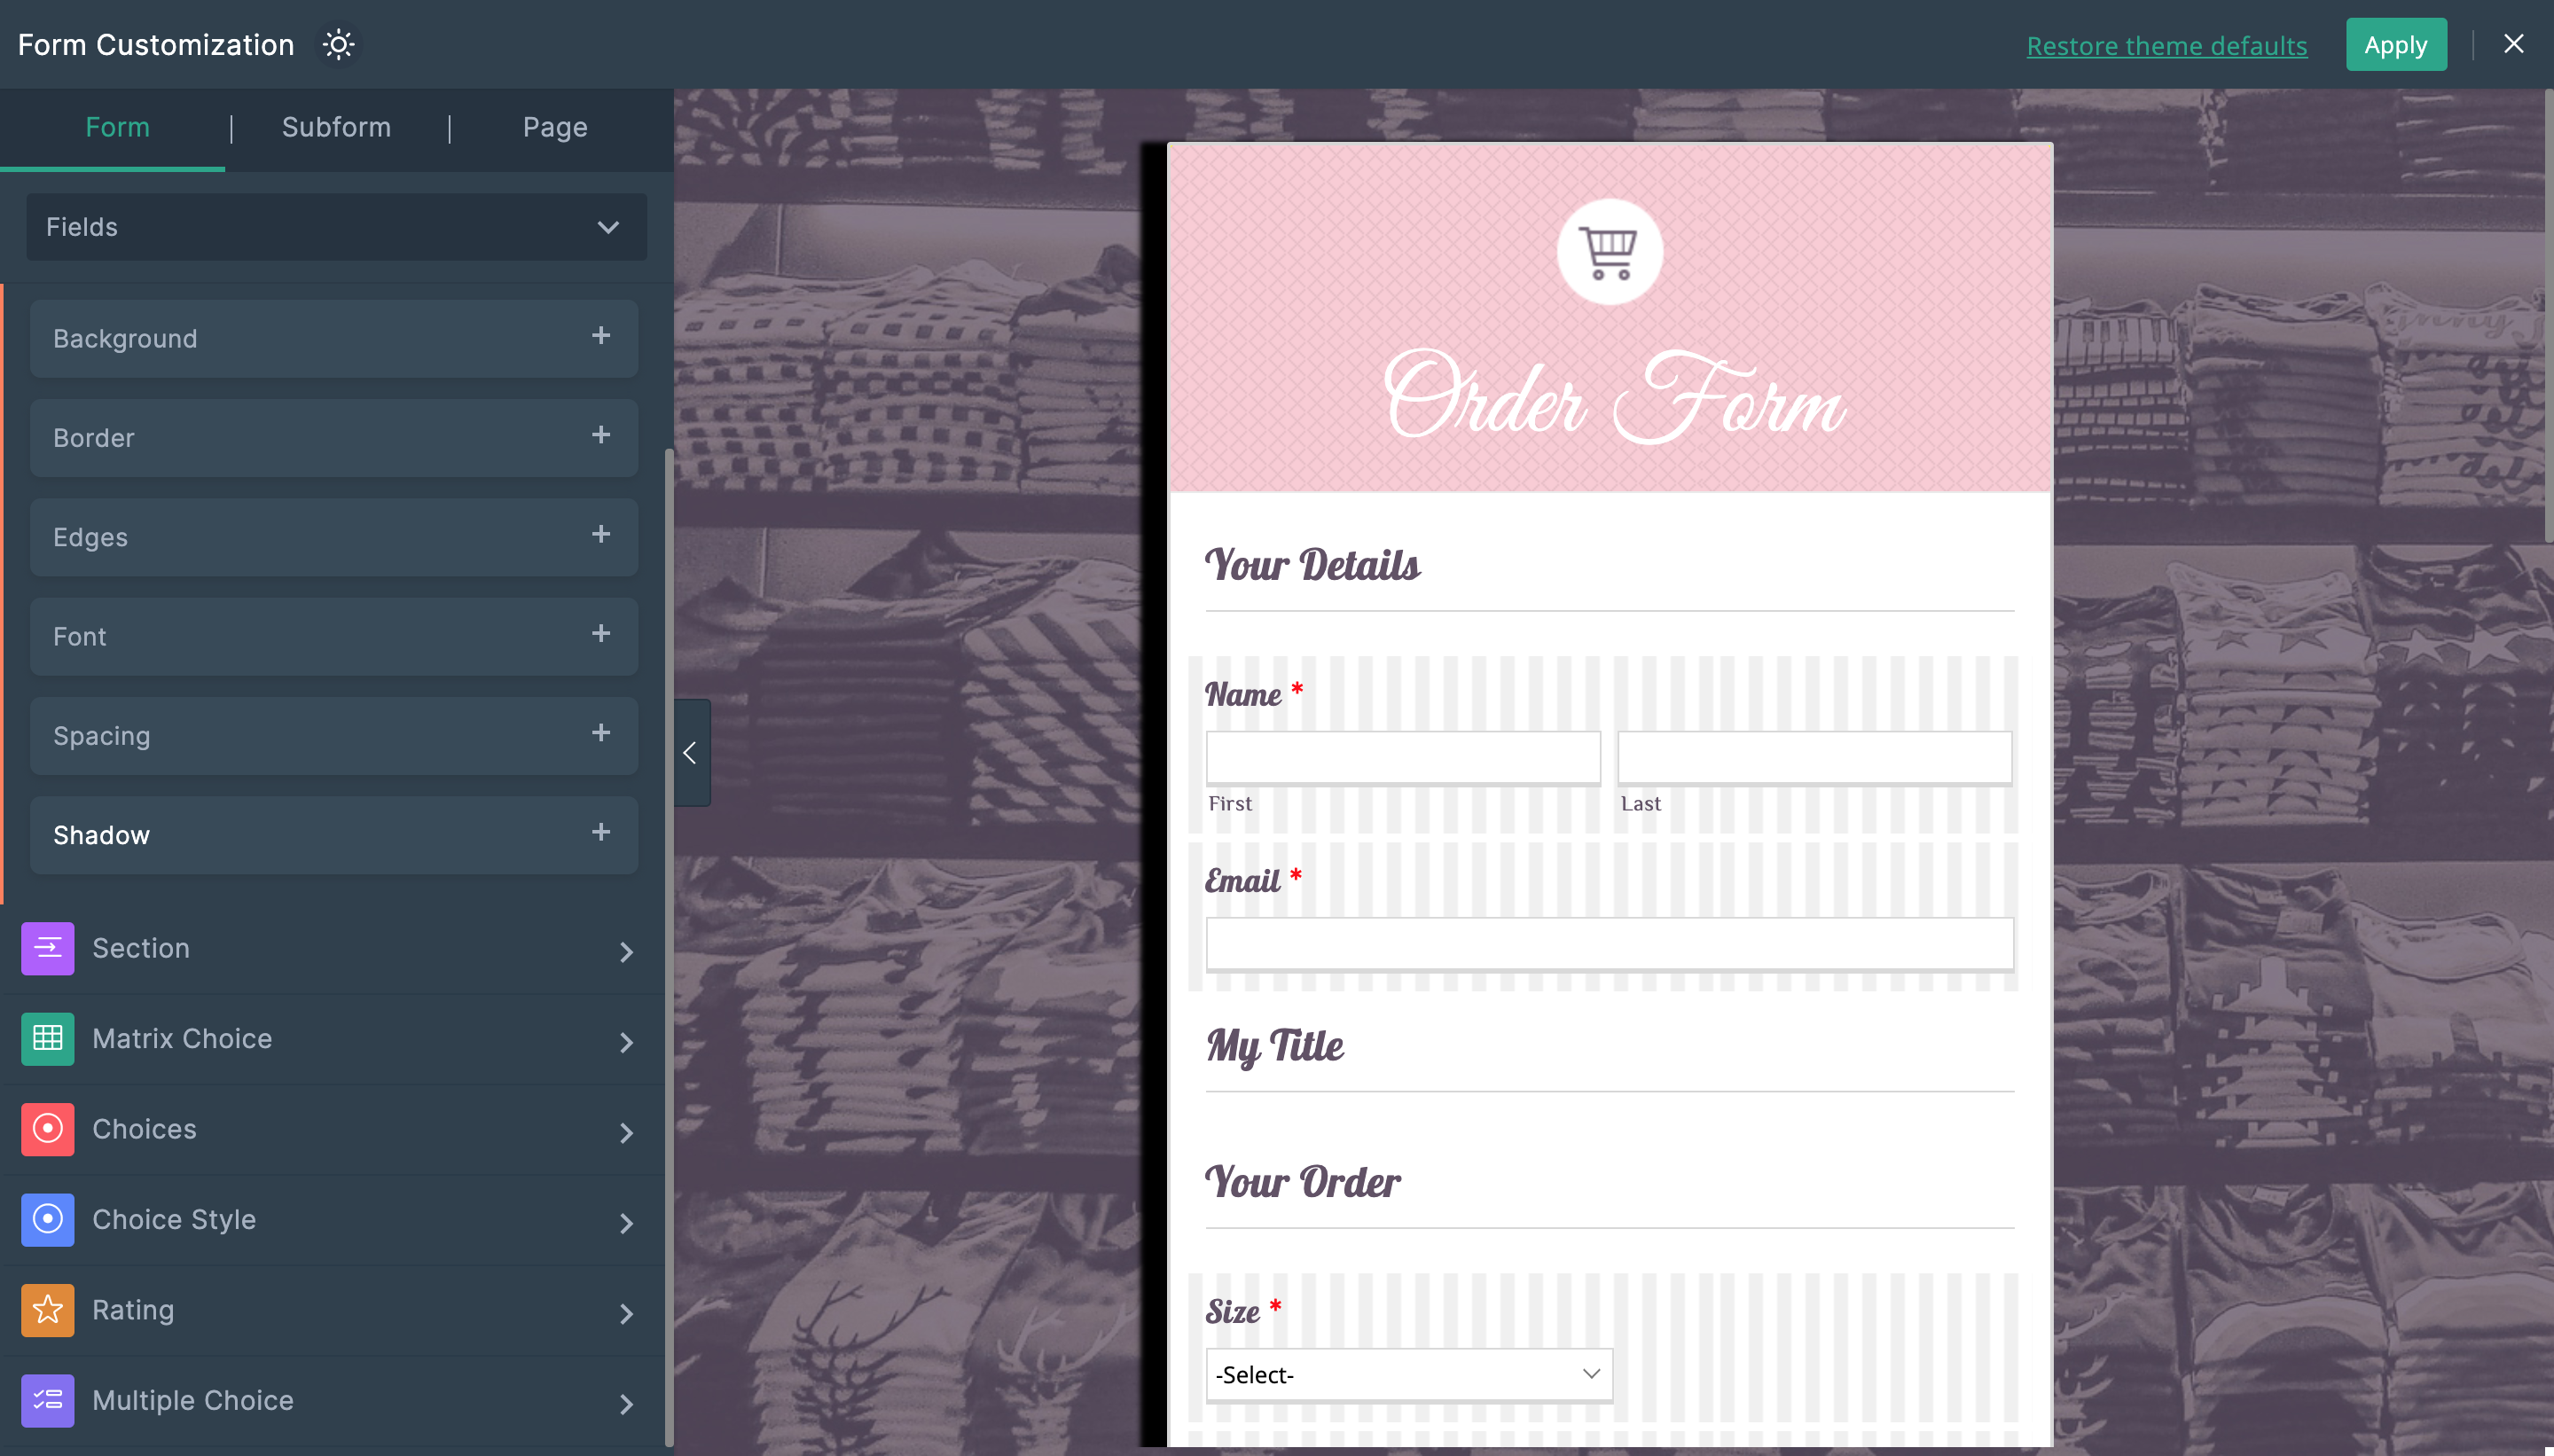
To customize the fields in your form, go to Form Customization > Form tab > Fields in the dropdown.
Under Field Container, you can customize the Background, Border, Edges and Spacing of a field container. You can change the font of the content in the field container too.

You can likewise customize the above mentioned features of the fields too under All Fields option.
If you have separate sections in your form, you can customize the section features such as, Background, Border, Edges, and Spacing of the section.
If you have a Matrix Choice field in your form, you can choose the color, font, style, and size of the questions and answers of the field.
Likewise for a Choice field, you can alter the color, font, style and size of the content present in the field.
You can choose the style of your template (Radio, Checkbox) in a choice field under the Choice style option.
If you have a Rating field in your form, you can edit the style and size of the rating field and customize the border and fill color of both selected and unselected parts of the field.
If you have a Multiple Choice question in your form, you can edit the color, font, style and size of the content in the field.
Footer Customization
Under Form Customization > Form tab > Footer, you can customize various features of the footer like Background, Border, Edges, Alignment, Form width, Spacing and Shadow.
Let's look into how you can customize your button labels!!
Under Form Customization > Button > Width, you can customize the width of your button label.
There are 3 types of buttons i.e., Submit, Save and Review.
You can head into the Submit section to alter the Background, Border, Edges, Font, Alignment, Spacing and Shadow of the Submit button label.
If you also have Save and Review buttons in your form, you can alter the above mentioned features under their respective dropdowns.
Learn more about how you can change and customize your form buttons.
If you have a subform in your form, you can totally customize it to your liking as well!!!
Subform Container
Head to the Subform tab, choose Subform > Container from the dropdown to customize the subform.
Subform Fields
To customize the fields in your Subform, go to Subform tab > Fields in the dropdown. Under Field Container, you can customize the Background, Border, Edges,Spacing, and font of your field container.
You can likewise customize the above mentioned features of the fields under All Fields option.
If you have a choice field in your subform, you can alter the color, font, style and size of the content in the field.
You can choose the style of your template in a choice field under the Choice style option.
If you have a Rating field in your Subform, you can edit the style and size of the rating field and also the border and fill color of both selected and unselected parts of the field.
If you have a Multiple Choice question in your form, you can edit the color, font, style and size of the content in the field.
Pop-up Subform
If you have opted to have a Pop-up Subform, then you can edit the features of your pop-up like Background, Borders, Edges and also the font of the content under Pop-up > Cards section.
Having a multi-page form?
Long multi-page forms can get boring for your customer to fill out. Customize the look of the pages in your form and make your long multi-page form interesting!
Under Form Customization > Page tab, you can not only customize the pages but also the finer details like the navigation buttons on a page!
Page Customization
Customizing the features of the page header like Background, Border, Edges, Alignment and spacing can be done under the Page > Header option in the dropdown.
If you want to change the font, color, style and size of the content in the Title, you can do so under Page >Title.
The number and color of the footer for the visited and unvisited pages of the form can be customized under Page > Number section.
Page Navigation Buttons Customization
You can customize the features of the Navigation buttons (Next, Back) like Background, Border, Edges, Font, Alignment, Spacing and Shadow under the Navigation > Button section.
The change in color of the navigation bar indicating the status of page visit and the spacing of the bar in the page can be customized under the option Navigation > Bar in the dropdown.
Amazed by all the customization options available in Zoho Forms? Try it now!
Zoho CRM Training Programs
Learn how to use the best tools for sales force automation and better customer engagement from Zoho's implementation specialists.
Zoho DataPrep Personalized Demo
If you'd like a personalized walk-through of our data preparation tool, please request a demo and we'll be happy to show you how to get the best out of Zoho DataPrep.
Centralize Knowledge. Transform Learning.
All-in-one knowledge management and training platform for your employees and customers.
New to Zoho Writer?
You are currently viewing the help pages of Qntrl’s earlier version. Click here to view our latest version—Qntrl 3.0's help articles.
Zoho Sheet Resources
Zoho Forms Resources
New to Zoho Sign?
Zoho Sign Resources
New to Zoho TeamInbox?
Zoho TeamInbox Resources
New to Zoho ZeptoMail?
New to Zoho Workerly?
New to Zoho Recruit?
New to Zoho CRM?
New to Zoho Projects?
New to Zoho Sprints?
New to Zoho Assist?
New to Bigin?
Related Articles
Tips for creating visually appealing forms
Table of Contents Overview What details matter the most in a form? Form Title and Description Fields Choice fields Image Choices to market your products Talk to your respondent with dynamic fields Submit button Structuring a long form Section and ...Creating custom PDF Template
Table of contents Creating your template from the scratch PDF Layout Elements Text Image Horizontal Line Vertical Line Table Summary Table Header and Footer Fields Matrix Choice Image Upload Image Choices Subform My Templates Using the Pre-populated ...Theme Gallery
Table of contents Applying a Theme From Theme Gallery Creating New Theme Publishing Themes to your Org Users Using the Org Themes Applying a theme from the theme gallery The Theme Gallery consists of certain pre-designed themes that you can instantly ...Customizing Themes (Old Theme Builder)
Table of Contents Form Customizing Form Background Adding a Wallpaper Adding a Banner Customizing Form Elements Container Header Body Fields Dropdown List Footer Customizing Form Buttons Subform Subform Container Subform Fields Pop-up Subform Page ...Best practices for making your forms accessible
Table of contents Impact of inaccessible forms What can you do? How can you build accessible forms with Zoho Forms? Impact of inaccessible forms Despite the growing focus on web accessibility, a significant portion of the internet, including online ...
New to Zoho LandingPage?
Zoho LandingPage Resources


