Tracking using Google Analytics
Universal Analytics
-
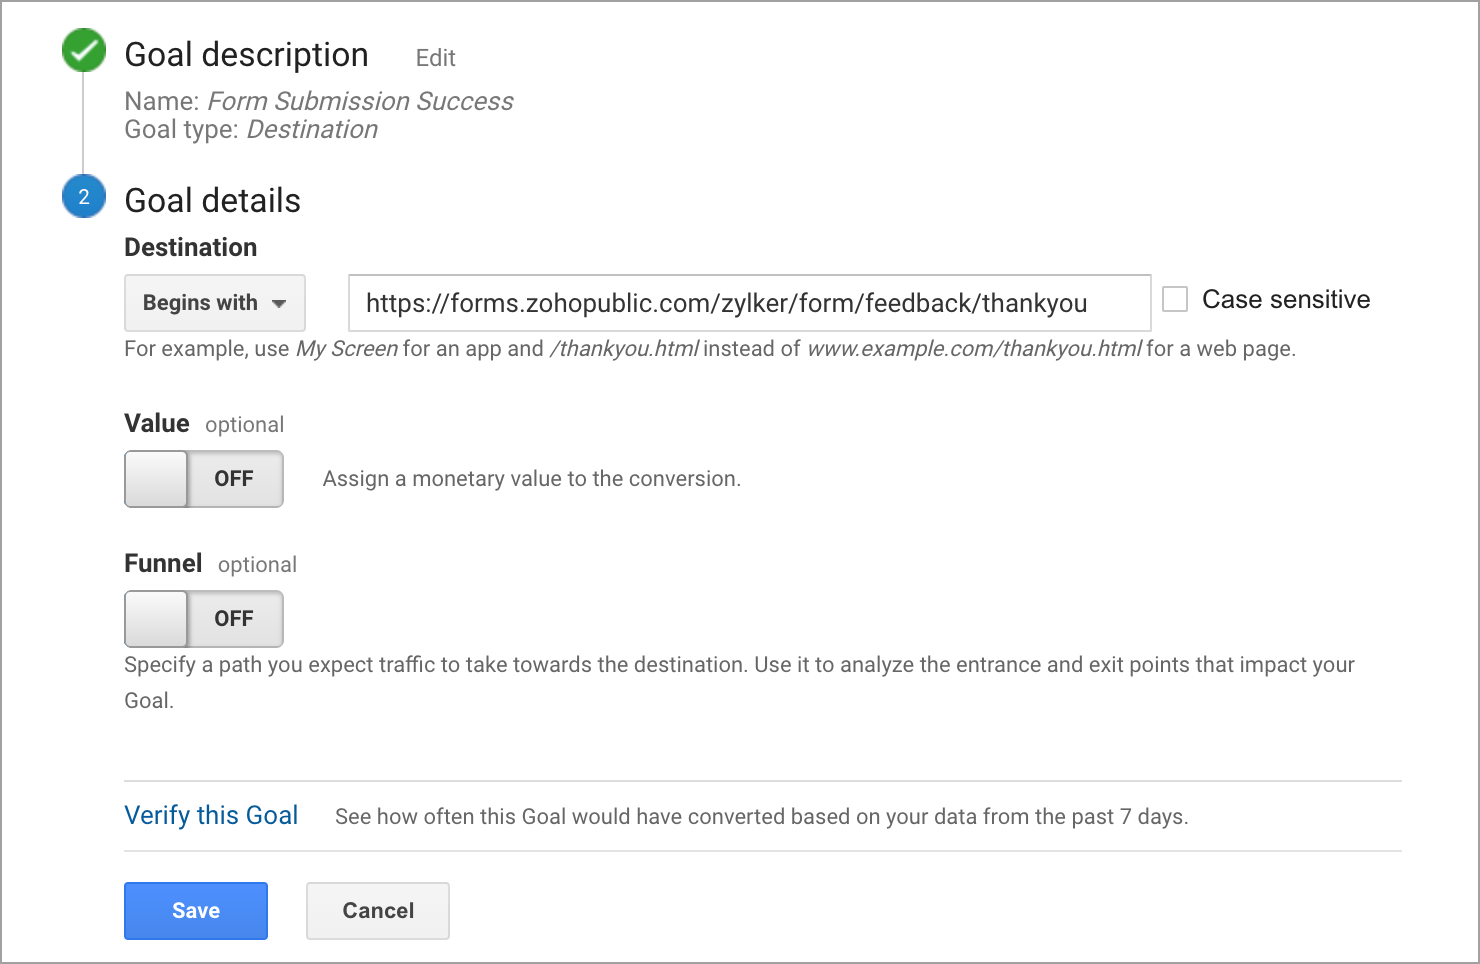
Set up a Destination goal in Google Analytics.
-
Under Goal details, choose Begins with and enter the Thank You Page URL of your form.
-
You can also enter a value and a path if you wish to assign a monetary value and track your website traffic path.
-
Click Save.
After completing the above pre-requisites in Google Analytics,
-
Select Add Google Analytics or Facebook Pixel tracking code under Thank You page settings in Zoho Forms.
-
In the Tracking Settings popup, enter the Google Analytics ID (Eg.: UA-000000-2) in the Tracking ID field.
 Note : Universal Analytics property has stopped processing data. They no longer measure website traffic and reports stopped updating. If you want to keep using Google Analytics to measure your website traffic, you must migrate to the next version of Analytics, Google Analytics 4.
Google Analytics 4
-
Go to Admin page, in Property settings, select Events under Data display in the left menu and click Create event.
-
In Custom events pane, click Create.
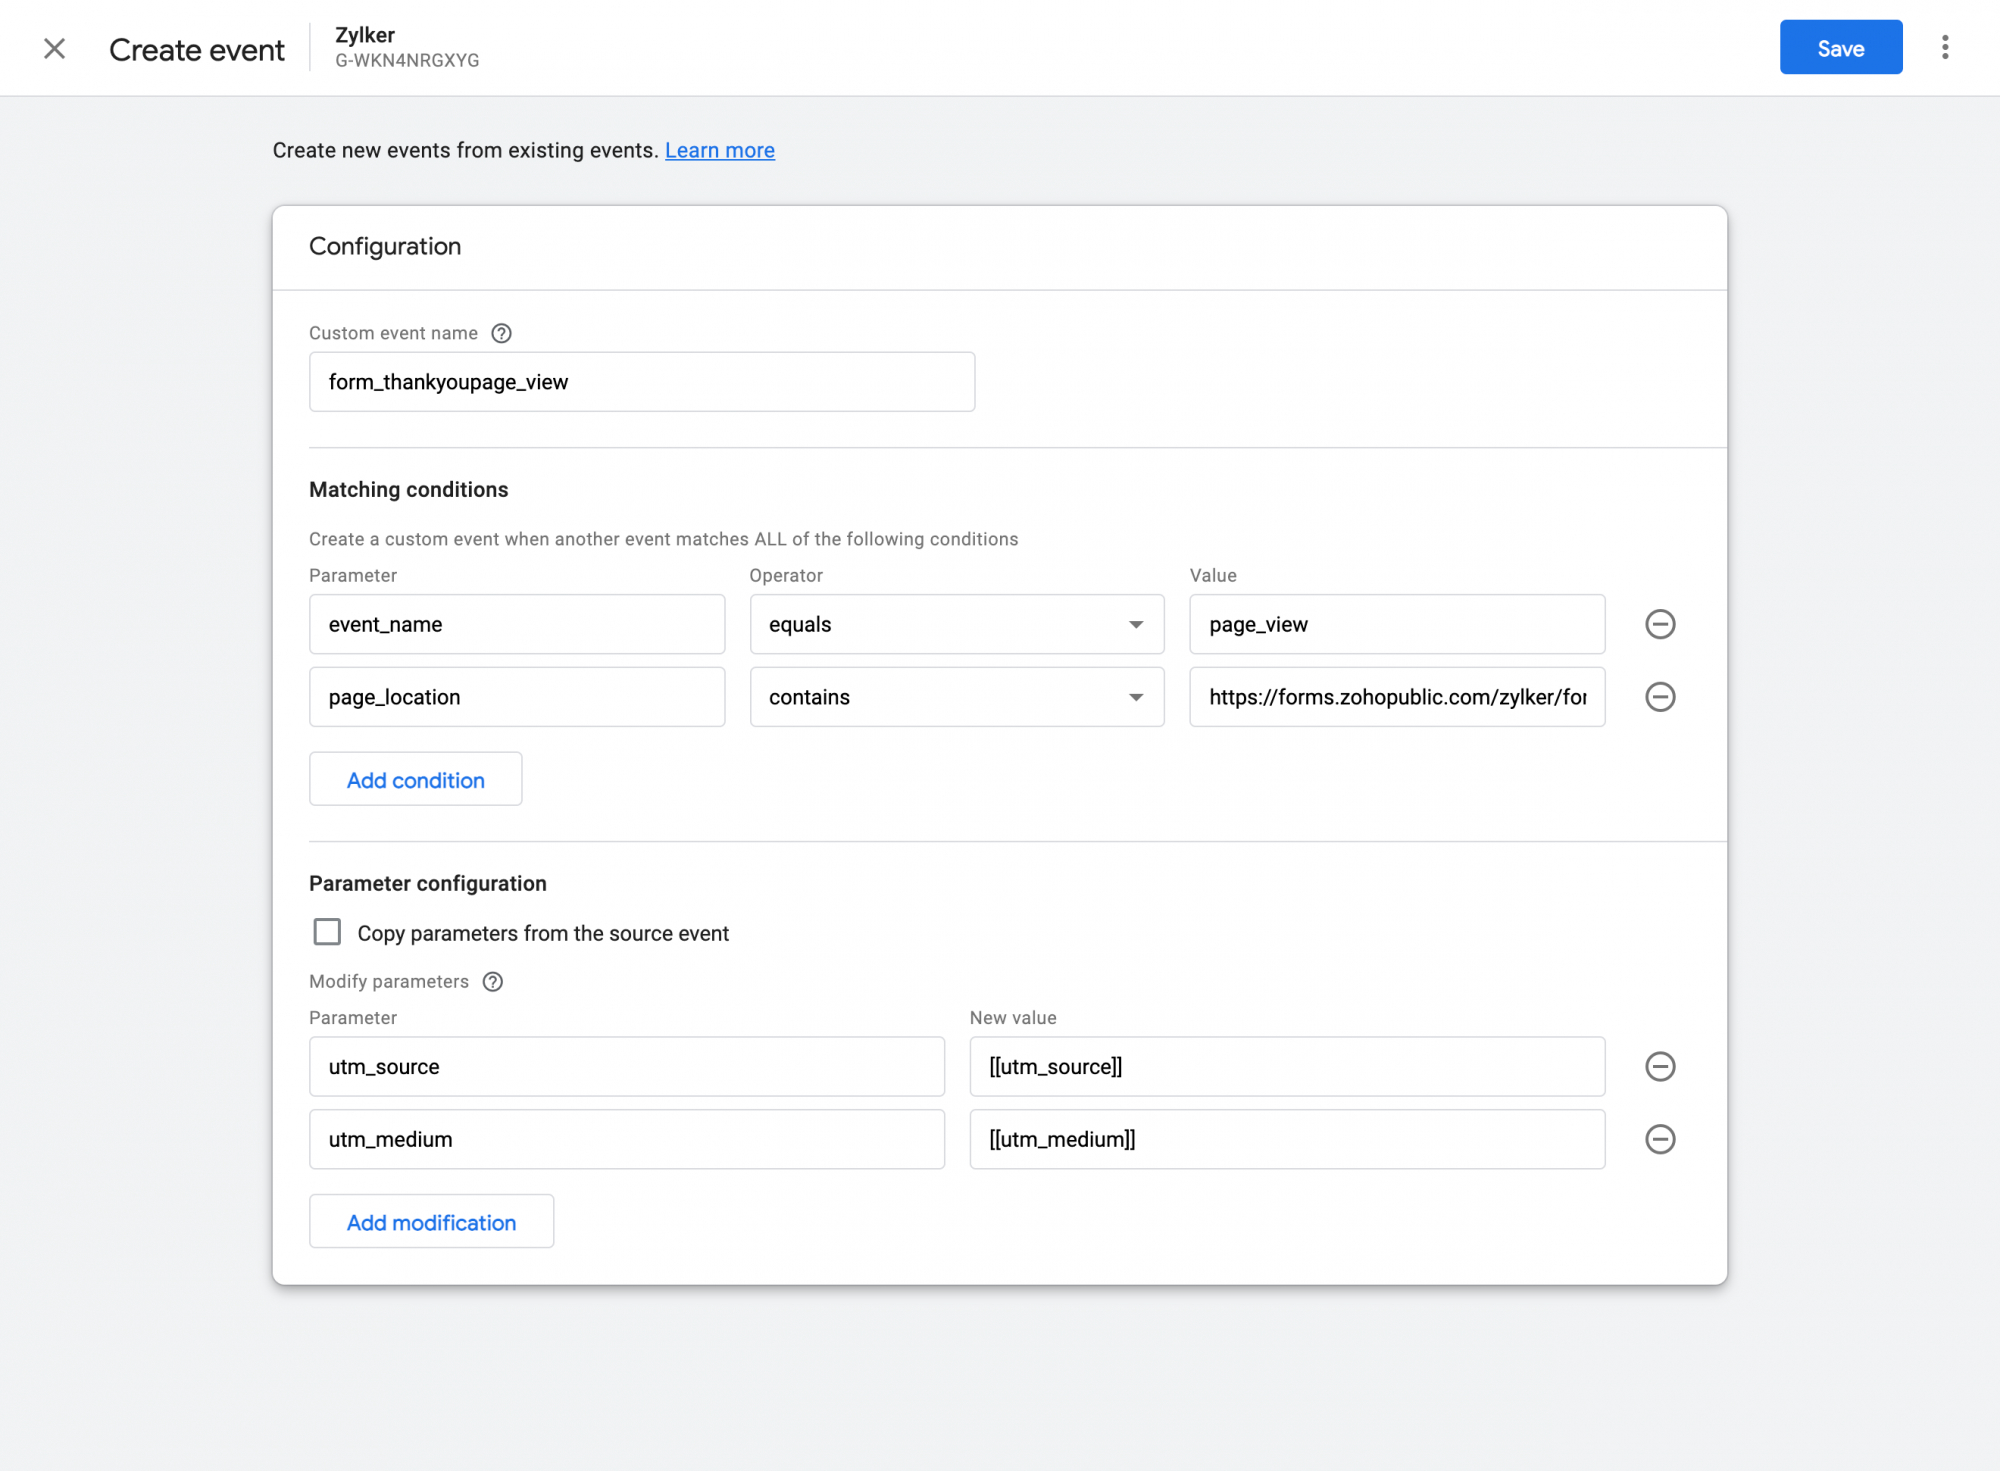
In the create events configuration pane, enter a valid Custom event name. Copy this event name to your clipboard to create a key event.
-
Under Matching conditions, define the parameters as
-
event_name equals page_view
-
page_location contains <ThankYou Page URL>
-
Under Parameter configuration, configure the UTM parameters and map them to the parameters defined by you in Zoho Forms.
-
Save the Event.
-
Click Key events under Data display in the left menu. Click New key event and in the event name, paste the event name you created under Events.
-
Go to Data Streams in the Property settings and copy the "G-" Measurement ID for web data stream.
After completing the above pre-requisites in Google Analytics,
- Select Add Google Analytics or Facebook Pixel tracking code under Thank You page settings in Zoho Forms.
- In the Tracking Settings popup, paste the copied ID under Tracking ID/Measurement ID.
Using tracking parameters in Goal Conversion
-
In your form builder, go to Track Entries under the Share tab.
-
Enable tracking and copy the Advanced Tracking Code.
-
Paste the code on all the pages of your website.
-
In the Tracking Settings popup (Thank You Page configuration), click +Tracking Parameters, enter your Parameter Name, and map it with the tracking parameters defined in Zoho Forms.