Setting up Language Translation
Translating a form into supported languages
- After building your form, navigate to the Settings > Translation & Messages > Translation from the left menu.
- Click Start Translating.
- In the Form Language dropdown, you can choose to change the default form language.
 Note: The Form Language dropdown reflects the default language you set in your form's display settings. This language becomes uneditable once you create translations, as it serves as the source for them. Th change the default language, you must update the Form Language setting under General > Display before you begin adding any translations.
 - In the Translate To dropdown, select the language you wish to translate your form from the list of languages. If you do not find the language of your choice in the list, you can manually translate the form into any other language using the Custom Language option.
- Click Translate.
In the Translation Settings pop-up, you can view the translation applied to your form and modify the translated content as required under the following sections:
Form Content
Under this section, you can change the translated versions of the Form Name, Form Description, Form Tab Title Save, Review, and Submit buttons.Field Content
Under this section, you can modify the translated content for the field labels, field elements, field instructions, choices of choice-based fields, navigation buttons of a multi-page form, Subform field labels, etc. Note: If you have customized the field labels, or applied text formatting to the content in the Description and Terms and Conditions fields while building your form, the customization will not be carried over to the translated version. You will have to re-apply the same to the translated content.
Acknowledgment Content
Under this section, you can change the translated content of the Thank You pages and Splash Messages configured under Acknowledgement and Redirects settings and Form Rules.Custom Messages
Under this section, you can change the translated versions of the error messages, validation messages, and other general messages that appear in your live form.
To translate your form into more languages, repeat the above steps. Once you translate the form, you can view a list of all the languages that your form is translated into under Translated Language(s).
Translation Settings
Show translated languages in the live form
- You expand your audience to include respondents from diverse linguistic backgrounds.
- Respondents choose the language they're most comfortable with, making the form easier to understand and complete.

- If you have modified the content of your form after saving the configuration for a language translation, you will have to re-translate the modified content for the changes to reflect in the live translated form.
- To customize alerts and error messages, use the custom messages option under Settings > Translation & Messages and translate the error messages to the desired language.
 If you have configured Language Translation for your form, the merged field responses in the merged documents will be in the same language as entered by the respondents. To merge translated form responses for the following fields while creating merged documents using Zoho Writer templates, enable the Send picklist values in form's translated language option for:
 -Choice-based fields
-Dropdown in Matrix Choice field
-Title in Name field
-Country list in Address field
Note :
The Language Translation option is available only in our paid plans.
You can configure only up to 10 language translations.
For Trial plan, you can translate 3 forms per organization. For Basic, Standard, Professional, Premium, Express, and Zoho One plan you can translate up to 250 forms per organization.
To change the form language selected in the Translate From dropdown while configuring a language translation, you must first delete all the language translations that are already configured.
Supported Languages by Zoho Forms
| EU DC | |||
| German | German | Hindi | Hindi |
| Hindi | Hindi | German | German |
| Portuguese | |||
| Filipino | Portuguese | Portuguese | Swedish |
| Lithuanian | Filipino | Portuguese | |
| Croatian | Lithuanian | English | |
| Latvian | Croatian | Hungarian | Italian |
| Hungarian | Latvian | Malayalam | |
| Chinese | Hungarian | Swedish | Hungarian |
| Armenian | Chinese | Kannada | Tamil |
| Ukrainian | Oriya | Chinese | |
| Indonesian | Armenian | Marati | Spanish |
| Urudu | Ukrainian | English | Czech |
| Macedonian | Italian | Arabic | |
| Malayalam | Indonesian | Tamil | Japanese |
| Marati | Urudu | Chinese | |
| Malay | Macedonian | Spanish | Romanian |
| Greek | Malayalam | Gujarati | Dutch |
| English | Czech | ||
| Italian | Malay | Arabic | |
| Spanish | Greek | Telugu | |
| Estonian | Punjabi | ||
| Arabic | English | Assamese | |
| Assamese | Japanese | ||
| Japanese | |||
| Persian | Italian | Romanian | |
| Romanian | Spanish | Dutch | |
| Dutch | Estonian | ||
| Russian | |||
| Belarusian | Arabic | ||
| Finnish | Assamese | ||
| Bulgarian | |||
| Bengali | Japanese | ||
| French | |||
| Georgian | Persian | ||
| Slovak | Romanian | ||
| Slovenian | Dutch | ||
| Catalan | |||
| Serbian | Belarusian | ||
| Swedish | Finnish | ||
| Kannada | Bulgarian | ||
| Oriya | Bengali | ||
| Korean | French | ||
| Tamil | |||
| Gujarati | Georgian | ||
| Czech | Slovak | ||
| Telugu | Slovenian | ||
| Punjabi | |||
| Tagalog | Catalan | ||
| Polski | |||
| Danish | Serbian | ||
| Hebrew | |||
| Swedish | |||
| Kannada | |||
| Oriya | |||
| Korean | |||
| Tamil | |||
| Gujarati | |||
| Czech | |||
| Telugu | |||
| Punjabi | |||
| Tagalog | |||
| Danish | |||
| Hebrew | |||
Translating a form manually
- Navigate to Settings > Language Translation from the left menu.
- Click Start Translating.
- In the Form Language dropdown, you can choose to change the default form language.
- In the Translate To dropdown, select the Custom Language option.
- Enter the Language Code of the language to which you wish to translate your form. An empty translation interface will open for you to enter the translated values manually.
 If you enter a supported language code in the Custom Language code, the translation interface will show the translated content.Note: Adding a custom language requires manual entry for all translated content. The language code for a custom language cannot be edited once the translation is completed, so ensure you enter a valid code, as it will be used for integration and accessibility.
 - Click Translate.
In the Translation Settings pop-up, you can enter the translation manually under the following sections:
Form Content
Field Content
Acknowledgment Content
Custom Messages

- You can change the text direction of the translated content from LTR to RTL or vice versa.
- For the languages that you will translate your form into from now on, the default text direction will be set as LTR with the exception of Arabic and Hebrew, which will be RTL. You can change the text direction for the translated content at any point of time under Translated Language(s).
- If no text direction is selected for a translated language, the default text direction (under General Settings) will be used.
If you have modified the content on your form after saving the configuration for a language translation, remember to translate the modified content again.Important Requirements for Custom Languages
- All form, field, and acknowledgment content must be entered manually; no automatic translation is provided for custom translation.
- Once saved, the language code cannot be edited. So ensure to enter a valid language code as it will be used for integrations and accessibility compliance.
- Please ensure your custom code does not match or overlap with existing system-provided language codes. To view the list of supported language codes, click here.
- Language codes must be 10 characters and should only contain letters, numbers and special characters such as hyphens ( - ), and underscores ( _ ).
Managing Translated Languages
Text Direction
- Click the Text Direction icon next to the language.
- Select either:
- Left to Right — for languages like English, French, Portuguese
- Right to Left — for languages like Arabic, Hebrew, Urdu
Editing Translated Content
- Click the Edit (pencil) icon next to the language.
- The translation interface will open with all translated content.
- Make the necessary changes and save.
Edit Language Name
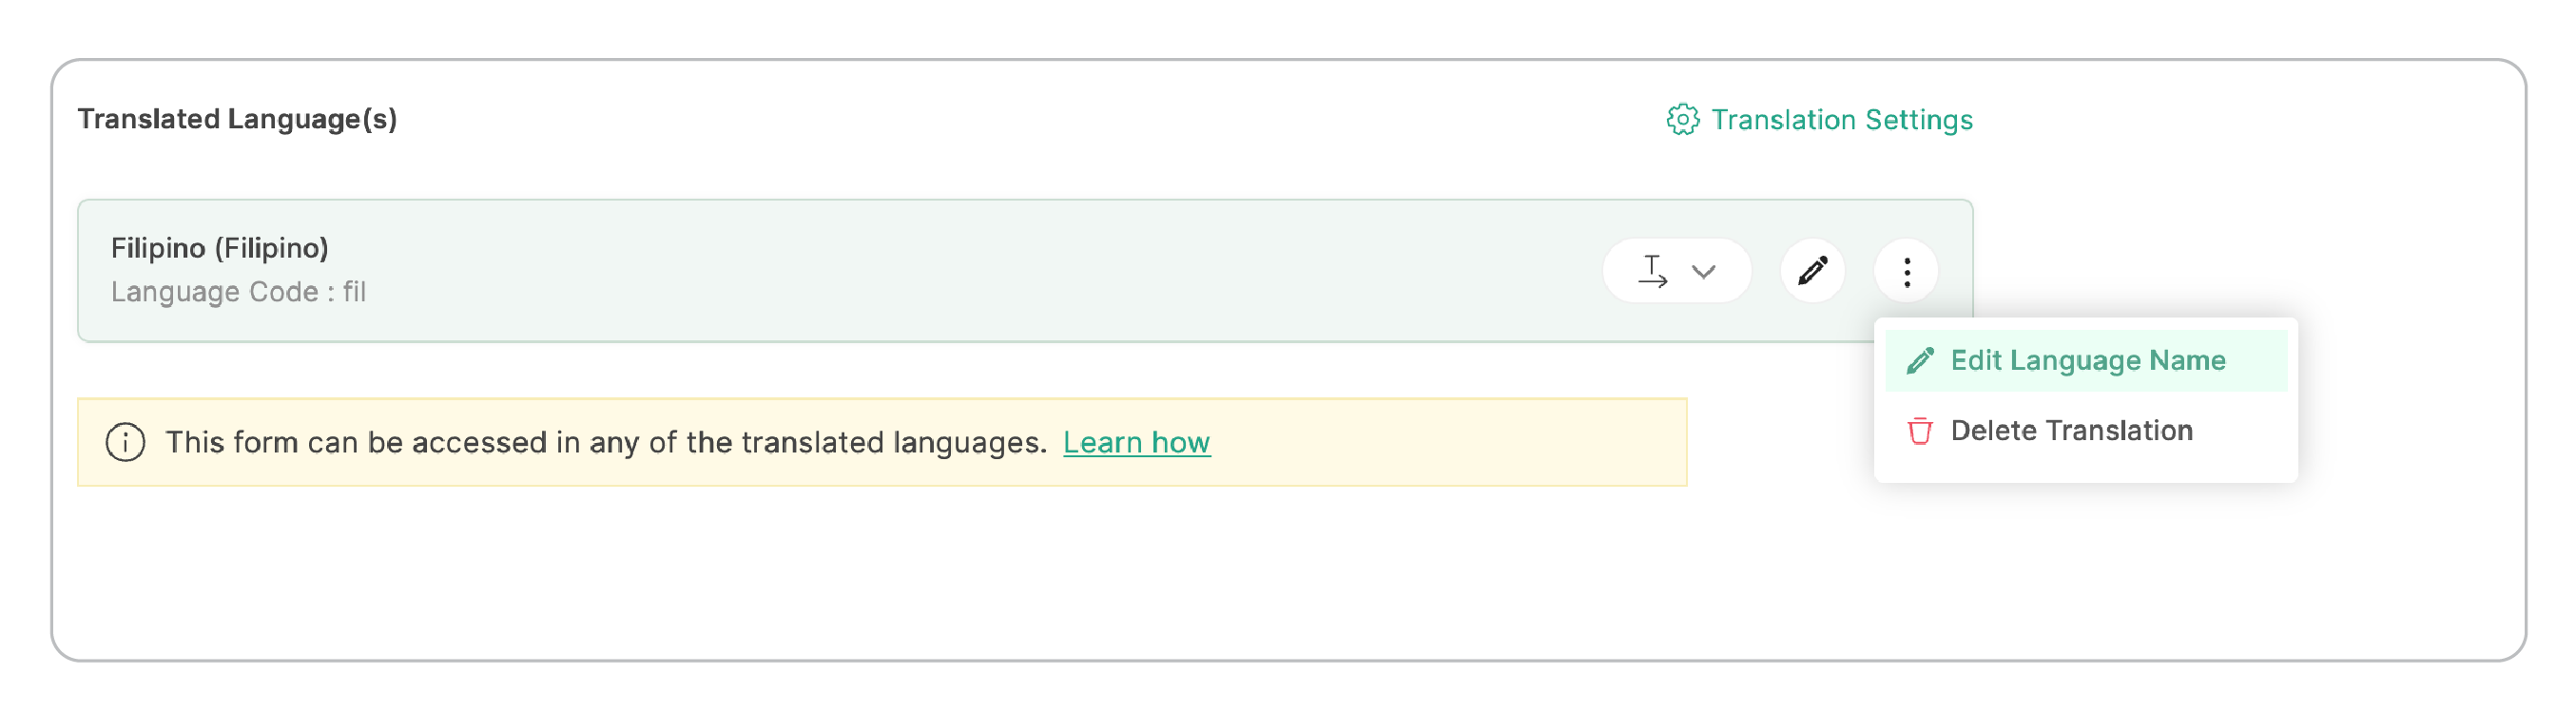
- In the Translated Languages list, click the more options icon (⋮) next to the language.
- Select Edit Language Name.
- In the Edit Language Name dialog, enter a preferred name in the Language Namefield.
- Click Save.
Delete Translation
- Click the more options icon (⋮) next to the language.
- Select Delete Translation.
- Confirm the deletion in the dialog that appears.
- How can I redirect a translated form to another form automatically?
- When a translated form is submitted, how to trigger email alerts in the same translated language?