Google Tag Manager Configuration with Universal Analytics Property
Installing Google Tag Manager in your form
To install Google Tag Manager in your form,
- In your Google Tag Manager account, go to Workspace and copy the container ID(GTM-XXXXXX) on the top of the window.
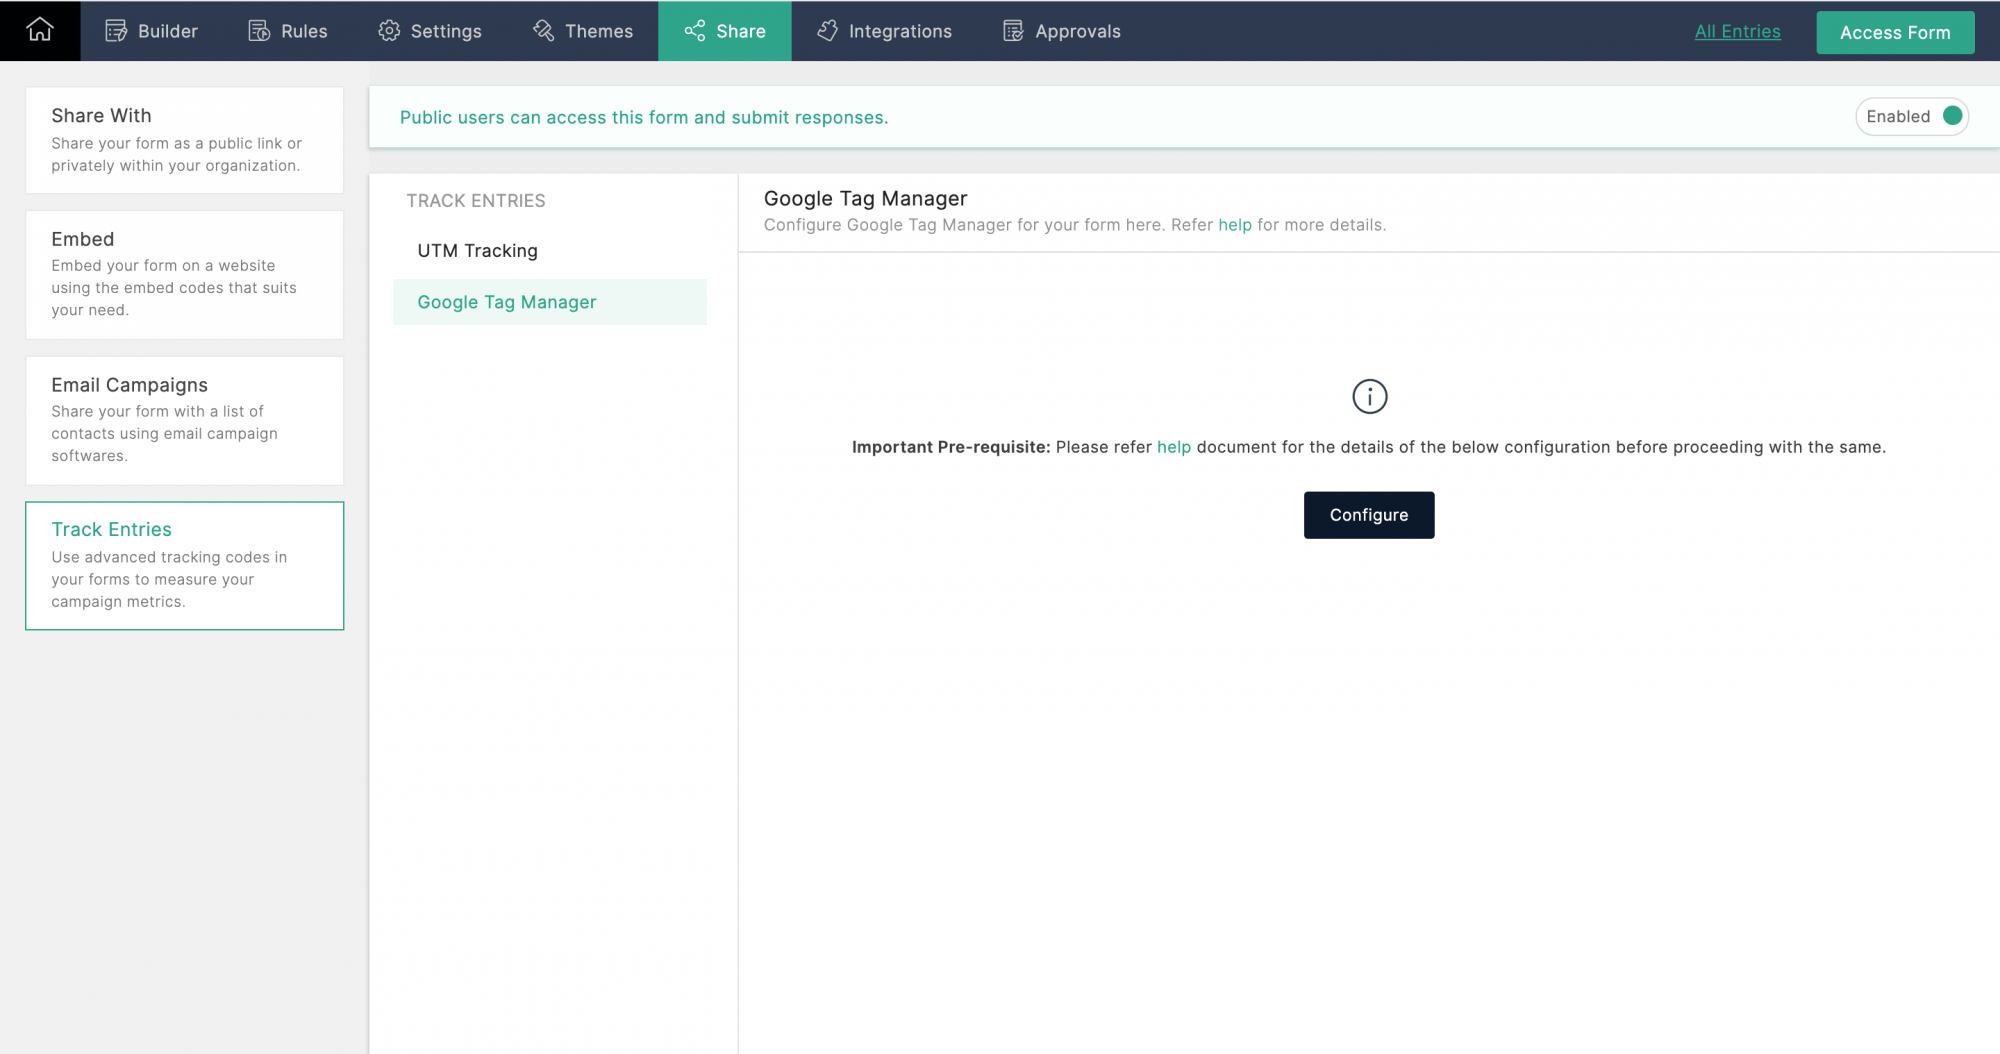
- In your form builder, navigate to the Share tab > Track Entries.
- Click Google Tag Manager and click Configure.
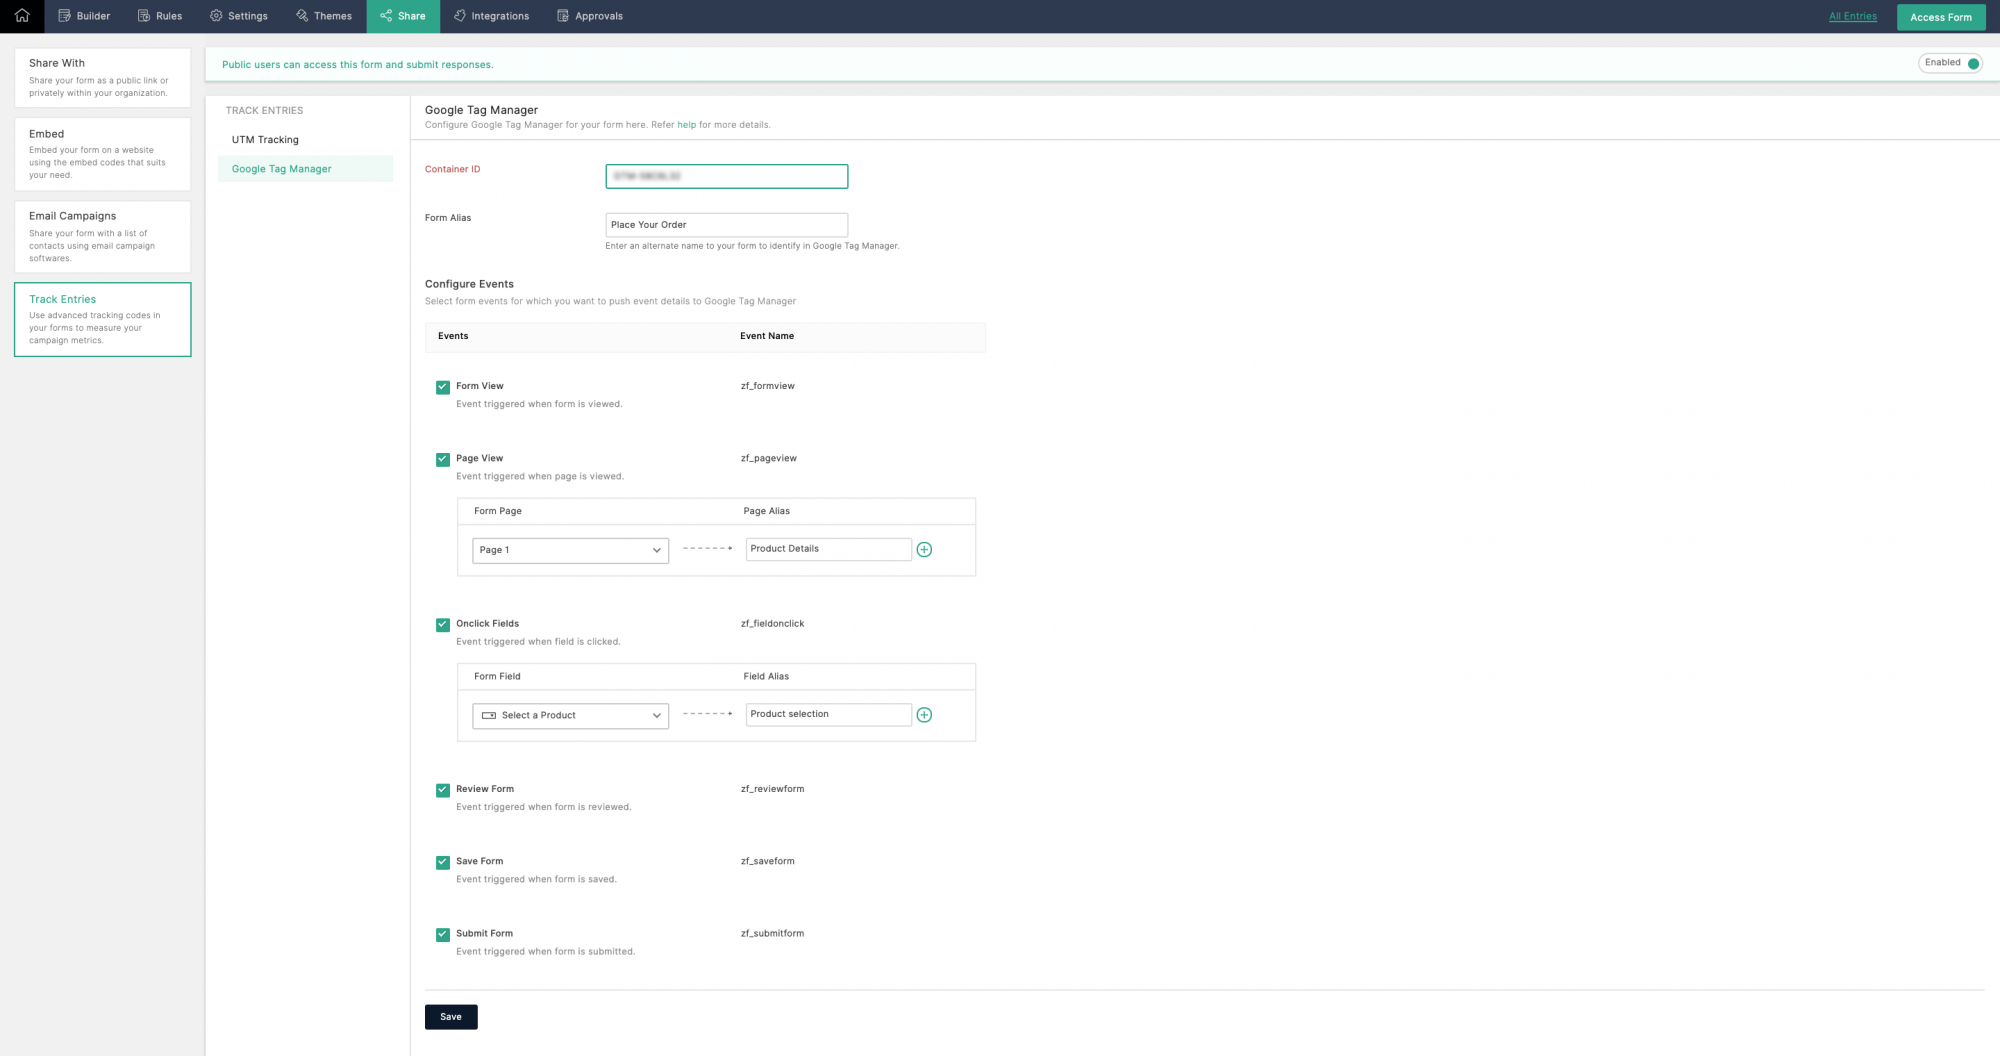
- Paste the Container ID.
- Enter an alternate name for your form in Form Alias to identify it in Google Tag Manager.
- Under Configure Events, select the form events from the following for which you want to push the event details to Google Tag Manager:
- Form View : You can push an event when a respondent views your form.
- Page View : If you have a multiple-page form, you can push an event when a respondent visits the selected pages. Enter an alias name for the selected pages to identify them in Google Tag Manager.
- Onclick Fields : You can push an event when a respondent clicks the selected fields in your form. Enter an alias name for the selected fields to identify them in Google Tag Manager.
- Review Form : You can push an event when a respondent reviews the form.
- Save Form : You can push an event when a respondent saves your form.
- Submit Form : You can push an event when a respondent submits your form.
- Form View : You can push an event when a respondent views your form.
- You can view the list of variables that will be pushed with each event by clicking Variables.
Click Save.
Learn more about the considerations before you install Google Tag Manager.
Configuring Google Tag Manager
Configuring Custom Event Trigger
| Event | Event Name |
| Form View | zf_formview |
| Page View | zf_pageview |
| Onclick Fields | zf_onclickfield |
| Review Form | zf_reviewform |
| Save Form | zf_saveform |
| Submit Form | zf_submitform |
To configure a custom event trigger for the above events,
- In Google Tag Manager, click Triggers from the left menu and click New.
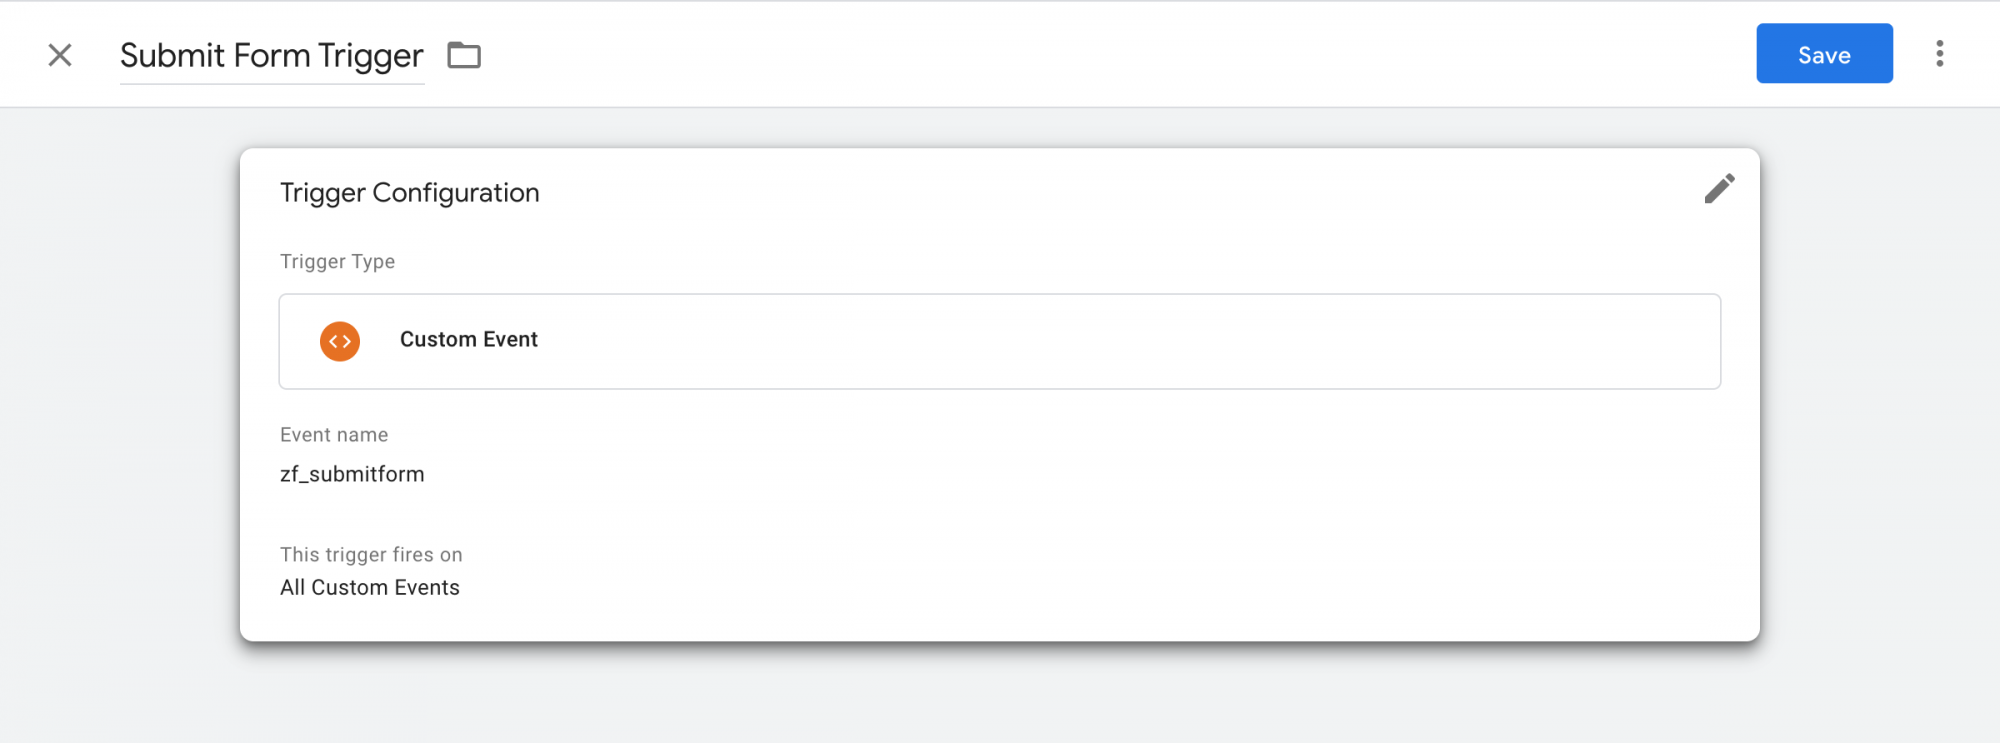
- Enter a name for the event (For example: Submit Form Trigger).
- Click Trigger Configuration and choose the Custom Event trigger type.
- Enter the Event Name as given in the above table for the event that you wish to track. To track all the supported custom events in Zoho Forms, you can enter zf_* and select Use regex matching to allow the field to handle regular expressions.
- Click Save.
 Repeat the above steps in Google Tag Manager for the events selected in Zoho Forms.
Creating Data Layer Variables
When an event is triggered, a set of data regarding the event is sent from the form to Google Tag Manager. In order to capture this data on Google Tag Manager's end, data layer variables will have to be created. Data Layer is a virtual layer of your form that temporarily holds the data generated when a respondent interacts with your form. For example, you can capture additional details from form events in Google Tag Manager, such as the fields clicked or the pages viewed using Data Layer Variables.
You can create the following Data Layer variables in Google Tag Manager to capture a form event data:
- zf_category : This indicates that the data is being pushed from Zoho Forms. This will always be set as Zoho Forms.
- zf_action : Action that takes place in your form
- zf_formname : Name of the form
- zf_field : Field alias name of a field on being clicked
- zf_page : Field alias name of a page on being viewed
To create a Data Layer variable in Google Tag Manager,
In Google Tag Manager, click Variables from the left menu.
Under User-Defined Variables, click New.
Enter a name for the variable.
Click Variable Configuration and select Data Layer Variable.
Under Data Layer Variable Name, enter the name of the variable as given in the above list (For example: zf_formname) and click Save.
Repeat the above steps to create all the Data Layer variables that you wish to push to Google Tag Manager. New variables may be added at the request of users.
Creating Google Analytics Settings variable
The Google Analytics Settings variable is used while configuring a Universal Analytics tag. Once you have created this variable, you can reuse it to configure multiple Universal Analytics tags.
To create Google Analytics Settings variable,
In Google Tag Manager, click Variables from the left menu.
Under User-Defined Variables, click New.
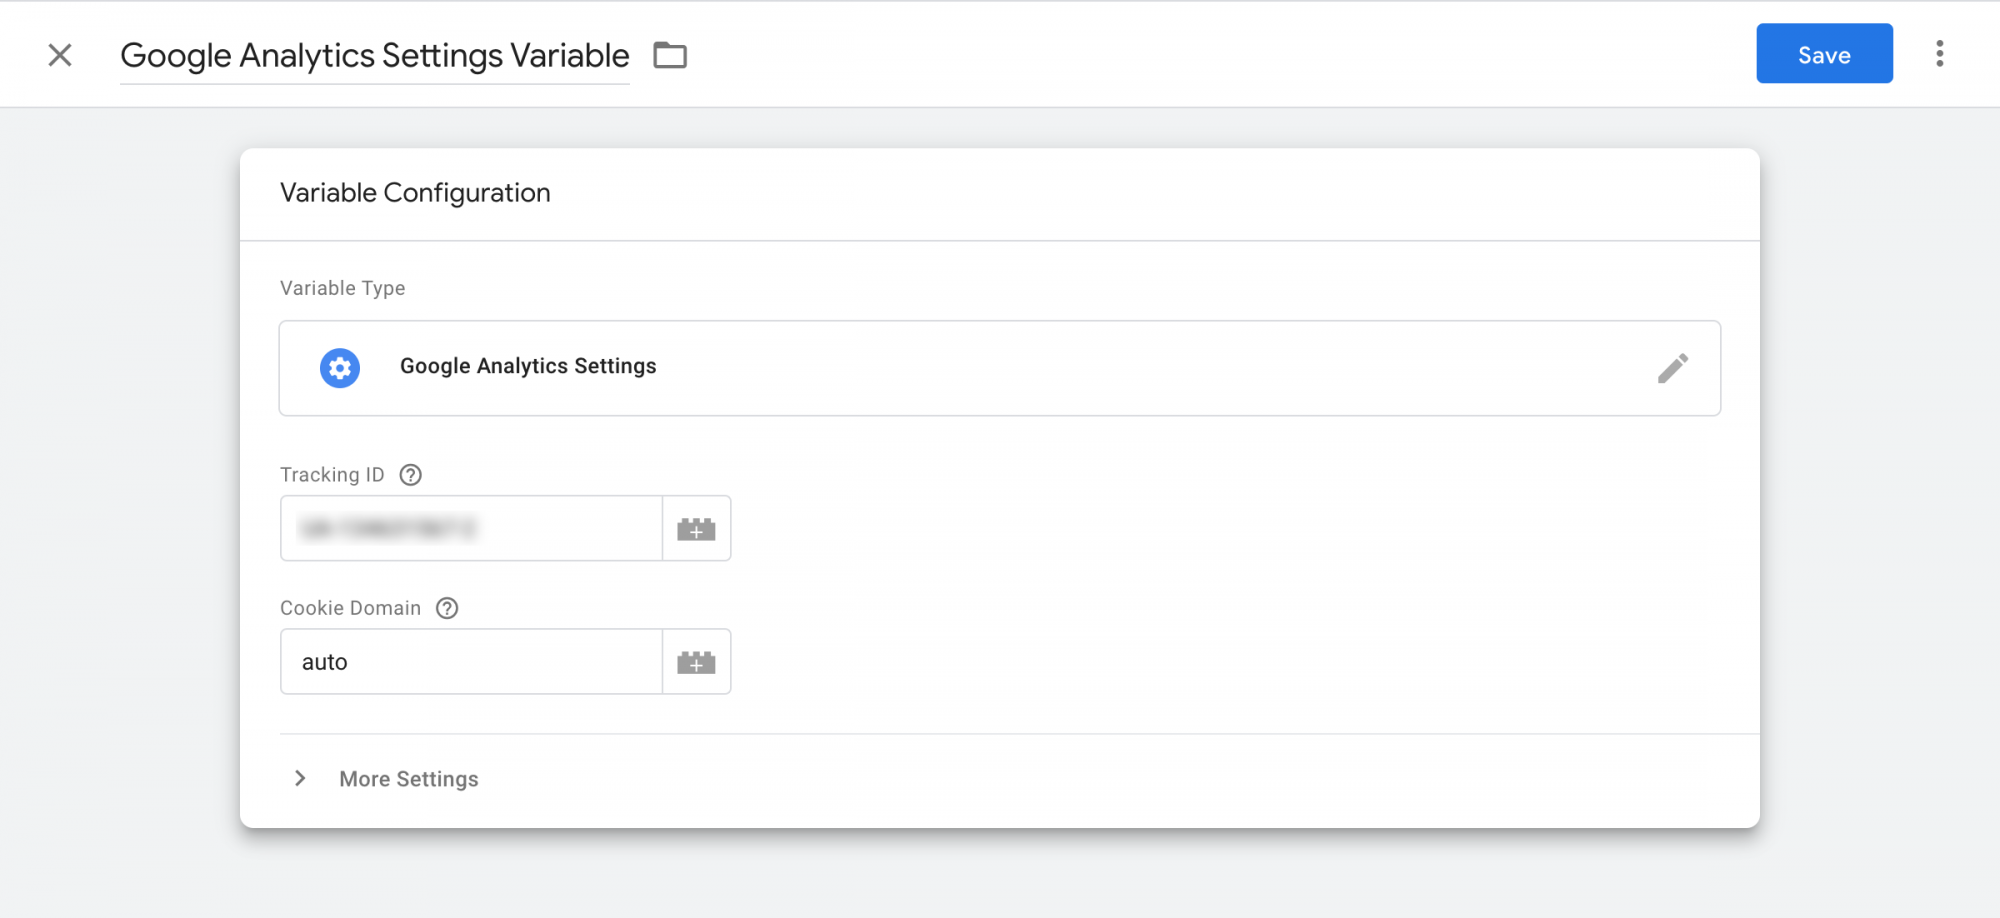
Enter a name for the variable.
Click Variable Configuration and select Google Analytics Settings under Utilities.
Enter your Google Analytics Tracking ID and click Save.
Creating Google Analytics Tag
To create a Universal Analytics tag,
In Google Tag Manager, click Tags from the left menu and click New.
Enter a name for the tag (For example: Submit Form Tag).
Click Tag Configuration and select Google Analytics: Universal Analytics.
Under Track Type, select Event.
Enter the Event Tracking Parameters : Under Category, click the variable picker and select the data layer variables that you have created from the list to track them in Google Analytics.
Under Google Analytics Settings, select the Google Analytics Settings variable created earlier. If you have not created it already, select New Variable from the list and create a Google Analytics Settings variable.
Click Triggering, and select a custom event trigger that you have created to associate it with the tag.
Click Save.
Repeat the above steps to configure more tags using the custom event triggers created.
Tracking events when form is embedded in Website
If your form's iframe is embedded in a website, and you have configured to track events in both your website and form using Google Tag Manager, you must configure certain additional settings.
When your Form and Website have different domains
- Ensure that you use the same Google Analytics Property across the website and the embedded form.
- In Google Tag Manager, check if the Cookie Domain parameter is set to auto in the Google Analytics Settings variable.
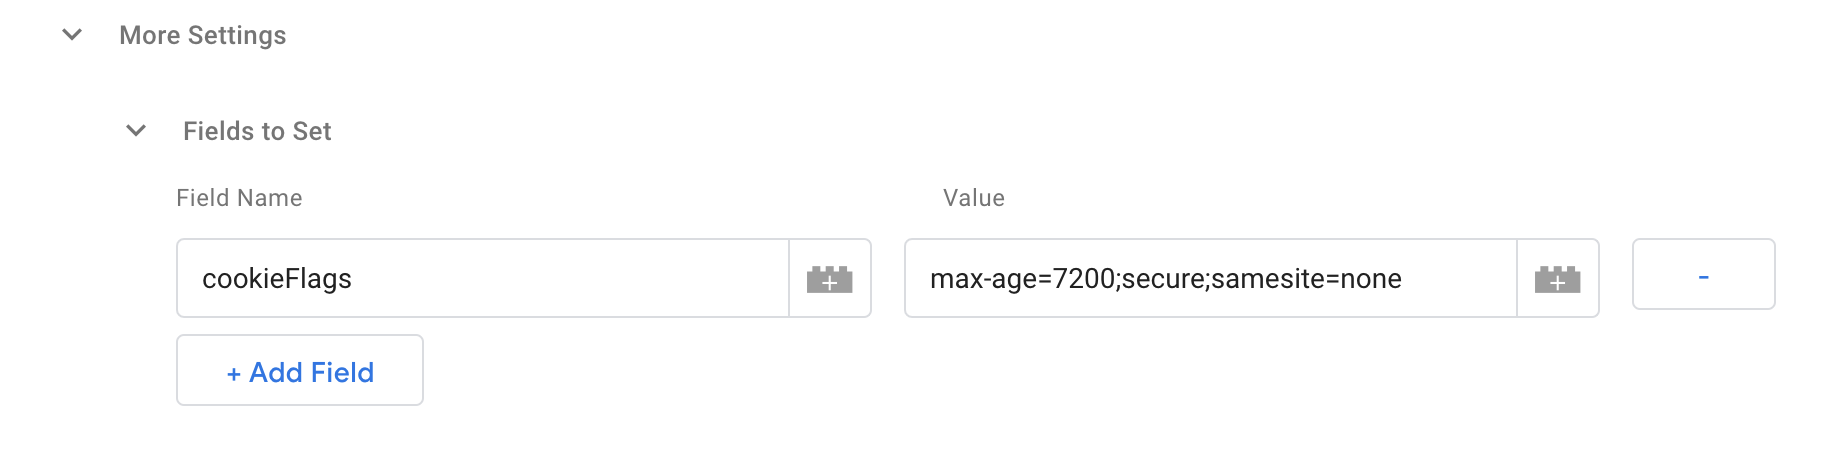
- While configuring the Google Analytics tag, click Fields to Set under More Settings.
- Enter the Field Name as cookieFlags and Value as max-age=7200;secure;samesite=none.
When your Form and Website have the same domain
For example, if your form is in the domain forms.zylker.com and you have embedded it on your website which is in the same domain zylker.com, and you have configured to track events in both your website and form using Google Tag Manager, follow the steps below:
Ensure that you use the same Google Analytics Property across the website and the embedded form.
In Google Tag Manager, check if the Cookie Domain parameter is set to auto in Google Analytics Settings Variable.
- In your Google Analytics account, go to Admin > Property Column > Tracking Info > Referral Exclusion List. Enter the domain if it is not present already.We recommend that you use the same domain for seamless integration with Google Analytics and Google Tag Manager.
Preview and Publish
Once you have configured and saved all your tags, you can click Preview in the top-right corner of Google Tag Manager to test and debug your configuration using the steps here if you are facing issues in tracking.
Click Submit in the top-right corner to publish and push the changes to Zoho Forms.

Note:
- Google Tag Manager can be configured only in our paid plans.
- Configuring Google Tag Manager is not supported for forms with Payment field.
- You can track form events only in Google Analytics using Google Tag Manager.
Zoho CRM Training Programs
Learn how to use the best tools for sales force automation and better customer engagement from Zoho's implementation specialists.
Zoho DataPrep Personalized Demo
If you'd like a personalized walk-through of our data preparation tool, please request a demo and we'll be happy to show you how to get the best out of Zoho DataPrep.
- Zoho Workerly Home
- Forums
- Connect With Us:


- Zoho Recruit Home
- Forums
- Connect With Us:
You are currently viewing the help pages of Qntrl’s earlier version. Click here to view our latest version—Qntrl 3.0's help articles.


Zoho Sheet Resources
Zoho Forms Resources
Zoho Sign Resources
Sign, Paperless!
Zoho TeamInbox Resources
Zoho DataPrep Resources
Design. Discuss. Deliver.
Related Articles
Google Tag Manager Configuration with Google Analytics 4 Property
Installing Google Tag Manager in your form To install Google Tag Manager in your form, In your Google Tag Manager account, go to Workspace and copy the container ID(GTM-XXXXXX) on the top of the window. In your form builder, navigate to the Share tab ...Google Tag Manager setup : Overview
If you are looking to understand how respondents interact with your form, Google Tag Manager (GTM) can help you add and manage analytics and measurement tags on your form to track events in Google Analytics when respondents view your form, click the ...Steps to debug your Google Tag Manager Configuration
Before you debug If you have embedded your form on a website, make sure that the form is embedded as an iframe and not using the downloaded HTML/CSS of the form. Make sure that you have configured Google Tag Manager only with a Google Analytics 4 ...Google Tag Manager Configuration
Watch a quick video to see how you could configure Google Tag Manager to track your form events. The below video is an example configuration with a Universal Analytics property. Help Guide: Configure Google Tag Manager Frequently Asked QuestionsTracking using Google Analytics
If you are using Google Analytics to track your campaign goals, you can track each completed form submission as a goal by configuring Destination Goals. Universal Analytics If you are using the Universal Analytics property in Google Analytics, follow ...