How to create a Shopify private app? – New Version
Shopify updated their changelog
late October 2025, indicating that legacy custom apps can't be created
in the Shopify admin starting January 1, 2026. Instead, users have to go
to the Dev Dashboard to build the apps.
 Note: If
you have already created custom apps before this change took place,
they will continue to function properly. You need not make any changes
to them.
Note: If
you have already created custom apps before this change took place,
they will continue to function properly. You need not make any changes
to them.Why this change?
To improve security and long-term support for custom apps, Shopify has introduced this change. Moreover, Shopify
changed custom-app creation to align with modern practices, ensure
scalability, and offer better developer tools while improving usability
even though it makes the workflow a bit more technical than before.
Creating a new custom or private app via Dev Dashboard
To create and install a private app for your Shopify store, please follow the steps below:
- Access the Dev Dashboard either using the URL https://dev.shopify.com/ or, by accessing Settings at the bottom-left of your store -> click Apps from the left side menu -> click the Develop apps button at the top-right -> click the Build apps in Dev Dashboard button.
- In the dashboard, click the Create app button at the top-right.
- Under the Start from Dev Dashboard section, provide a name for your app. The name should be a maximum of 30 characters.
- Click Create once done.
- In the page that appears, you'll be prompted to create a version in the Versions section.
- In this Versions page, provide the URL of your app in the App URLs field under the URL section and choose the Webhooks API Version as 2025-10.
- Under the Access section, you must choose the API scopes that the app needs. Scopes are nothing but the permissions that the app should have.
- You have to use the scopes below:
read_products
read_orders
read_content
read_customers
read_script_tags
write_script_tags
read_price_rules
read_discounts
read_all_orders
There are two ways you can use to select the scopes:
a. Click the Select Scopes option at the top-right of the Scopes field. Upon clicking, a window will appear.
You can place the cursor inside the search box to find the above-mentioned scopes.
Select them using the checkbox present before each scope. Once you've selected, click the Done button.
b. Type or copy the above-mentioned scopes inside the Scopes field separated by commas. You need to separate them by commas if there are more than one scope.
- If needed, you can specify information under the POS and App proxy sections.
- Click the Release button present at the top-right or bottom-right of the page.
- In the window that appears, you can specify the version name and message (optional) and click the Release button or directly click it to create the app.
- You should be able to see the latest version in the Versions page.
- Now, you need to install the app on your merchant store. To do that, click the Home option in the left-side menu of the dashboard and click the Install App button at the top-right.
- In a new tab that appears, you should select the store in which the app needs to be installed.
- In the next page that appears, review the permissions and click Install.
- The app will be installed and appear in the left side menu of your store.
How does Zoho Marketing Automation get impacted?
Due
to this change, there will be one minor impact when it comes to the
Zoho Marketing Automation – Shopify integration. When you're integrating Shopify,
now, we'll only ask for the Client ID and Secret along with the Shopify Store URL.
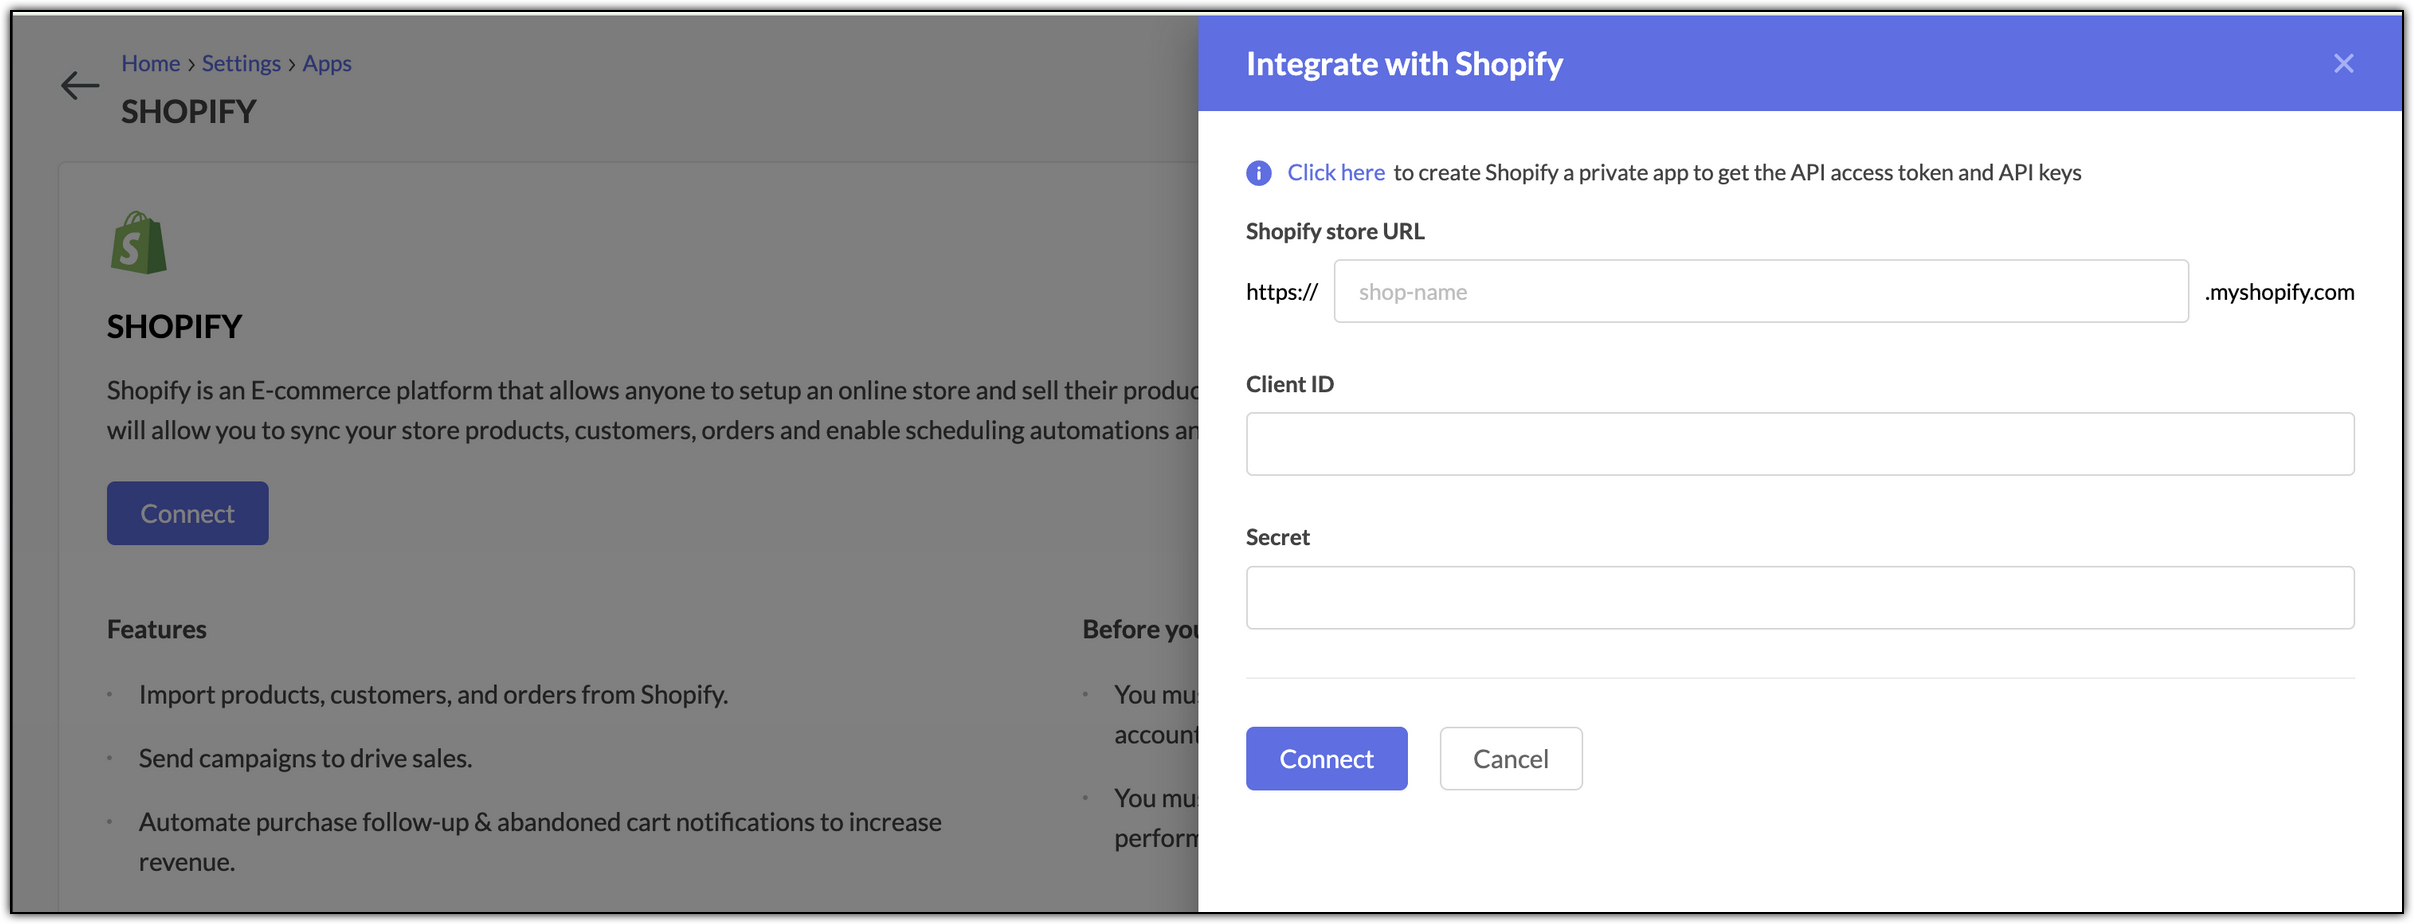
To access the Client ID and Secret:
- Access the private or custom app you created in the Dev Dashboard by using the URL https://dev.shopify.com/ and clicking the app or, by accessing Settings at the bottom-left of your store -> click Apps from the left side menu -> click the Develop apps button at the top-right -> click the Build apps in Dev Dashboard button -> click the app in the dashboard page.
- After accessing the app, click the Settings option to access the Client ID and Secret. Click the notepad button beside each to copy the data.
- Paste them in the respective fields, one after the other, in Zoho Marketing Automation and proceed with the integration process.