Landing page reports
Landing page reports lets you view details of the visits, visitor type, conversions and much more. You can use this information to tailor your landing page according to the visits best suited to the visitors' needs. You can customize the period of the reports in the top right corner.
To view landing page report:
- Select Lead Generation from the Navigation Toolbar to the left and choose Landing Pages.
- Click on a published landing page you need to view the report for. You will land on the reports page.
Page Stats
Basic information of the landing page appears in the top section, such as:
- Visitors - Number of unique visitors who have viewed the landing page.
- Visits - Number of visits for the landing page.
- Conversions - Number of visitors who have clicked the call-to-action (CTA) button.
- Conversion Rate - Rate of conversion for the landing page.
- Average Time Spent - Average time spent by visitors on the landing page.
The above data is displayed in a table and a graph.
Visitor Type
This shows the number of known and anonymous visitors who have viewed the landing page.
Known visitors are the ones who have provided their email address via signup forms, pop-ups.
Anonymous visitors are the ones who have not provided their email address.
Known visitors are the ones who have provided their email address via signup forms, pop-ups.
Anonymous visitors are the ones who have not provided their email address.
Source Stats
This pie chart shows the number of visitors and the various sources from which they might have accessed the landing page link. It also lists out the conversion and its conversion percentage of the visitors if there are any. Click the drop-down at top right of this chart and select the respective option to view the conversion and conversion percentage data.
Devices Stats
This pie chart displays the number of visitors and the devices from which they have signed up. It also lists out the conversion and its conversion rate of the visitors if there are any. Click the drop-down at top right of this chart and select the respective option to view the conversion and conversion rate data.
Location Stats
This location-based report shows the number of contacts signed up from various locations. It also lists out the number of clicks made by visitors of each location respectively.
Heat Map
This section shows various visitor and visitor interaction based data such as:
- Visitors - Number of unique visitors who have viewed the landing page.
- Visits - Number of visits for the landing page.
- Clicks - Number of clicks on the landing page.
- Engaged visitors - Percentage of visitors who've interacted with at least one element of the landing page.
- Clicks/Visits - Number of clicks per number of visits.
You can view heat map, scroll, and attention maps for the landing page by clicking the drop-down below the data table.
Form Reports
This section shows various visitor and visitor interaction based on data of the signup form present in the landing page,
- Visitors - Number of unique visitors who have viewed the landing page.
- Visits - Number of visits for the landing page.
- Starters - Number of visitors who've interacted with at least one element of the landing page.
- Abandons - Number of visitors who abandon before filling up the form
- Conversions - Number of visitors who have submitted the CTA the form along with details.
This page also has various form interaction based data, such as average time spent, field level stats, time spent on each field, filled and blank fields, and hesitation and total time.
Contacts tab
This tab lets you view details of the various contacts who have signed up from the landing page.
You can filter data by clicking on the filter icon on top right corner of this tab. Additionally you can save a segment based on the filter you apply. There are smart and advanced filters under this section.
Response Action
Based on signup form responses in the landing page, contacts can be associated with a tag, added to a list, added to a journey and have the contacts' field updated. You can also remove the contacts from lists or journeys and dissociate them from tags based on your requirements.
Push records to Zoho CRM
To push data submitted by form visitors (form in the landing page) to your Zoho CRM:
- Click Configure in the Push to CRM tab.
- Select which contacts you want to update in Zoho CRM.
- Update existing and push new contacts: Choose this if you want to update the field values of pre-existing contacts (if there is a change) as well as push new records incoming from the form.
- Update existing contacts only: Choose this if you want to update field values of only pre-existing contacts.
- Select the CRM module into which you want to push the records.
- Map the fields between Zoho Marketing Automation and Zoho CRM. Mapped fields will be updated in Zoho CRM when the records are pushed.
- Click Save.

Note: Data can be pushed from Zoho Marketing Automation to Zoho CRM but the reverse is not possible.
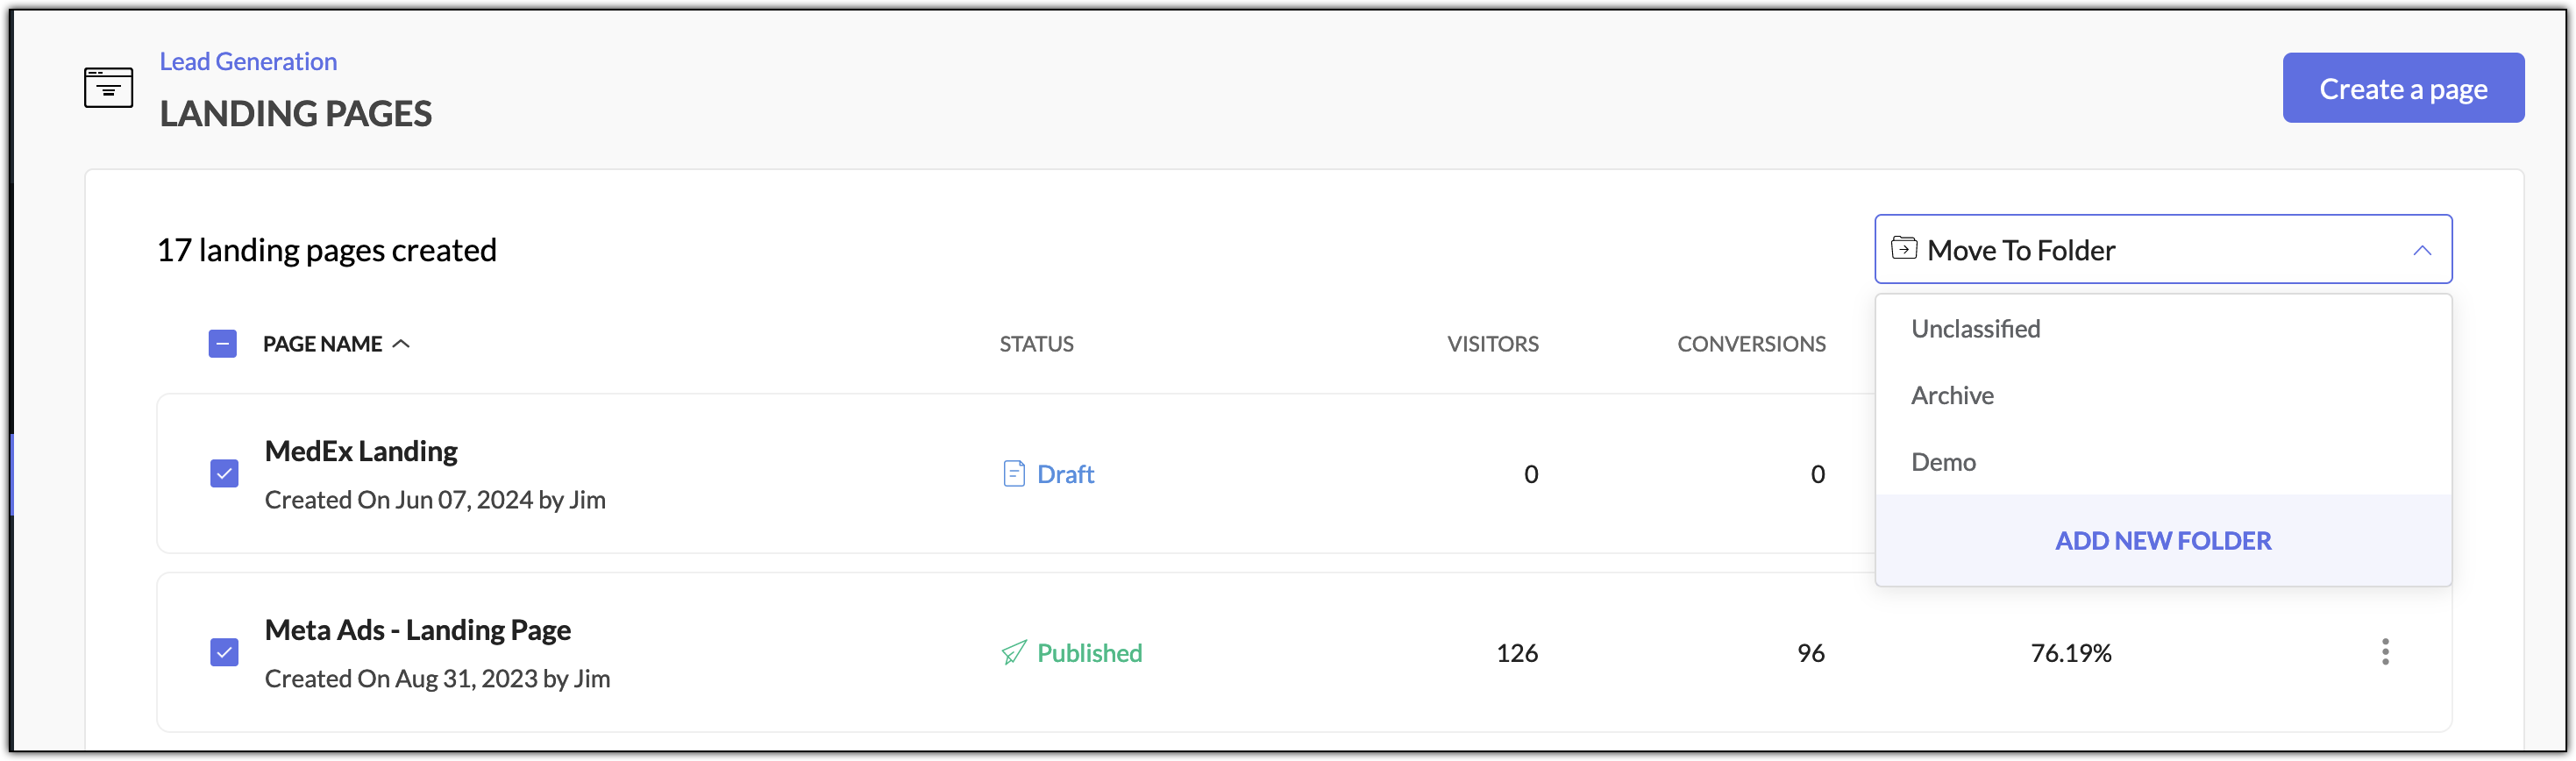
Other Actions
In the Landing Pages list view, you can select some pop-ups and move them to a different folder using Move to Folder
option. You can also use the Add New Folder option to create a new
folder. If you want to categorize landing pages catering to different
purposes, having them in different folders would be a good option.
By clicking on the More Actions icon at far right of a landing page, you can make use of Clone and Delete options. Clone allows you to create a copy of the page you have created and
Delete option will delete the page. Once a page is deleted, it cannot be
retrieved.
The Delete option can also be used in a page's detail view.
Click on the More Actions icon at top right of the landing page next to the Publish Now or Un-Publish button to access this option.
Using the Edit Landing Page button you can edit the landing page to customize it.
You can use Un-Publish button to move the landing page to Unpublished status. If you need to publish it again, click on Publish Now button. Note that you would not be able to edit the landing page if it is in Unpublished
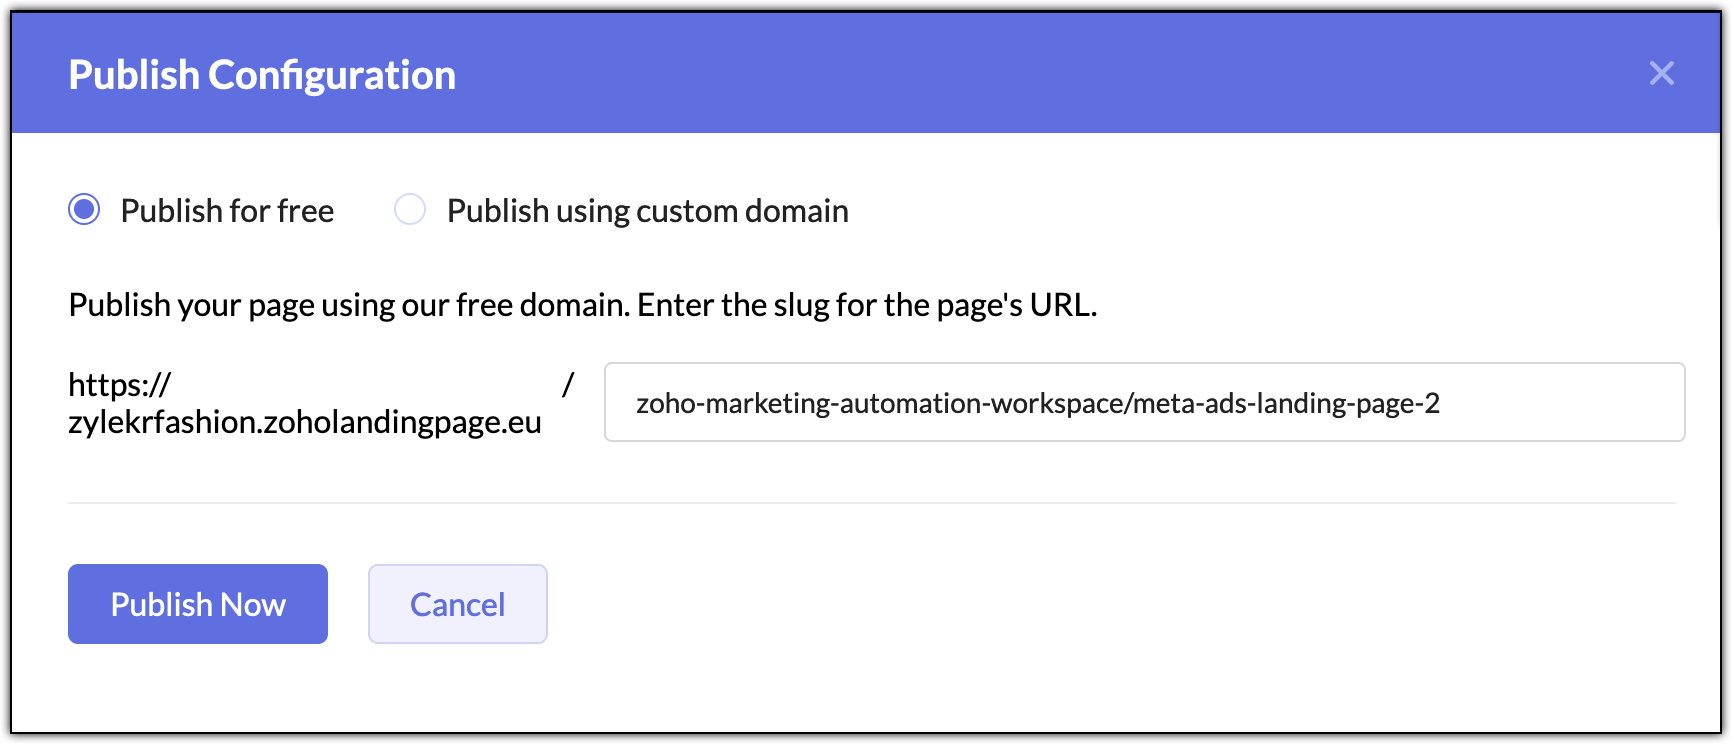
You can also access the Publish Options in the More Actions button. It will take you to the publish configuration window.
You can use Un-Publish button to move the landing page to Unpublished status. If you need to publish it again, click on Publish Now button. Note that you would not be able to edit the landing page if it is in Unpublished
You can also access the Publish Options in the More Actions button. It will take you to the publish configuration window.