How to set up sync with Zoho Commerce
Zoho Commerce is an e-commerce platform that allows anyone to setup an online store and sell their products. Integrating with Zoho Commerce will allow you to sync your store products, customers, orders and enable scheduling automations and campaigns.
Set up a sync
- Choose Settings on the left panel, then click Apps under Integrations.
- Click Zoho Commerce to create a sync.
- Select a mailing list if required to which you intend to sync the contacts. All the synced contacts will be available in the selected list as well as under All contacts in Zoho Marketing Automation.
- Select a topic if required to associate your contacts with a relevant topic you intend to communicate with them.
- Select a lawful basis. This option will be available only if you've opted to comply with GDPR in your Zoho Marketing Automation account settings.
- Click Next.
 Note: Zoho Marketing Automation will automatically map the fields of your contacts already available in Zoho Commerce. Once you have set up the sync, you can view the fields that have been mapped.
 Map fields
Map the relevant Zoho Commerce fields with Zoho Marketing Automation fields. You can map additional fields if required by clicking the plus side beside the last mapped field.
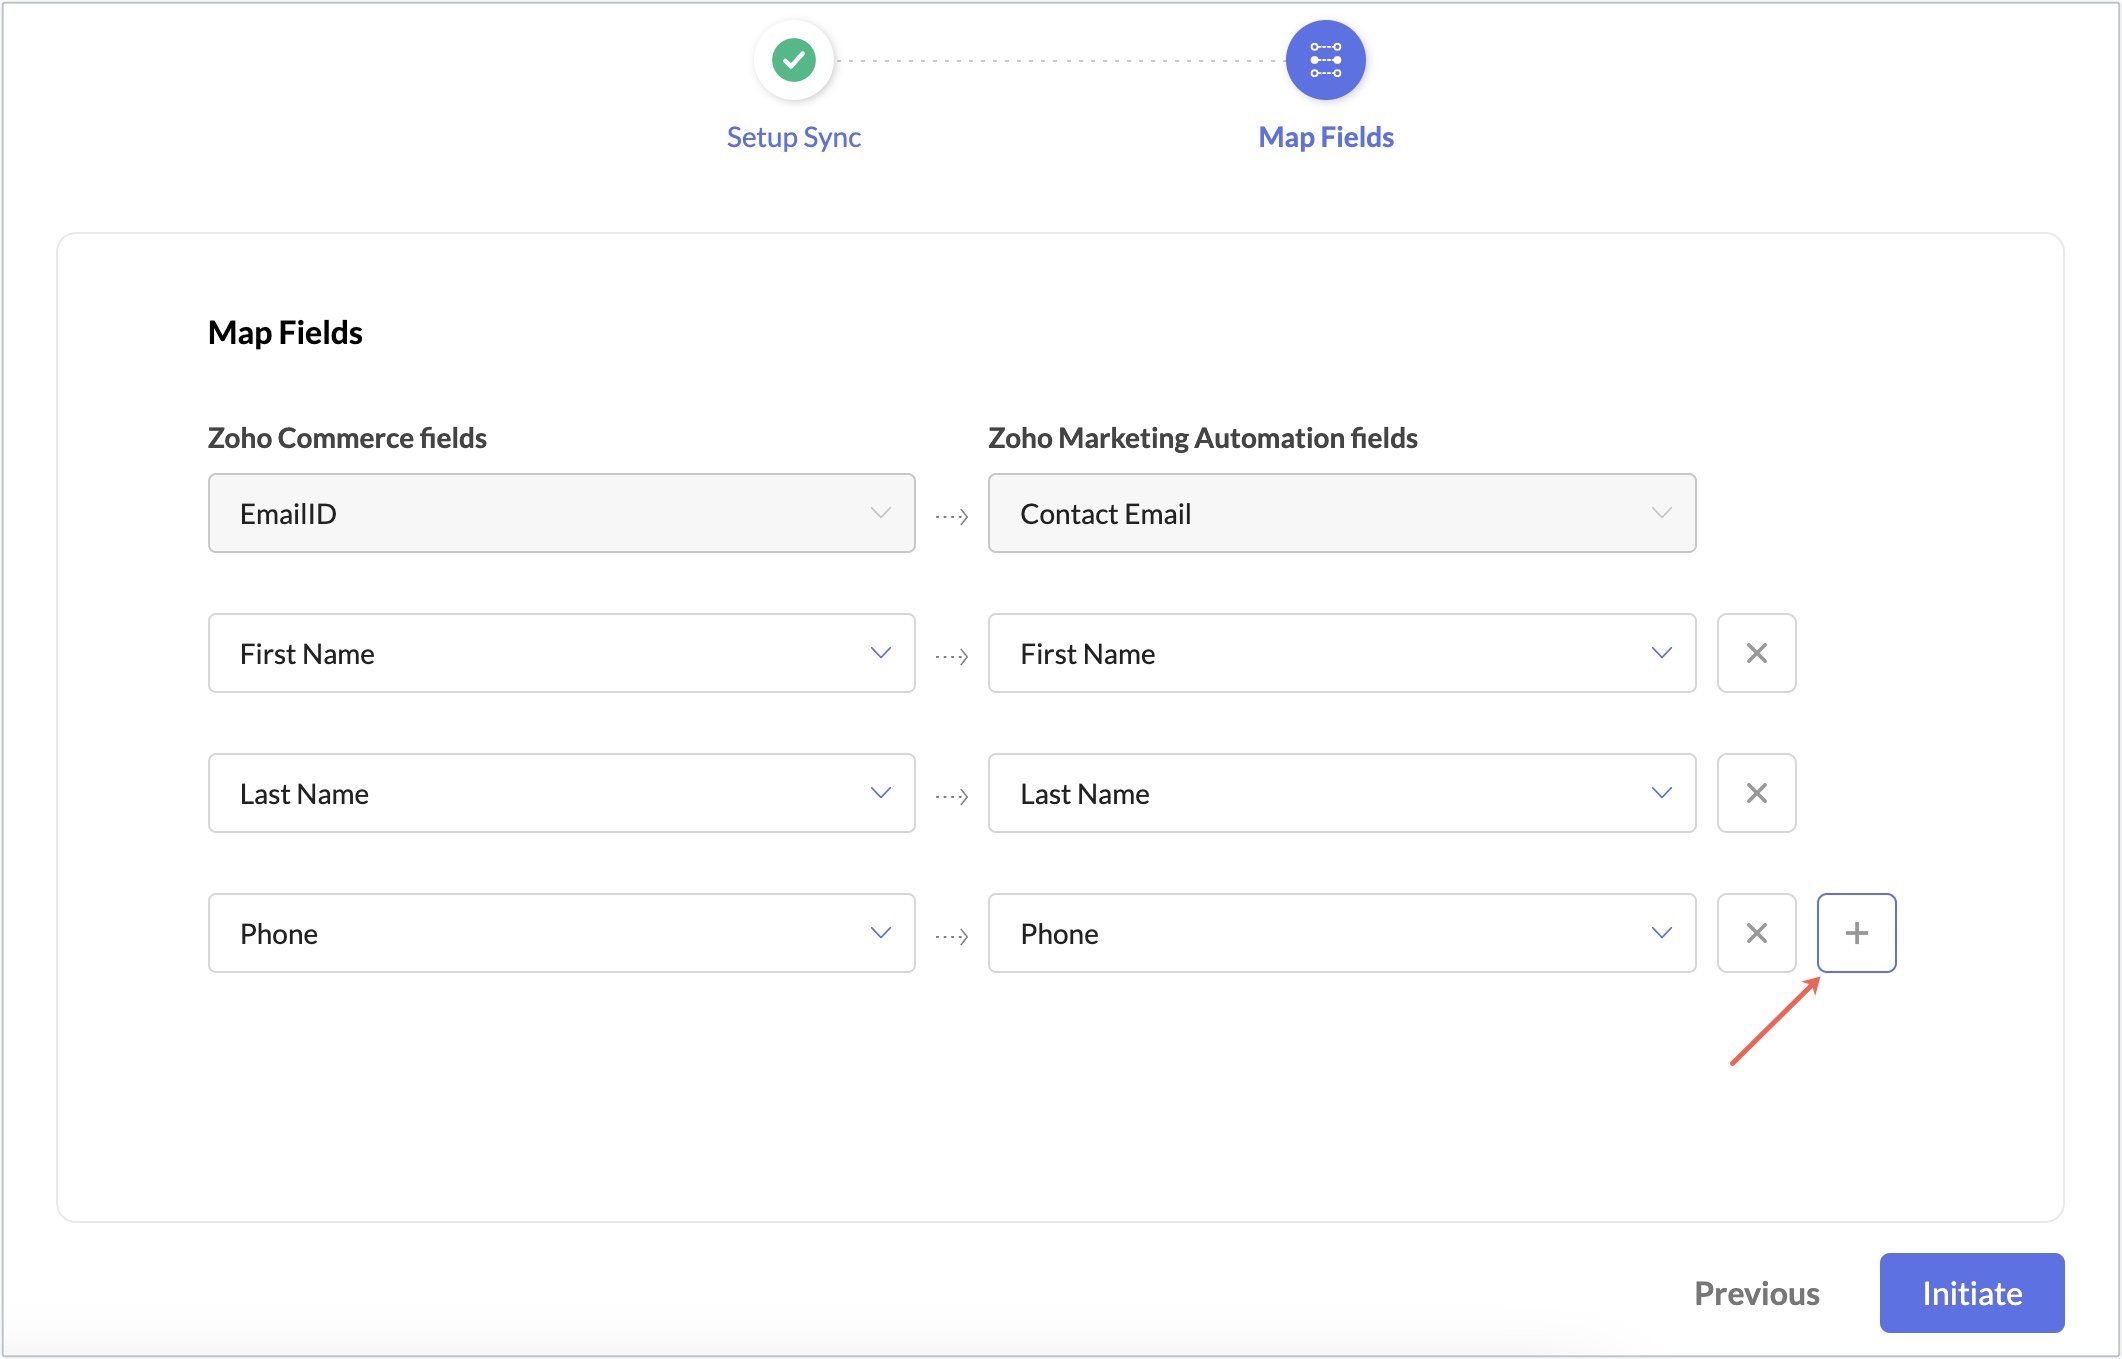
Click Initiate once you are done.
View mapped fields
Navigate to Field tab. Here you can view all the fields that have been mapped from Zoho Commerce. You can also edit your sync configuration or field mapping by clicking on the Edit icon available in respective tabs.
View sync history
Navigate to Sync history tab.
Here you can see the following details:
- Sync time - The time at which the sync was performed.
- Total records - Total number of contacts synced at the given time.
- Added - Number of new contacts added at the given time.
- Updated - Number of existing contacts updated.
- Skipped - Number of contacts not synced since they didn't match the sync criteria.
Note: You can export your skipped contacts as a .csv file by clicking the export icon next to the skipped value.