Add clients
Prerequisites
Roles required:
Organization Owner/Admin
To add clients:
The steps vary for the three User Interface versions supported in
Zoho One. Select the UI version you use from the tabs below and proceed
with the steps that follow.
One Experience UI
Spaces UI
Unified UI
One Experience UI
2.Click Portals on the left menu.
3.Under the Clients tab, click Manage Clients.
4.Click Add Client.
5.Enter the client's Email address, then click Next.
6.Under BASIC INFORMATION, enter the client's First Name, Last Name, Name Title, and Display Name.
7.Under WORK INFORMATION, enter the Company Name and Job Title.

If you enter a company name and click on create a new company, a new company will be created. Any clients added to that company afterward will automatically be marked as Colleagues.
8.Under CONTACT INFORMATION, enter the Phone Number, Mobile Number, Fax Id, and Website.
9.If you have created custom fields beforehand, fill them out. If you wish to create custom fields now, click  .
.
10.Uncheck Send invitation email if you want to share the invitation or credentials manually with the client.
11.Click Add.
Sign-in Status
Once you've added clients to your organization, the Sign-in Status (last signed in) of the clients can be viewed under Manage Clients.
Spaces UI
2.Click Portals on the left menu.
3.Under the Clients tab, click Manage Clients.
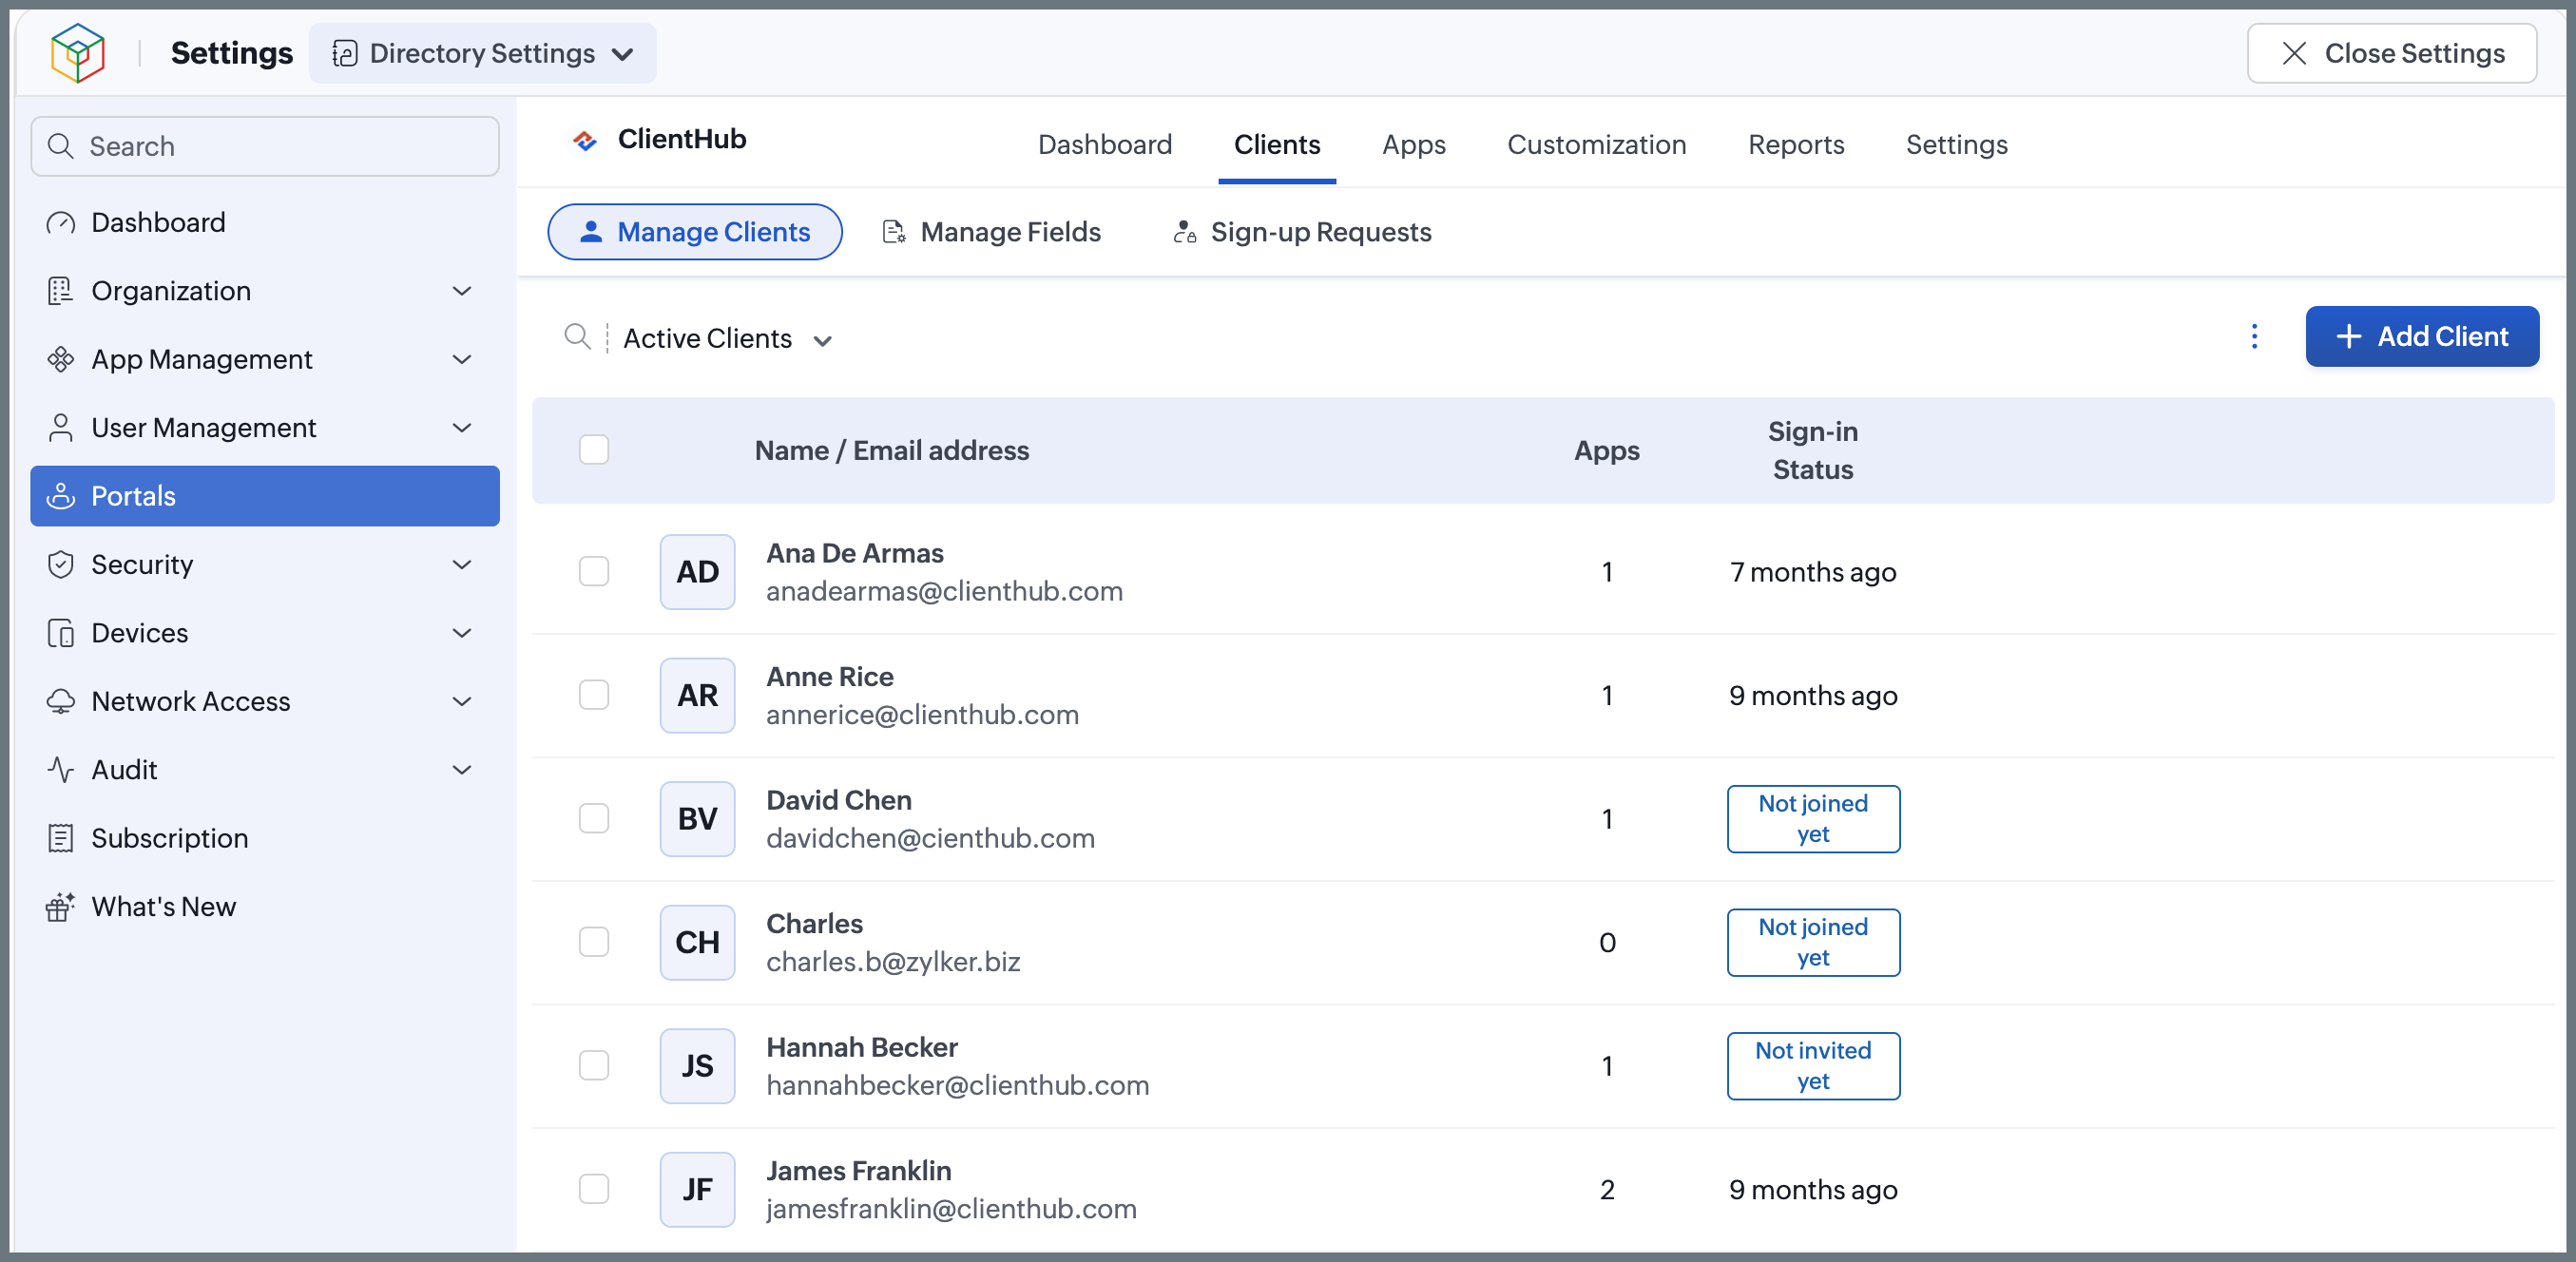
4.Click Add Client.
5.Enter the client's Email address, then click Next.
6.Under BASIC INFORMATION, enter the client's First Name, Last Name, Name Title, and Display Name.
7.Under WORK INFORMATION, enter the Company Name and Job Title.
If you enter a company name and click on create a new company, a new company will be created. Any clients added to that company afterward will automatically be marked as Colleagues.
8.Under CONTACT INFORMATION, enter the Phone Number, Mobile Number, Fax Id, and Website.
9.If you have created custom fields beforehand, fill them out. If you wish to create custom fields now, click .
10.Uncheck Send invitation email if you want to share the invitation or credentials manually with the client.
11.Click Add.
Sign-in Status
Once you've added clients to your organization, the Sign-in Status (last signed in) of the clients can be viewed under Manage Clients.
Unified UI
1.Sign in to Zoho One , then click Directory in the left menu.
2.Click Portals.
3.Under the Clients tab, click Manage Clients.
4.Click Add Client.
5.Enter the client's Email address, then click Next.
6.Under BASIC INFORMATION, enter the client's First Name, Last Name, Name Title, and Display Name.
7.Under WORK INFORMATION, enter the Company Name and Job Title.
If you enter a company name and click on create a new company, a new company will be created. Any clients added to that company afterward will automatically be marked as Colleagues.
8.Under CONTACT INFORMATION, enter the Phone Number, Mobile Number, Fax Id, and Website.
9.If you have created custom fields beforehand, fill them out. If you wish to create custom fields now, click .
10.Uncheck Send invitation email if you want to share the invitation or credentials manually with the client.
11.Click Add.