Learn how to configure your Push Notifications for iOS
PageSense allows you to send push notifications to your applications from our dashboard. Please follow the steps to send your first push notification to your application. Please note to test remote push notifications you need to connect your actual iOS device. The remote push notifications don't work on simulator.
Step 1: Configure Push Notifications
To send push notifications on your iOS Application using PageSense dashboard, you first need to upload key or certificate from Apple developer account. There are 2 ways to configure push notifications.
- Go to Apple developer account and go to Certificates, Identifiers & Profiles
- Go to Keys section and click on a new key using Add button(+)
Choose a unique name for key and select Apple Push Notification service(APNs) checkbox. Click Continue and then Confirm.
- Note and save the key ID. Click Downloadto generate and save the key.
 Note: Remember you have to save the key in a secured place because you can't download key more than once. Do not rename Auth key file, and upload it as it is to the PageSense dashboard, as shown in step 6.
 - Now go to PageSense dashboard and go to Settings > Channels > Mobile Push. Choose iOS tab andchoose Provider authentication token (Auth key) under Authentication Type as given in the following picture.
You will get an option to Upload Auth Key. Upload your .p8 key from Apple developer account and enter Team and Bundle ID.
You will get your Team ID from Apple Developer Account. Go to Membership tab and get your Team ID. Your app's Bundle ID can be found in Xcode. Select the appropriate mode for sending push notifications and click Save.
We recommend that you create and upload an APNs Auth Key rather than uploading .p12 certificate for the following reasons:
i) No need to re-generate the push certificate every year.
How to acquire and upload a .p12 certificate?
If you have configured .p8 file successfully, you can skip this and directly go to Step 2.
Log in to Apple Developer account, and navigate to the Program Resources tab and select Certificates, Identifiers & Profiles.
Select Certificates tab and add a new certificate using the '+' sign
- Select Apple Push Notification service SSL under Services and click Continue
Choose App ID of your project from the dropdown.
Now Apple will ask you to upload a Certificate signing request. On your MAC open Keychain Access and navigate to Certificate Assistant. Select Request a Certificate From a Certificate Authority.
Selecting this option directs you to the Certificate Assistant. Select Request is > Saved to Disk and leave the email address blank. Click Continue.Now Upload the certificate on Apple developer account as requested in 5.
Download the certificates generated and open it with the Keychain Access application.
- In Keychain Access, click My Certificates and locate your push certificate.
- Select, right-click and export it as a .p12 file and use a temporary password. (It will be required when uploading your certificate to PageSense dashboard).
- Navigate to Manage Settings > Settings in the dashboard and upload your certificate under Apple Push Certificate. The passphrase is your temporary password.
 Info: You can upload either your development or production push certificates to the dashboard for your distribution provisioning profile apps, but you can only have one active push certificate at a time.
If you wish to test push notifications in a production environment once your app goes live in the App Store, we recommend setting up a separate app group or app for your development environment
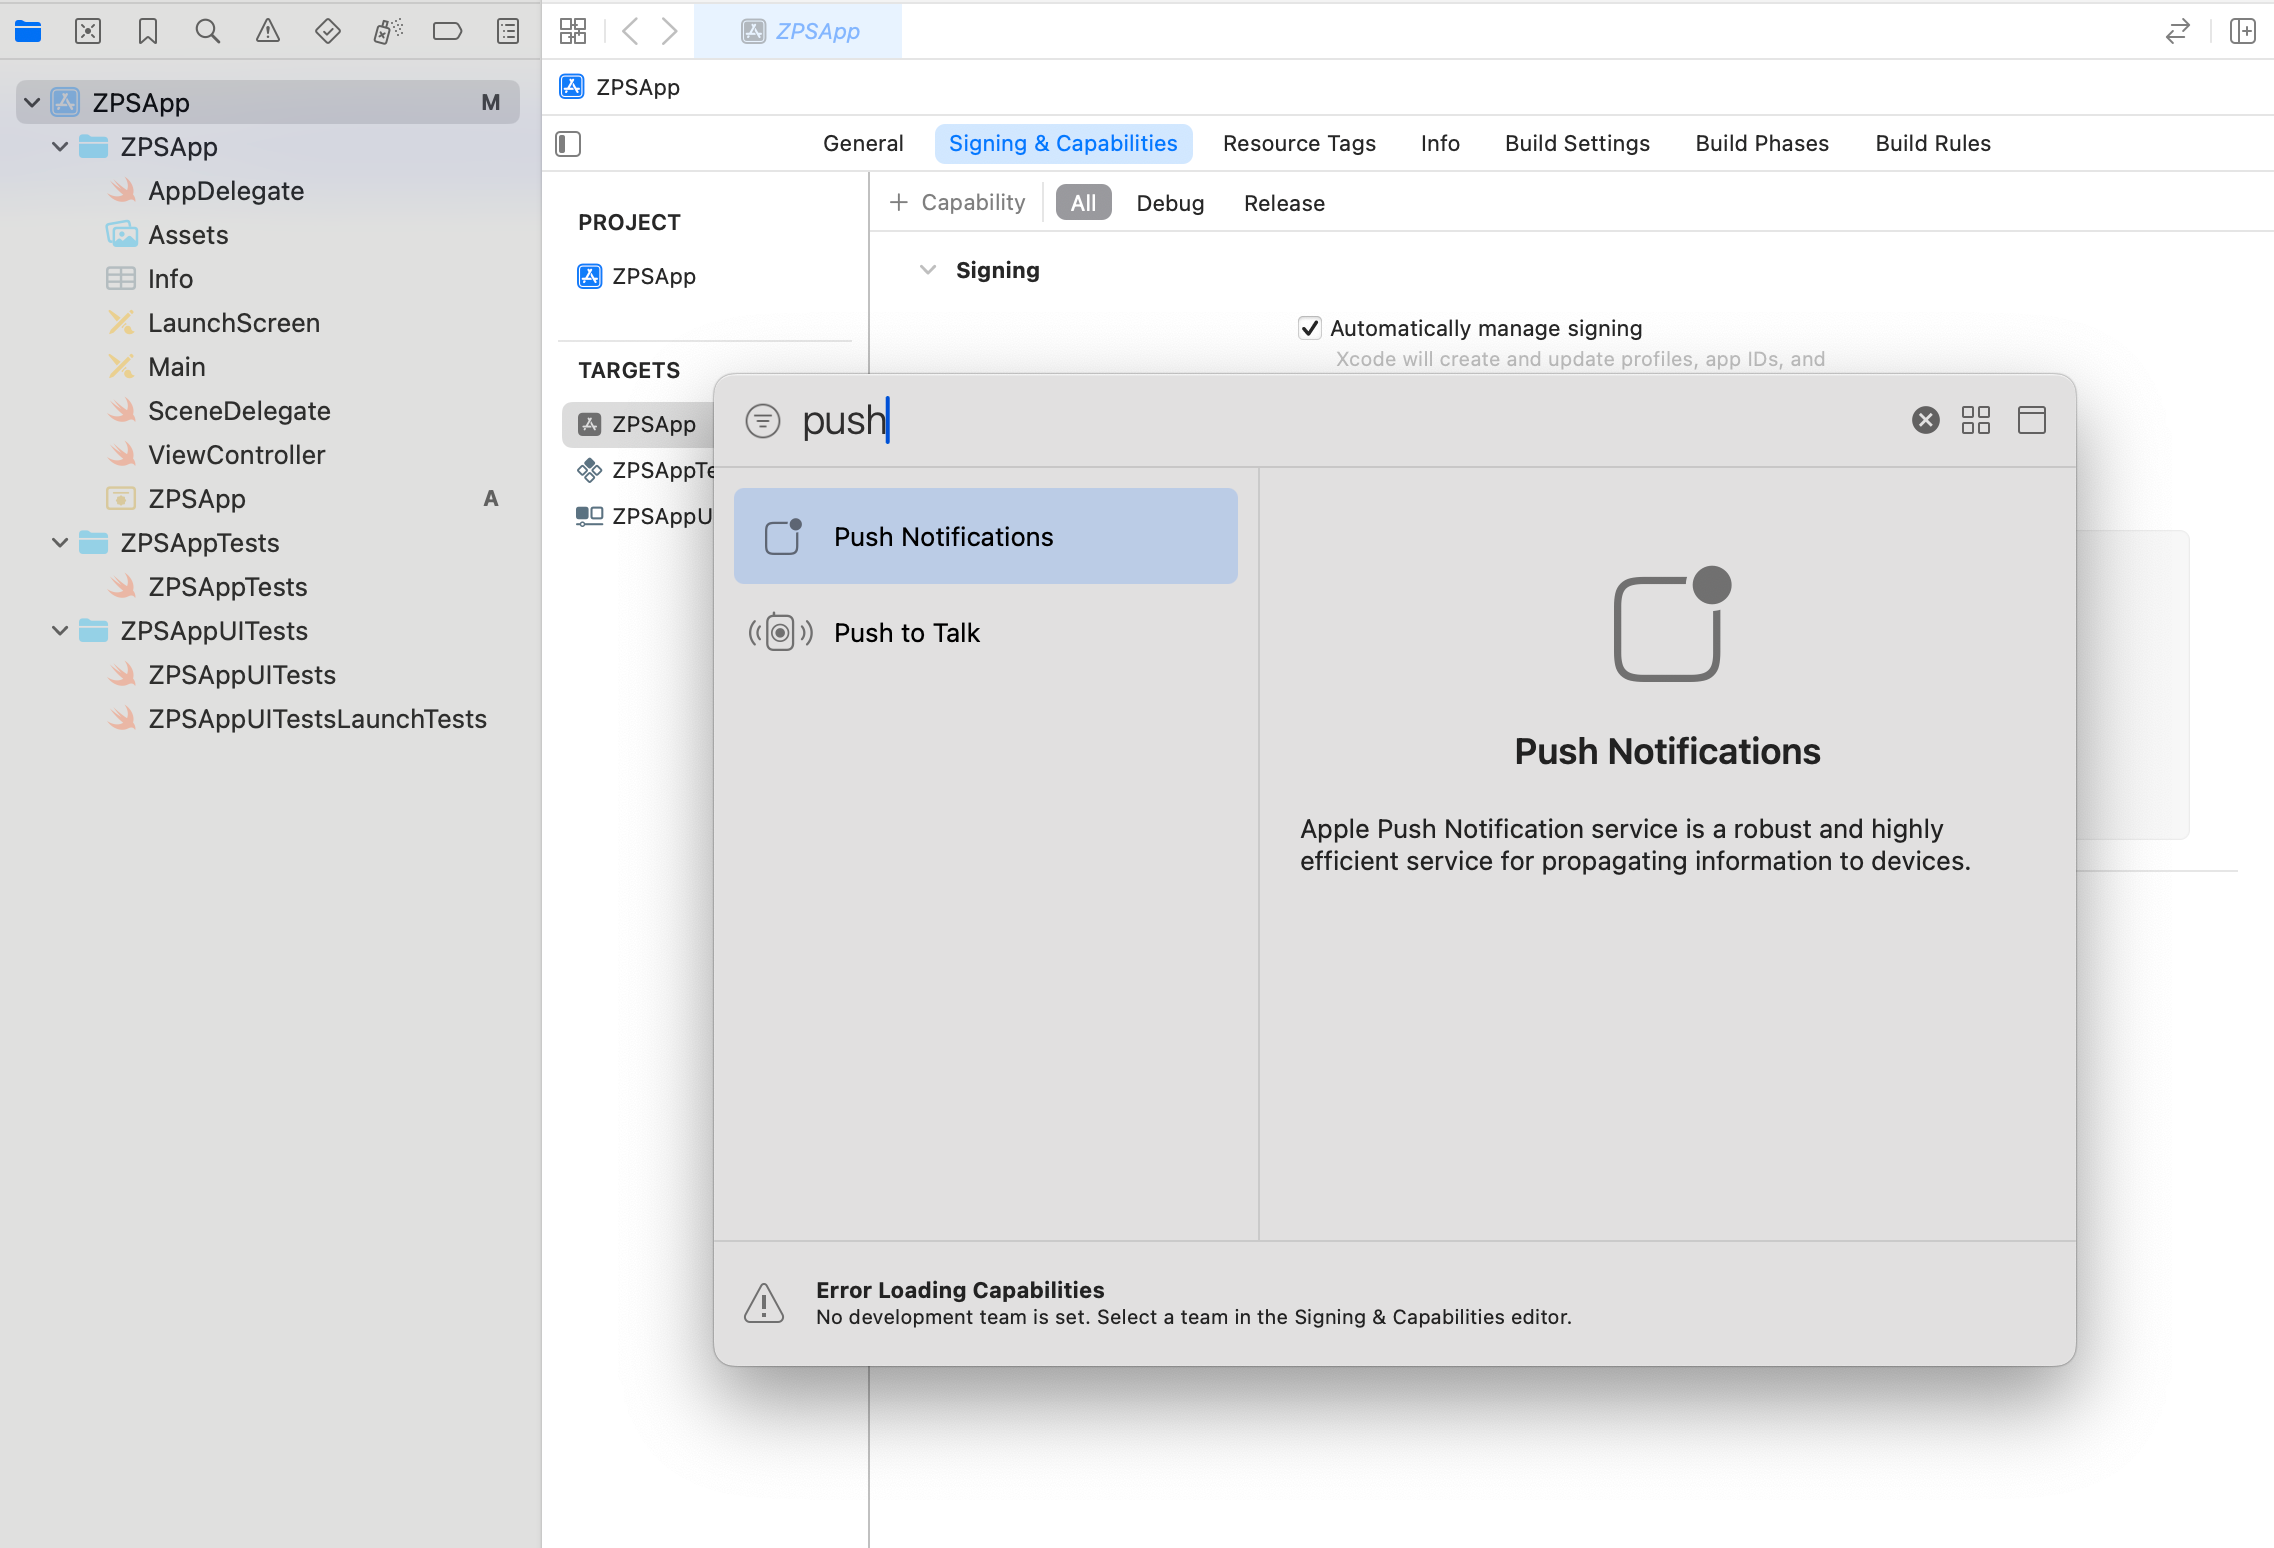
Step 2: Enable the Push Notifications Capability
Step 3: Registering for push notifications
Delegate method of your app delegate:
- func application(_ application: UIApplication, didFinishLaunchingWithOptions launchOptions: [UIApplication.LaunchOptionsKey: Any]?) -> Bool {
- // Override point for customization after application launch.
- PageSense.integrate()
- UNUserNotificationCenter.current().delegate = self
- registerForPushNotifications()
- return true
- }
- func registerForPushNotifications() {
- UNUserNotificationCenter.current().requestAuthorization(options: [
- .badge, .sound, .alert
- ]) { granted, _ in
- guard granted else { return }
- DispatchQueue.main.async {
- UIApplication.shared.registerForRemoteNotifications()
- }
- }
- }
- func application(_ application: UIApplication, didRegisterForRemoteNotificationsWithDeviceToken deviceToken: Data) {
- PageSense.setPushToken(deviceToken: deviceToken)
- }
Push Impressions
- override func didReceive(_ request: UNNotificationRequest, withContentHandler contentHandler: @escaping (UNNotificationContent) -> Void) {
- self.contentHandler = contentHandler
- bestAttemptContent = (request.content.mutableCopy() as? UNMutableNotificationContent)
- if let bestAttemptContent = bestAttemptContent {
- // Modify the notification content here...
- bestAttemptContent.title = "\(bestAttemptContent.title) [modified]"
- contentHandler(bestAttemptContent)
- PageSense.trackPushNotificationReceived(notificationContent: request.content)
- }
- }
We’ve designed this documentation to guide you every step of the way. If you need further assistance or have any questions, don’t hesitate to contact us at support@zohopagesense.com - we’re always here to help!