Self-healing in Zoho QEngine
1. Overview
Self-healing is an AI-driven mechanism that automatically identifies and repairs broken or obsolete locators in test cases, making the automation testing process more resilient and efficient. Locators are identifiers such as IDs, class names, XPath, or CSS selectors used to find elements on a webpage, like buttons or forms. When UI changes occur, like updates or redesigns, locators can break, leading to test failures. Self-healing adapts to these changes, reducing the manual effort to update locators and lowering test execution time.
When implementing self-healing locators, it is crucial to establish effective locator strategies and priorities. These strategies help the self-healing mechanism prioritize the use of stable and unique locators. In Zoho QEngine, elements and their locators are stored centrally, and their priority can be influenced by the order in which they are set. During test execution, if a locator fails, the self-healing feature suggests alternate saved locators for that element, which helps maintain test continuity and reduce flaky or unstable tests. After each test run, any locator adjustments made by the self-healing mechanism are available in self-healing logs for review.
2. Enabling Self-healing Mechanism
To enable self-healing mechanism, follow the steps below:
- Navigate to Settings > Preferences.
- Toggle on Self-Healing.
Once enabled, the elements referenced in the test cases will automatically self-heal if obsolete locators are detected.
3. Self-healing in Live Preview
The self-healing mechanism continuously monitors the website or application for changes in the structure or attributes of elements. This is done during test execution, and may also be performed in a test plan. When changes are detected, the self-healing mechanism dynamically adjusts the locators to match the modified elements.
Let's understand how the self-healing mechanism works with the execution of a test case. Consider an example with a recorded web test case. Here, the interacted elements of the website are captured and stored automatically in the Elements page.
3.1 Self-healing Logs
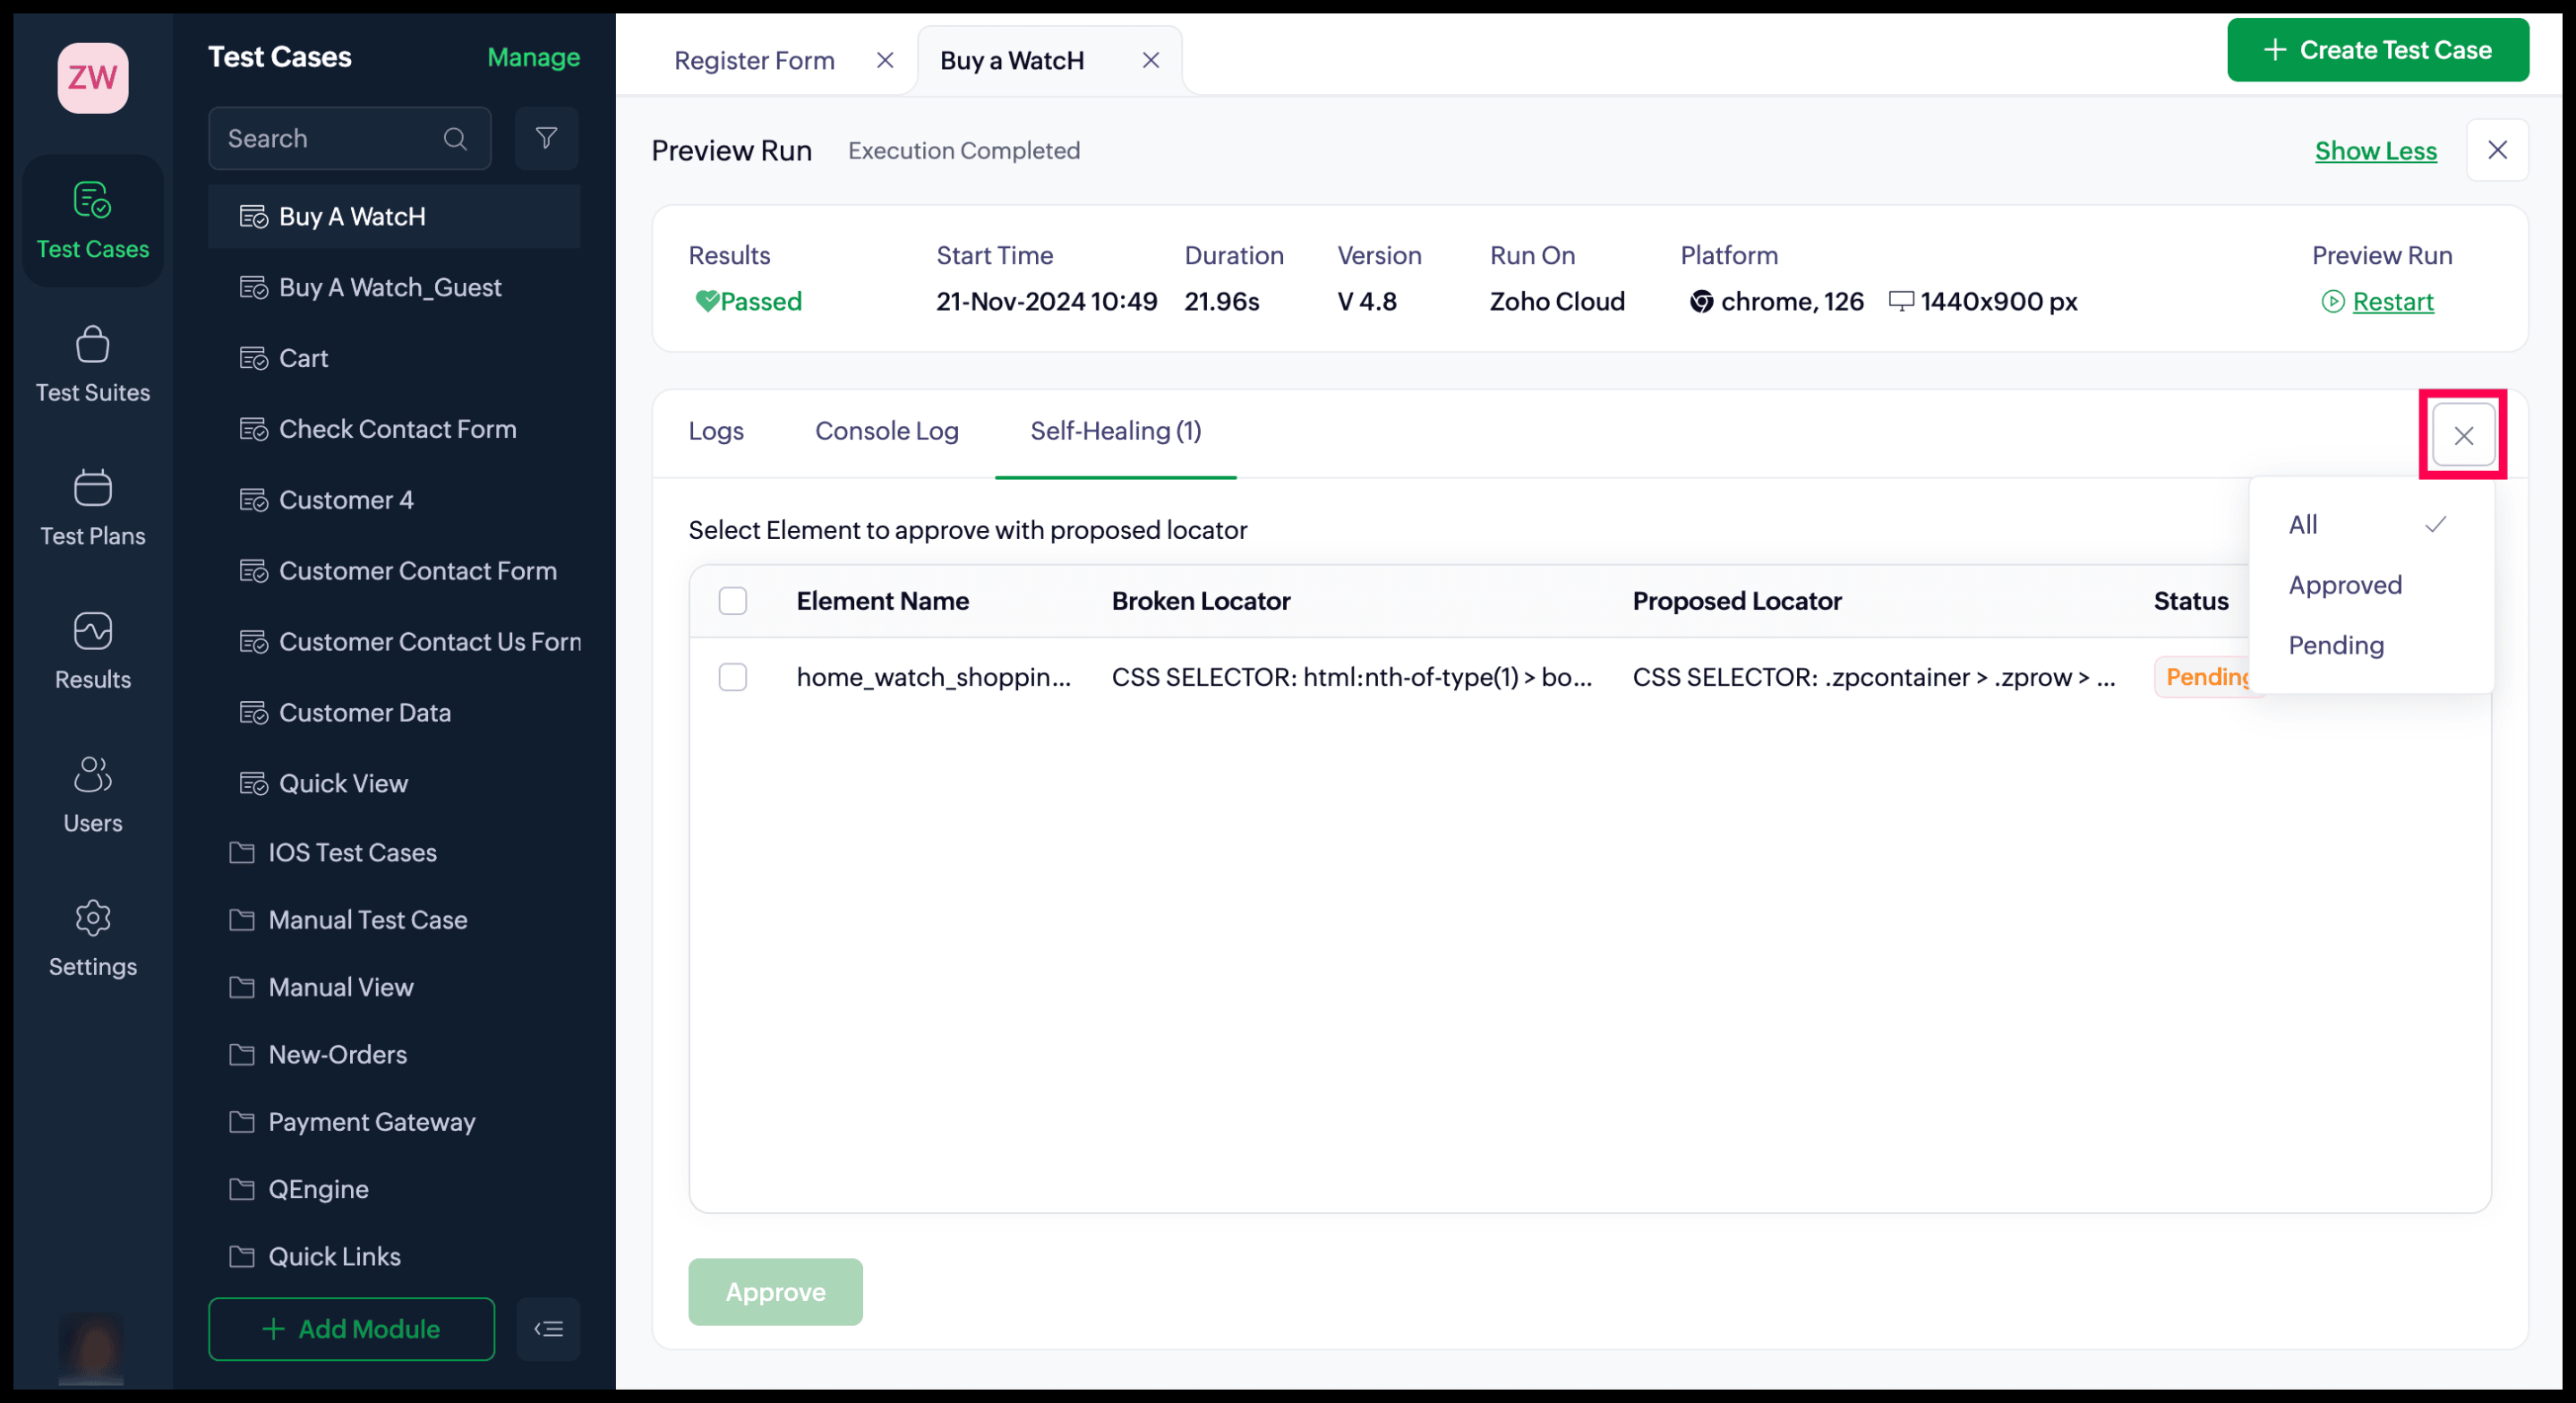
In the live preview, the broken locators will be self-healed with a proposed locator in the logs, represented in green. To complete the self-healing process, you need to confirm the proposed locators. The preview contains Self-Healing logs apart from the Logs and Console Log.
3.2. Steps for Self-Heal Approval
The self-healing logs will contain a list of proposed locators. By default, these locators will be in the Pending status.
To approve the proposed locators:
- Select the locators you wish to approve and click Approve.
- Here, you will be prompted with the list of selected proposed locators to confirm your approval. To continue with the approval, click Proceed.
Upon confirmation, the proposed locator is prioritized for that element. The updated order takes effect from the next execution and is reflected on the Elements page, where locators are stored. Until the request is approved, the proposed changes remain in a pending state unless further modifications are made to the element's locators.
Alternatively, you can click the Approve icon { } corresponding to each proposed locator to approve individual locators.

Note: Using the filter option, you can see the list of locators: All, Approved, and Pending.
4. Self-Healing Mechanism in Test Plan
The self-healing mechanism can be initiated for test cases within test plans. Let's see how the AI-driven mechanism works for test plans.
To self-heal the test cases that are part of a test plan. Follow the steps below:
- Navigate to the Results page.
- The test cases with self-healing {
} icon differentiates other test cases from the self-healed test cases.
Click on the self-heal icon to view the list of proposed locators for that corresponding test plan.
Alternatively, you can view the test plan results and select the test case that has the self-heal icon.
- Select the locators that need to be approved and click Approve. Alternatively, click the Approve icon {
} beside the Status section to individually approve the proposed locators.
- The status of the test case will change from Pending to Approved once the approval is confirmed with the selected proposed locators.
Note: The broken locator will be replaced with the proposed locator only upon your approval. This change prioritizes the proposed locator over the existing one. Learn more about locators
5. Related Links
Preferences
6. What's Next?
Next Steps
Previous Steps
Next Steps
Now with the self-healing enabled, users can confidently test their cases, knowing locators will automatically adjust. They can also add these tests to broader test plans, ensuring smoother execution and reduced manual intervention.
Previous Steps
Before using the self-healing feature, users must ensure it is enabled in the Preferences section. Without it, they would manually manage and update locators whenever failures occurred, requiring frequent checks and adjustments.