Offer Negotiation with Pre-Offer in Zoho Recruit
When to use a Pre-Offer
- Offer details need to be discussed or negotiated based on the candidate's input.
- The candidate may have questions or concerns about the proposed offer.
- The recruiter expects multiple rounds of discussion and updates before finalizing the offer.
- The recruiter wants to work through the proposed offer details before preparing the Final Offer.
 Note:
Note: Pre-Offer sharing supports email delivery only. E-signature is available only after the Pre-Offer is converted to a Final Offer.
| Pre-Offer | Final Offer |
Purpose | Used to discuss and negotiate the proposed offer details. | Used to issue the finalized offer. |
When to use | When offer details may need discussion or changes. | When the offer details are finalized. |
Changes | Can be revised and shared again during the discussion. | Represents the final offer and cannot be reverted to a Pre-Offer. |
Delivery | Available delivery options, including e-signature |
Availability - Users whose profile has the Customize Zoho Recruit permission can enable the Pre-Offer feature.
- The permissions required to generate a Pre-Offer letter are the same as those required to generate an Offer letter. For more information, refer to the Availability section in the Offer Letter Generation help document.
Pre-Offer workflow
1. Enable Pre-Offer
- While creating an offer—Enable Pre-Offer directly from the Create Offer page.
- From the Offer module layout — Add the Offer Phase field to the Offer layout.
Method 1: While creating an offer
Navigate to the Offers module and click Create Offer.
In the Create Offer form, click the Enable Pre-Offer option.
Note:
If you click Do It Later, the Introducing Pre-Offer information box will no longer be displayed for your account. To enable the Pre-Offer feature later, you must follow Method 2: From the Offer Module Layout.Once enabled this way, Pre-Offer becomes available for the organization.
Method 2: Through the Offers module layout
- Go to Setup → Customization → Modules → Offers.
- Open the Offer layout.
- Drag the Offer Phase field from Unused Fields into the layout.
- Save the layout. After saving this layout, PreOffer feature will get enabled.
2. Generate the Pre-Offer
- Navigate Offers module and click Create Offer icon
- When creating an offer, you can choose the Offer Phase.
- Pre-Offer
Used for negotiation and discussion before the official offer. - Final Offer
Used after both parties have agreed on all terms. - Select Pre-Offer as the Offer Phase.
- Now Save and Next.
3. Send the Pre-Offer
- The Offer record is updated with the corresponding Pre-Offer made status.
- The Pre-Offer letter PDF is added to the Offer record under the Pre-Offer attachment category.
4. Candidate reviews the Pre-Offer
The candidate opens the Pre-Offer from the email and reviews the offer details. They have two options.
1. Request Revisions
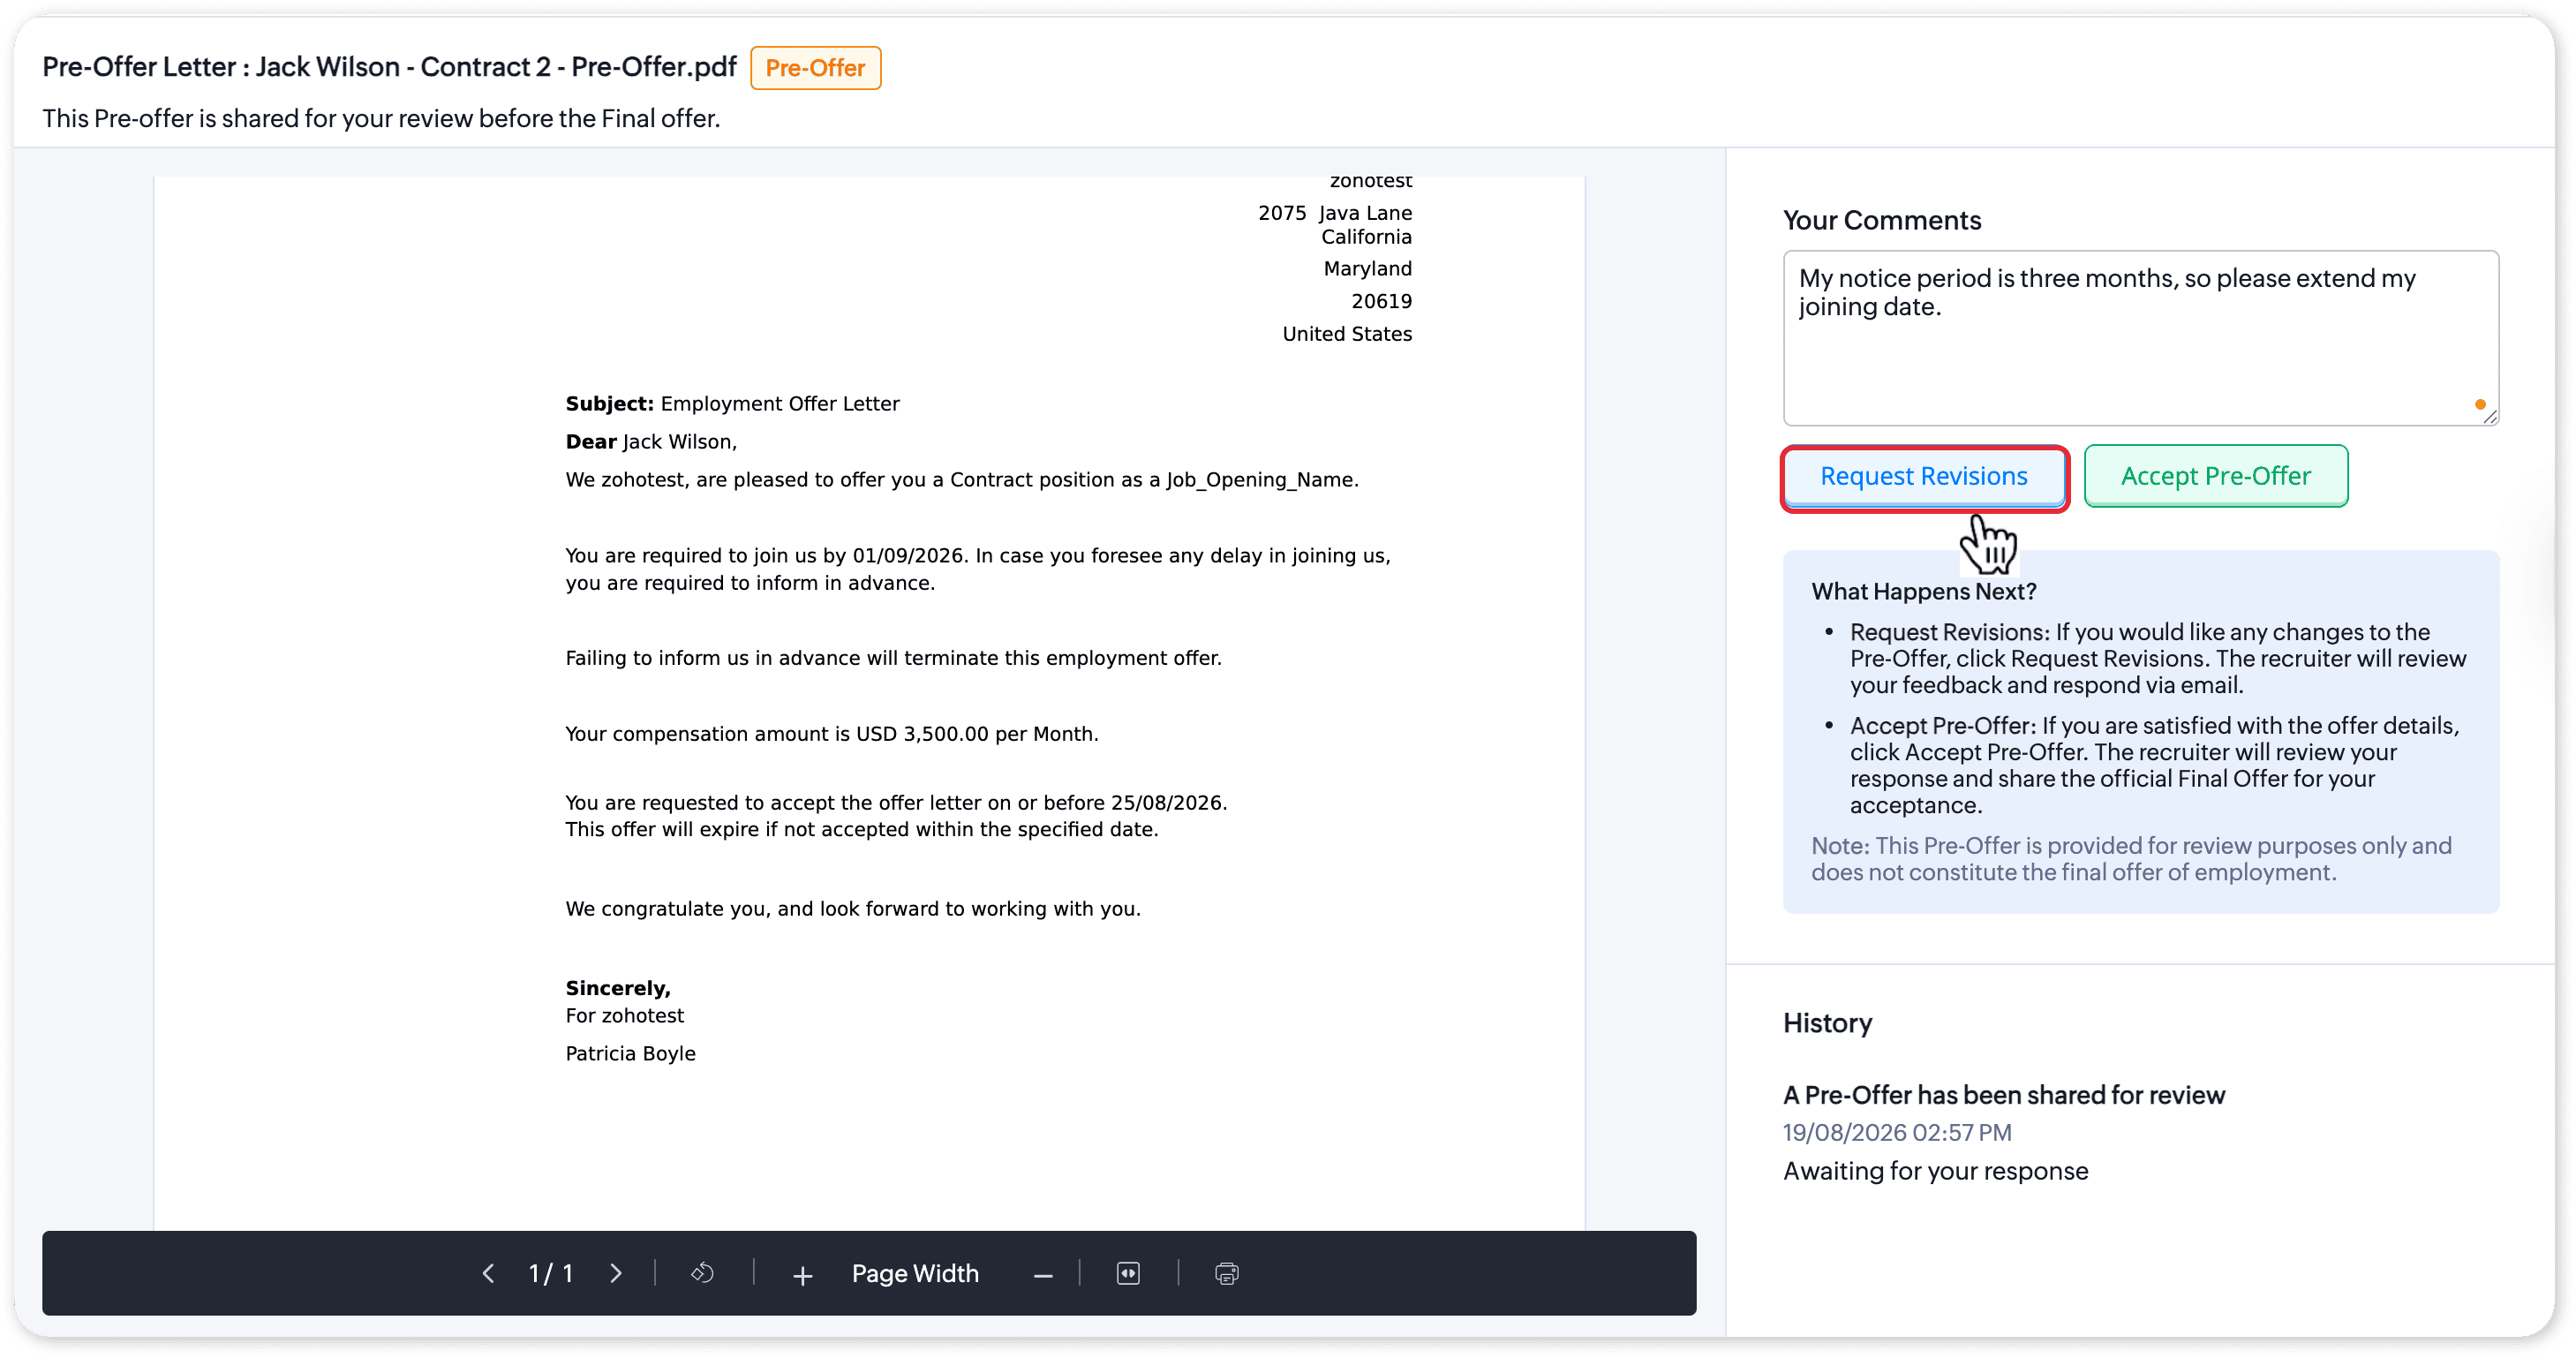
- Offer status → Pre-Offer revision requested
- Candidate comments are added to Notes.
2. Accept Pre-Offer
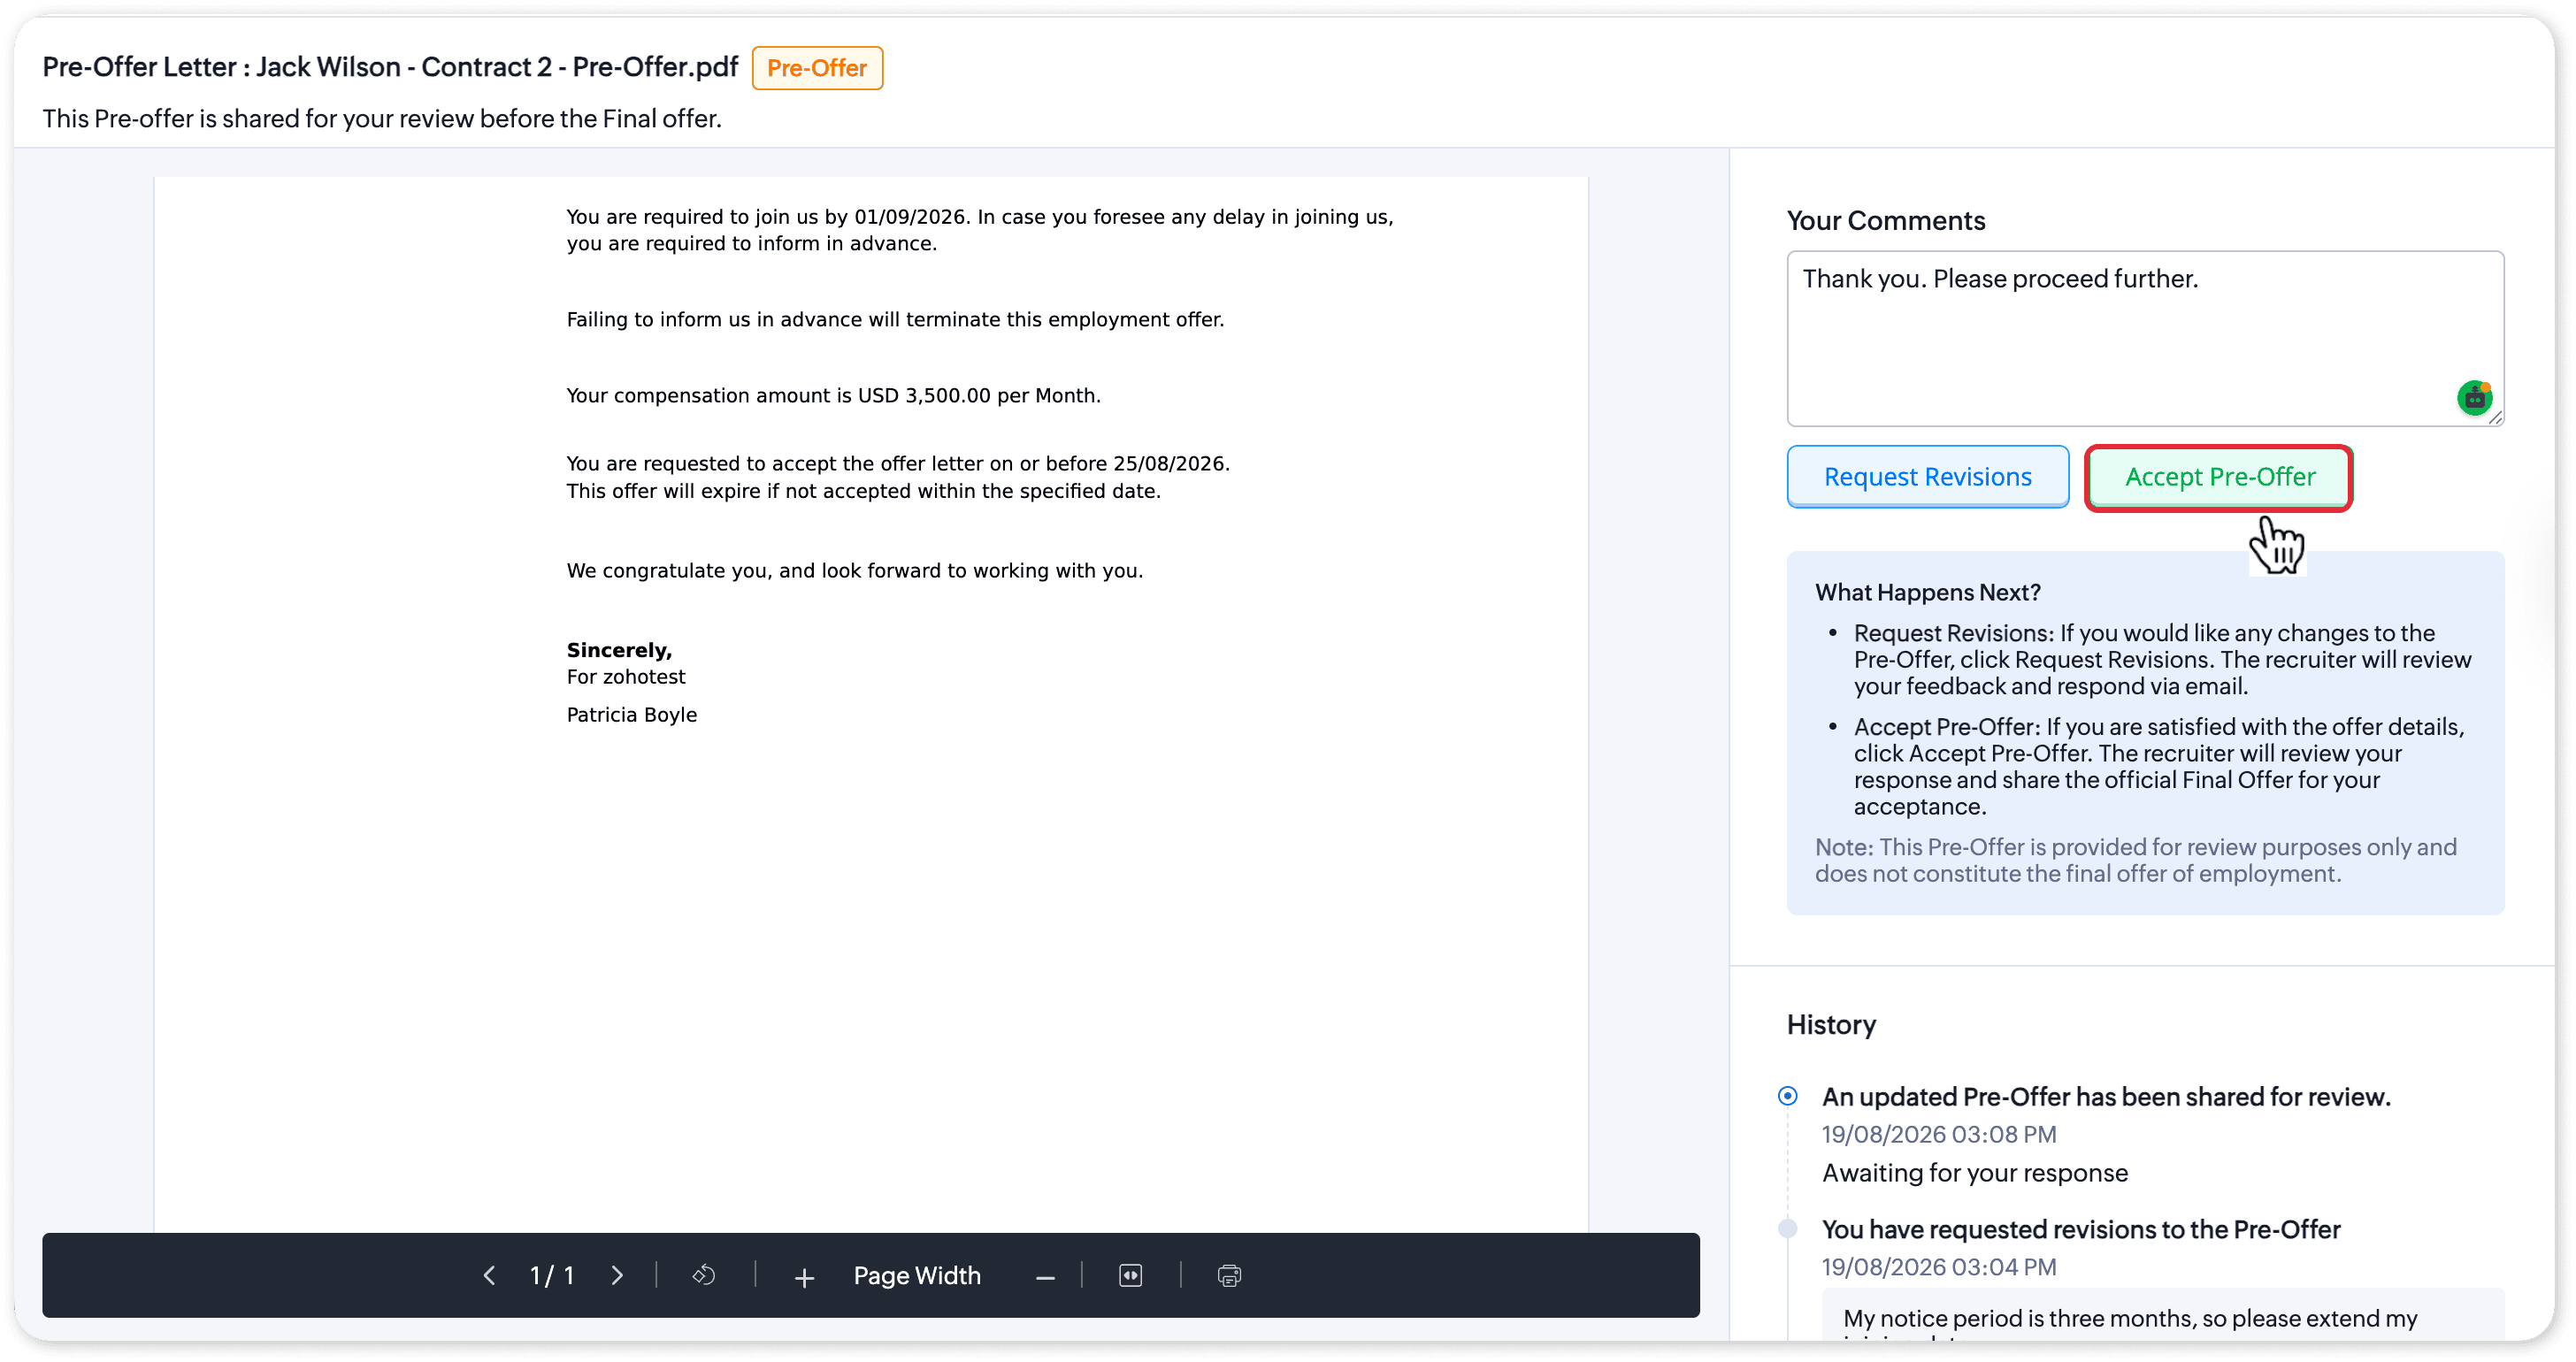
- Offer status → Pre-Offer Accepted
- Candidate confirmation is added to Notes.
Accepting a Pre-Offer does not mean accepting employment. It only confirms that the recruiter and candidate agree on the negotiated terms before the Final Offer is issued.
Pre-Offer Status | Description |
Pre-Offer Sent | The Pre-Offer has been sent to the candidate and is awaiting their response. |
Pre-Offer Revision Requested | The candidate has requested changes to the proposed Pre-Offer details. |
Pre-Offer Accepted | The candidate has accepted the negotiated Pre-Offer details, and the Pre-Offer is ready to be converted into a Final Offer. |
5. The Recruiter reviews the response
- Choose Revise Pre-Offer.
- Open the existing Pre-Offer and review the candidate's feedback.
- Update the offer details and send the updated Pre-Offer.
6. Convert to Final Offer
- The Final Offer can be sent directly through email or through a supported e-signature service, including Zoho Sign, DocuSign, and Adobe Acrobat Sign.
- The original Pre-Offer PDF remains available in the Offer record under the Pre-Offer attachment category.
- The Final Offer PDF is added under the Offer attachment category.
Filter Pre-Offer Records
- Navigate to the Offers module.
- Click the Filter icon and Select Offer Phase as the filter criteria.
- Choose Pre-Offer to view all Pre-Offer records, or Final Offer to view Final Offer records.
- Click Apply Filter.
7. Generate and send the Final Offer
After converting the Pre-Offer into a Final Offer, you can generate the Final Offer letter using the finalized offer details. You can then review and send the offer to the candidate through the available delivery options, including e-signature.
For detailed instructions on generating and sending Final Offer letters, see Generating Offer Letters.