Restricted Check-in/out
Restricted Check-in/out allows your field agents to check-in or check-out only when they are located within the allowed radius.
Setting up Restricted Check-in/out
1. Click the globe icon in the top right corner to open "Settings".
2. Enable restricted check-in/out.
2. Enable restricted check-in/out.
 Note: Check-in/out restriction is applied to all users in your organization. If you would like to enable restriction for check-out, contact us at support@routeiq.com.How Restricted Check-in/out Works
Check-in can be done in 2 ways:
In the RouteIQ mobile app.
In the Zoho CRM mobile app
RouteIQ Check-in/out
When a user checks in RouteIQ verifies if they're located within the allowed radius. If they're located within the radius, check-in is done, if not check-in is not allowed.

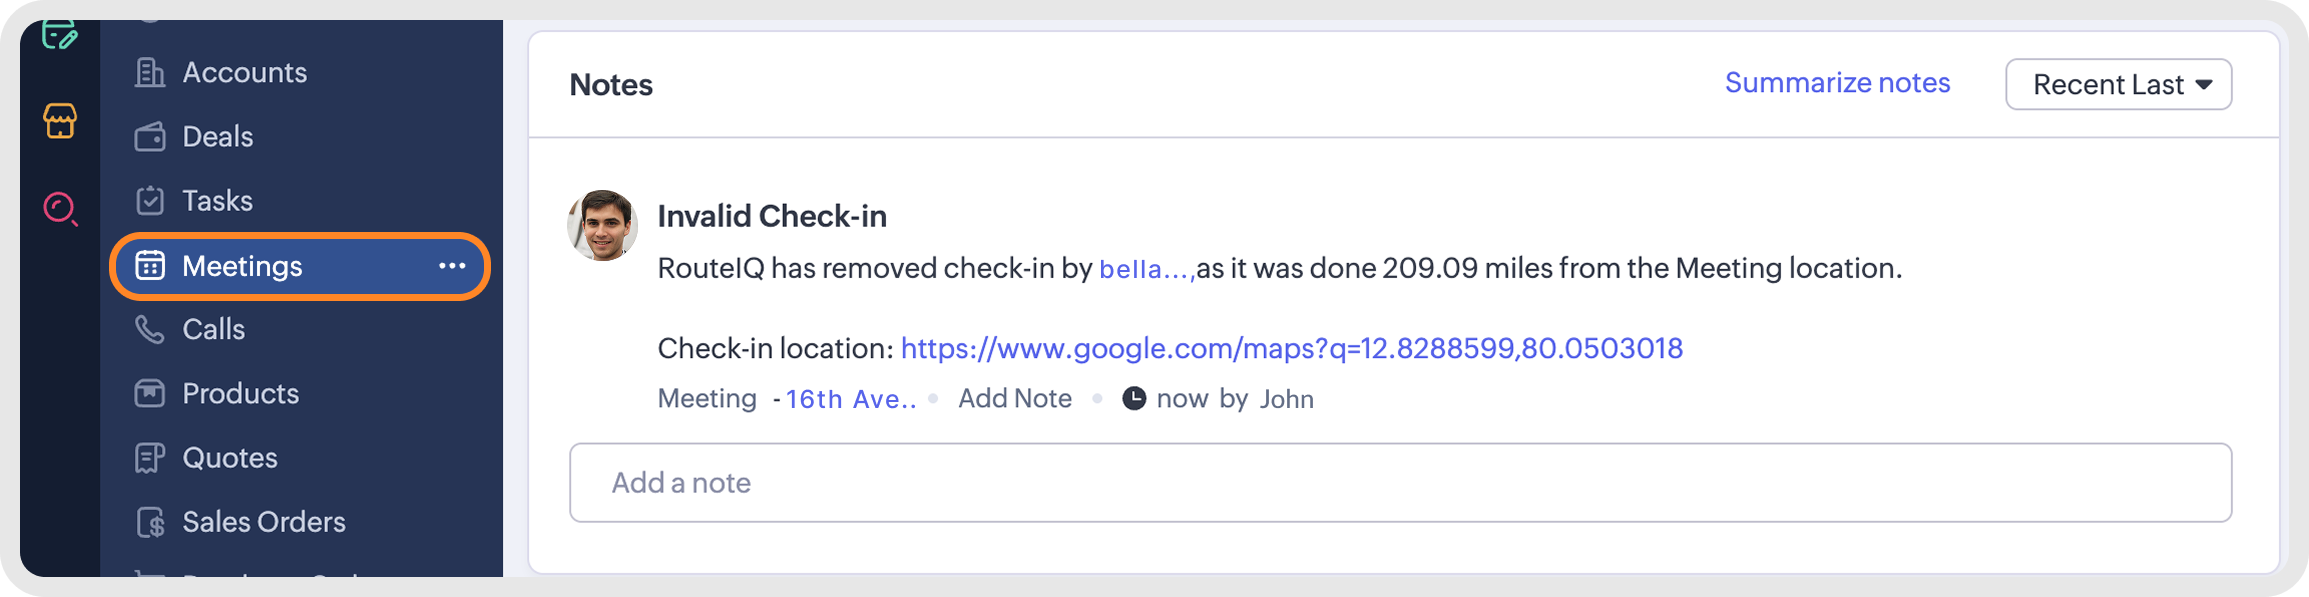
Info: When a user checks in to a stop via RouteIQ or Zoho CRM, it automatically logs the Google Maps location URL, along with the timestamp and username of the person who checked in.
This helps you:
1. See exactly where the check-in occurred
2. Know when it happened
3. Identify who performed the check-in.
Zoho CRM Check-in
When check-in is done in Zoho CRM. The check-in is verified by RouteIQ and a verification status is updated accordingly.
There are 3 verification statuses:
There are 3 verification statuses:
- Verified: Check-in was performed within the allowed radius.
Invalid: Check-in was performed outside the allowed radius.
Unverified: Check-in couldn't be verified.
Verified Check-in
Invalid Check-in
 Invalid
Unverified Check-in
Force Check-Out
 Note: This feature is applicable only when restricted check-in / out has been enabled for the organisation.
Web
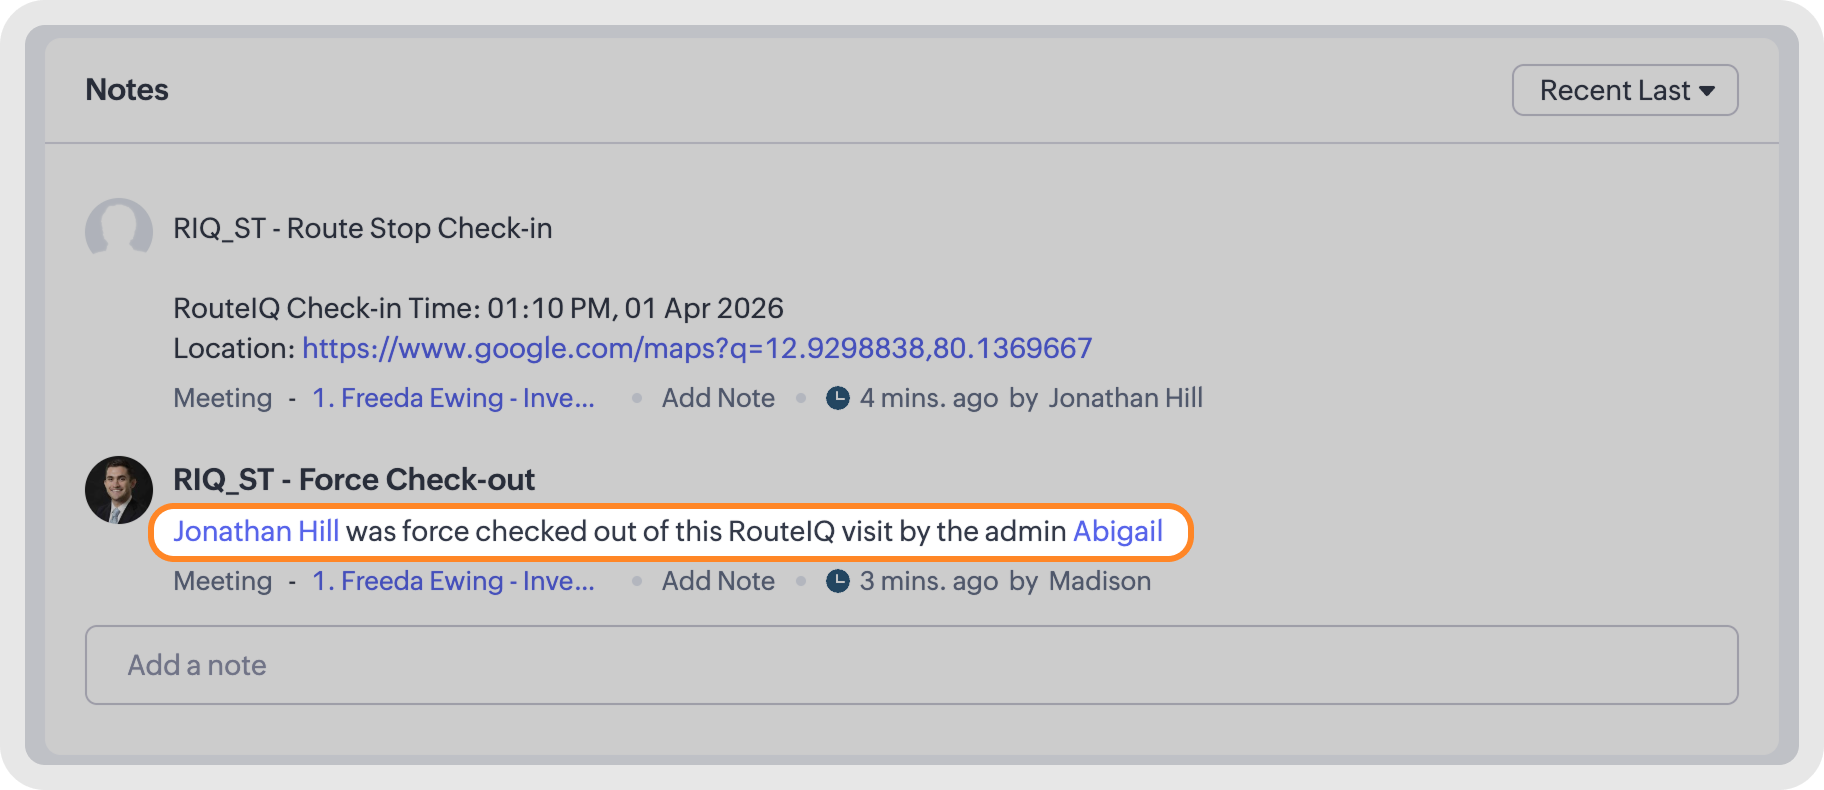
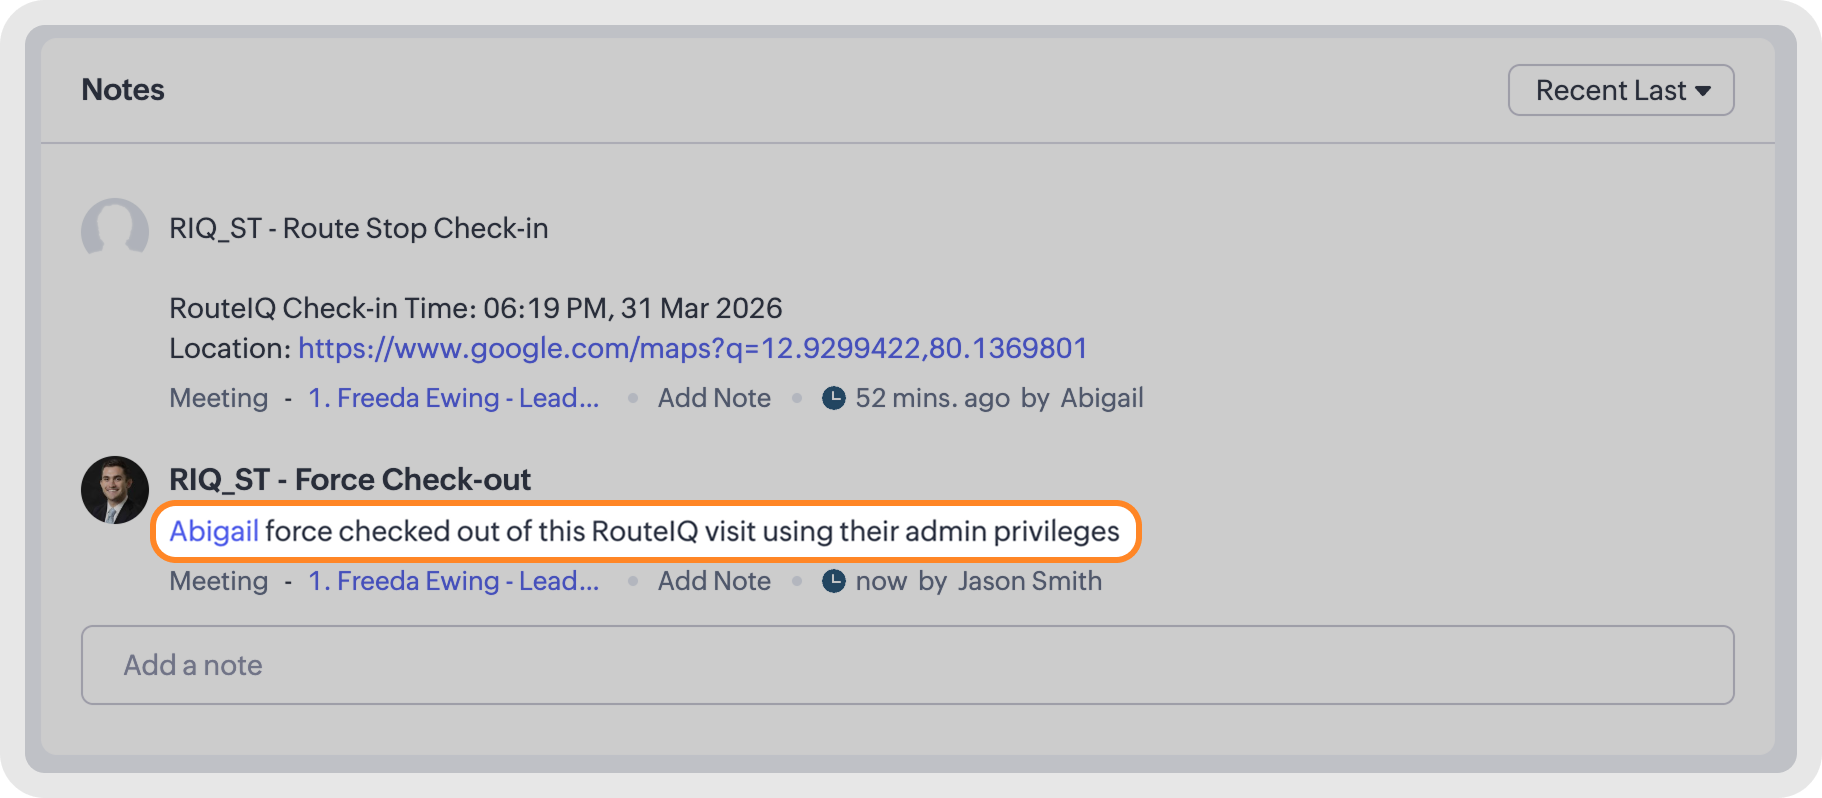
If a field agent forgets to check out from a stop within the allowed radius and subsequently travels to a distant location, the system will prevent the agent from checking out at that location. Additionally, this will prevent the agent from checking in at subsequent stops. In such cases, the agent must contact their admin to initiate a Force Check-out operation. The admin can then perform the force check-out by clicking the three dot menu as visible in the screenshot.
There is a second way to complete the Force Check-Out action as well. Go to the Tracking module in RouteIQ. Under Visits Tracking, click the stop that you need to check your agent out of. Click the three dot menu and select "Force Check Out". As displayed in the screenshot below)
You could do the same via mobile as well. Just open the route and select the stop out of which you need to force check out. Click the 3 dot menu in the far right and click "Force Check-Out". You will have now forcibly checked out of a stop via mobile.
Info:
1. When an admin forcibly checks a different user out, the note attached to the meeting will look like this.
2. When a user with admin access forcibly checks themselves out, then the note attached to the meeting will look like this
1. When an admin forcibly checks a different user out, the note attached to the meeting will look like this.
2. When a user with admin access forcibly checks themselves out, then the note attached to the meeting will look like this