Share presentations-Externally
With the Show app for iOS you can share presentations externally with an individual or team outside your organization or with anyone on the internet. You can set access level permissions and also create custom links to restrict access when you embed the presentation on websites, blogs, or social media.
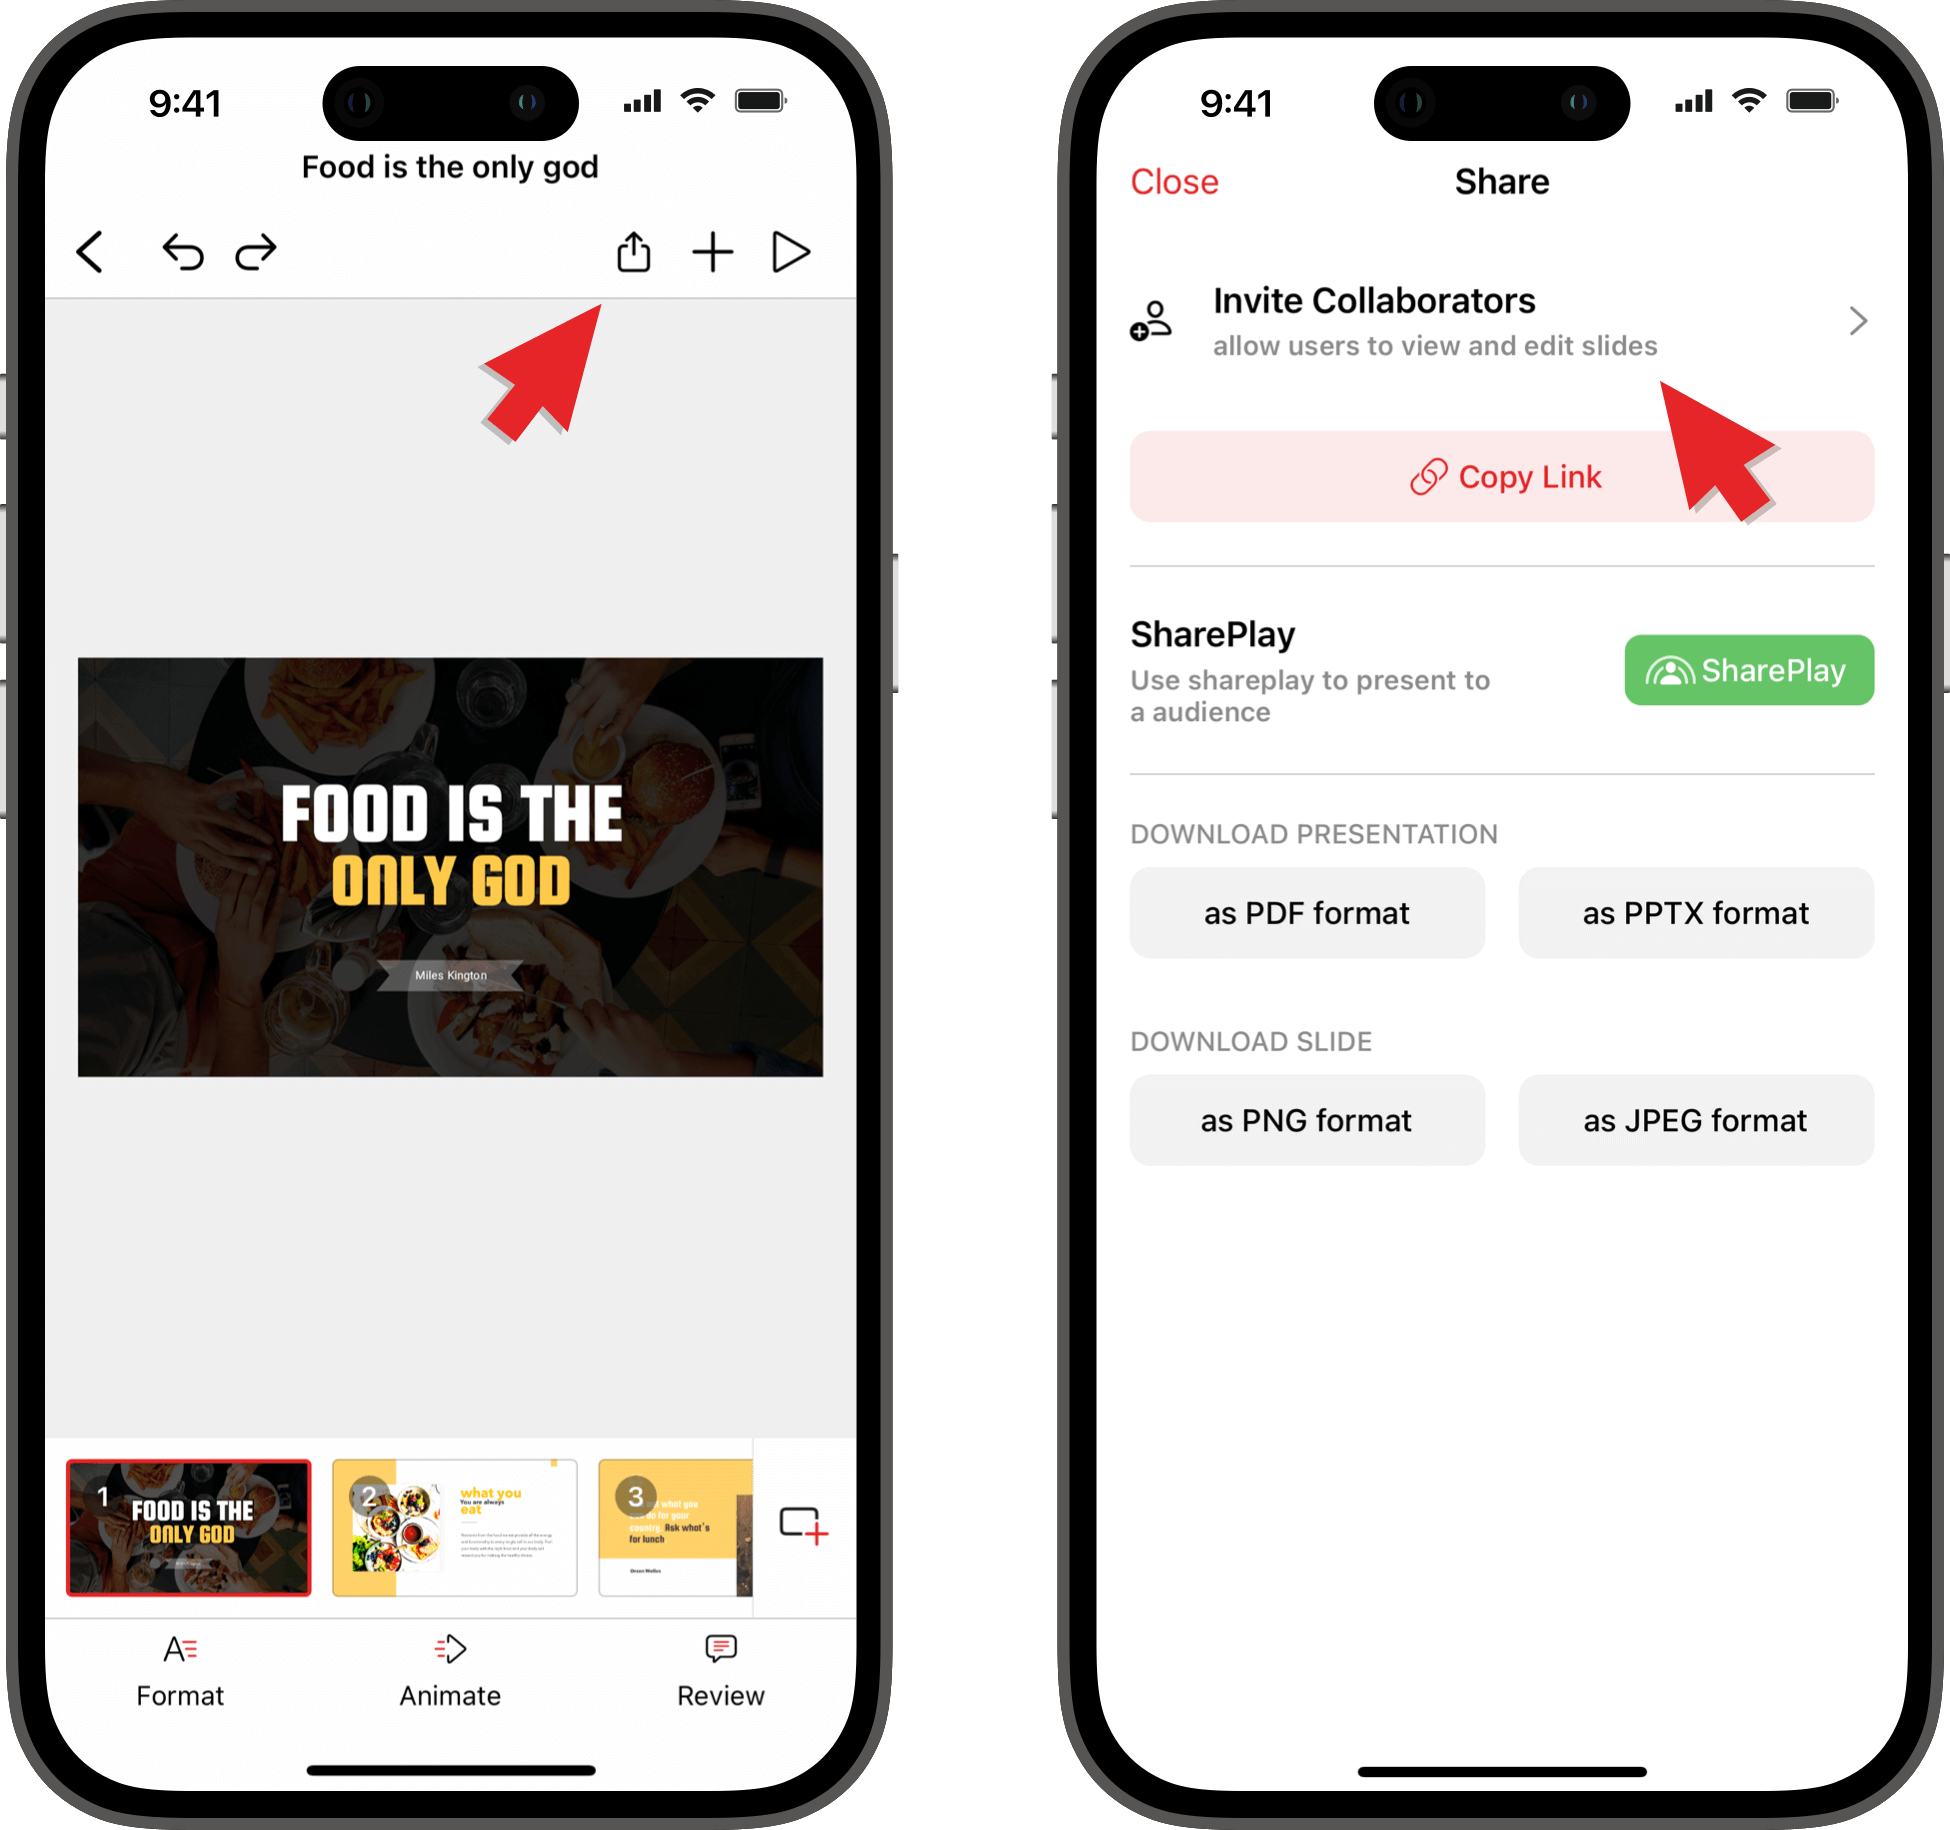
- Open the required presentations and tap
in the top-right of your screen.
- Tap Share.

Alternatively, you can also long press any presentation in the listing page and tap Share.
Share presentations through email address
You can collaborate on your presentations with any individual outside of your organization using their email address.
- Enter the email address in the Add members space.
- Tap the Access Level dropdown to assign any of the below permissions.
Edit: Can edit, view, and comment on the presentations.
View and comment: Can view and comment on the presentations.
View: Can view the presentations. - Toggle the Notify switch on to send notifications to the collaborator, then tap SHARE.
Share presentations through permalink
You can share your presentations with anyone on the internet. When you share the presentation through permalink you will be able to set an expiration date and assign access.
- Tap Permalink and tap Anyone in Internet.
- Tap Anyone in Internet dropdown to assign Edit, View and Comment or View access.
- Toggle the Set expiration switch on to assign a expiration date for the presentation and tap UPDATE.
- Tap
to copy the link or
to share it through other apps directly.
Share presentations through custom links
You can create custom links and provide access level settings to share it on your website or social media accounts. You can set passwords and expiration date, allow or disallow downloads, and even request user information for the shared link to help restrict access and track activity.
- Tap New External Share Link at the bottom.
- Enter the link name for the presentation for your reference.
- Tap the Anyone with the share link dropdown to assign Can View or Can Edit access.
- Toggle the Password protect switch on to protect the confidentiality of your presentation with a password.
- Toggle the Set Expiry switch on to restrict access to your presentation after the specified date.
- Toggle the Allow download of files switch on to allow anyone with access to the presentation download it.
- Toggle the Request User Data switch on to collect the Name, Phone, and (or) Mail of the users who have accessed the presentation.
- Tap CREATE at the bottom to create the new link.
Remove or stop sharing presentations
- Tap Collaborators in the Share dialog.
- Tap the access level drop next to the collaborator's name.
- Tap Delete.
From here you can change the access levels of the collaborators anytime.
To learn how to share presentations internally from your iOS device, click here.