Publishing on Pinterest
Creating a Pin
Once your Pinterest account is connected, you can create posts to be published immediately, or schedule them for a specific date and time. You can also schedule posts in bulk.
To create a pin from photos
- Click New Post from the menu bar at the top of your screen.
- Click the Pinterest icon and select a Board where you want to publish the post. You can also create a new board.
- To create a new board:
- Click + Create a new board.
- Enter the Board name in the Create Pinterest board popup.
- Select the checkbox to keep the board visible only to you and your collaborators.
- Click Save.
- Draft the content in the Publishing Window.
- Click the Media icon
to attach an image or video to the post. You can attach from the desktop, media library, Google Drive, Zoho Workdrive, Box, OneDrive, Dropbox, or Evernote, or design an image on Canva.
- If you have added a video, you can choose an appropriate thumbnail in the following ways:
- Choose a custom video thumbnail - From the suggested images, you can choose the thumbnail you prefer to use as a cover for your video.
- Choose frame - You can click the + icon to customise and choose a frame from the video timeline. Once you choose the required frame, click Apply to add it to the thumbnail suggestions.
- Upload a custom video thumbnail - You can add an image from Desktop, Media Library, or Cloud Picker such as Zoho WorkDrive, Google Drive, Box, OneDrive, or Dropbox.
- Click the Pinterest Posting Options icon and add the Title, Source, and ALT text. Click Add.
- Click the Emoji icon to include emojis to the post.
- Click the Alt Text icon to add an alternate text to the image.
- Click Publish Now to publish the post right away on Pinterest.

Note:
The image uploaded to the post must satisfy the following conditions:
- Only one image can be attached for a post
- The maximum file size of the image can be 20MB
- The dimensions of the image must be 1000 x 1500 pixel
To publish on Pinterest from your Zoho Social mobile application:
- Select Pinterest as the desired channel to post on.
- Click the Compose icon to create a pin.
- Click Create board to create a new board if you don't have any existing boards, or choose a board from the drop-down.
- To create a new board, add a board name and switch the toggle if you want to keep the board visible only to you and your collaborators.
- Add a caption, relevant media using your mobile camera or gallery.
- Click Next to proceed with publishing.
- Click Pinterest Posting Options to add title, destination link, alt text to your media file, and click Add.
- Click Next and choose from any of the publishing options to either publish your post immediately, schedule it, or save it as a draft.
Schedule a Pin
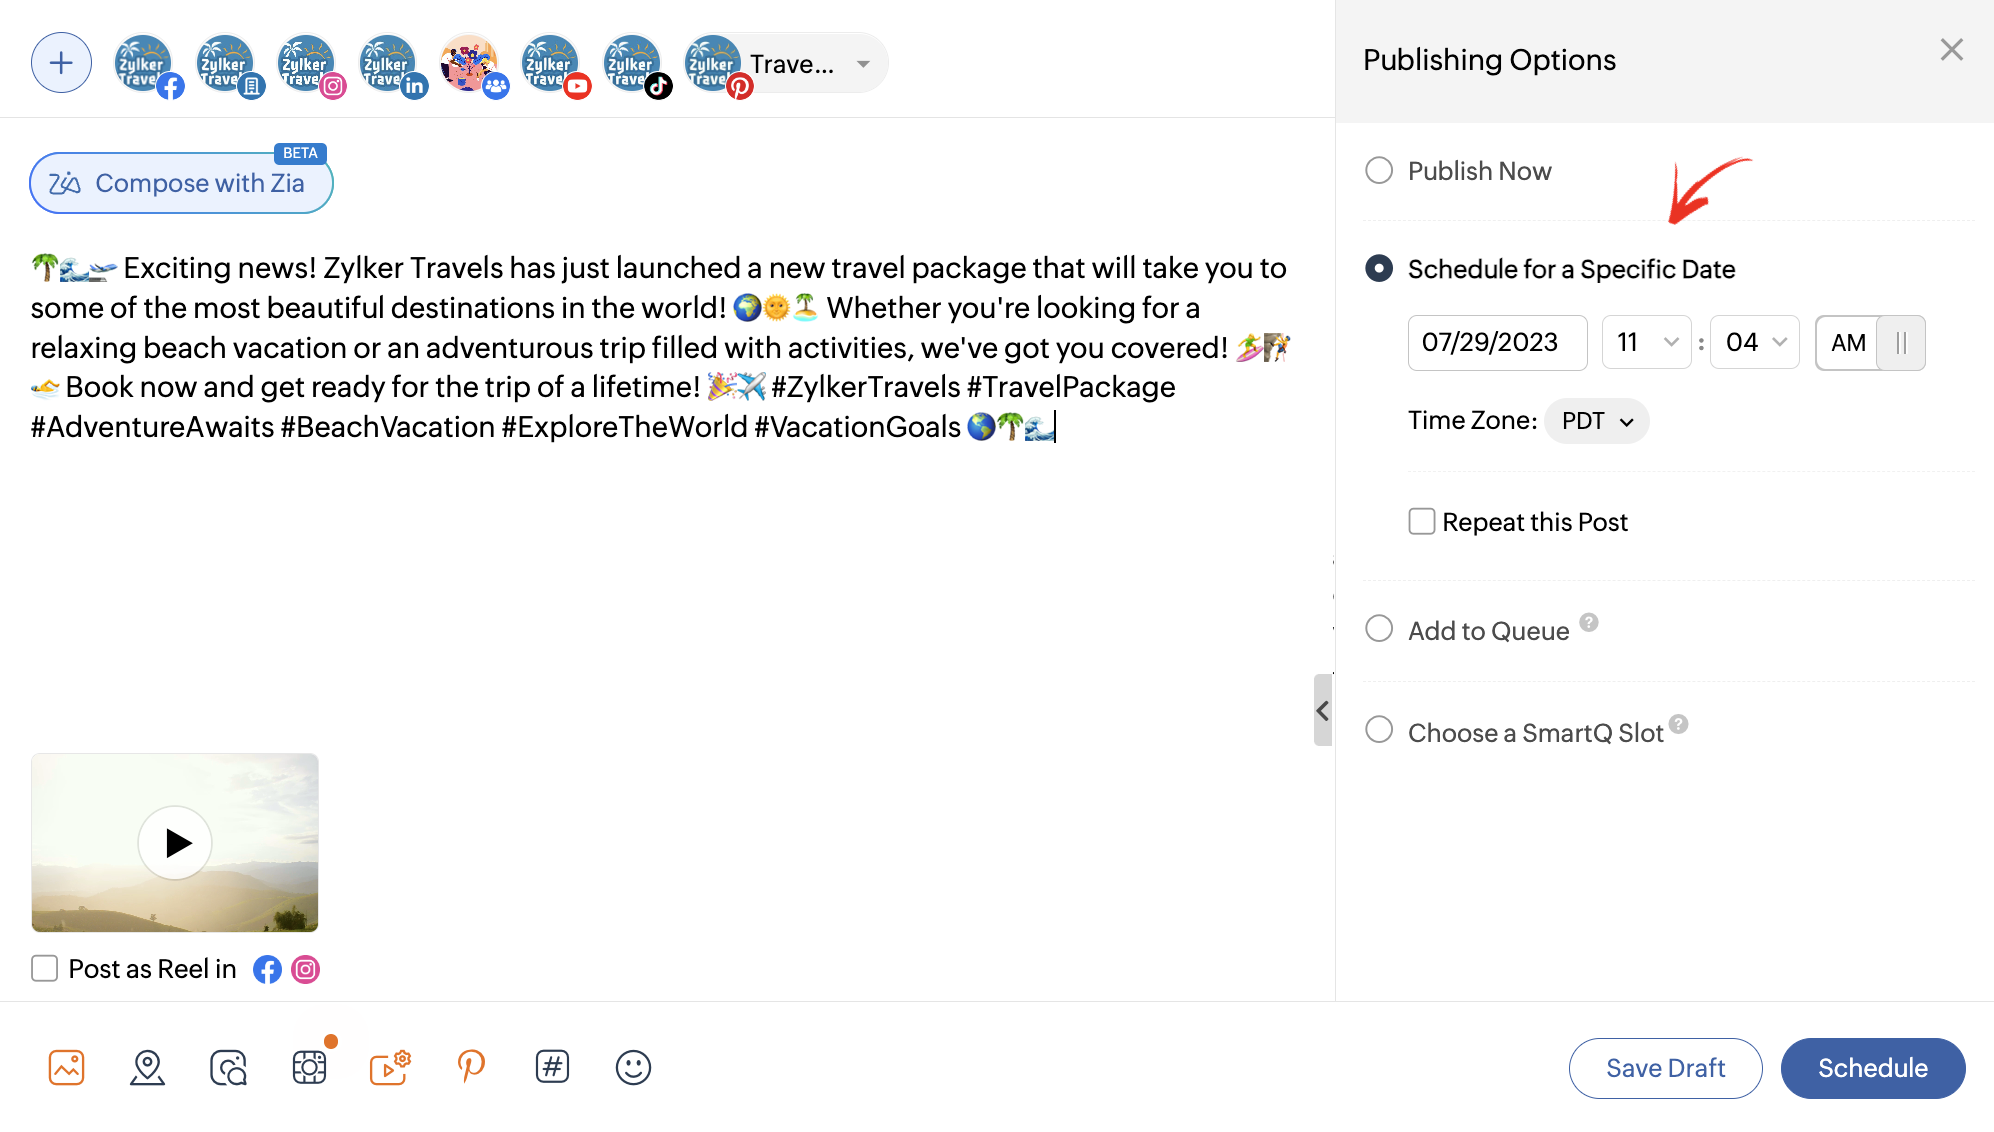
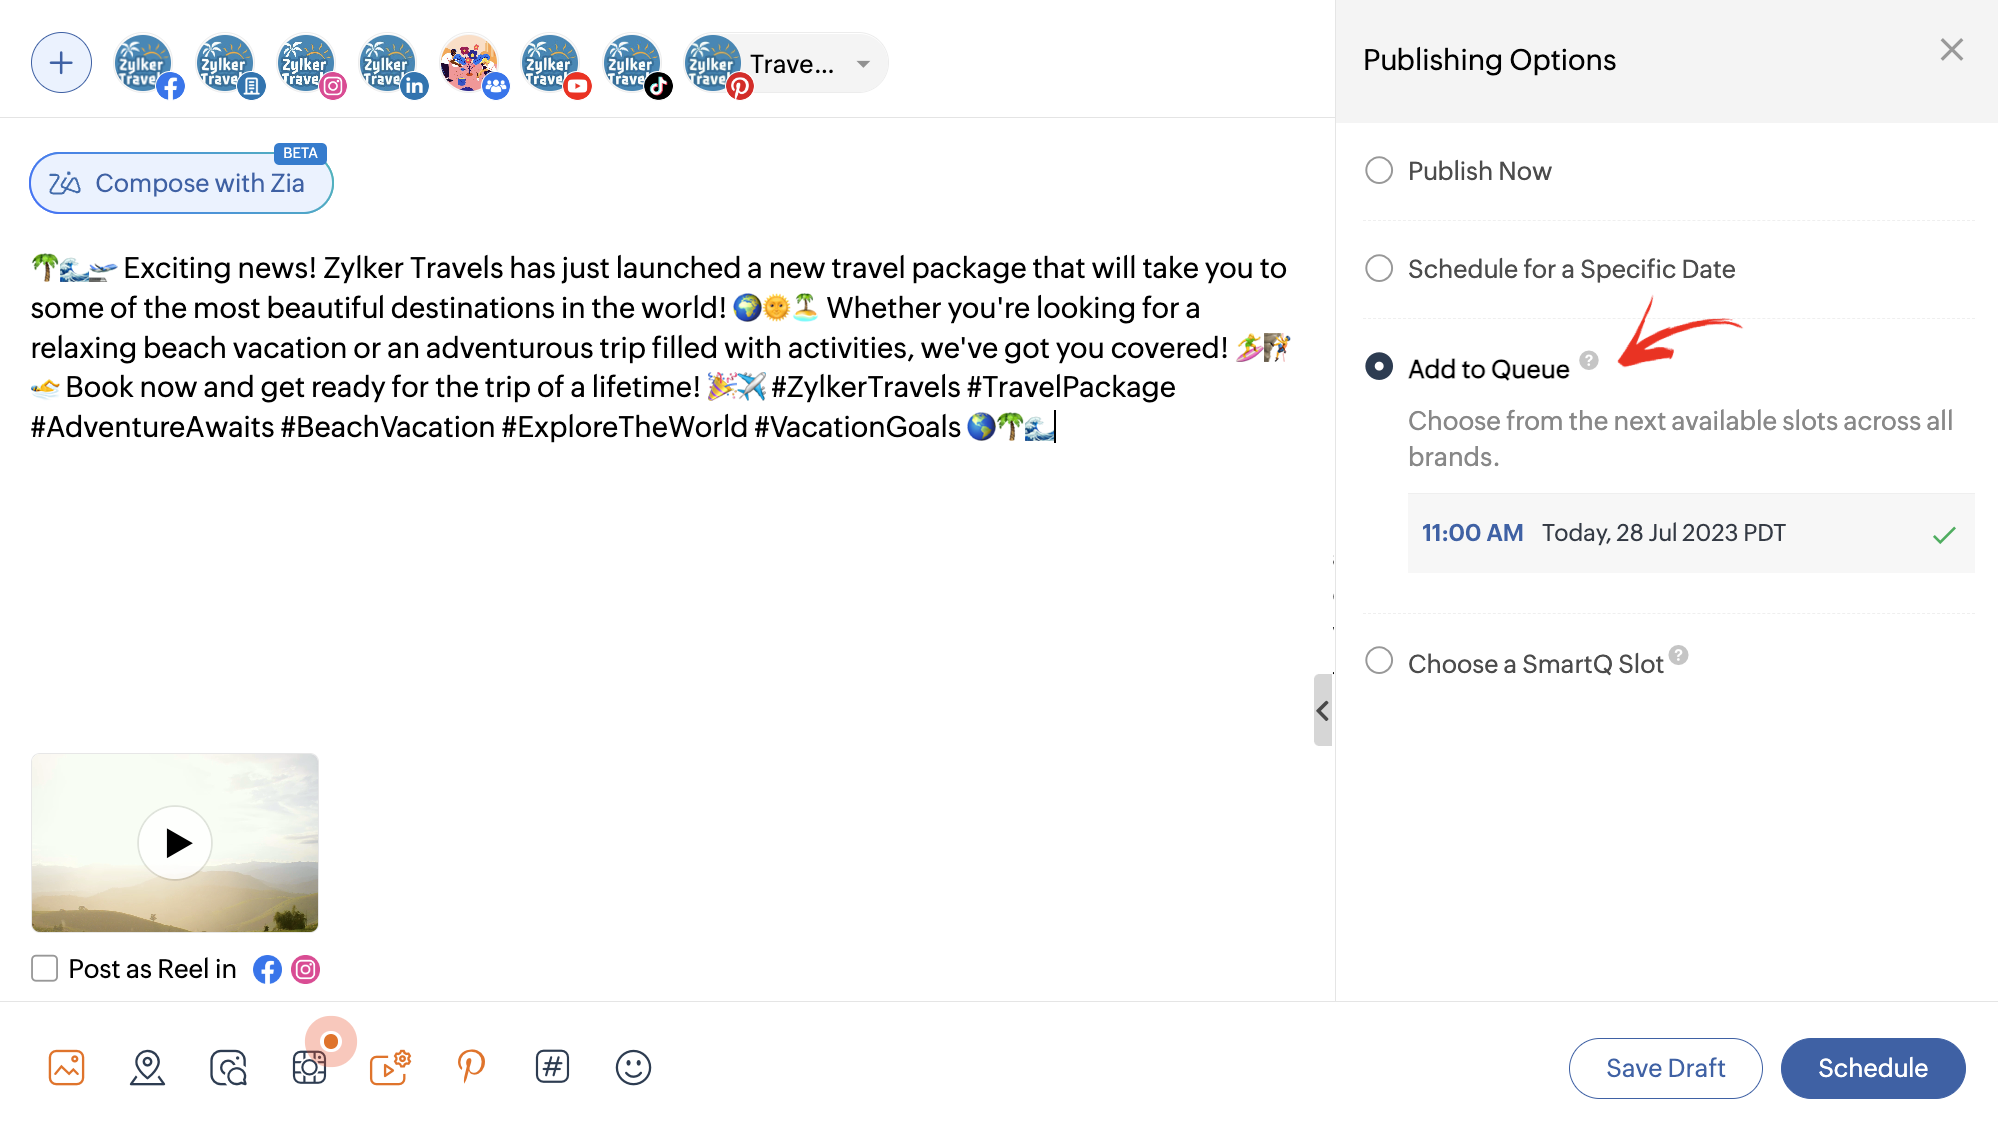
Once the content and the Pinterest posting options are updated, you can choose to schedule the post at a specific date and time, or add the post to the queue. Read More: Scheduling Posts
Schedule for a specific date: This option lets you select a specific date and time when the post has to be published. You can also choose to repeat the post every week or month until a specified date. Read More: Repeating Posts

Add to Queue: This lets you follow a consistent schedule for publishing your posts at regular intervals. You can specify fixed time slots for the days of the week when you want the content to be published. When this option is selected, the post will be scheduled for the next available time slot. Read More: Scheduling posts with CustomQ

Schedule multiple Pins together
Zoho Social lets you schedule multiple posts to a board in your Pinterest account in one go. The data can be uploaded as a .CSV, .XLS, or .XLSX file. The images in the post have to be in the form of public URLs. You can add multiple images to the file in different columns, such as IMAGE URL 1, IMAGE URL2, and so on. The file has to be in the following format:

Read More: Schedule multiple posts
To bulk schedule pins
- Click the drop-down next to New Post button and select Bulk Schedule.
- Click the Pinterest icon and select a Board where you want to publish the post. You can also create a new board.
- Click Browse File and select the file from your device.
- Click Schedule.
Save Pin as draft
When the pin is not finalized, you can still add it to Zoho Social and save it as a draft.
To save a pin as draft
- Click New Post from the menu bar at the top.
- Click the Pinterest icon and select a Board where you want to publish the post. You can also create a new board.
- Draft the content in the Publishing Window and schedule the post for a specific date and time.
- Click Save Draft.
View Pins
You can view published posts, scheduled posts, unpublished posts, posts awaiting approval, and drafts from the Posts tab. Select the Pinterest icon to filter posts published in Pinterest. You can also view all the posts in the Calendar.
- Published Post: Displays the list of all the posts published in Pinterest.
- Scheduled Post: Displays the list of all the posts scheduled to be published.
- Unpublished Posts: Displays the list of posts that were failed to be published.
- Drafts: Displays the list of all the posts that are incomplete.
Delete a Pin
You can delete the pin that you have published from the Posts tab.
To delete a pin
- Go to the Posts tab and select the Pinterest icon.
- Select the post that you want to delete and click the More icon.
- Click Delete from the Menu.
Delete a Board
You can delete a board that you have in Pinterest. This deletes all the pins that are part of the board.
To delete a board
- Go to the Posts tab and select the Pinterest icon.
- Select a Board from the Boards drop down list.
- Click Delete Board.
Zoho CRM Training Programs
Learn how to use the best tools for sales force automation and better customer engagement from Zoho's implementation specialists.
Zoho DataPrep Personalized Demo
If you'd like a personalized walk-through of our data preparation tool, please request a demo and we'll be happy to show you how to get the best out of Zoho DataPrep.
Centralize Knowledge. Transform Learning.
All-in-one knowledge management and training platform for your employees and customers.
New to Zoho Writer?
You are currently viewing the help pages of Qntrl’s earlier version. Click here to view our latest version—Qntrl 3.0's help articles.
Zoho Sheet Resources
Zoho Forms Resources
New to Zoho Sign?
Zoho Sign Resources
New to Zoho TeamInbox?
Zoho TeamInbox Resources
New to Zoho ZeptoMail?
New to Zoho Workerly?
New to Zoho Recruit?
New to Zoho CRM?
New to Zoho Projects?
New to Zoho Sprints?
New to Zoho Assist?
New to Bigin?
Related Articles
Pinterest - Frequently Asked Questions
Can I integrate my business Pinterest account with Zoho Social? es, you can integrate your business or personal account with Zoho Social. To integrate Go to Settings > Social Channels and click Connect next to Pinterest Profile. You will be ...Connecting your Pinterest account in Zoho Social
Pinterest is an image-sharing social media service that lets you create and share your ideas, and get inspired by the billions of images available online. When you find images that you like, you can pin and save them to your board, which makes it ...When will I be able to start publishing on Pinterest from Zoho Social?
Sorry. At the moment, Zoho Social does not support Pinterest. However, you can expect this integration very soon as this is definitely on our product roadmap.Media guidelines for publishing across social channels
Publishing images, video, or other media files on social media is something that businesses do almost every day to build their brand's presence across different channels. As a content creator, it's essential to be aware of the different requirements ...Composing, publishing and scheduling posts - Frequently Asked Questions
How do I set up Custom Targeting on Zoho Social? Facebook: When you're creating a post on Facebook, you'll be able to target your posts to your audience in a particular country, or to those who speak a particular language. To create posts for a ...
New to Zoho LandingPage?
Zoho LandingPage Resources


