Content Approvals on mobile
A content approval workflow plays a crucial role in helping you maintain the brand image and reputation you wish to project through your social media profiles. No matter what role you work in, you might have the need to cross-check your content with someone in the team before you publish it on social media. This would ensure that every piece of content that goes out from your brand is aligned with your broader marketing strategy, and there are no errors in the conveyed message.
To handle this, and to help you collaborate better with your team, you can make use of the content approval workflow in your Zoho Social web as well as Android and iOS mobile application. You can send out your post for approval to approvers in the brand. The approvers can verify the post content and approve or reject the post by providing relevant feedback. The post will then be published immediately or added to the queue and published later.
To send a post for approval from your Zoho Social Android mobile application
- Click the Compose icon to draft a new post.
- Choose the channels you wish to post to.
- Add the content, relevant media, and hashtags to the caption.
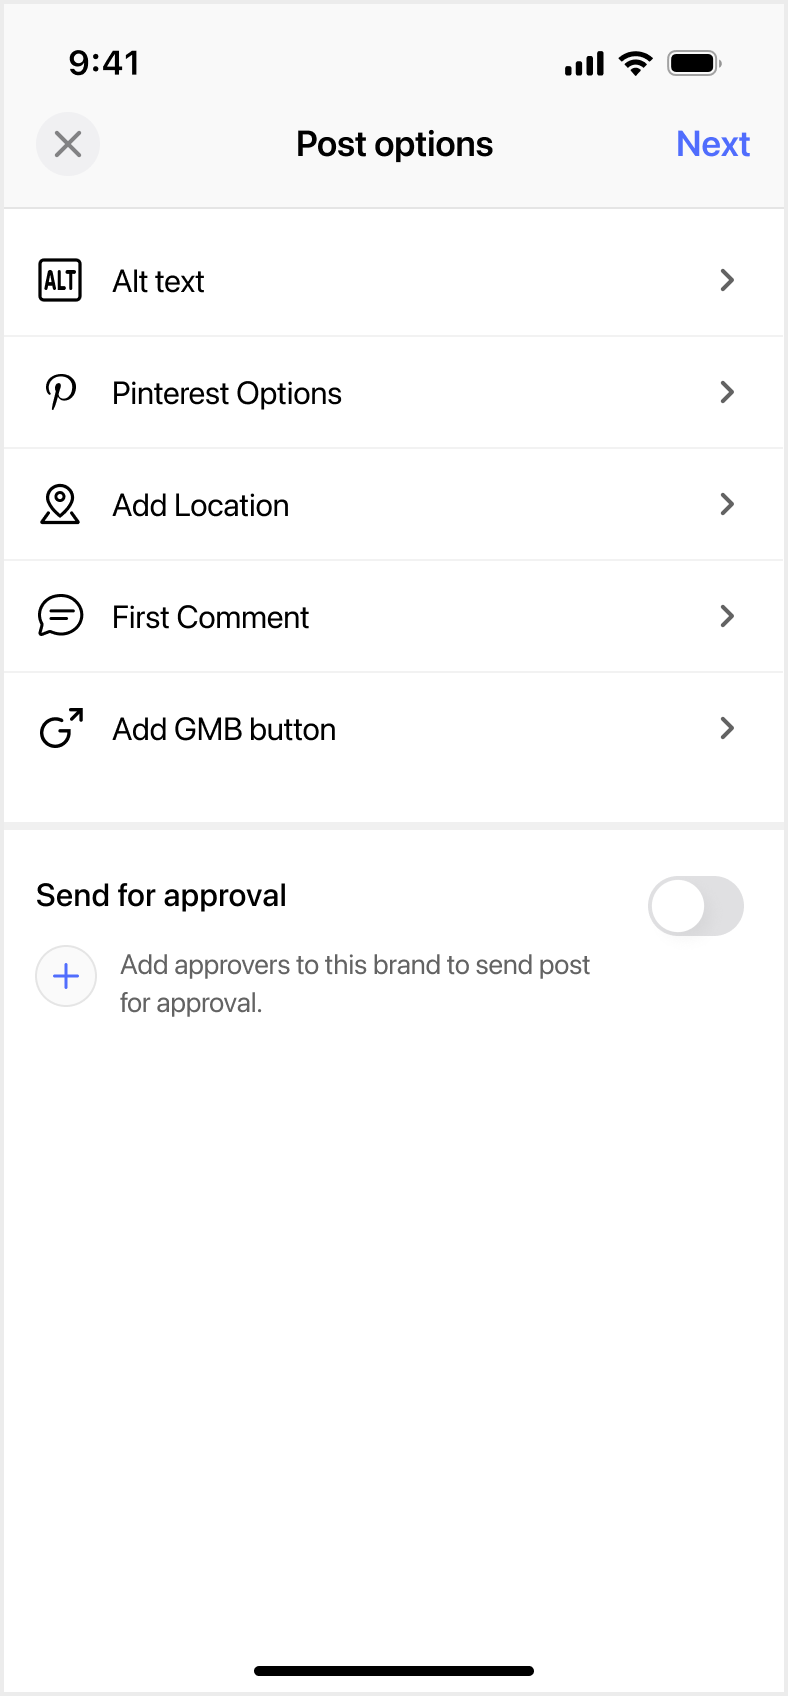
- Click Next to proceed.
- Select the toggle next to Send for approval to send the post for approval to all the approvers in the brand.
- Click Next to choose scheduling options.
- Choose Proceed without scheduling to publish the post after it's approved, or you can use any of the scheduling options like Custom Schedule, SmartQ, CustomQ to schedule the post for a specific date and time. You can also save it as a draft by clicking Save as Draft.
For admins

A user in any role can send a post for approval. While limited publishers and users without publishing permissions have to get an approval from approvers before they can publish, admins and users in other roles with publishing permissions can either choose to send the post for approval or can publish the post by themselves.
If you're an admin in your brand, but you still want to send your post for approval, you can do the same by sending the post to the other approvers in the brand. If there are no approvers in the brand, you can click the + icon in the post options screen and add approvers directly.
You can see the posts sent for approval and monitor their status under the Approvals section of the Posts tab.
To manage a post sent for approval
An approver can manage the post sent for approval by either accepting or rejecting to publish it.
- Go to Posts tab -> Approvals.
- Click the post you want to review and manage.
- Change the status of the post from Yet to Review to Under Review.
- Click Approve to approve the post content.
- Choose from the approval options to simply approve it with the scheduling option chosen by the sender, post it immediately, or add it to the publishing queue.
- Click Confirm.
- Click Reject to reject the post content.
- Add your feedback or a comment for rejecting the post.
- Click Done.
- You can monitor notifications related to the activity on the posts you've sent or received for approval in the Notifications section.
You'll receive real-time push notifications when you receive a post for approval, and a reminder notification in the Home tab of the mobile application when you open it.