Email Distribution
Send your survey's link to your email lists within Zoho Survey, without having to switch a tab. You can also track the responses and see the details of opened, unopened, bounced, and unsubscribed invites.
There are four ways to do this:
- Zoho Survey's email distribution
- Zendesk integration
- Shopify integration
- Eventbrite integration
Note : You can send up to 3000 email invites per 24 hours period with a maximum of 1000 email invites for integrated apps ( Eventbrite , Zendesk , Shopify ) per campaign and 500 email invites for Zoho Survey email distribution. Your total email invites will be 60000 per 30 day period. To send to a larger client list, you can use Zoho Campaigns, which is integrated with Zoho Survey.
Read on our email distribution terms and conditions here .
To send surveys through emails :
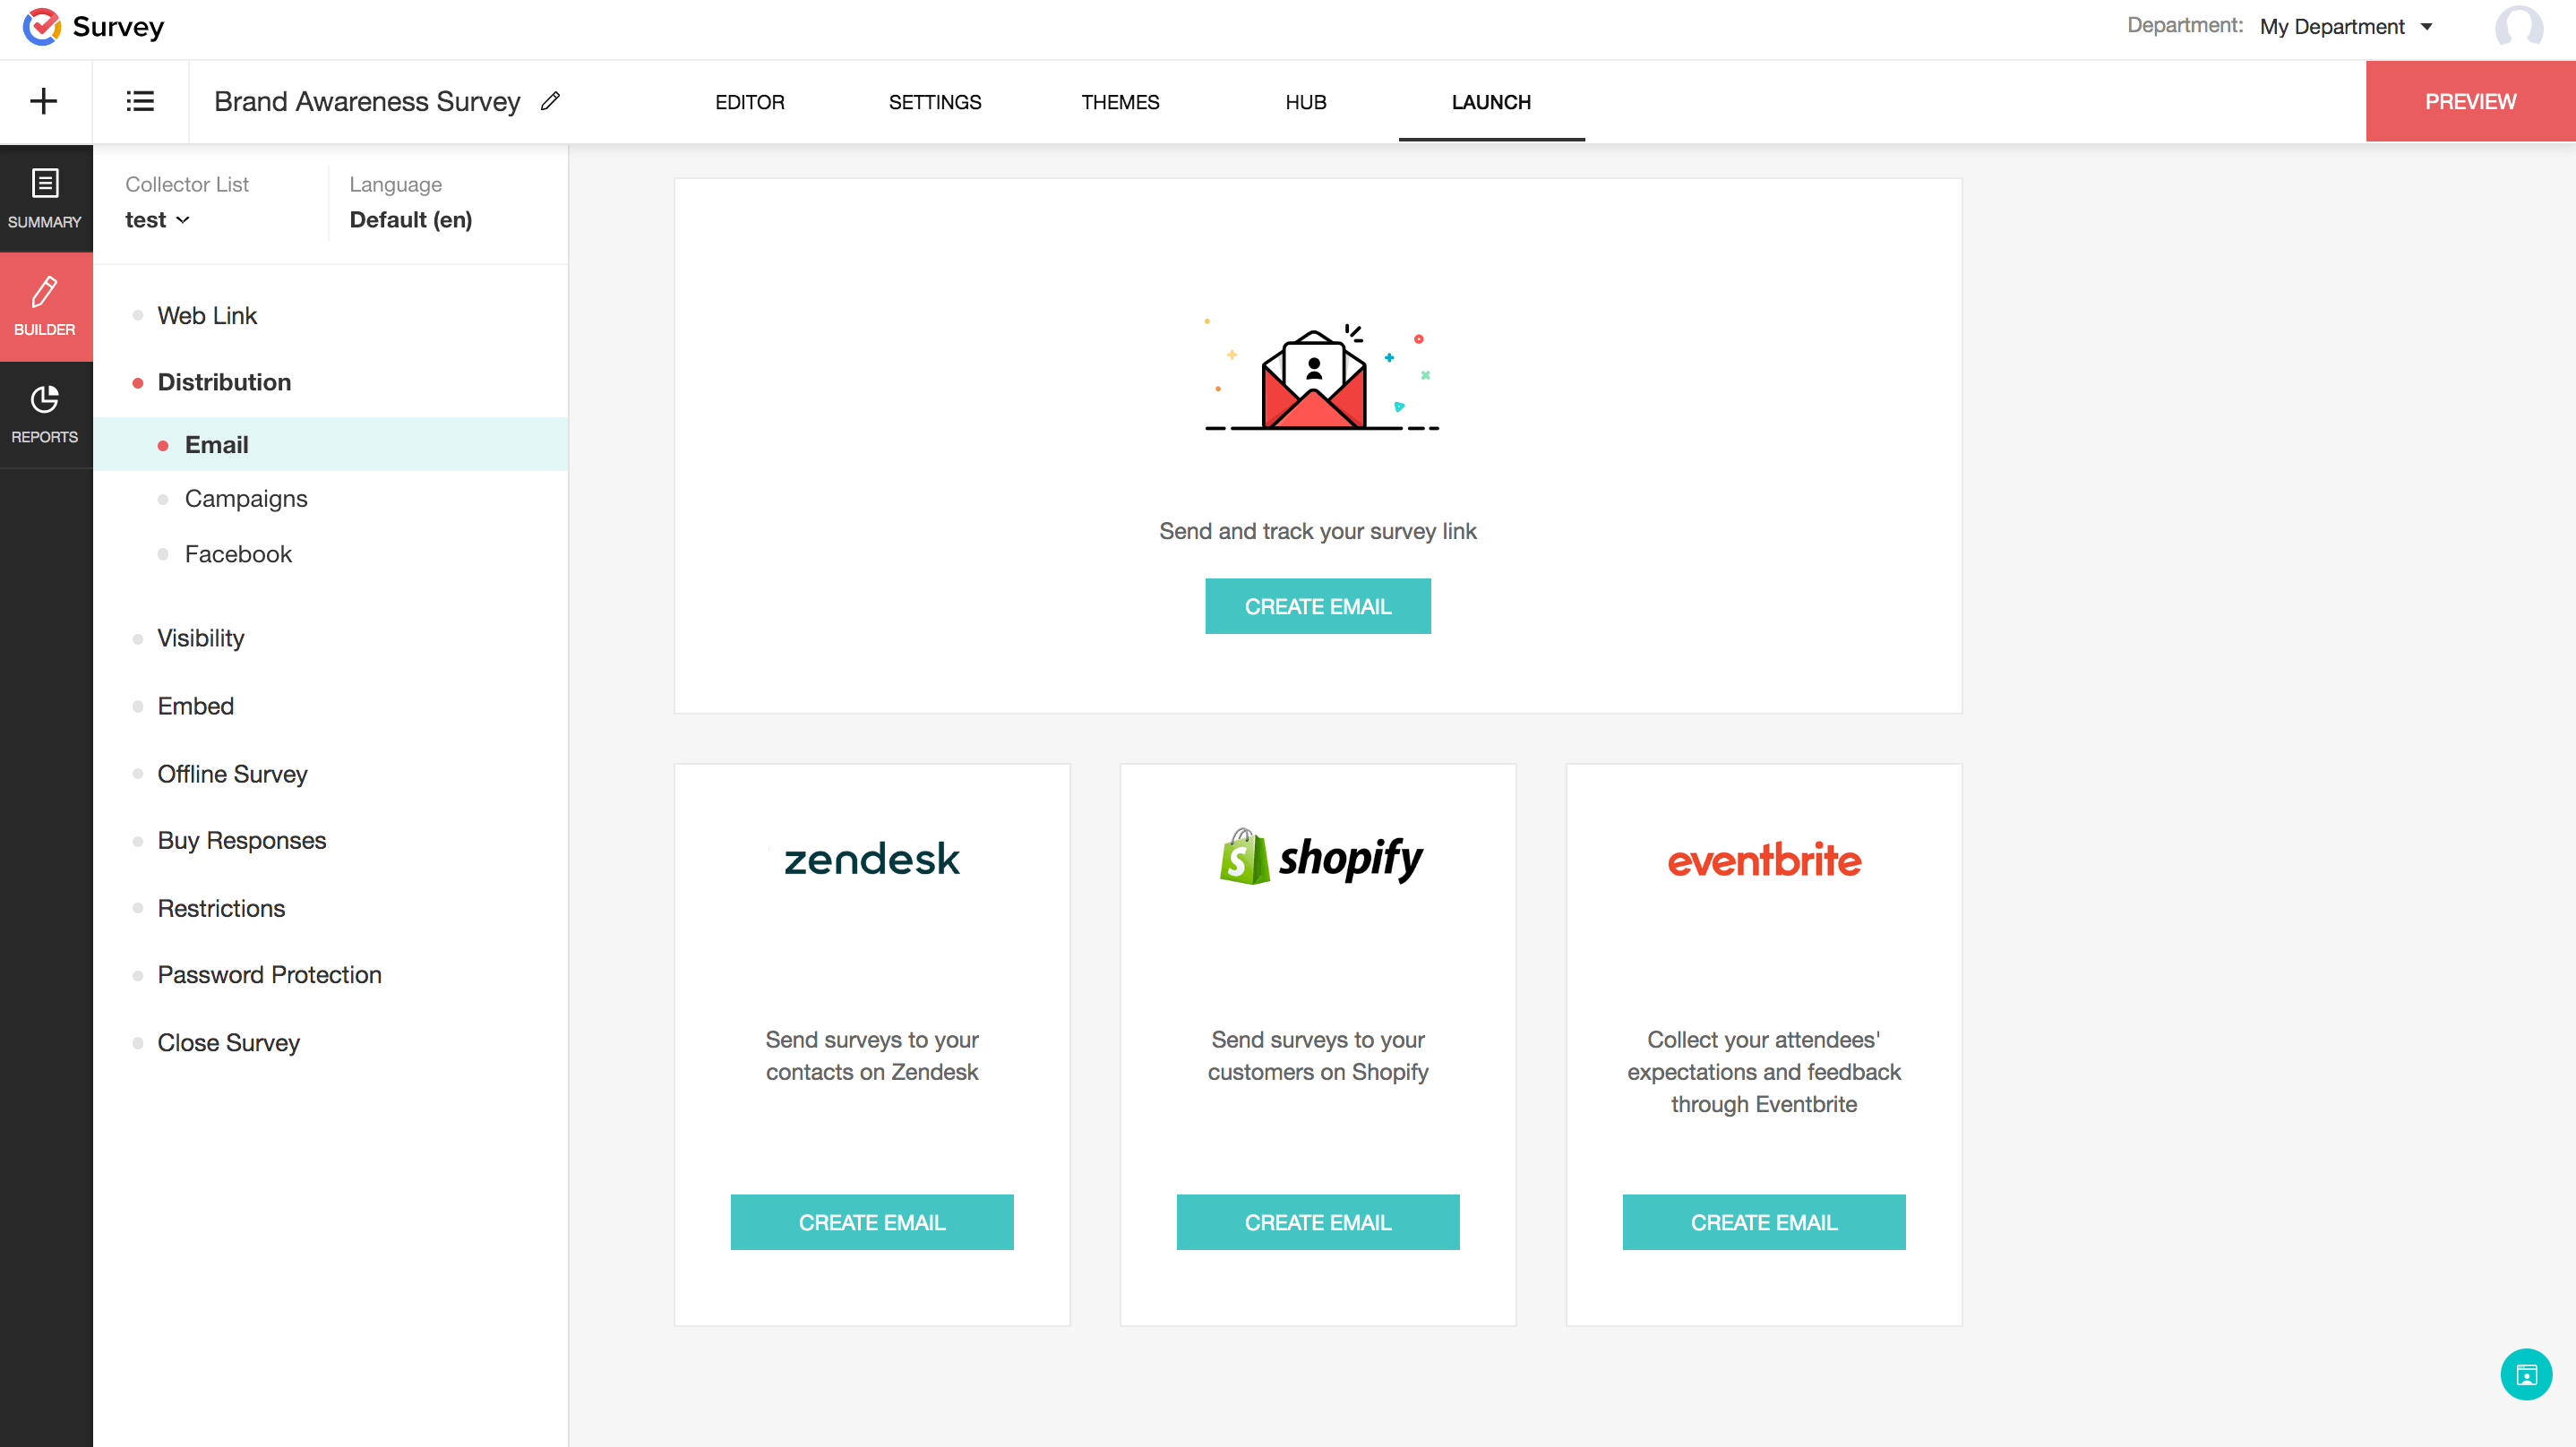
- Go to the Launch tab.

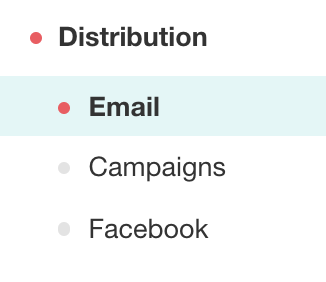
- Click Distribution on the left pane. You can access this only after you publish the survey. The email distribution option is the default selection.
- Click Create Email to send and track your survey link. If you have already created one before, click Create New . You can also, send surveys through Zendesk, Shopify, and Eventbrite.


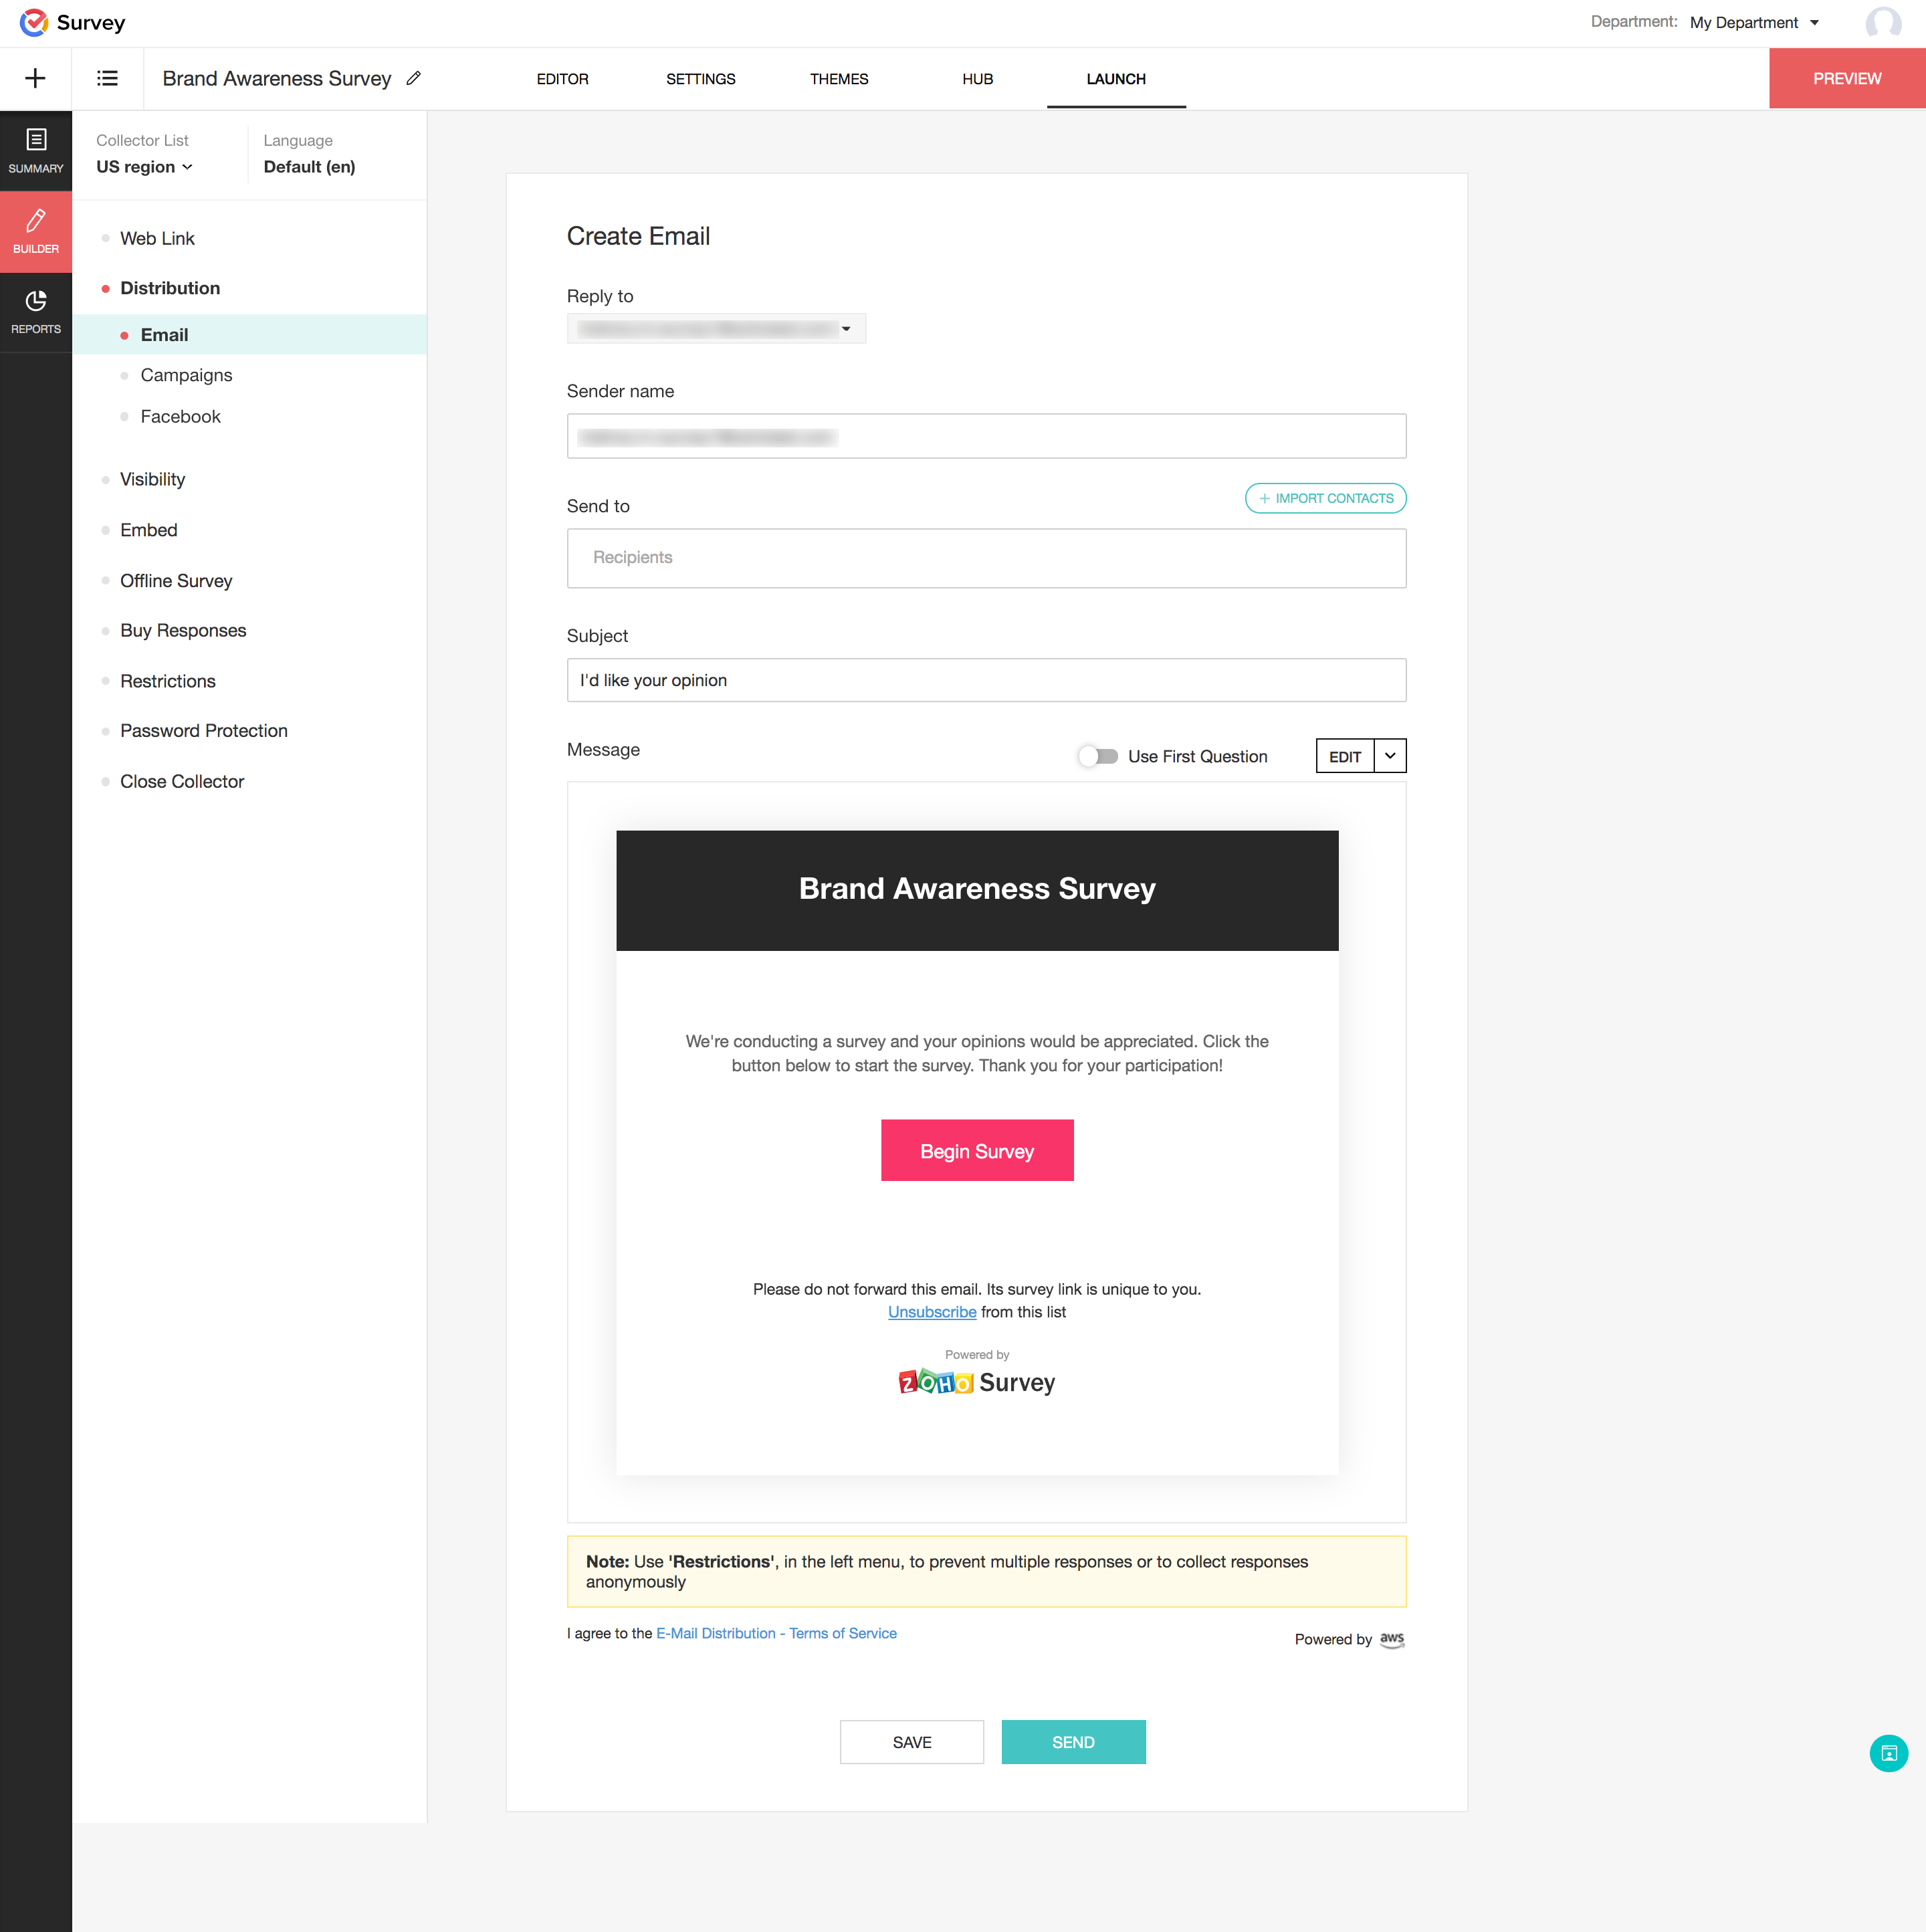
- Click the email address displayed in the Reply to box if you want to change the default 'from' email address.
- Type the name of the sender in the Sender name field.
- Type the recipients' email addresses in the Send to box.
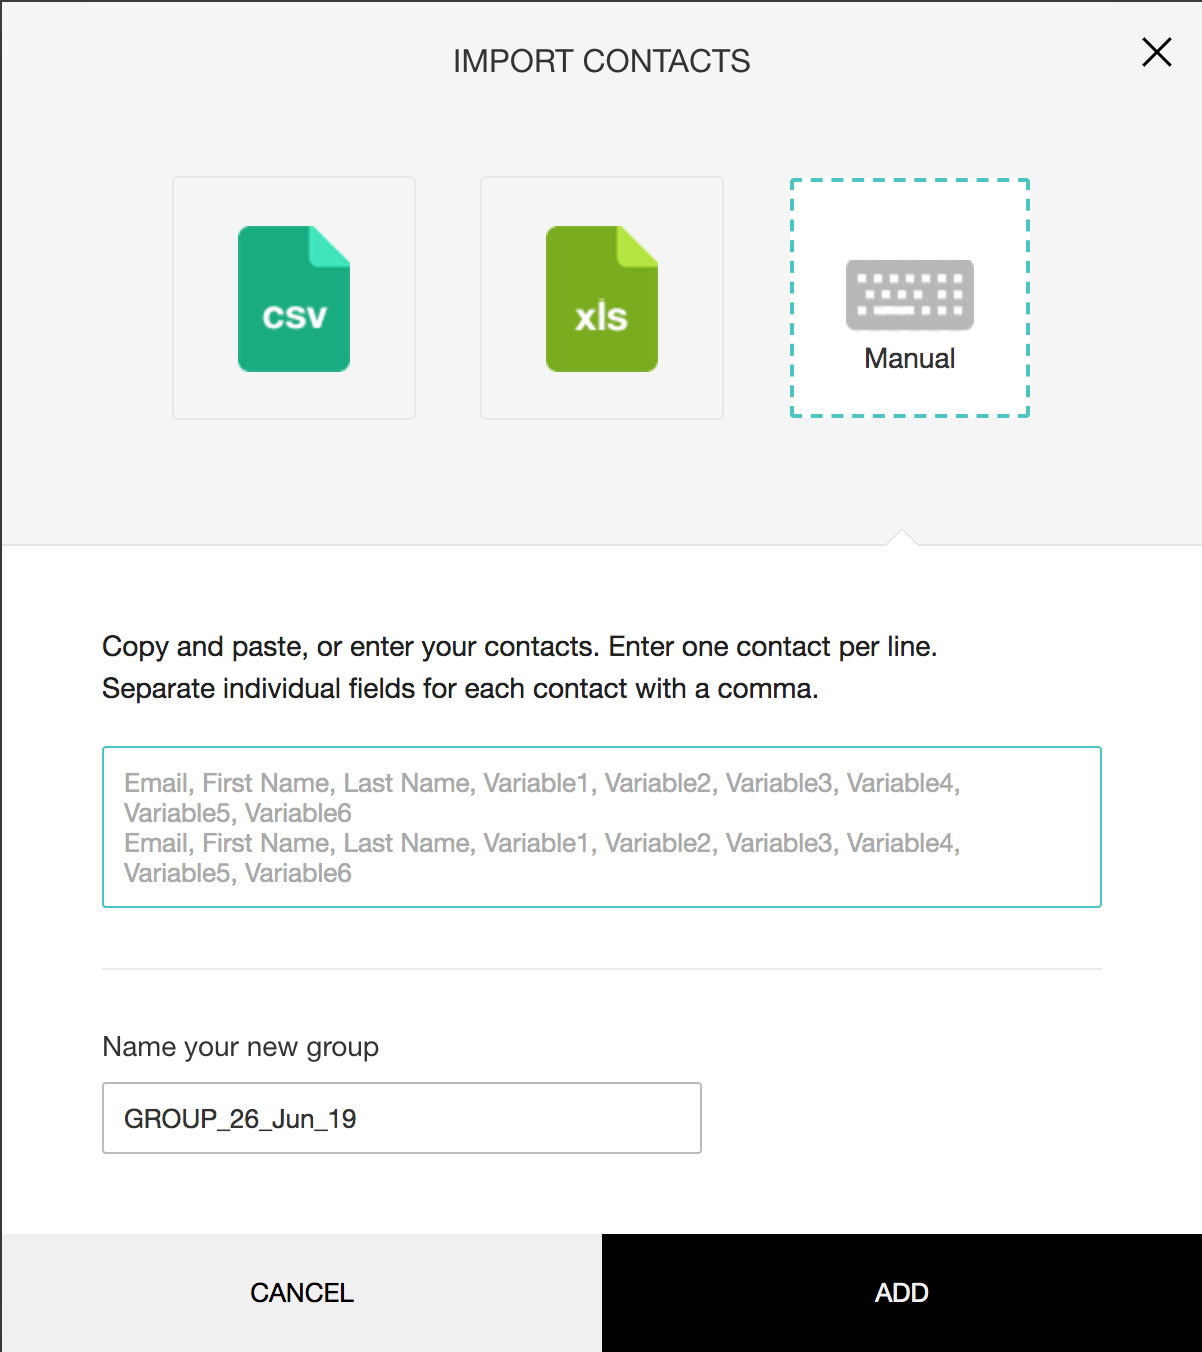
- To import contacts by uploading CSV or XLS files, or by manually typing the contact details, click Import Contacts .
- Click CSV and select Choose file to upload a CSV file.
- Click XLS and select Choose file to upload an XLS/XLSX/ODS file.
- Click Manual to type or copy-paste contacts manually. Insert known variables, separated by commas, to tag respondents. For the manually-inserted custom variables , responses are in the Individual Responses section of the reports. Note : Email invitations will be sent as many times an email address occurs in a contact list and the corresponding invitation variables are recorded for each occurrence of the email.
- Type a name for the new group of contacts you import in the Name your new group box.
- Click Add to add the group to the recipient's list.
- Type a subject for the email in the Subject box.
- Click or hover over the email template and click
 to edit the email template or you can click the Edit button on the top right corner of the message box. You can make edits to the default template that gets displayed here.
 - Click the dropdown arrow next to the edit button and select Save as template to save any changes you make.
- Click Select an existing template to choose from a list of templates you have already made.
- Click Insert Variable to personalize the body of the template to include contact information like first name, last name and custom variables. You can embed a multiple choice, rating, drop down or NPS question from the first page of your survey directly into your email. This particular question will replace the Begin Survey button as a link to your survey.
- Click Save to save the changes.
- Choose to enable or disable the footer in your surveys in the Footer section when you use the email distribution feature.
- Click Background color, and Font color palettes in the Button section to adjust the background and font colors of the button name respectively.
- The logo that is added in the Settings tab will be added here.
- Make edits to the button name in the Button name field, if required.
- Click Background color and Font color palettes in the Header section to adjust the background and font colors of the template respectively.
- Make edits to the title of the email template, if any, in the Title name box. If you do not make any changes to the title, it will take the name of the survey by default.
- Click Send to distribute your survey through email. You can also save a draft version and send it later.
To change the 'From' email address:
- Go to the Launch tab.
- Click Distribution on the left pane. You can access this only after you publish the survey. The email distribution option is the default selection.
- Click Create Email to send and track your survey link. If you have already created one before, click Create New . You can also, send surveys through Zendesk , Shopify , and Eventbrite .
- Click the email address displayed in the Reply to box if you want to change the default 'from' email address.
To import contacts by uploading CSV or XLS files:
- Go to the Launch tab.
- Click Distribution on the left pane. You can access this only after you publish the survey. The email distribution option is the default selection.
- Click Create Email to send and track your survey link. If you have already created one before, click Create New . You can also, send surveys through Zendesk , Shopify and Eventbrite .
- Click Import Contacts .
- Click CSV and select Choose file to upload a CSV file.
- Click XLS and select Choose file to upload an XLS/XLSX/ODS file.
To edit the contents of the email:
- Go to the Launch tab.
- Click Distribution on the left pane. You can access this only after you publish the survey. The email distribution option is the default selection.
- Click Create Email to send and track your survey link. If you have already created one before, click Create New . You can also, send surveys through Zendesk , Shopify , and Eventbrite .
- Click the Select a question to be embedded dropdown list to select the question you want to embed in the email.
- Click or hover over the email template and click to edit the email template or you can click the Edit button on the top right corner of the message box. You can make edits to the default template that gets displayed here.
- Click the dropdown arrow next to the edit button and select Save as template to save any changes you make.
- Click Select an existing template to choose from a list of templates you have already made.
- Click Insert Variable to personalize the body of the template to include contact information like first name, last name and custom variables.
To customize the colors of the email invite:
- Go to the Launch tab.
- Click Distribution on the left pane. You can access this only after you publish the survey. The email distribution option is the default selection.
- Click Create Email to send and track your survey link. If you have already created one before, click Create New . You can also, send surveys through Zendesk , Shopify , and Eventbrite .
- Click Background color and Font color palettes in the Button section to adjust the background and font colors of the button name respectively.
- Make edits to the button name in the Button name field, if required.
- Click Background color and Font color palettes in the Header section to adjust the background and font colors of the template respectively.
Add Parameters
Add Parameter provides you the option to map URL parameters with dynamic parameters. If you have a question in the survey form and wish to autofill it, or you wish to pipe data to the questions using the URL parameter, then you can use the Add Parameter feature.

Note:
The Add parameter feature can be used only via spreadsheets.
How to add parameters in Email distribution
Follow the steps below to add parameters in Email distribution:
- Go to the Launch tab, then publish your survey if it's a draft.
- Under distribution in the left pane, choose Email Distribution.
- Click the + CREATE NEW button.
- Click Create Email to send and track your survey link. If you've already created one before, click Create New. You can also send surveys through Zendesk, Shopify, and Eventbrite.
- In the Compose Email page, click the Edit Message button.
- Scroll down to the BUTTON section, then click Add Parameter. Provide a parameter name and map it to the parameter value. For example, here, I am planning to pre-populate the name of the survey responders, so I name it "Parameter Name" and select First Name as Value.
- Click OK, and go to Builder. Here, add the question whose value needs to be pre-populated. For example, I'm adding a Short Answer type question to ask the names of respondents and autofill the name.
- Click the the advanced options, then tick the Pre-populate answer checkbox. For the field, Value from provide the URL parameter option and map it to the variable value you have configured in Email distributions. Click SAVE.
- Navigate back to Launch section> Email distributions, then select Continue with Draft.
- Update the sender Info, then click NEXT.
- Click on the upload button in Send To > Specific Contacts
- Import contacts as CSV or XLS , or do so manually by typing in the textbox provided below. Click ADD, then NEXT
- Choose the type of Invite and set the type of delivery.
- Further, if you wish to pipe this value to the questionnaire, add the question to which the value needs to be piped, click Insert Variable at the top-right corner, then choose the param-name.
To track the survey:
- Go to the Launch tab.
- Click Email on the left pane.

- Click Overview to see the following details.
- Invites - Displays the details on how many of your respondents have opened your invite, how many are yet to open it, if any email has been scheduled or bounced, or if someone has unsubscribed to your invite.
- Responses - Displays the total number of responses, and the details of completed, partial, and disqualified responses.
- Invite History - Displays the date and other details of each invite.
- Click View for a detailed history.
- Click Create Reminder to send reminder emails to people who have not responded to your survey. Follow the steps in editing the email template to draft a reminder email.
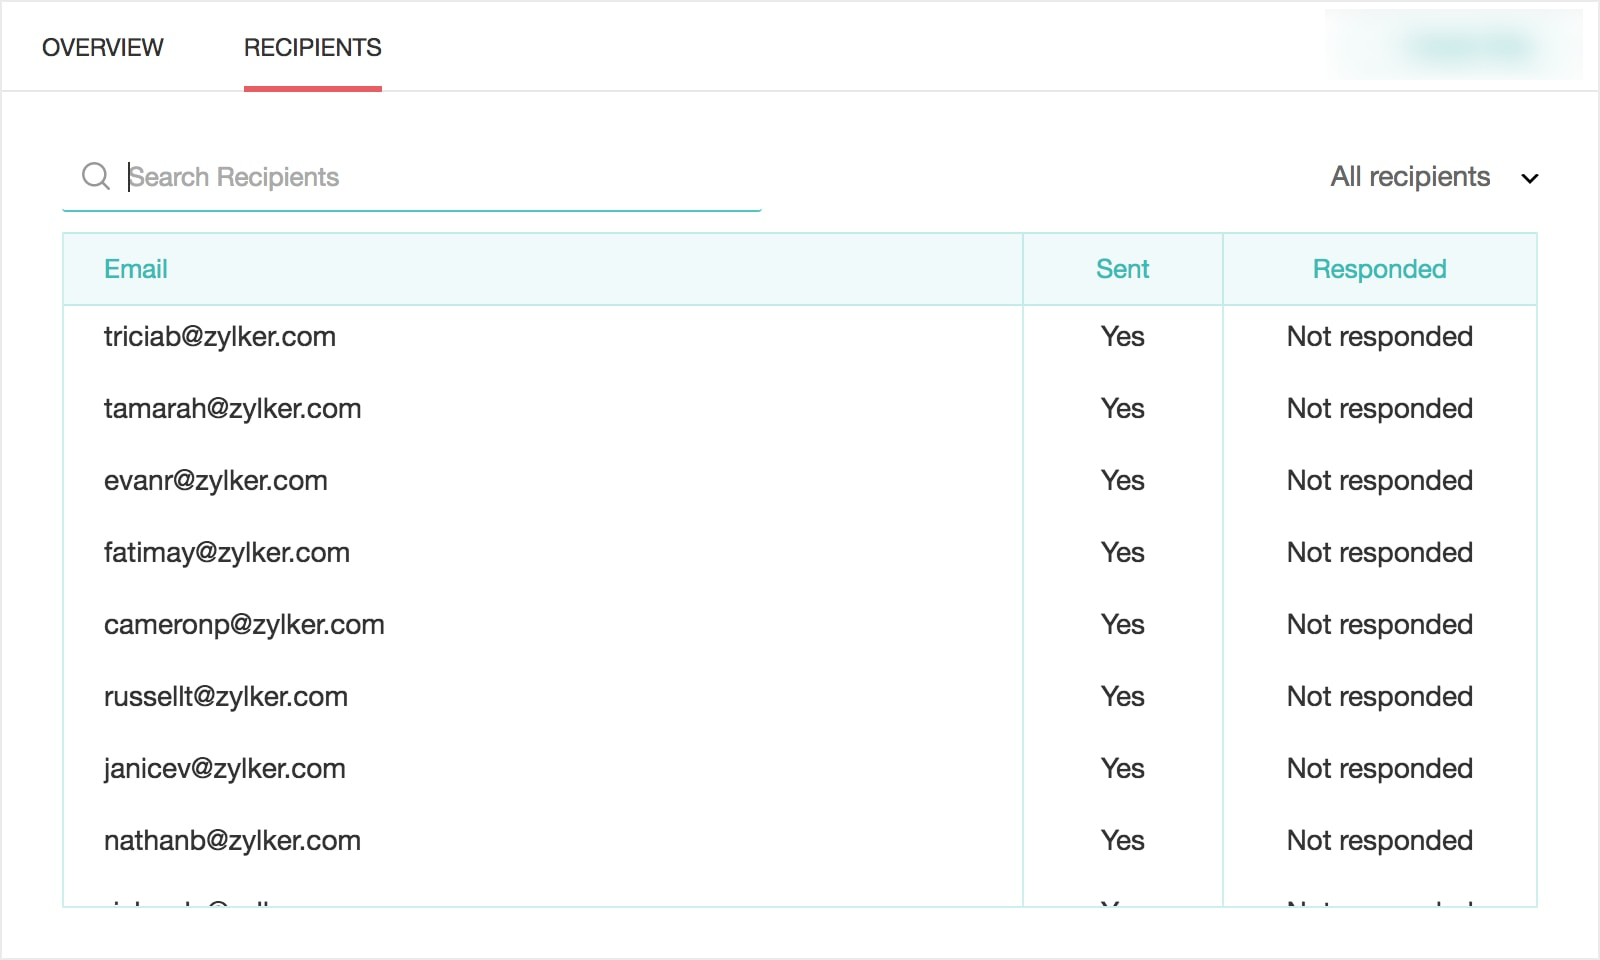
- Click Recipients to see the following details.
- Search Recipients - Search for a recipient by using keywords.
- Email - Displays email addresses of the email invitees.
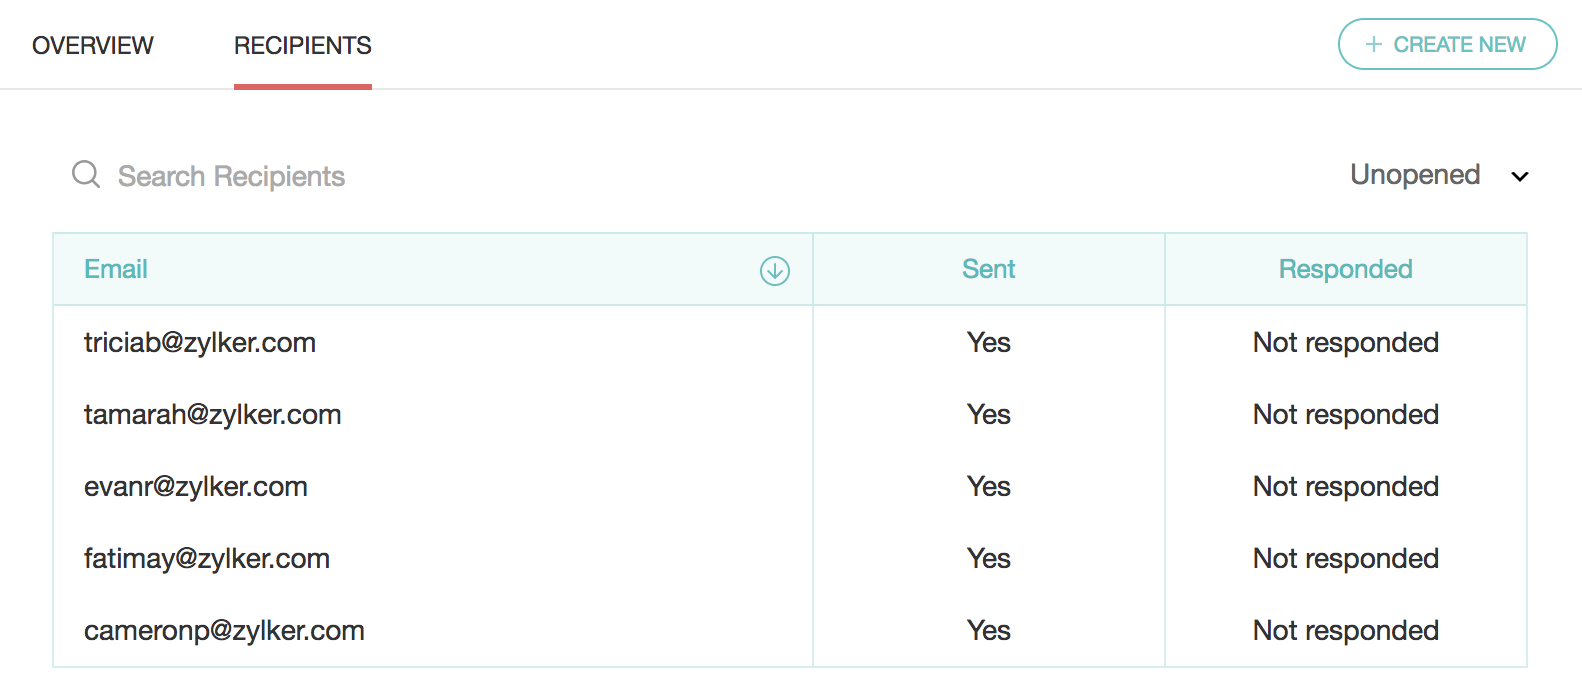
- Download as CSV - Download the list of filtered recipients in a CSV format.
- Sent - Displays whether your invite has been sent.
- Responded - Displays the response status of your survey. If they have responded, click View Response to view the responses you have received. It will take you to the reports section where you can see detailed response details.
- Filter - Filter your recipients based on various parameters.
- All recipients - To view all the recipients
- No responses - To view the recipients who haven't responded yet
- Partial responses - To view the ones who have partially responded
- Complete responses - To view the ones who have submitted complete responses
- Disqualified responses - To view the recipients who don't fit your requirements
- Opened - To view the recipients who have opened the invite
- Unopened - To view those who haven't yet opened the invite
- Unsubscribed - To view those who have unsubscribed to your mailing list
- Bounced - To view the invites that haven't reached your recipients yet
- Not sent - To view the invites that have not gone out of your mailbox
- Failed - To view the invites that have failed to send
To search for a contact to find out if they have answered your survey:
- Go to the Launch tab.
- Click Email on the left pane.
- Click Recipients and search for recipients in the search bar by using keywords.
To filter your email distribution contacts:
You can filter your email distribution contacts based on the following parameters:
- All recipients - To view all the recipients
- No responses - To view the recipients who haven't responded yet
- Partial responses - To view the ones who have partially responded
- Complete responses - To view the ones who have submitted complete responses
- Disqualified responses - To view the recipients who don't fit your requirements
- Opened - To view the recipients who have opened the invite
- Unopened - To view those who haven't yet opened the invite
- Unsubscribed - To view those who have unsubscribed to your mailing list
- Bounced - To view the invites that haven't reached your recipients yet
- Not sent - To view the invites that have not gone out of your mailbox
- Failed - To view the invites that have failed to send
Schedule Email Distribution
You can now automate an email distribution invite or a reminder to be sent out at a time you decide.
To schedule an email invitation:
- Once you click Send , you'll be prompted to choose from the following options:
- Immediately
- Schedule
- To send it at once, click Send Now .
- To send it at a later point, click Send Later .
- Select Send on a Particular Date and Time if you would like to select the date and time in the calendar.
- Select Send Periodically if you want the invite to be sent out daily, weekly, monthly, or at a custom interval of your choosing.
- Select the start and end date schedule in the Start Date and End Date calendars respectively.
- Click the Set Interval dropdown to select the interval and time at which the email invite needs to be sent out.
- If you want to set a custom interval, click Custom Interval and select the interval and date from the dropdown.
- Click Schedule .
To edit a scheduled email invite:
- Open the email invite and click Edit Schedule Time .
- Make any necessary changes, then click Schedule .
To delete a scheduled invite:
- Click the delete icon next to the invitation you want to delete from the list of scheduled invites.
- Click Yes in the confirmation dialogue box that follows.
To schedule a reminder for an invite you have sent:
- Hover over an email invite you have sent, then select Create Reminder .
- Select a filter in the Send to field.
- Make any necessary edits in the email, then click Send .
- To send it at once, click Send Now .
- To send it at a later point, click Send Later .
- Select Send on a Particular Date and Time if you would like to select the date and time in the calendar.
- Select Send Periodically if you want the invite to be sent out daily, weekly, monthly, or at a custom interval of your choice.
- Select the schedule start date in the Start Date calendar. You can send up to three reminders per invite.
- Click the Set Interval dropdown to select the interval and time at which the reminder needs to be sent out.
- Click Custom Interval if you would like to select an interval and date from the dropdown.
- Click Schedule .
To schedule a reminder for an invite that has been scheduled:
- After you schedule the invite, you can select from the following options on the schedule invitation success screen:
- Schedule Reminder Later - You can schedule a reminder later to be sent days after you send out your invite.
- Schedule Reminder Now - You can schedule a reminder immediately after you schedule the invite.
- You can also create a reminder by clicking Create Reminder from the Scheduled Invitations list.
- Select a filter in the To field, then make necessary changes in the email body.
- Click Schedule .
- Select Send on a Particular Date and Time to choose when the reminder needs to be sent.
- Select the number of days after which the schedule should start, and the time in the dropdown. You can send up to three reminders per invite.
- Select Send Periodically and select the number of days after which the schedule should start in the dropdown.
- Click the Set Interval dropdown and select daily, weekly, monthly, or custom interval.
- Select the time at which the reminder needs to be sent out.
- Click Custom Interval if you would like to select an interval and time at which the reminder needs to be sent.
- Click Schedule .
To edit a scheduled reminder:
- Hover over an invite in the Invite History section, then click
and select Edit .
- Select a filter in the To field and make necessary changes in the email body.
- Make and necessary edits in the email, then click Edit Schedule Time .
- Update the schedule time and click Schedule .
To delete a scheduled reminder:
- Hover over an invite in the Invite History section, then click
and select Delete .
- Click Yes in the confirmation dialogue box that follows.
Email Campaigns
Email campaigns help you send your survey to a lot of people at once. Zoho Survey is integrated with Zoho Campaigns and MailChimp, so you can link your survey with either of these accounts and send your survey to your contacts via an email campaign. Read more on both of these integrations in the respective Zoho Campaigns and MailChimp pages.

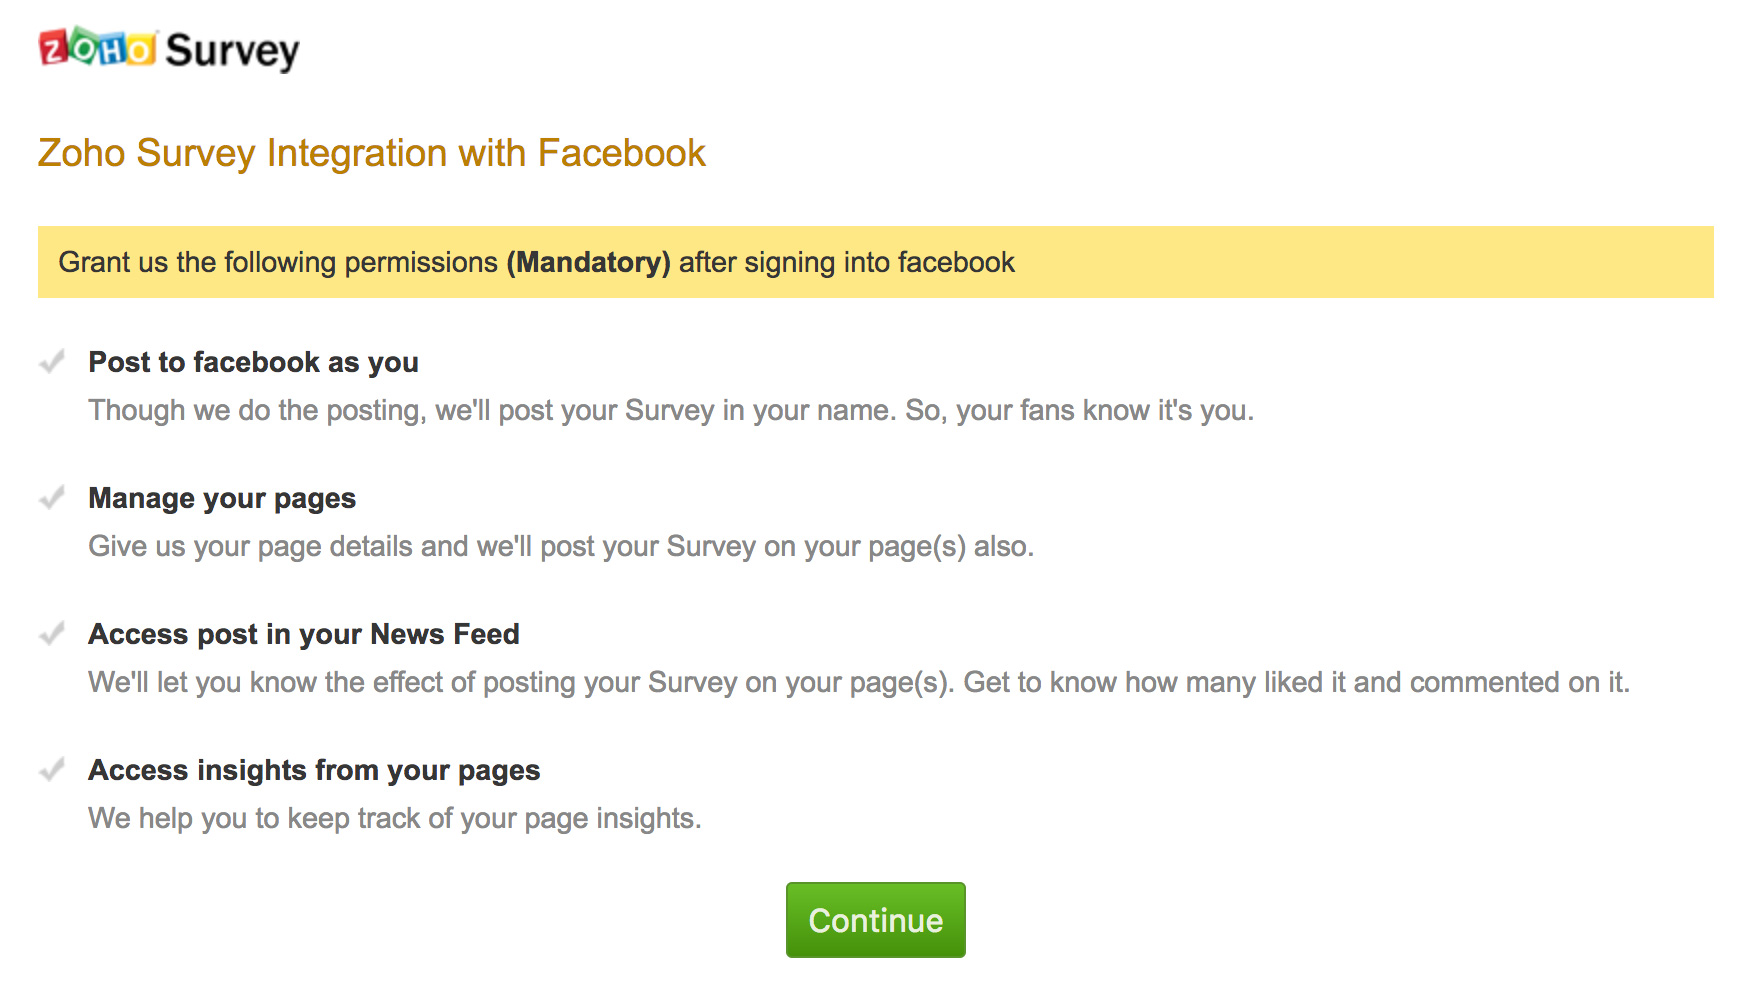
Facebook
Post your surveys on your Facebook page by linking your Facebook page to your Zoho Survey account and make it easily accessible to your followers.

To post a survey on your Facebook page:
- Go to the Launch tab.
- Click Facebook under Distribution .
- Click Connect .
- Complete the steps that follow to authenticate your Facebook account with Zoho Survey. The list of pages you have added will show up on your Launch tab in the Via Facebook section.
- Select the page where you want to share your survey.
- Click Post .
- Click Open in a new tab to see the survey posted on your Facebook page.
To disconnect Facebook and Zoho Survey:
- Click your profile on the top right corner.
- Click Setup and select Apps and Services .
- Click Disconnect in the Facebook section.
- Click Yes, Disconnect Integration and confirm the selection.