Send Survey Invitations via Zendesk
Overview
Integrating Zendesk with Zoho Survey empowers businesses to enhance their customer support and feedback collection processes. This seamless integration streamlines the process of sending surveys to customers after you've resolved their support tickets through Zendesk. Using scheduled email distribution, businesses can collect valuable insights, gauge customer satisfaction, and identify areas for improvement. This integration ensures a holistic approach to customer experience management, boosting efficiency and promoting stronger customer relationships with just a few clicks.
Use cases:
Suppose you run an e-commerce business and use Zendesk for customer support ticket management. You want to gather feedback from customers after their support tickets are resolved so you can continuously improve your support services. First, you set up Zendesk to manage customer support requests and tickets. Next, you integrate it with a survey. Once a support ticket is resolved, an automated email is sent to the customer thanking them for using your support services and politely asking for their feedback.
The email includes a link to the Zoho Survey form where they can share their thoughts and suggestions.
Send Survey Invitations via Zendesk
How to create a collector to send survey invitations via Zendesk
- Select the required survey and click the Builder option from the left pane.
- Go to the Publish tab.
- Select the required collector or click Add New Collector.
- For a new collector, under Email Invites by Zoho Survey, click Create, then select Create Email under Zendesk section to send surveys to your contacts on Zendesk.
- For an existing collector, click Create Email under the Zendesk section to send surveys to your contacts on Zendesk.
How to install the Zoho Survey app in your Zendesk account
- Log on to your Zendesk account.
- Click Zoho Survey.
- Click Install.
- Click Install. Zoho Survey will be installed in your Zendesk account. The app will be placed on the left pane for ease of use.
- Type a name in the Title field.
- Click Enable role restrictions? and select roles that can access your app.
- Click Enable group restrictions? and select groups that can access your app.
- Click Install.
- Click the app to open.
- Click Authorize.
- Click Allow to allow Zoho Survey to read and write all Zendesk user data.
How to send a survey to your event attendees
- Log on to your survey app using your Zoho account. If you don't have a Zoho account already, sign up to use the app.
- Click Create New after opening the Zoho Survey app.
- Select a survey to send from the Select a Survey dropdown list.
- Select a collector from the Collector dropdown list.
- Click Next.
- Click on the Templates dropdown.
- To select an existing email template, click Select an existing email template. Choose a template and click Use Template.
- To save your current template for future use, click Save as template. From here, you can choose to overwrite an existing email template or create a brand new template.
- Enter the subject of your email in the Subject textbox. You can insert variables by clicking Insert Variable.
- To edit the email contents, click on Edit Message.
- From here, you can edit the Header, Body, and Survey Link sections. Enter a title in the Title Name textbox.
- Click the Background Color and Font Color palettes in the Header section to adjust the colors of your template.
- Enter the body of the email in the Rich Text Editor.
- Set the survey link display type to Button format or Question Embed format.
- If you choose Button:
- Enter a button label in the Button Label textbox.
- Click the Background Color, and Font Color palettes in the Button section to adjust the colors of the button name.
- If you choose Question Embed:
- Choose the question to be embedded in the dropbox.
- Add a URL parameter by clicking + Add Parameter. Then, enter the URL and select the value. Click + to add more parameters and X to delete a parameter.
- Click the Select Value dropdown and set the value. You can insert a direct value as a respondent variable by clicking Edit. For example, type "Organization" and under Select Value, click Param-Value and enter "XYZ Inc." Make sure you have created a corresponding custom variable for "Organization" in the survey.
- Select Show "Powered by Zoho Survey" in the footer, if you want the message displayed.
- Click OK.
- Click Next.
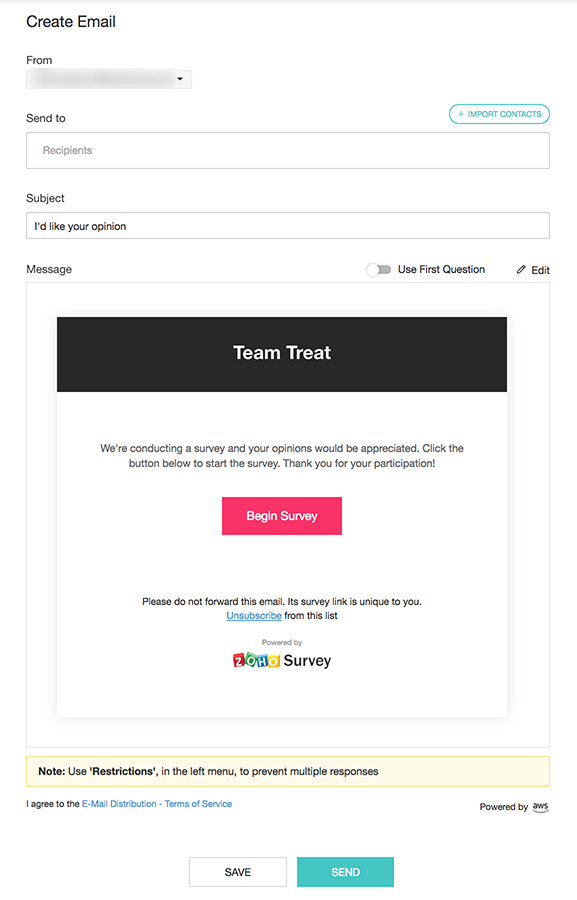
- To send your email immediately, click SEND NOW under Immediately.
- To schedule the email, click SCHEDULE under At Scheduled Time. You can choose the date and time from their respective dropdowns to schedule the email.
- Select Send Periodically to send the email regularly over a defined period and set the interval. Select the start and end date on the Start Date and End Date calendars respectively.
- Click the Set Interval dropdown to select the interval and time at which the email invite should be sent out.
- If you want to set a custom interval, click Custom Interval and select the interval and date from the dropdown.
- Click Schedule.
Note:
- You can add up to 1,000 email addresses per batch for an email campaign (i.e. you can send 1,000 emails at a time).
- Only verified domains in DKIM can be displayed as a "from" address. If the domain is not configured, the default "from"address will be "survey@invitation.zohosurvey.com"
How to schedule an email invite or a reminder
You can now automate an email distribution invite or a reminder to be sent out at a time you decide. Learn more about it here.
To track your survey:
- Click the survey you want to track from the list of published surveys.
- Click Overview to view the following details.
- Invites - Displays the details of how many of your respondents have opened your invite, how many are yet to open it, if any email has been scheduled or bounced, or if someone has unsubscribed from your invite.
- Responses - Displays the total number of responses, and the details of completed, partial, and disqualified responses.
- Invite History - Displays the date and other details of each invite. Click View for a detailed history.
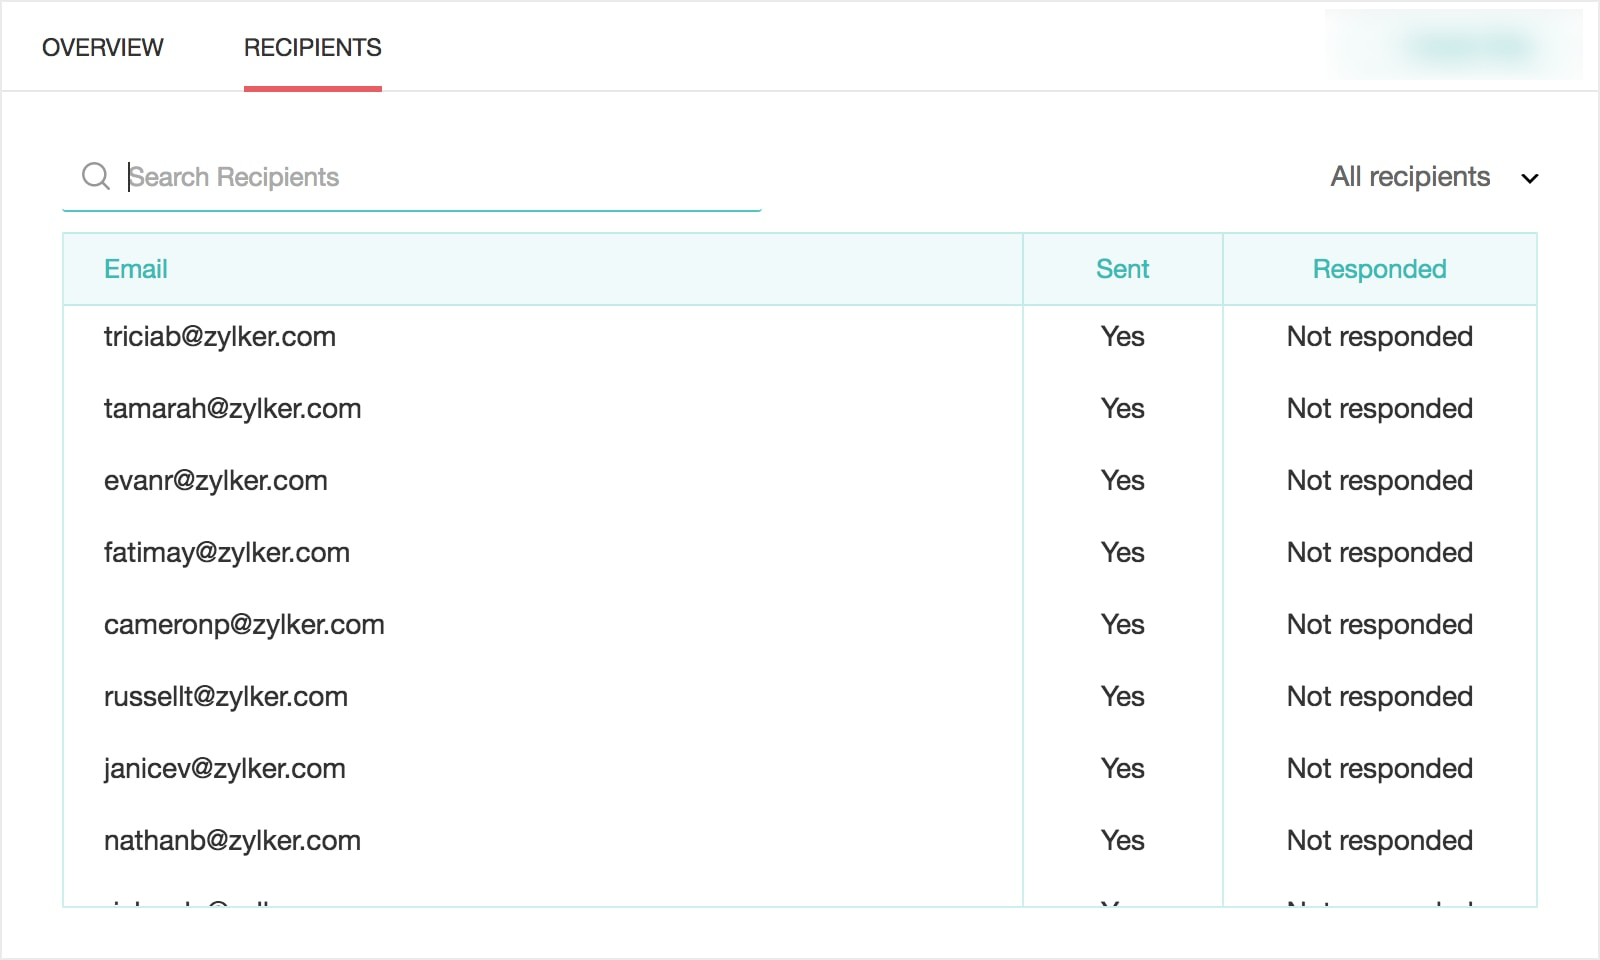
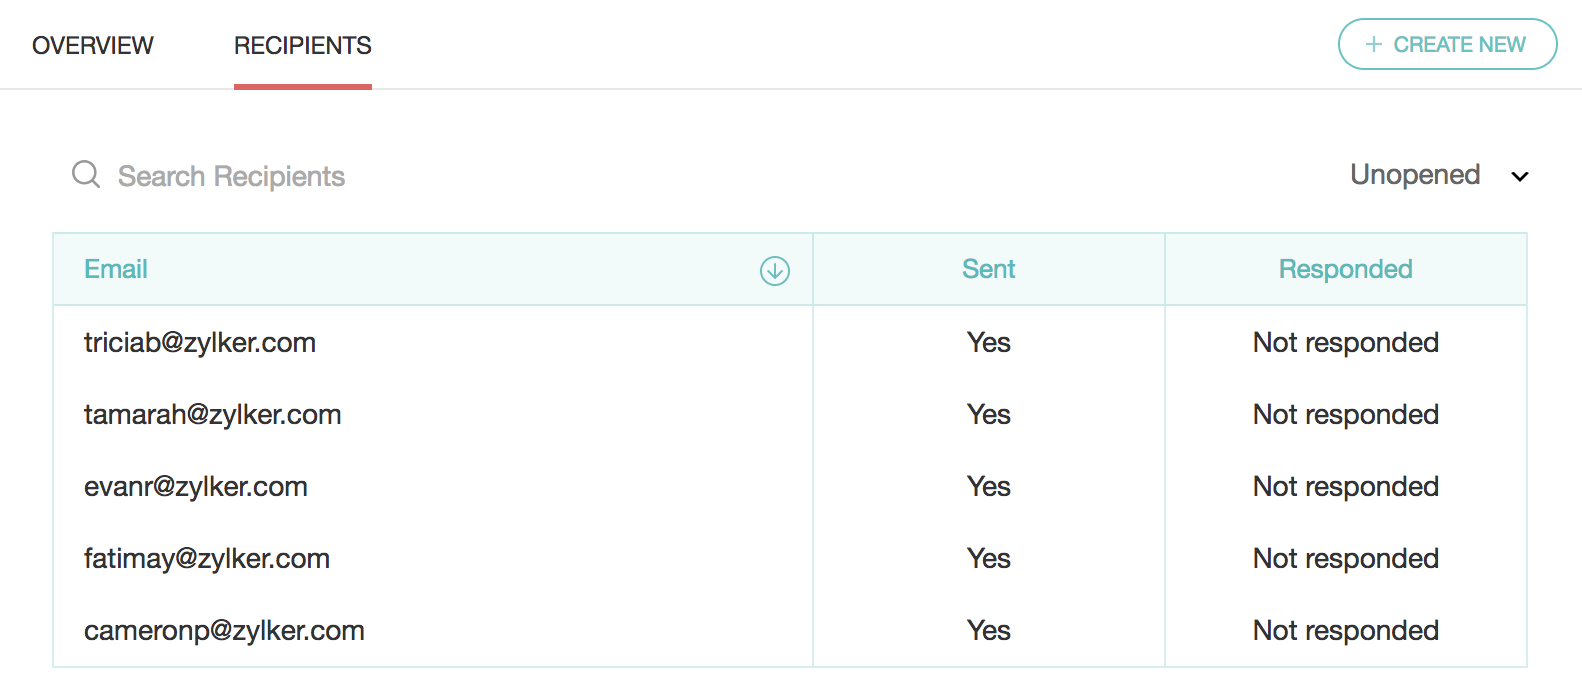
- Click Recipients to see the following details.
- Search Recipients - Search for a recipient by using keywords.
- Email - Displays email addresses of the email invitees.
- Sent - Displays whether your invite has been sent.
- Responded - Displays the response status of your survey. If they have responded, click View Response. It will take you to the reports section where you can see detailed response details. You will also be able to track the respondent variables applied here.
- Filter - Filter your recipients based on various parameters.
How to edit the draft email invite
- Click on the Draft Saved tag on the email template and click
 to edit the default email template.
 - Edit the contents of the email invite as described earlier and click OK.
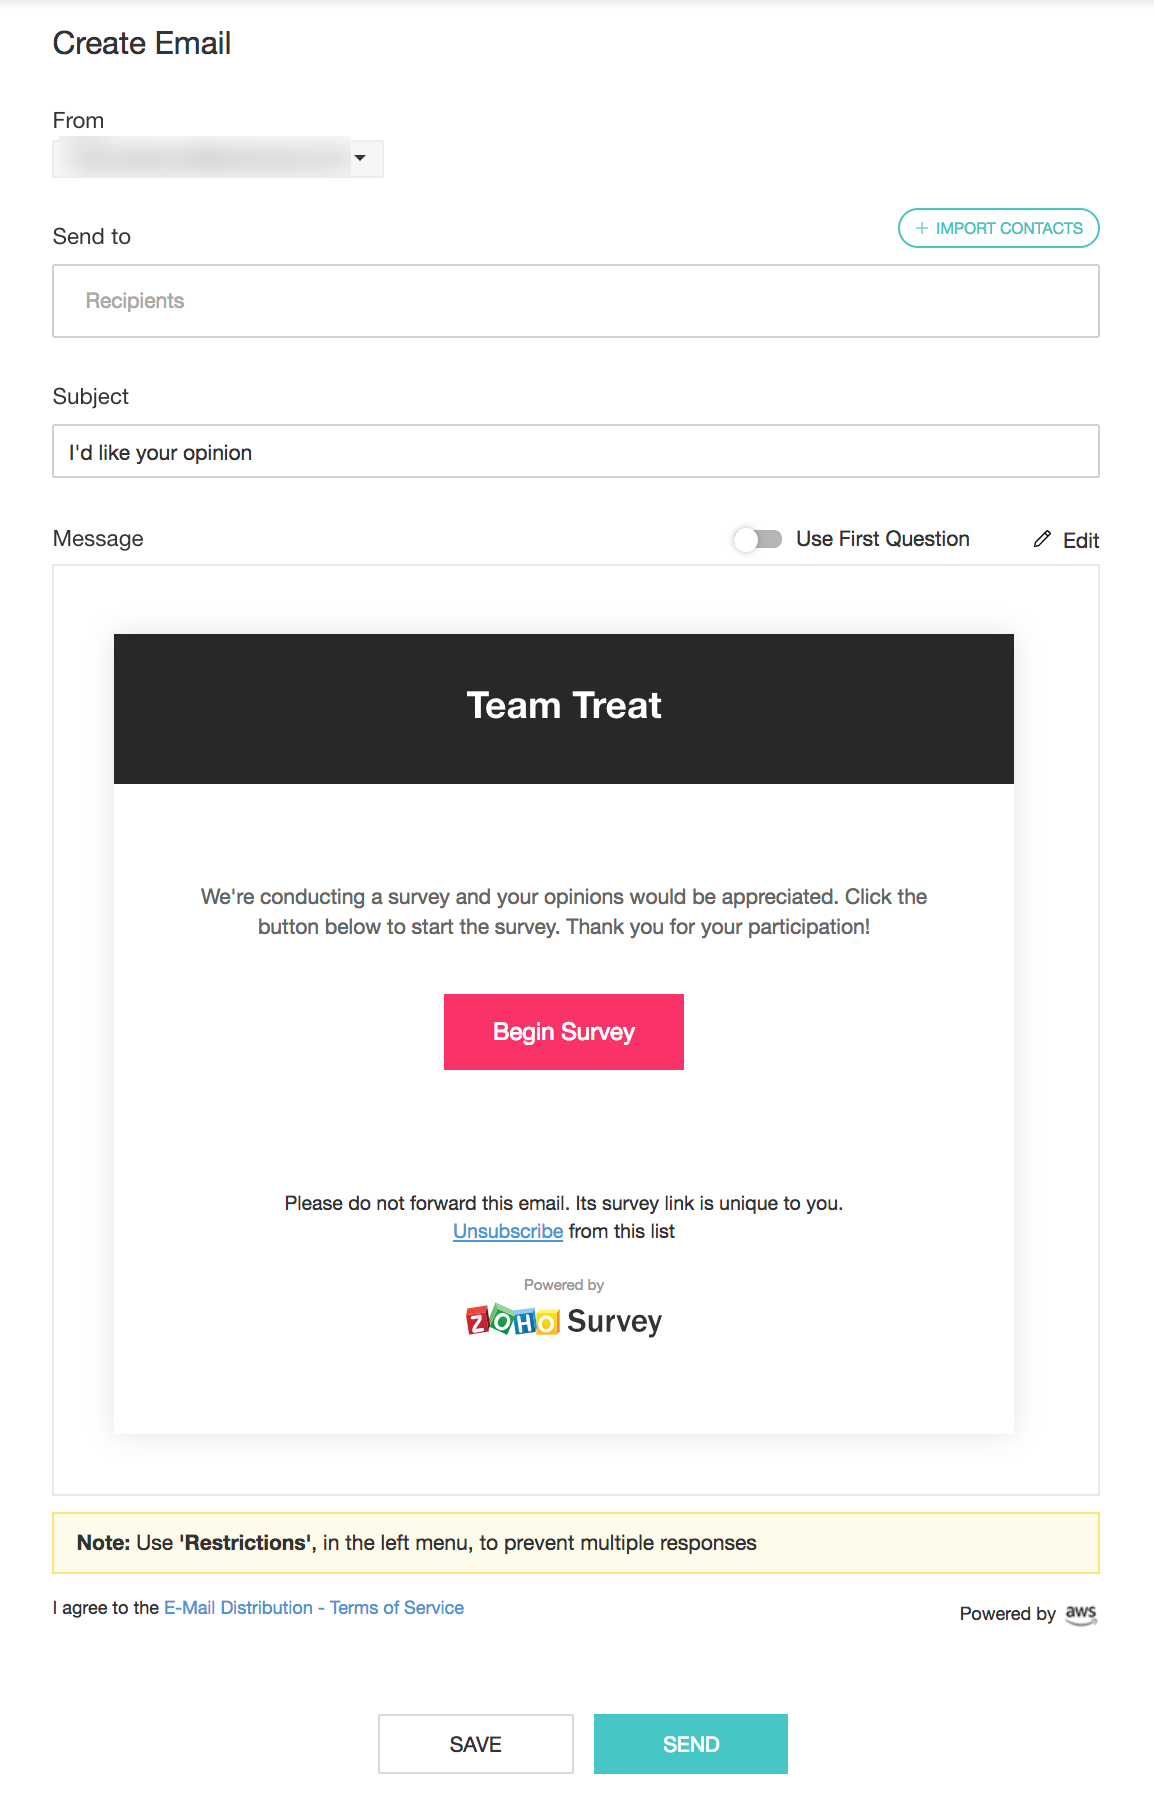
- Make edits to the title of the email template, if any, in the Title name box. If you do not make any changes to the title, it will take the name of the survey by default.
- Click Background color and Font color palettes in the Header section to adjust them in the template.
- In the Button name field, make edits to the button name, if required.
- In the Button URL field, click + Add Parameter, to insert the respondent variable from Zendesk into your survey.
- Type name, if, for example, you want to track the respondent's name.
- Click the Select value dropdown and select either first name or last name.
- Click OK. Similarly, you can also insert a direct value as a respondent variable. For example, type 'Organization' and in Select value, click param-value and enter "XYZ Inc". Make sure you have the corresponding custom variable for 'organization' created in the survey.
- Click the Background color, and Font color palettes in the Button section to adjust them in the button name.
- Select whether you want to show the default 'powered by Zoho Survey' option.
- Click Save.
- Click Send to distribute your survey through email. You can also save a draft version and send it later.
Note
You can add up to 1000 email addresses per batch in an email campaign i.e. you can send 1000 emails at a time. |
How to search if a Zendesk contact has answered your survey
Click Recipients and select Search Recipients.
How to filter your recipients
You can filter your recipients based on the following parameters:
- All recipients
- No responses
- Partial responses
- Complete responses
- Disqualified responses
- Opened
- Unopened
- Unsubscribed
- Bounced
- Not sent
- Failed
How to remove Zoho Survey from your Zendesk account
- Log on to your survey app within Zendesk.
- Click the Remove Integration icon on the top right corner of the home page.
By merging Zendesk with Zoho Survey's email distribution, businesses can effortlessly gather feedback, improve customer support, and make informed decisions. This powerful integration enhances overall customer satisfaction and strengthens client-company relationships—all from a unified platform.