Composing and Sending Emails in Trident (Windows)
Composing a New Email
To compose an email:
Click the New Mail button in the top-left corner below the main menu.
Fill in the required email fields, such as To, CC, BCC, and Subject.
Draft the email body and use the rich text formatting options present in the Mail Composer to format it.
Click Send.
Notes:
@mentioning a contact in the email body will automatically populate the entry in the To field.
All your composed emails are saved automatically as drafts when you close the Mail Composer.
You can use the Discard draft option to delete the email you've composed. This action is not reversible. The discarded draft will not be found in the Trash folder and will be deleted permanently.
The built-in spell checker, powered by Zoho's Zia, helps catch typos and spelling mistakes and provides suggestions for corrections while composing emails in the Mail Composer. To enable this feature, go to Settings > Mail > Mail Composer.
Currently, it is only supported for English language.
Formatting Email Content With Rich Text
The Mail Composer has a What You See Is What You Get editor to customize the email body.
The following formatting options are available in the rich text mode:
Font Family | |
Font Size | |
Font Color | |
Background Color | |
Bold | |
Italics | |
Underline | |
Strikethrough | |
Alignment Options | |
Bullet List | |
Numbered List | |
Indentation | |
Remove Formatting | |
Writing Direction |
Quote | |
Horizontal Line | |
Image | |
Table | |
Hyperlink | |
Smiley | |
HTML | |
Superscript | |
Subscript |
Enabling Native Spell Checker
You can compose emails error-free using the available system spell checker. To enable it:
Place the cursor in the large text area of the Mail Composer.
Right-click and select Turn On Spell Checker.
 Note: To disable the spell checker, right-click and select Turn Off Spell Checker.
Enabling Auto-Capitalization for Sentences
Click the Main Menu
icon in the top-left corner of the app.
Select Settings from the menu list.
Select Mail.
Go to the Mail Composer section.
Toggle the Auto-capitalize sentences option on.
Note: This setting only applies to text editors within the Mail module.Adding Attachments
You can attach files from your system or the WorkDrive to your email.
Click the Attachment
icon in the Mail Composer and click attach file.
Browse and select the file to add to the email.
Click Open.
Notes:
Multiple attachments can be added to an email.
The maximum size for attachments is 40 MB.
You can also drag and drop files from your Cliq chats or WorkDrive to add them as attachments to the Mail Composer using Smart Flow.
Click the Attachment
icon in the Mail Composer and click Attach From WorkDrive.
Browse for and select the file to add to the email.
Click Attach.
Adding Huge Attachments
You can choose to automatically add huge attachments when the size limit is exceeded, be prompted to confirm each time you add a huge attachment, or disable huge attachments entirely from Zoho Mail web Settings.
To add huge attachment:
Click the Attachment
icon in the Mail Composer and click Attach File.
Browse for and select the file to add to the email.
Click Open.
If you have enabled the setting to confirm before adding huge attachments, click Share as Link in the alert that appears.
Limited Access: Only recipients with a valid Zoho account can view the attachment.
Public Access: Anyone with the link can view the attachment.
To change the visibility, click the visibility label on the attachment and select the required option.
Adding SecurePass
- Click the SecurePass
icon in the Mail Composer.
- Choose the email expiry date from the drop-down or select a custom date.
- Click Apply.
Notes:
The email content will be protected with a passcode when sent.
The recipient can access the content in the email by providing the verification passcode sent to their email upon clicking the link.
Modifying and Revoking Access to SecurePass Emails
- Navigate to the Sent folder.
- Click the email you want to modify the SecurePass date for.
- Click Modify.
- Choose the email expiration date from the drop-down or select a custom date.
- Click Apply.
To revoke access to the SecurePass email:
- Click Revoke in the email detail view.
- In the dialogue box that appears, click Revoke.
Note: On revoking access, recipients will no longer be able to view this secure email. The recipients will get the "Access Revoked" alert when they try to access the link.- Navigate to the Sent folder.
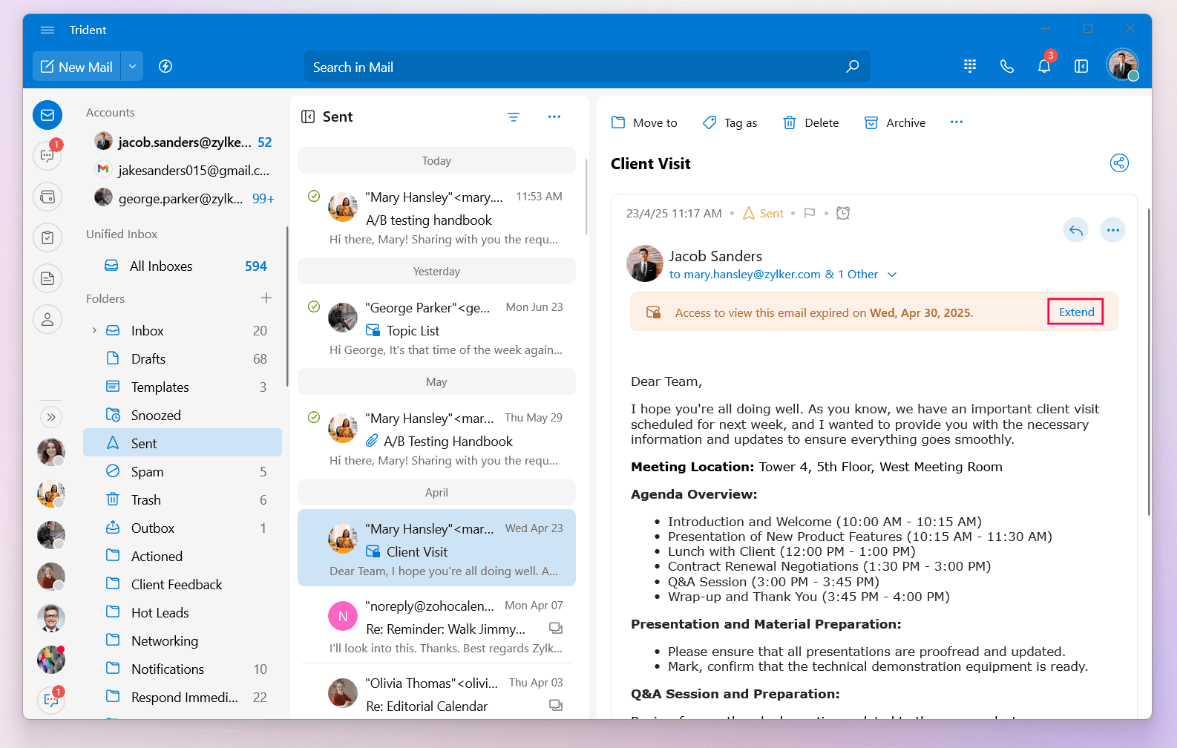
- Click open the email you want to extend the view access for.
- Click Extend in the email detail view.
Inserting Images
You can insert image files from the local device or internet. To do so:
Click the Insert Image option from the more options drop-down in the Rich Text Editor ribbon.
Select Upload from Disk to insert an image from local device.
Select Link from Web to insert an image from the internet.
Resize the image to Small, Best Fit, or Original as desired.
Click on the image and select Remove to delete the image from the email body.
 Note: You can also copy-paste images to the Mail Composer.
Annotating images
To annotate an image in the Mail Composer:
Paste the copied image into the Mail Composer.
Select the image, then click More > Edit.
Choose the required annotation option from the left pane and click Save Changes.
Notes:
To close the annotation tool, click Discard in the top-right corner.
Inserting Signature
You can have multiple email signatures and customize them according to your email address or email alias used from the Mail web app. In Trident, the default signature will appear in the editor whenever the Mail Composer is invoked. To switch between other signatures:
Click the Signature
icon in the Mail Composer.
Select the desired signature from the listed options.
Inserting Templates
You can choose to insert the template you wish in the Mail Composer. To do so:
Click the Templates
icon in the Mail Composer.
Select the desired template from the listed options.
Setting Email Priority
While crafting your email, you can set its priority to High/Medium/Low. This will help the recipient prioritize those emails that need to be attended to immediately. To set email priority:
Click the More options
icon in the Mail Composer.
Choose between High, Medium, and Low priority.
Notes:
High priority emails are annotated with a red exclamatory mark
Low priority emails are annotated with a blue exclamatory mark
Medium priority emails are not annotated.
The priority annotations appear beside the Sender's Name of the recipient's incoming email.
Setting Reminders
Click the Reminder
icon in the Mail Composer.
In the pop-over, select whether you want to be reminded At a Specific Time, If Nobody Replies by, or On Every Reply.
Pick the date and time.
Choose to receive the reminder either via Notification or Email.
Check the Remind Recipients Also option to send the reminder to the email recipients.
Click Set Reminder.
Emails for which you've set reminders will have a bookmark indication.
When you set the reminder mode as Notification, you'll receive the reminder notification through Streams.
Learn how to set email reminders from the mail list view and the detail view.
Requesting Read Receipts
Click the Main Menu
icon on the top-left corner of the app.
Select Settings from the menu list.
Select Mail.
Go to the Mail Composer section.
Toggle on the Ask Receipts option.
Sending Read Receipts
When other people send you emails, and they request a read receipt, you can choose to configure the setting to either always send it automatically, never send it, or ask you first each time to send it. To configure the read receipt setting:
Click the Main Menu
icon on the top-left corner of the app.
Select Settings from the menu list.
Select Mail.
Go to the Mail View Options section.
Scroll down to the Send Read Receipts section.
Choose between Always, Never, and Ask Me.
Always | Automatically sends the read receipt. |
Never | Doesn't send the read receipt even if the sender has requested it. |
| Ask Me | A consent pop-up will appear asking whether you want to send the read receipt each time you receive an email in which the sender has requested the read receipt. |
- When you send a read receipt, an email will be sent to the email sender acknowledging that you've read the email.
- If the "Ask Me" option is selected, a pop-up will appear for emails sent by others requesting read receipts. You can choose to send the receipt, decline it, or decide later.
Switching From Addresses
When you're logged into multiple email accounts, you can switch the "From" address while replying to or composing a new email. This allows you to send emails from the appropriate account without logging out and back in.
To switch between from addresses:
Open the Mail Composer by clicking New Mail or replying to an existing email.
Click the current email address in the From field to open the drop-down menu listing all of your logged-in email accounts.
Select the email address you want to send the email from.
Draft the email body and click Send.
By default, the selected email account in the folder pane will be listed in the "From" field of the Mail Composer.
When switching the "From" address, some aspects, such as huge attachments, SecurePass, and so on, will be impacted. Click here to learn more.
Scheduling Emails to Send Later
The Send Later option enables you to schedule your email to be sent at a later time. To do so:
Click the Send Later
icon in the Mail Composer.
Pick the desired time and date.
Click Schedule and Send.
Notes:
By default, Tomorrow Morning schedules the email to the next day at 8:00 AM, and Tomorrow Afternoon schedules the email to the next day at 3:00 PM.
The scheduled email will be queued in the Outbox Folder and can be edited or stopped at any time until it's sent.
Sending Recurring Emails
You can schedule recurring emails that are regularly sent at a pre-defined interval. To do so:
Click the Send Later
icon in the Mail Composer.
Toggle to the Recurring tab.
Set the recurrence pattern.
Click Schedule and Send.
Note: You can edit the recurring email anytime but the recurrence pattern must be set again.Recalling Sent Emails
You can retract an email you've sent within 30 minutes from the recipients' inbox.
To recall an email from the email list:
Navigate to the Sent folder.
Hover over the email you want to recall and click the Mail Delivery Status icon.
In the pop-up that appears, click Recall Email.
Select Recall in the alert dialog box.
Alternatively, you can also:
Right-click the email.
Select Recall Email from the menu list.
To recall an email from the email detail view:
Open the email you want to recall.
Click the More Options
icon at the top-right corner of the email detail view.
Select Recall Email from the menu list.
Alternatively, you can also:
Click open the email you want to recall.
Click the More Options
icon in the toolbar.
Select Recall Email from the menu list.
Notes:
Recalling will only delete the sent email from the recipient's Inbox only if they have not deleted or shared the email.
The recipients will be notified of the recall attempt.
You cannot recall emails if the recipients are not from your organization and if the emails were sent through POP/IMAP accounts.