Enhance your WorkDrive account security with the Zoho Directory integration
Zoho Directory is a cloud-based identity and access management service that helps you authenticate and manage your organization's employees to protect your various apps and resources.
Integrating your WorkDrive account with Zoho Directory empowers you to implement robust password policies, activate multi-factor authentication, control IP address access, and more. This makes it easy for team administrators to implement solid security policies for their WorkDrive teams.

Notes:
- This integration can only be initiated from your Zoho Directory account.
- It is not necessary to create an account in Zoho Directory before integrating with WorkDrive. Once you begin the integration, an account will be automatically created, and all your WorkDrive users will be synced with Zoho Directory.
To integrate your WorkDrive account with Zoho Directory:
- Visit www.zoho.com/directory/ and sign in with your Admin credentials. The Zoho Directory Admin Panel will appear on the screen.
- Access the Applications tab in the left pane and click the + Add Applications button in the top-right corner of your screen.
- Search for and select Zoho WorkDrive from the list of supported apps, and click Add.
The Add Zoho WorkDrive window will appear. Here, you can add your existing WorkDrive account or create a new account to integrate with Zoho Directory.
Once your account is added, you can:
- Configure security policies
- Store and manage user identities using Active Directory Sync
- View a user's login history, application usage stats, and more
Configure security policies
Add extra layers of security to your account with authentication protocols. Follow these simple steps to configure security settings for your account:
Notes:
- The security policies you configure in Zoho Directory will apply to all configured Zoho apps.
- The Default policy applies to all users on your Zoho Directory account.
- Only the Default policy applies to users with a free subscription. Zoho Directory users with a paid subscription or customers who have paid for any Zoho app have the option to set up and customize security policies according to their needs.
- Zoho Directory users with a paid subscription or customers who have paid for any Zoho app can also configure security policies for third-party applications. Learn more
Single sign-on (SSO)
Enabling SSO allows users to authenticate themselves through their identity provider (Idp) (or domain). For example, if SSO is enabled for zylkercorp.com, users logging in from that domain will be verified automatically and allowed to log in.
To enable SSO:
- Go to the Security tab in the left pane and navigate to the Custom Authentication tab.
- Click on the Add Identity Provider button. An Add Idp form will appear on the right side of your screen.
- Fill in the required details and click Save. This will enable SSO for your WorkDrive account.
Security policies
Security policies are a set of customizable rules that govern user authentication.
To access the Security Policy tab:
- Go to the Security tab in the left pane. The Security Policies window will appear on the screen.
- Search for and select the policy you want to configure. The Policy window will pop up on the right side of your screen.
Notes: - If you have not yet created policies, only the Default Policy will be listed here, and will apply to all Zoho apps.
- Any changes you make to your policies will be applied to user accounts during their next sign-in or password change.
Here, you will find the below security options, which can be configured based on your needs:
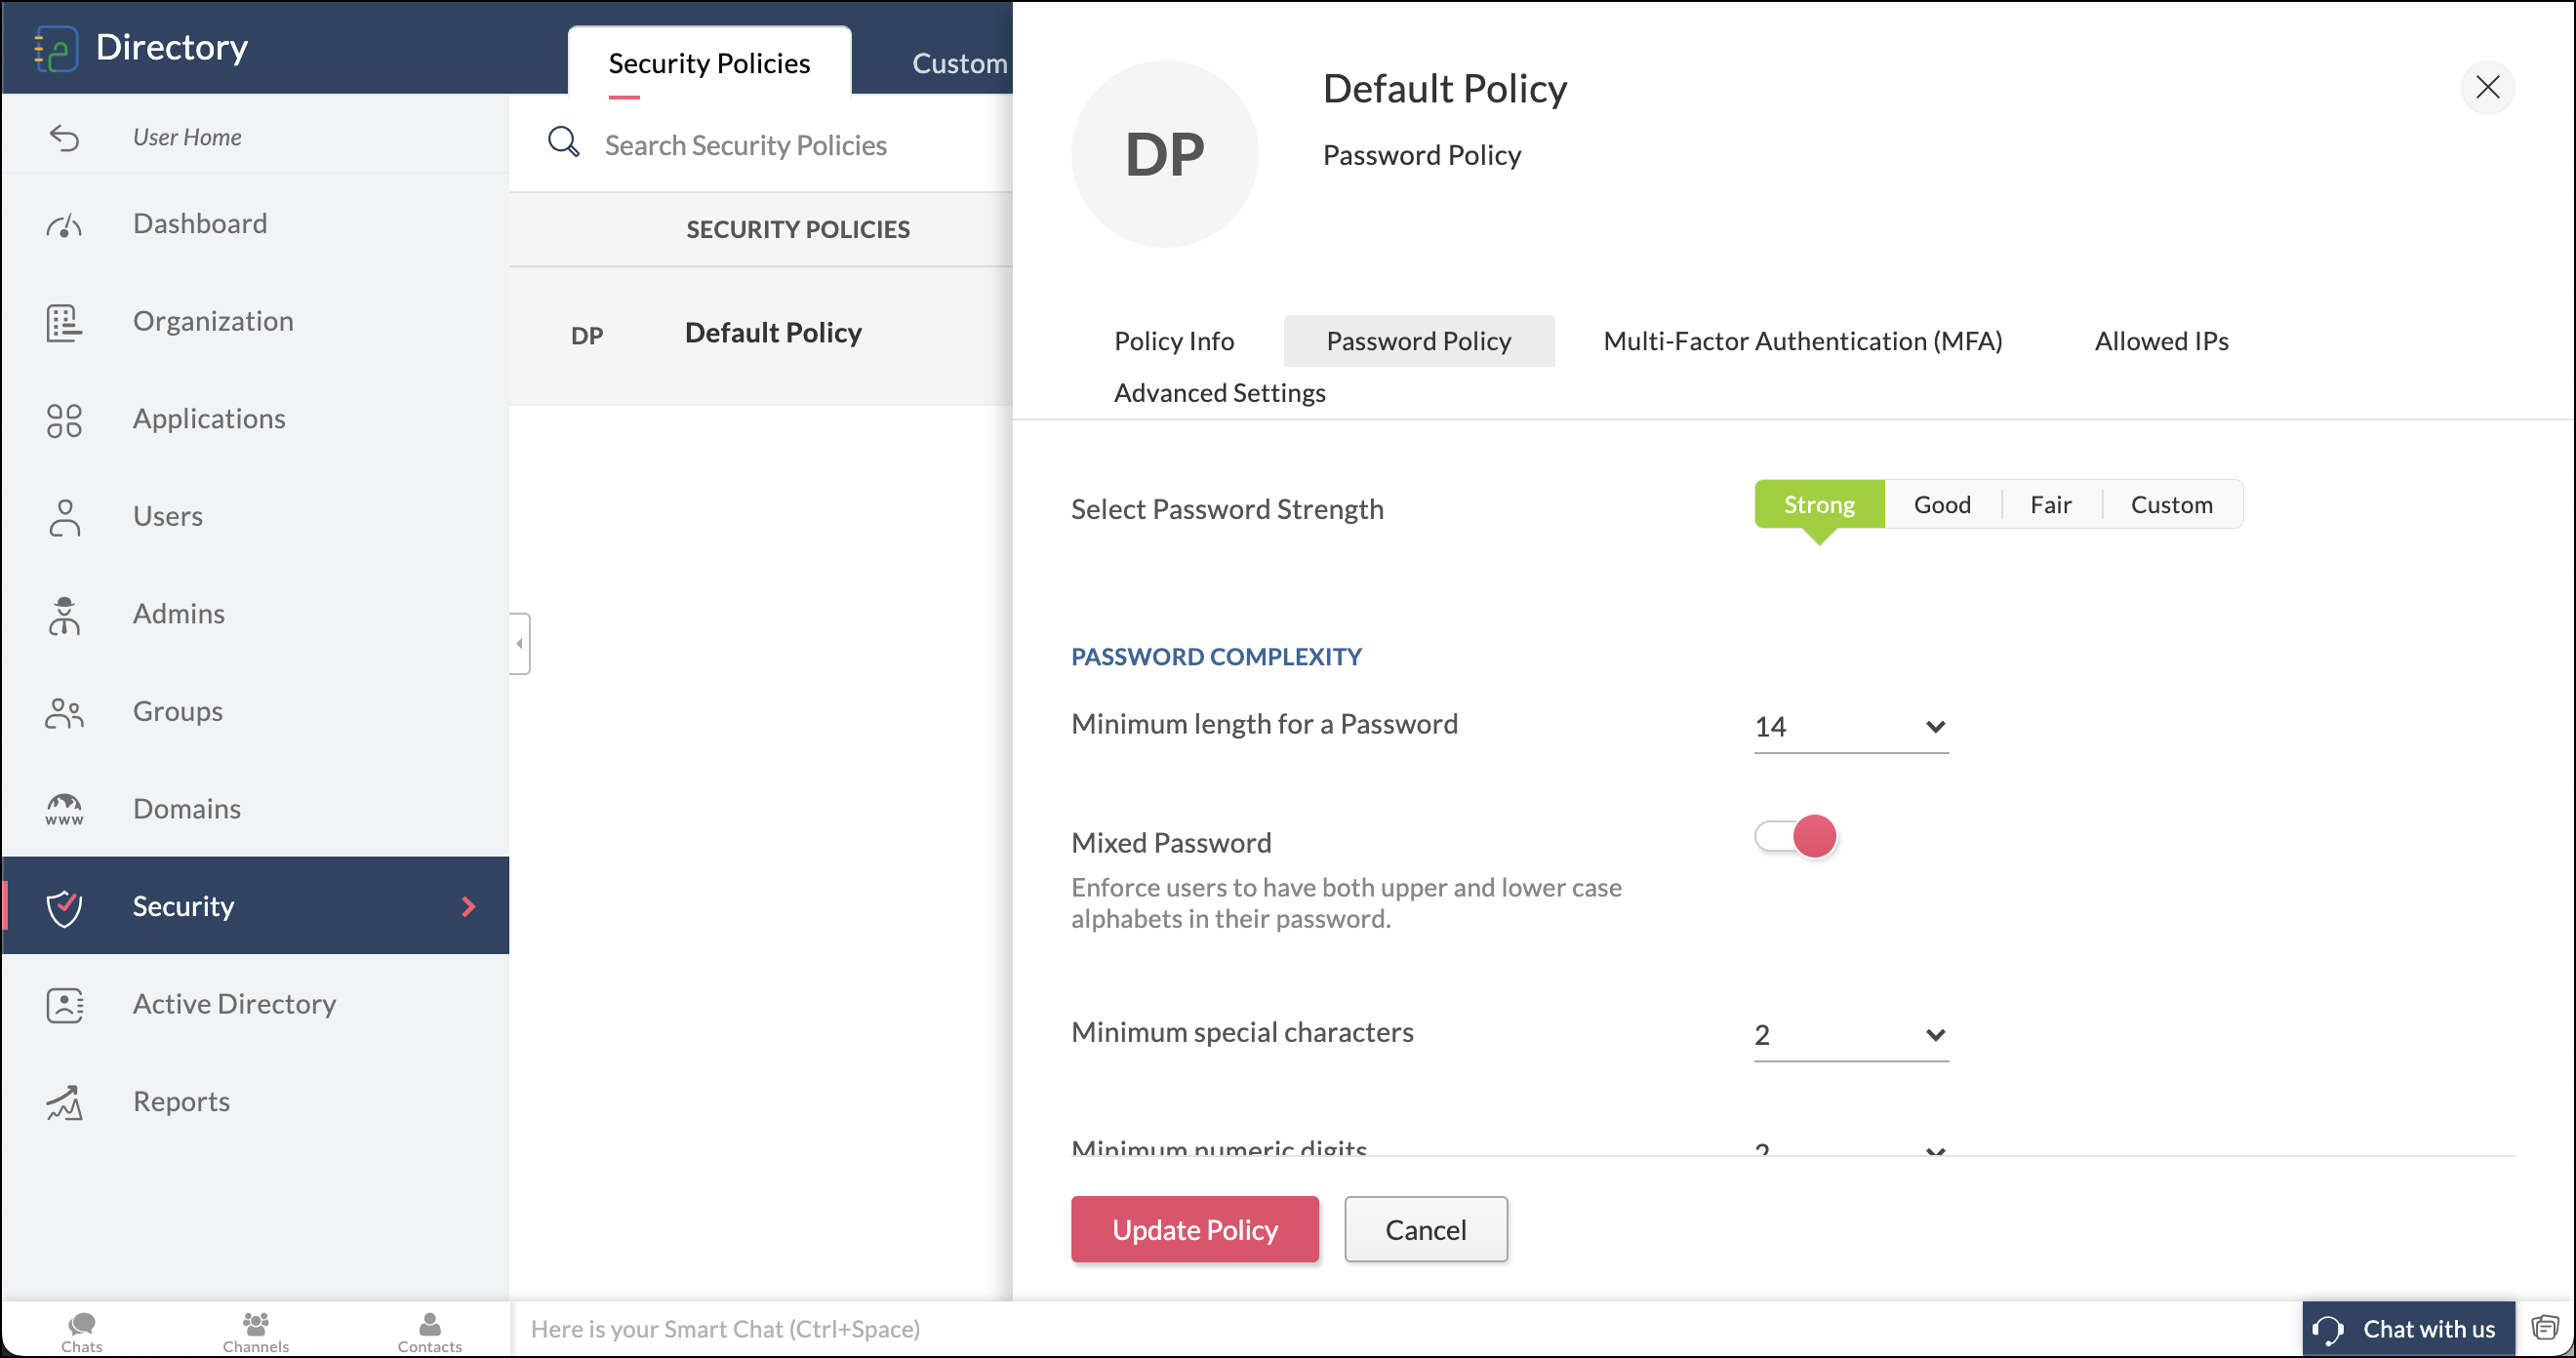
Password policy
If an employee's password is easy to guess, then it's easy to steal. Require employees to set strong passwords to prevent unauthorized data access. You can require a level of password complexity, add expiry dates, implement password reuse criteria, and more.
Multi-factor authentication
Strengthen user account security by enforcing two-factor authentication.You can enforce authentication through Zoho OneAuth, Google Authenticator, Authy, YubiKey, Titan Security Key, and more.
Allowed IPs
Restrict access to your WorkDrive account to users from whitelisted IP addresses. Multiple IP addresses can be whitelisted. Any sign-in requests from non-whitelisted IP addresses will be denied.
Advanced settings
Set the web session management parameters for session lifetimes, timeouts, and concurrent sessions.
Web session management: Easily identify users and their access permissions, and prevent anonymous access. The following session management factors can be configured:
- Session Lifetime: Users will automatically be signed out of their accounts after a predefined period.
- Session Timeout: Users will be signed out of their accounts if they stay inactive for longer than a predefined period.
- Concurrent Sessions: Users will only be allowed to participate in a predetermined number of active sessions at a time.
Active Directory Sync
The Zoho Directory Sync tool enables secure directory and password synchronization, and performs a one-way sync from your existing LDAP server to Zoho Directory. This enables you to maintain all your user identities in a single place without adding, editing, or disabling user accounts manually in Zoho Directory.
Zoho Directory Sync automatically synchronizes Zoho user accounts with the applicable user data in Active Directory. Since synchronization only takes place from Active Directory to Zoho, the data in Active Directory is never compromised.
You can download the Zoho Directory Sync tool from the Active Directory tab in the left pane. To install the tool on your device, open the downloaded file and follow the setup process.
An installation wizard will guide you through the process. Select the destination path of your choice and follow the wizard to complete the installation. After installing the Directory Sync tool, you can start your configuration steps, which will also be guided by our tool's wizard.
Once the configuration process is complete, Admins can do the following:
- Configure LDAP queries and exclusion rules to further customize the sync process.
- Sync passwords from Active Directory and eliminate the need for multiple passwords.
- Perform one-way sync to prevent changes to Active Directory data.
- Schedule automatic syncs to ensure your Zoho data is always up to date.
- Get email reports on sync statuses.
Login history and application usage stats
The Reports tab in the left pane gives you a complete login history, so you can view a user's login time, login device, and number of logins. You can also see apps they have logged into (in cases when third-party applications are integrated with WorkDrive), and more.