Workflow custom fields
Workflow custom fields are versatile tools designed to collect feedback and assignees' or approvers' data, and gather critical information during workflow transitions.
The following is a list of the available workflow fields in WorkDrive, along with practical examples of their usage:
- Single line text
- Purpose: Collect brief feedback or input during the workflow.
- Features:
- Set a maximum character limit.
- Define a default value if no input is provided.
- Example: Use this field to request a reviewer’s feedback, such as:
"Provide a brief summary of your review (max 150 characters)." - Multi-line text
- Purpose: Gather detailed or elaborative feedback.
- Features:
- No character limit, allowing extended responses.
- Example: Collect detailed feedback from a reviewer, such as:
“Share your observations and suggestions for improvement.” - Number
- Purpose: Capture numerical inputs or ratings.
- Features:
- Define minimum and maximum values.
- Example: Ask for a rating:
“Rate the document’s clarity on a scale of 1 to 10.” - Date & Time
- Purpose: Collect date and time information.
- Example: Use this field to schedule a task or review:
“Provide the expected completion date and time for the review.” - Date
- Purpose: Gather date-specific inputs.
- Example: Use this field to gather information about the deadline:
“Select the deadline for completing this task.” - Yes/No
- Purpose: Record binary decisions or confirmations.
- Example:
“Do you approve this document for final review? (Yes/No)” - Choice
- Purpose: Offer a set of predefined options for selection.
- Example: Provide choices for feedback:
“Select the type of document review: [Grammar Check, Content Accuracy, Formatting].” - Email Address
- Purpose: Collect assignee or approver email addresses.
- Example:
“Enter the email address of the approver(s) in the workflow.”
To create custom workflow fields
- Click Admin Console in the bottom-left corner of your WorkDrive account.
The Admin Console page will open in a new tab. Dashboard tab will be selected by default. - Click the Workflows tab in the left pane to open it on the right.
- Open an existing workflow or click the + New workflow option to create a new workflow.
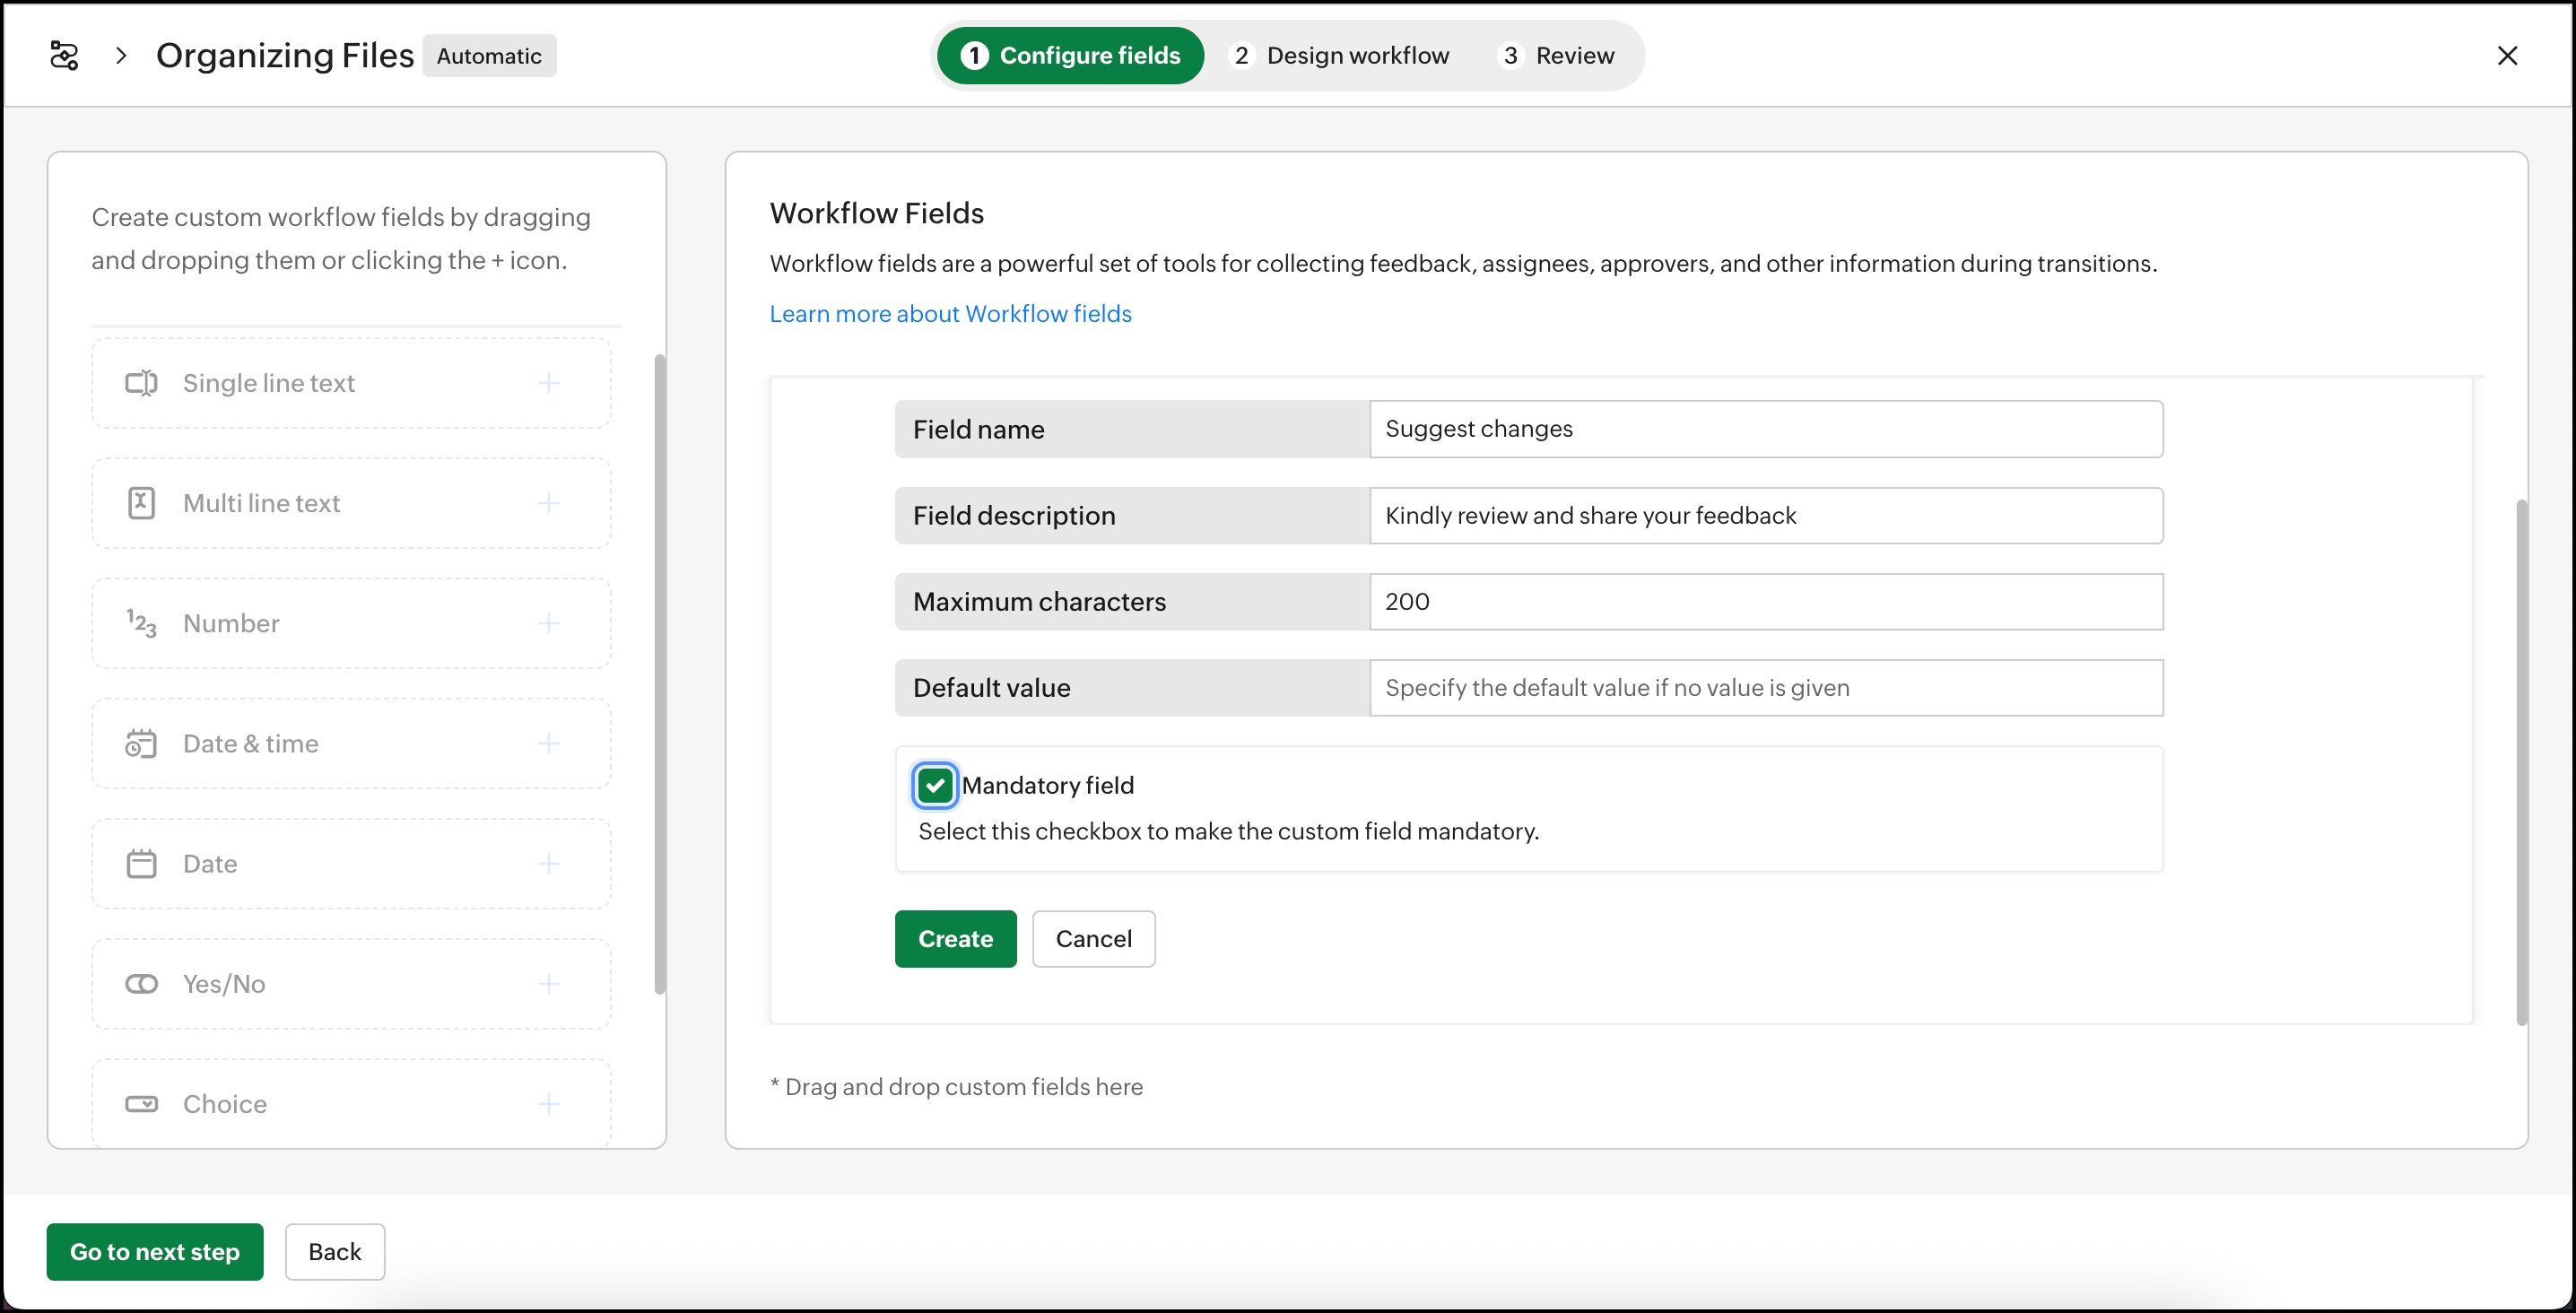
The Workflow Design window will appear with the Configure Fields tab selected by default. - Drag and drop the desired custom fields from the left pane to the right pane, or click the + icon next to the field name.
- Enter the custom field values as required for your template.
- Enter the necessary details for the custom field:
- Field Name: Provide a name for the custom field.
- Field Description: Optionally, add a description for the field.
- Default Value: Specify a default value to use if no input is provided.
- To make the custom field mandatory for users when associating it with a workflow, select the Mandatory Field checkbox.
- After filling in the custom field details, click Create.
Repeat the above steps to create additional custom fields for your workflow.
To associate custom fields in a workflow
In the Workflow builder, switch to the Configure Fields tab to create the required custom workflow fields, then return to the Design Workflow tab to associate them with transitions.
- In the Design Workflow tab, click on any transition. The Transition pane will appear on the right.
- Navigate to the During tab within the Transition pane to find the Get feedback or details section.
- Click the + Add Workflow Field option to associate any of the created fields with the selected transition.
- Use this feature to gather essential information such as feedback, assignee/approver details, or other critical data from users during the workflow transition.
Adding participants to a manual workflow
Unlike automatic workflows, where participants are pre-assigned for the initial transition, manual workflows offer flexibility to add participants at the beginning. The person initiating the workflow can choose who will participate in that specific workflow.
To design a manual workflow with this flexibility:
- Click on the created initial transition name to open the transition pane on the right. You'll see two tabs: During and After.
Info: You can collect assignees/approvers data directly from users via the email address field and use them anywhere in the workflow transitions. - In the During tab, select + Add Workflow Field and choose Create a workflow field. This will open the Configure Fields window.
- In the Configure Fields window:
- Drag and drop the Email Address field from the left pane to the right, or click the + icon next to it. This will open the Email Address field configuration on the right.
- Provide a name for the field and, optionally, a description to clarify its purpose.
- Specify whether the field should accept a single email address or multiple email addresses, based on your requirement.
- If it's essential for users to fill in this information before starting the workflow, mark the field as Mandatory by checking the Mandatory field option.
- Click Create to save the field.
- You can then associate the created workflow field to gather participants' information at the start of the manual workflow.
Manage Workflow Fields
To edit the created workflow fields:
 Important: You cannot edit the custom fields of a workflow when the workflow is in an active state; deactivate the workflow to make the necessary changes.
To deactivate workflow: Click Disable and edit workflow at the bottom of the design window and select Deactivate in the confirmation dialog box.
- In the Workflow builder, navigate to the Configure Fields tab. Here you'll find the list of all your created custom fields for the workflow.
- Hover over the workflow field that you wish to edit and click on the Edit icon. The Edit workflow field window will appear.
- Make necessary changes and click Update.
- Once done, to activate the workflow, navigate to the Review tab at the top and choose Enable workflow.
To delete the created workflow fields:
Important: You cannot delete the custom fields of a workflow when the workflow is in an active state; deactivate the workflow to make the necessary changes.To deactivate workflow: Click Disable and edit workflow at the bottom of the design window and select Deactivate in the confirmation dialog box.
- In the Workflow builder, navigate to the Configure Fields tab. Here, you'll find the list of all your created custom fields for the workflow.
- Hover over the workflow field that you wish to edit and click on the Delete icon.
Note: If you have added the workflow field in any transitions, you must remove it from those places first before you delete the workflow field. - Click Delete again in the confirmation dialog box.