Asana
US, IN, EU, AU, CN, JP
Available Plans:
All plans.
Available To:
| Roles | Entire organization | Team |
| Organizational Admins | ✔ | ✔ |
| Members | ✔ |
Business scenario:
An organization wants to create a website for its newly launched product.
Challenge:
Website creation involves collaboration. Teams have to keep track of each other's tasks, collaborate on idea's and acknowledge dependencies. In short they need a shared work space that leverages them to post notes, upload documents and see at a glance, what every one in their team is upto.
Solution:
Integrate Asana with Cliq to organize your work flow, convert your messages into tasks and get notified with task updates right from your Cliq's window and more.
- Install Asana extension for Cliq.
- Create and handle your tasks and organize your workflow.
- Create activity specific projects and set them as default to receive custom notifications.
- Convert your messages into task right from the chat window with just a Cliq.
- Comment on tasks and view other comments right from your Cliq window.
- Configure and modify your default workspace using the Configure action.
- View, comment and update your existing task status using Asana Widget.
What this help page will cover:
- Getting started with Asana
- Asana in Cliq
- Asana Bot
- Channels for each Project
- Message Action
- Asana widget
- Installation
Getting started with Asana
- Click here to go to Asana extension page in Marketplace. (Or)
- Go to Cliq marketplace (https://marketplace.zoho.com/cliq) --> In the Categories displayed in LHS, select Collaboration --> Asana.
- The Asana extension page will open. Here, an overview of the extension will be displayed along with screenshots and reviews.
- Click on Install button.
Asana in Cliq
Asana in Cliq consists of a personal bot, channels for each project and a message action. The initial steps to get started with Asana integration are consents and authentication as described below.
- The first time you perform any action that has to connect with Asana, you will get an authentication dialog requesting permission to connect with your Asana account. After authenticating your account, the connection will be established between your Asana and Cliq.
- Also on using any component of Asana integration the very first time (subscribing to bot, using message action) you will get a consents box requesting permission to access your data. This consents box is to ensure privacy by letting you know how your data will be handled. To know more, check out the related link at bottom of this page.
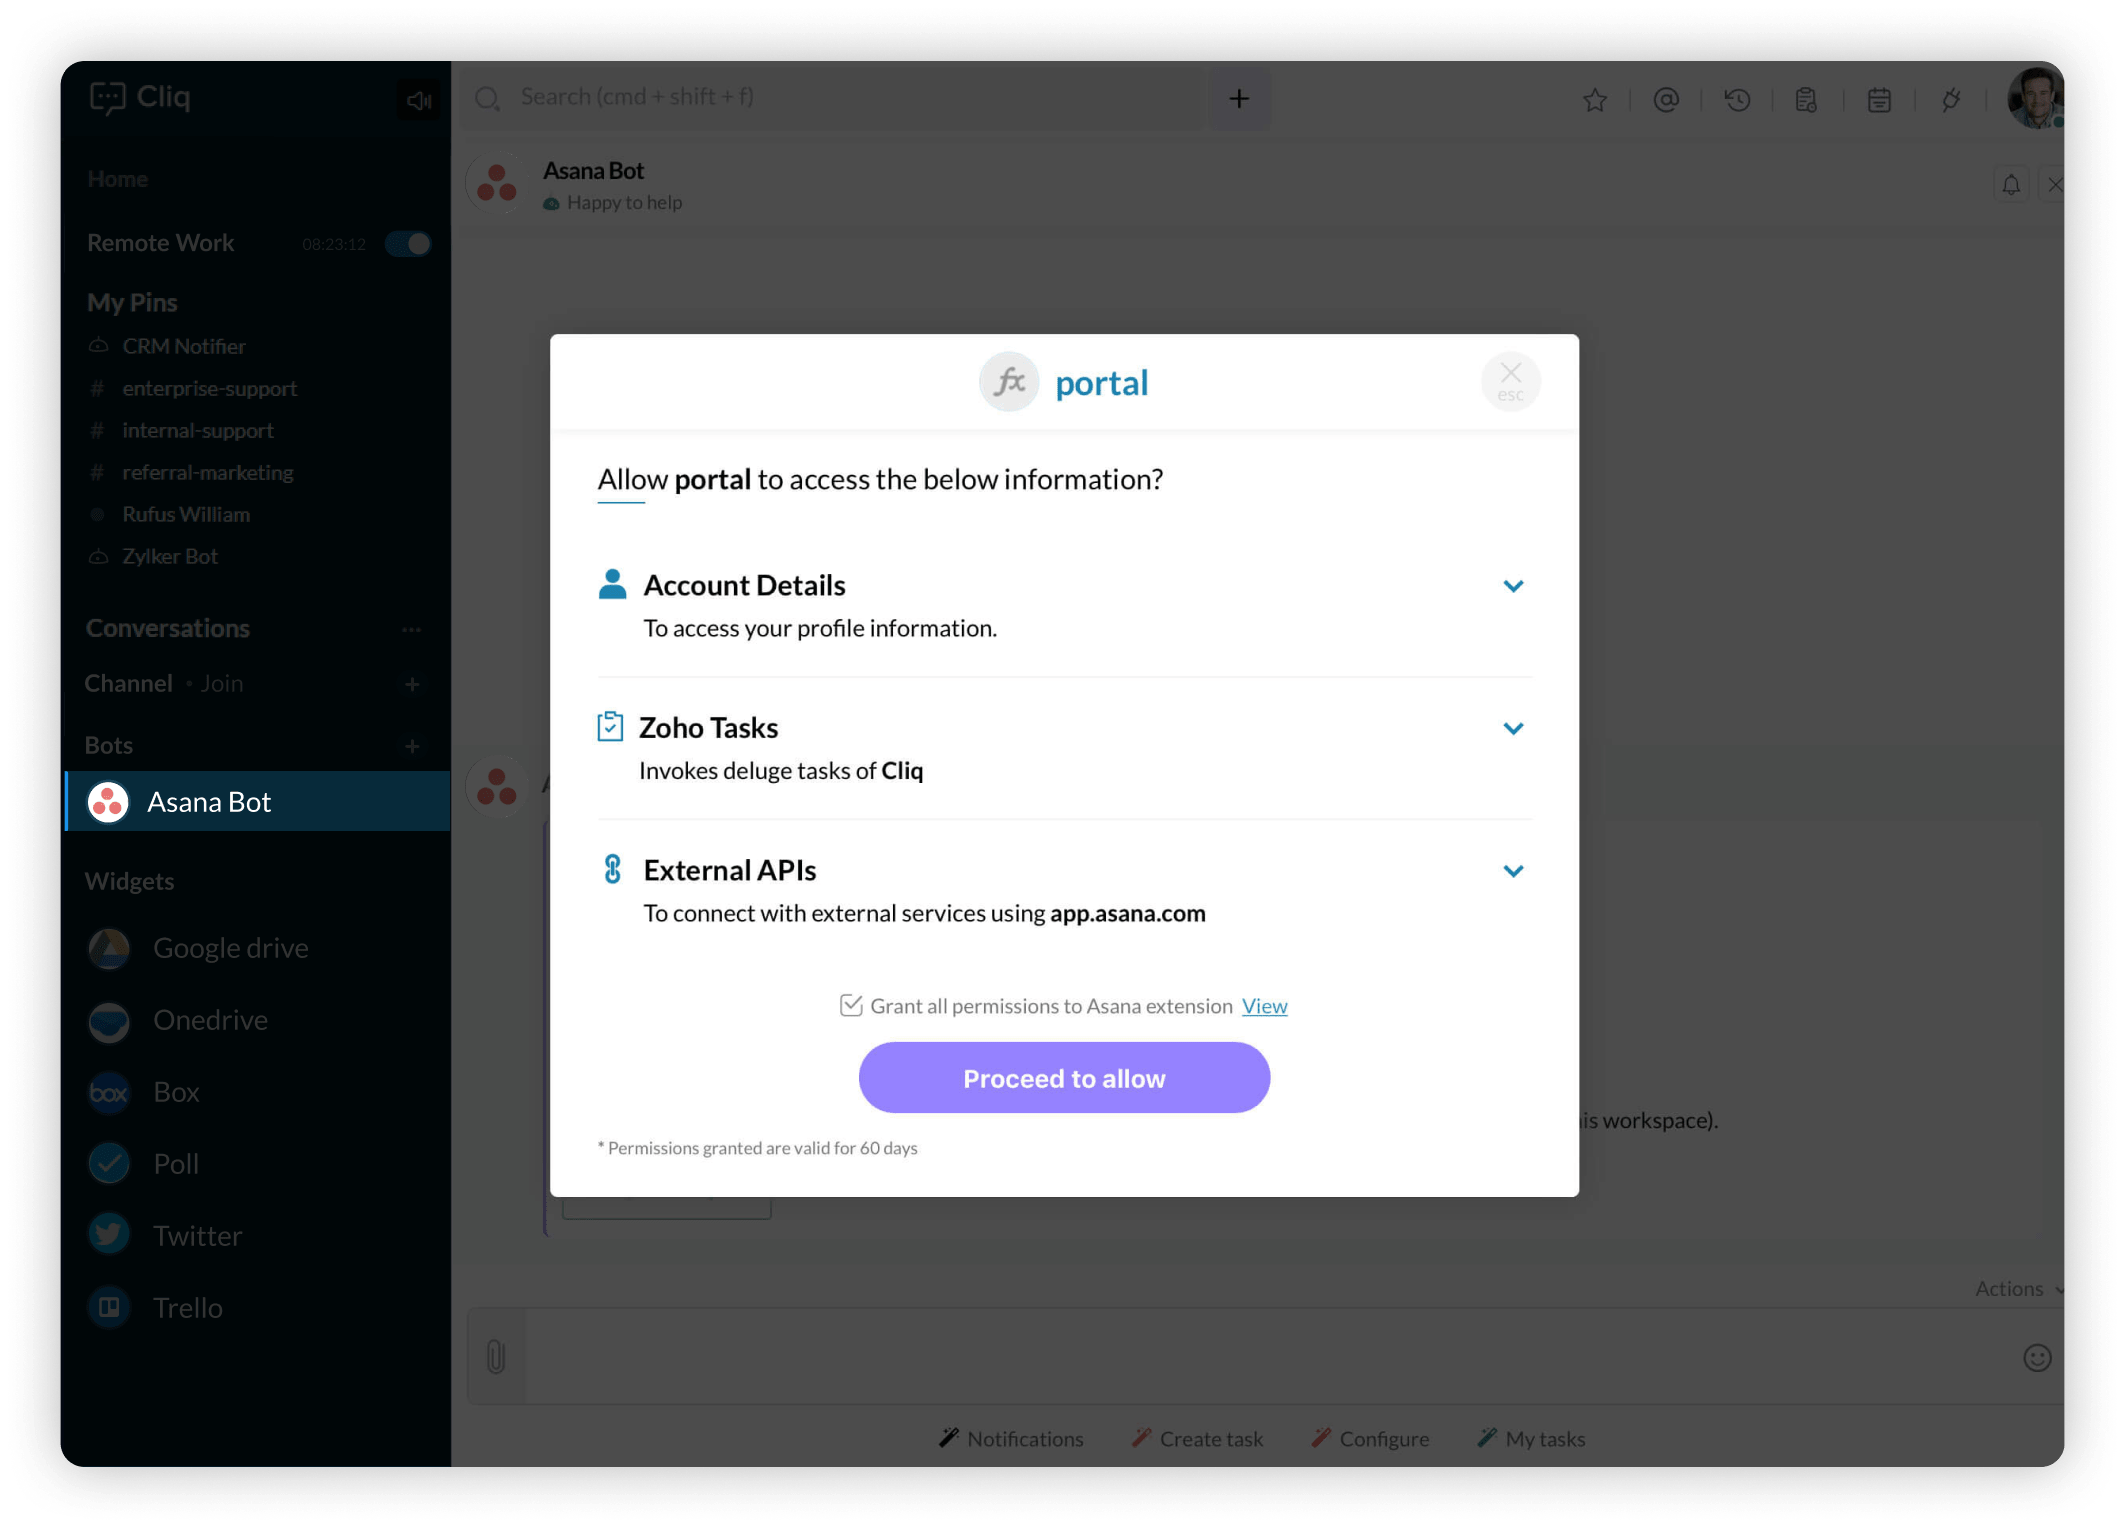
- After connecting with your account, you need to configure a Workspace in Cliq. Read on to know more.
Asana Bot
The Asana Bot is like a personal task assistant, exclusively for you. The bot will notify you of new tasks assigned and also of any updates done to your existing tasks. You can even check your tasks and add comments to it anytime by asking your bot. To get all these updates and notifications, you need to configure your workspace with Cliq. Follow the steps below:
- Click on the '+' of Bots in left sidebar.
- In the dialog that appears, look for Asana Bot, hover and Subscribe to it.
- In the welcome message, click on the Set up Workspace button, and select a workspace from your Asana account.
This workspace will be the point of connection between your Asana and Cliq accounts, i.e. all updates and task views will be from this connected workspace.
Once you've configured your workspace, you will start receiving notifications when tasks are assigned and updated! Now let's see about the Bot's actions (visible at the bottom of chat).
- Configure: This action is to set up your workspace and map projects with channels. Detailed description on mapping channels is explained below under next heading.
-
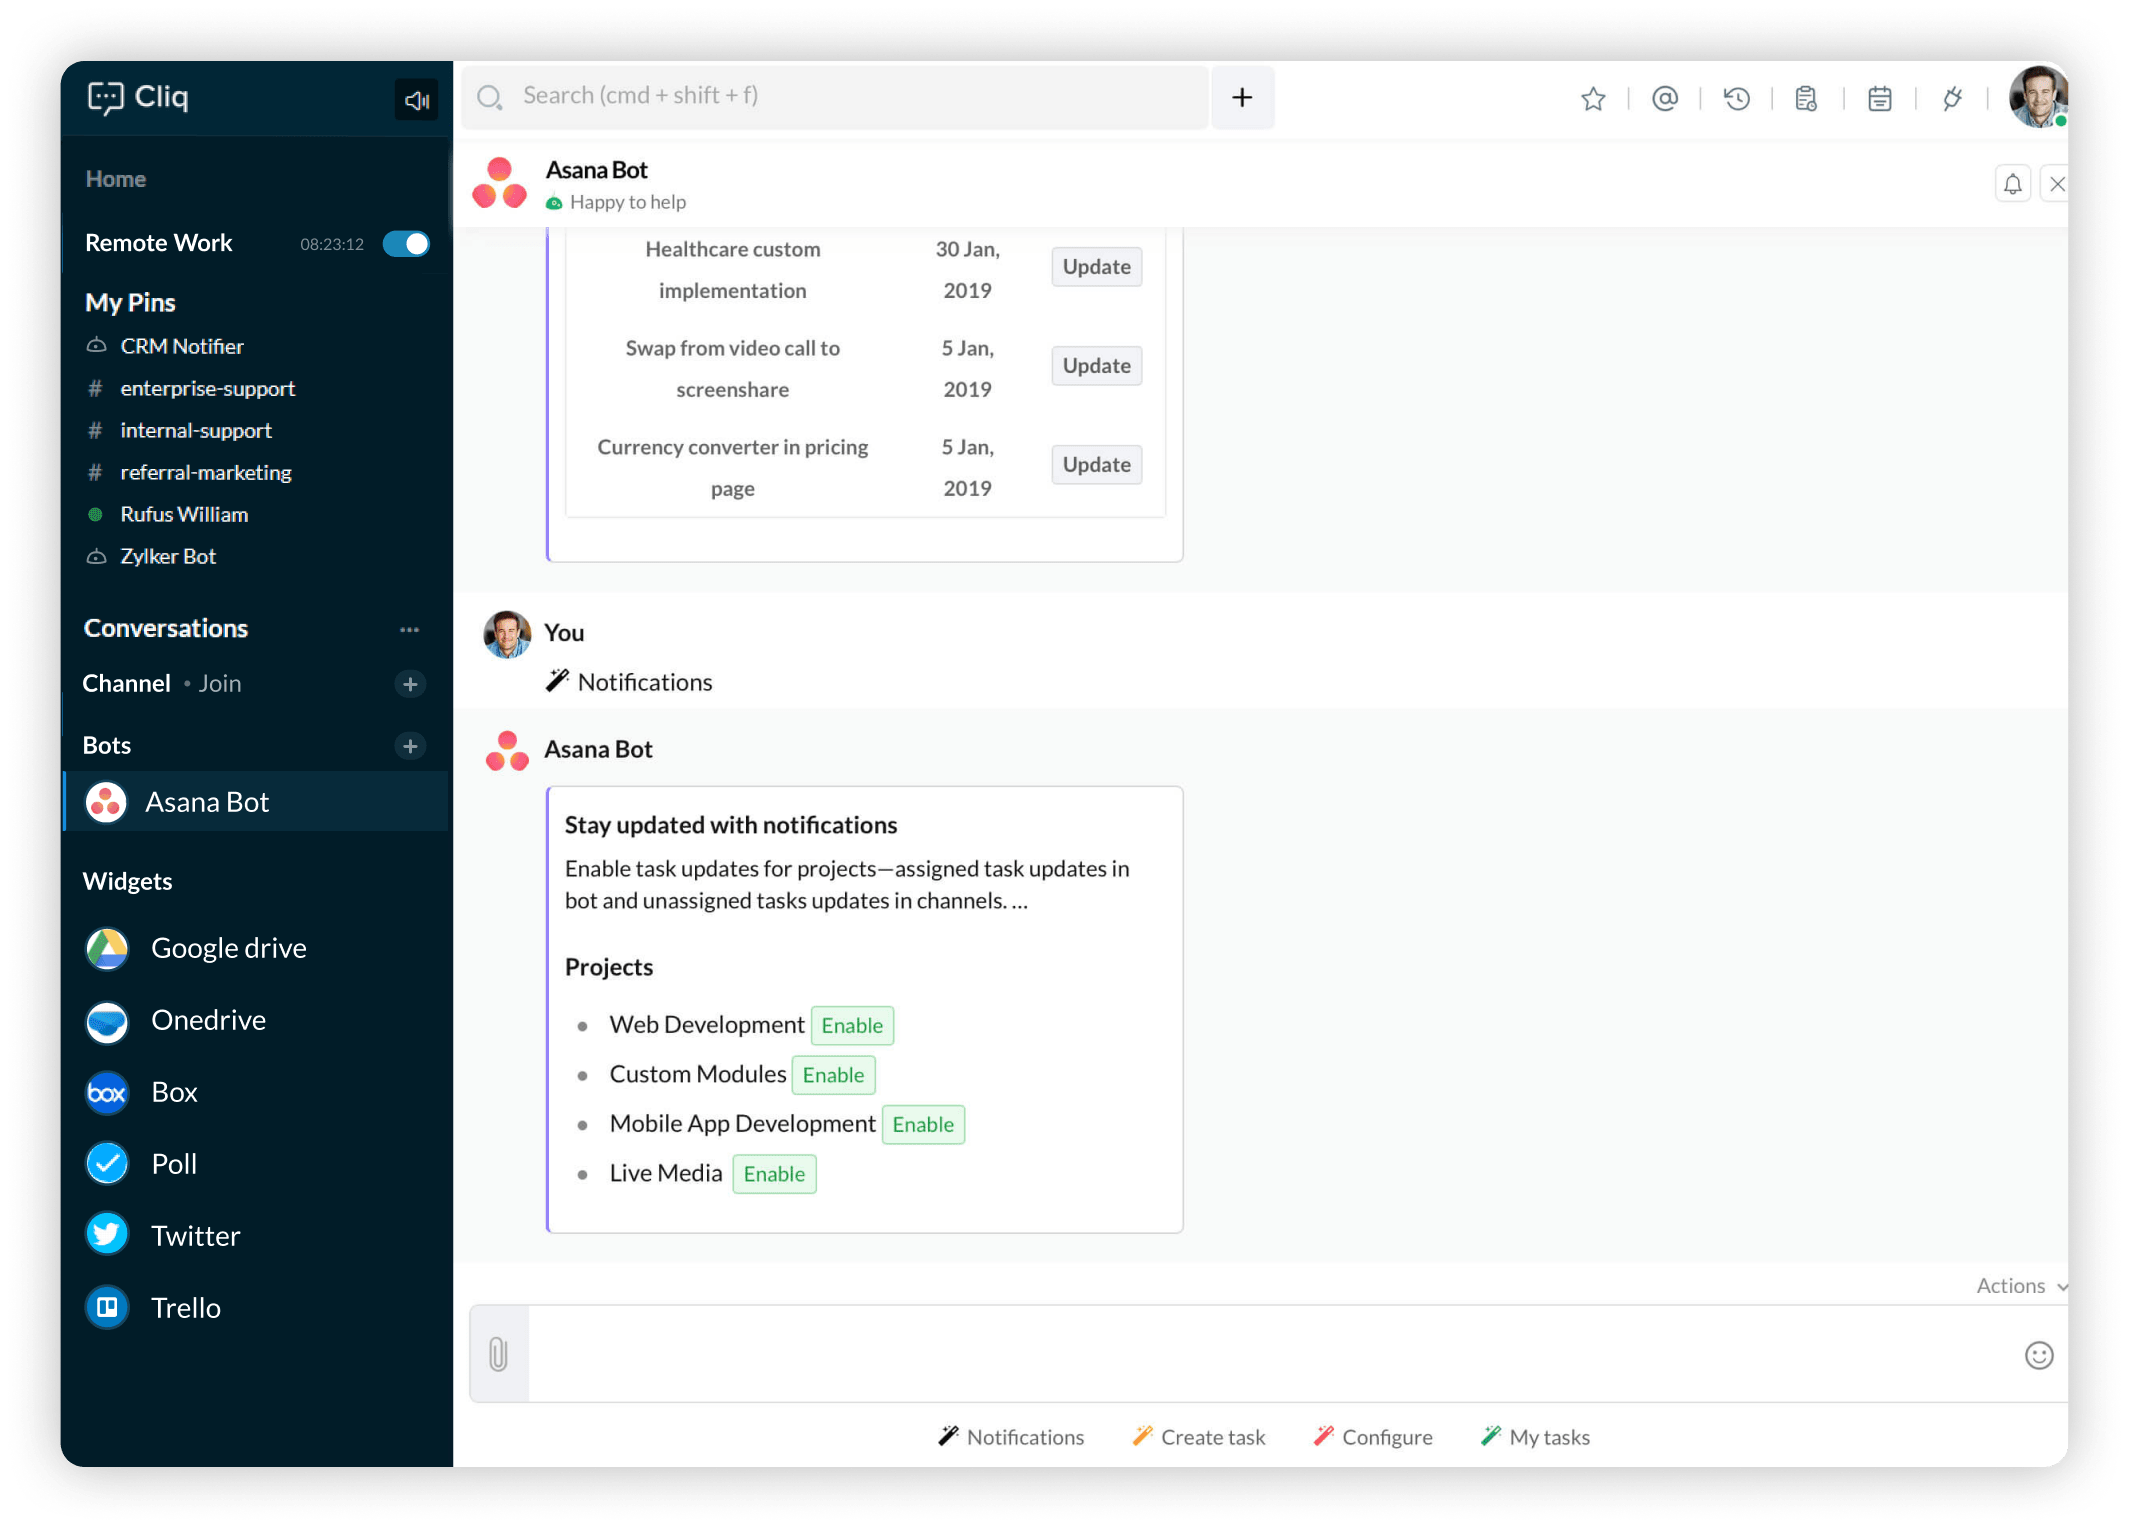
Notifications: With this action, you can choose to receive updates for projects you want to. This configuration will apply to everyone who uses the integration, i.e. if a user enables notifications for Project A, then it means that Project A is activated for the whole integration, and all users who have configured the workspace containing Project A, will receive its updates. These notifications will be segregated as bot and channel updates.
- Bot updates: When assigned tasks are updated and new tasks assigned to a user, then that update will be sent to the bot of that particular user. So user must be subscribed to the bot to not miss out on updates!
- Channel updates: When unassigned tasks are created or updated, then that update will be sent to the mapped channel as a common update for all team members. A channel must be mapped with a project to receive updates from it.
- Create task: This action is to create a task directly from Cliq into your Asana project. Just click on the action, fill in the details of the task in the form that appears, select a project, assign it to a user and finally set a due date for it.
- My tasks: On clicking this action, you will receive a list of the recent tasks assigned to you in the workspace you've configured. On clicking the Update button of a task, you can edit a task, add comments to it and view existing comments on it!
Channels for each project
Each project in your Asana workspace can be mapped with a channel to streamline the flow of updates. To map channels, open the Asana bot, click on Configure action found at the bottom of screen and then select Map Channels. A form will appear on screen wherein you can choose a project and a channel to map it with. 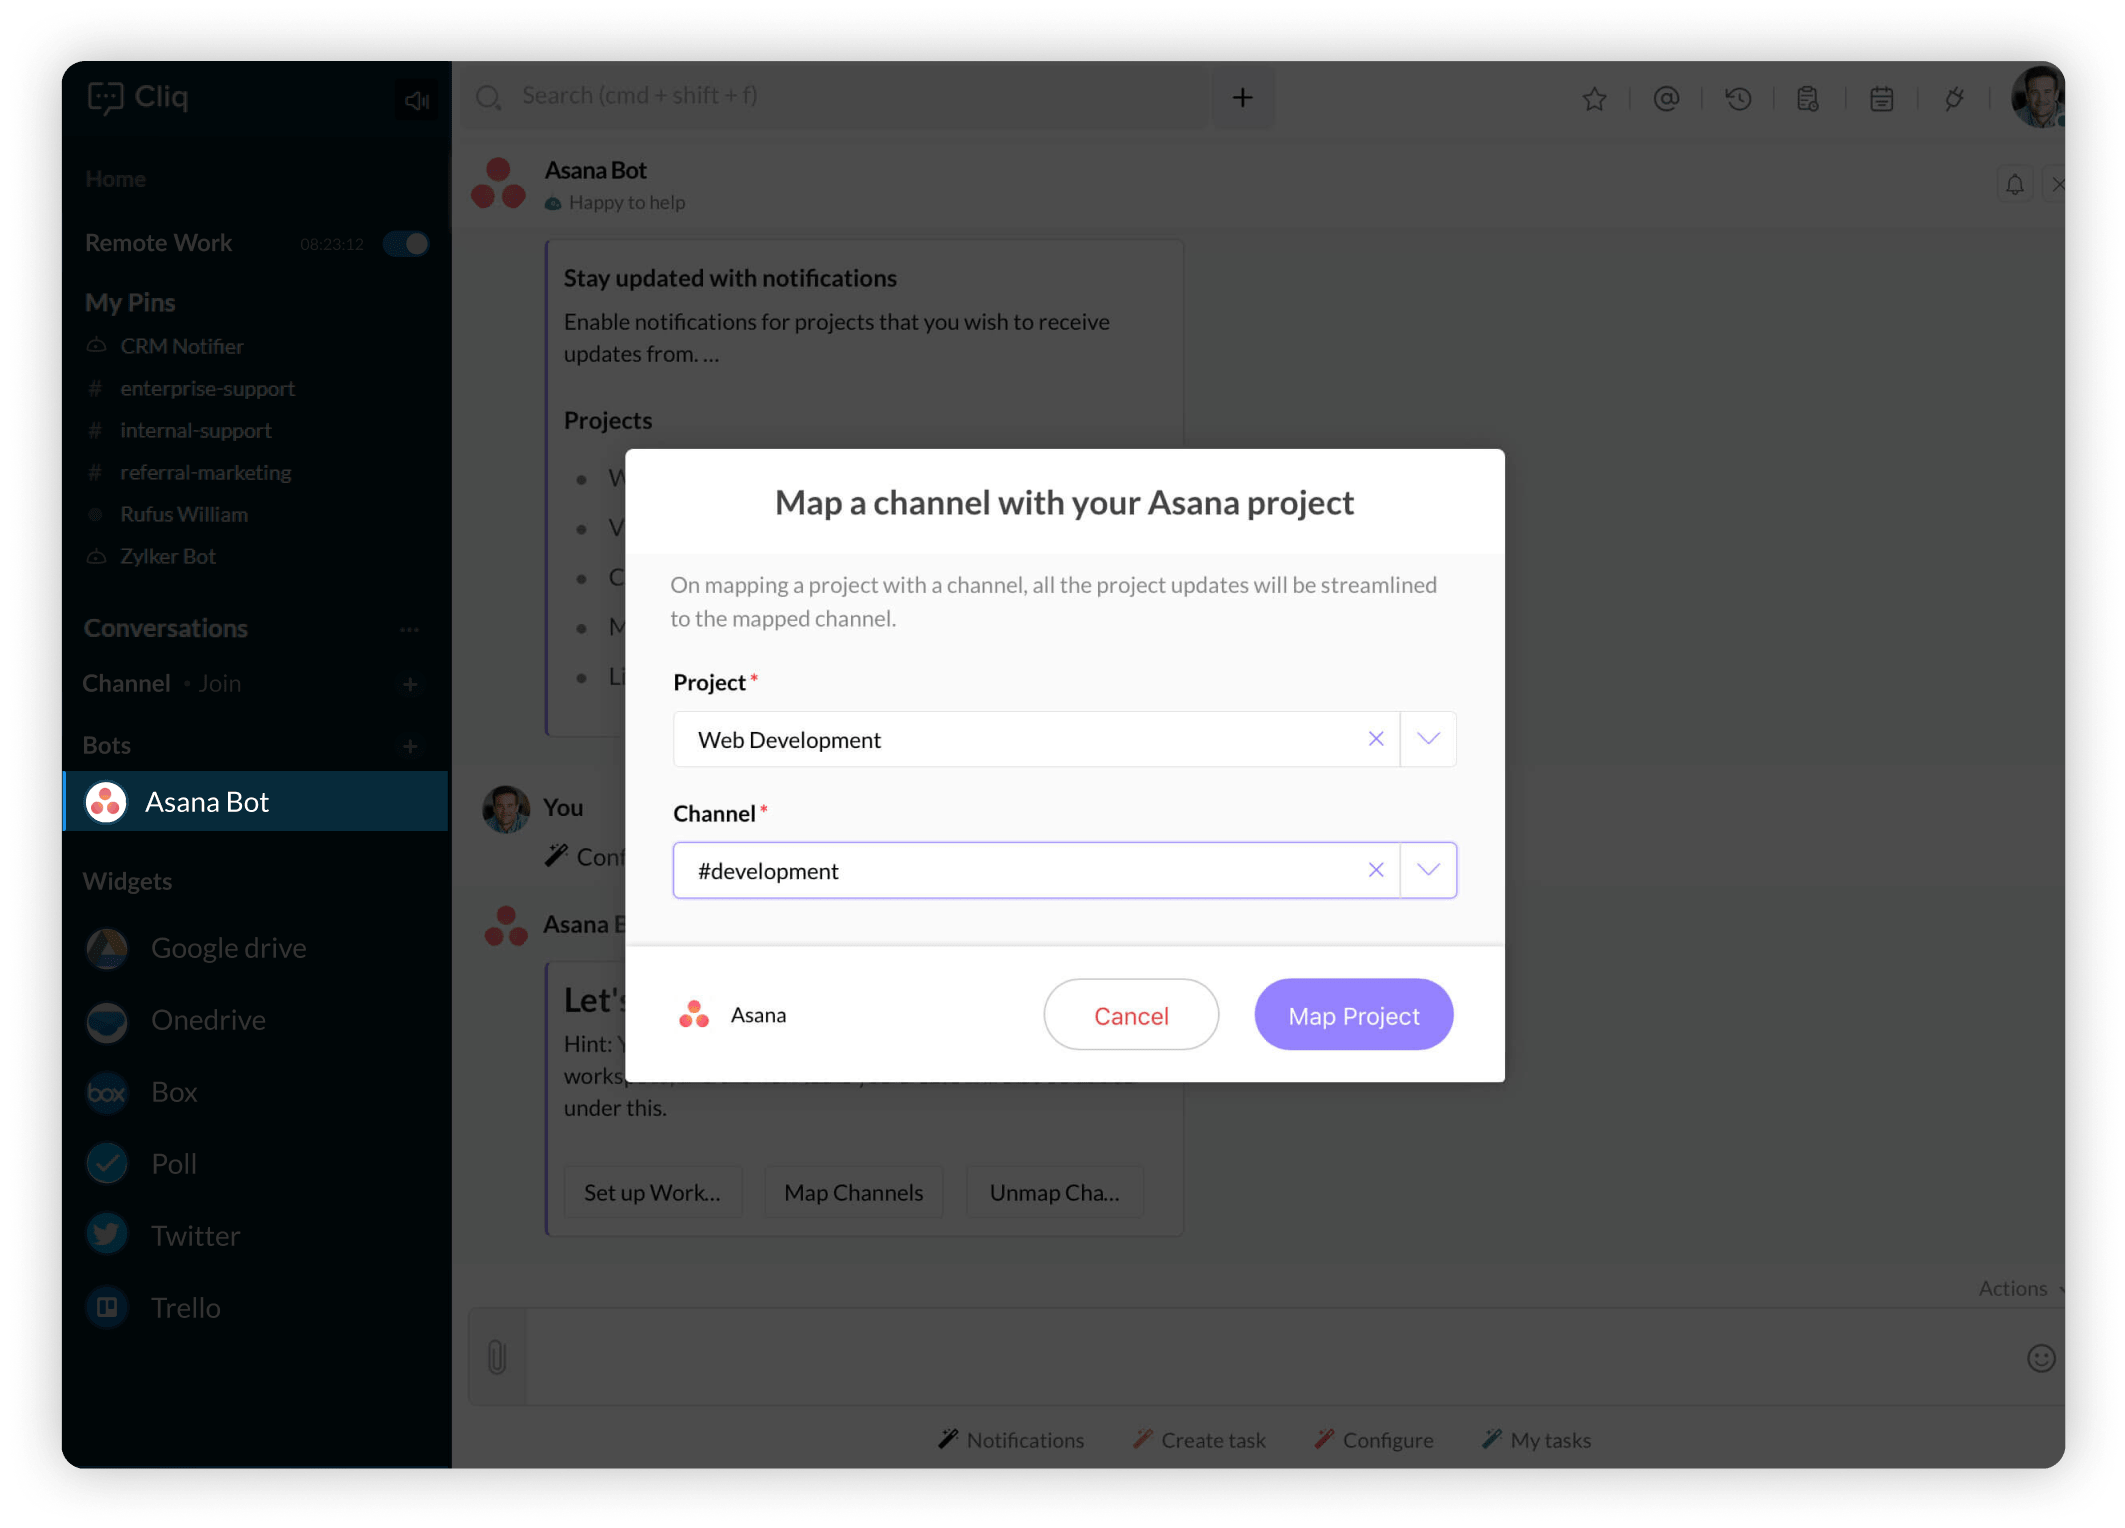
A few notes:
- The projects will be listed from your configured workspace.
- You can map only with existing channels. So first create specific channels for each project and then proceed with mapping them using the bot action. To know how to create channels, refer the help link at bottom of this page.
- Once a project is mapped with a channel, the person who installed the integration (admin) can unmap it. The Unmap Channels button will be visible only to the admin under Configure bot action.
Message Action
Turn your conversations into actions with the message action 'Create task'. Your conversations in Cliq will have a mix of new tasks, issues, future to dos, and new implementations—keep track of them all by sending it to your workspace as Tasks.
- All you have to do is hover over a message you want to add as a task, click on Actions (3 dots)-> Select. (You can also select upto 25 messages or 15 messages + 10 attachments simultaneously)
- Click on the Asana icon in the action bar at the bottom of the chat . Fill in other details like Project, Task name etc.. and click on the Submit Task button to add your messages and attachments as a task to your linked Asana account.
 Note : Creating a task message action can be performed on both texts and attachments. But the attachment size limit is only upto 3 MB. Please make sure that none of the selected files exceeds this limit during upload or that specific file will be skipped.
Asana widget
The Asana widget consists of the following tabs to manage the tasks with ease.
- Task
- Help
Task
Here are the insights you can get from the Task tab
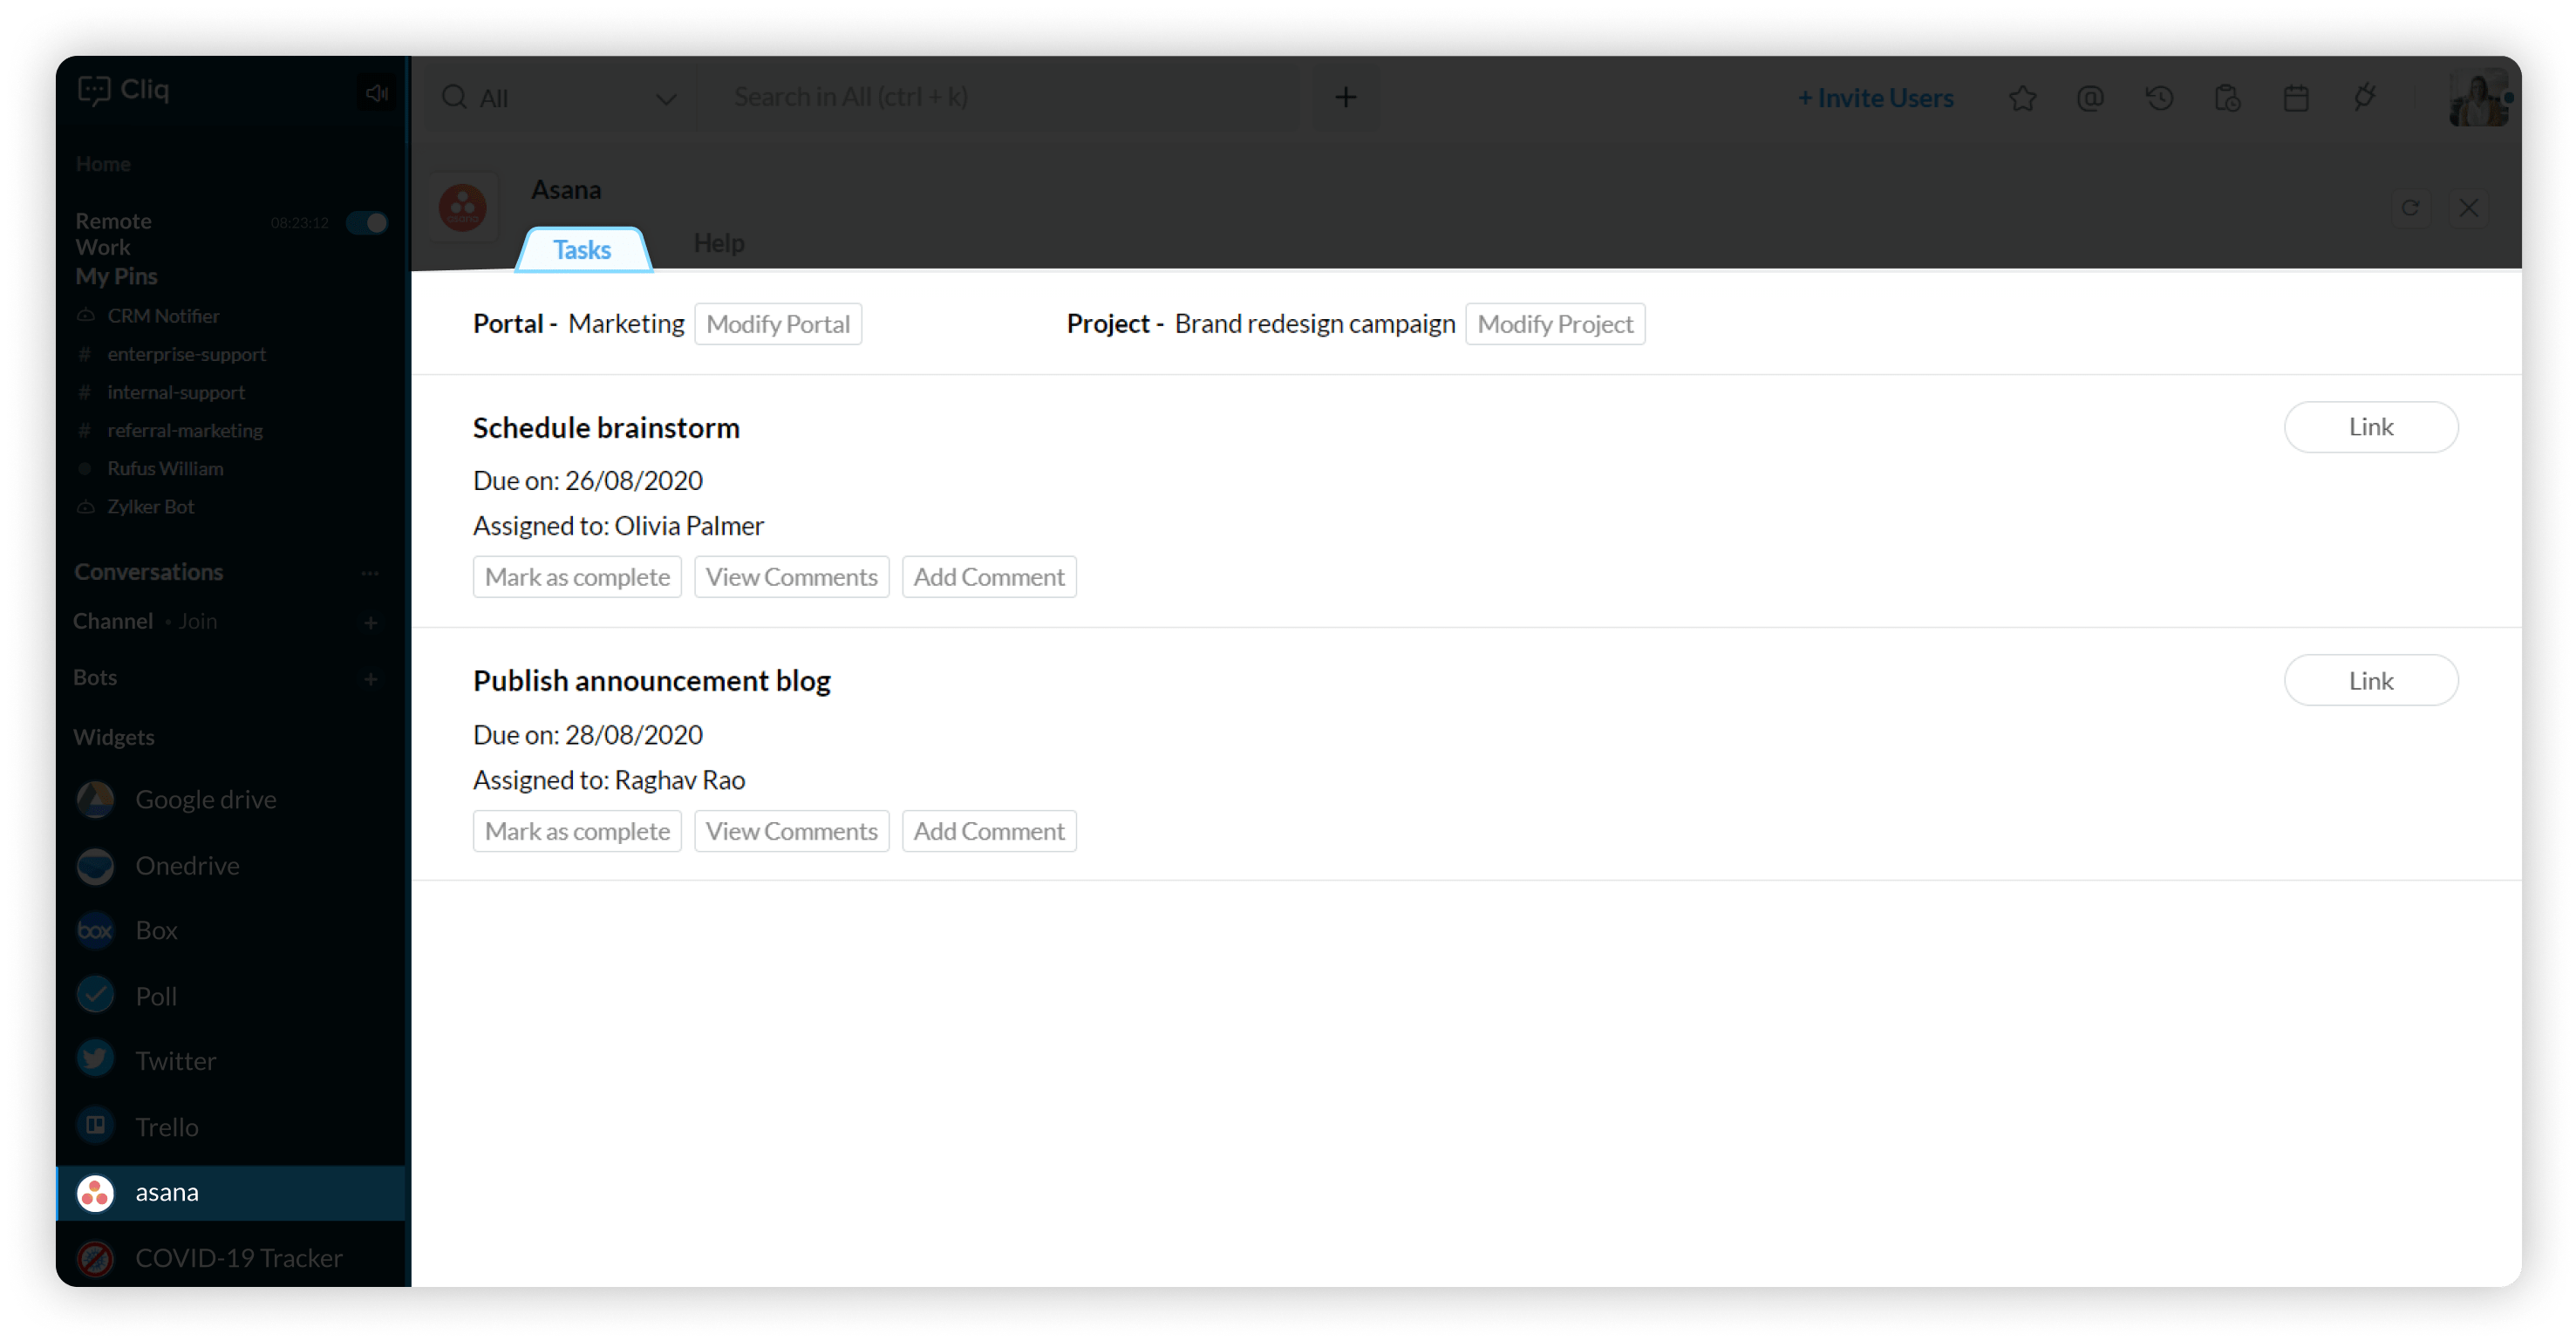
- Portal - The name of the portal under which the project has been created.
- Project - The name of the created project.
- Modify Portal - Click on Modify Portal button to change portal.
Below the Portal header you can see the all the tasks created via Asana, the details of who it is assigned to and the due date of the task. The tasks are equipped with the following options.
- Mark as complete - Once you are done with the task, click on Mark as complete button to update your status.
- View comments - To view the comments added to a task click on View comments button. On clicking it, the comments added to the task can be seen along with the name of the user adding the comment and the time of the comment.
- Add comments - To add a comment to a task, click on Add comment button, a Add comment dialog will appear, enter your comment and click on Add comments.
There is an Link button made available adjacent to each task, on clicking on it, that task will open in Asana.
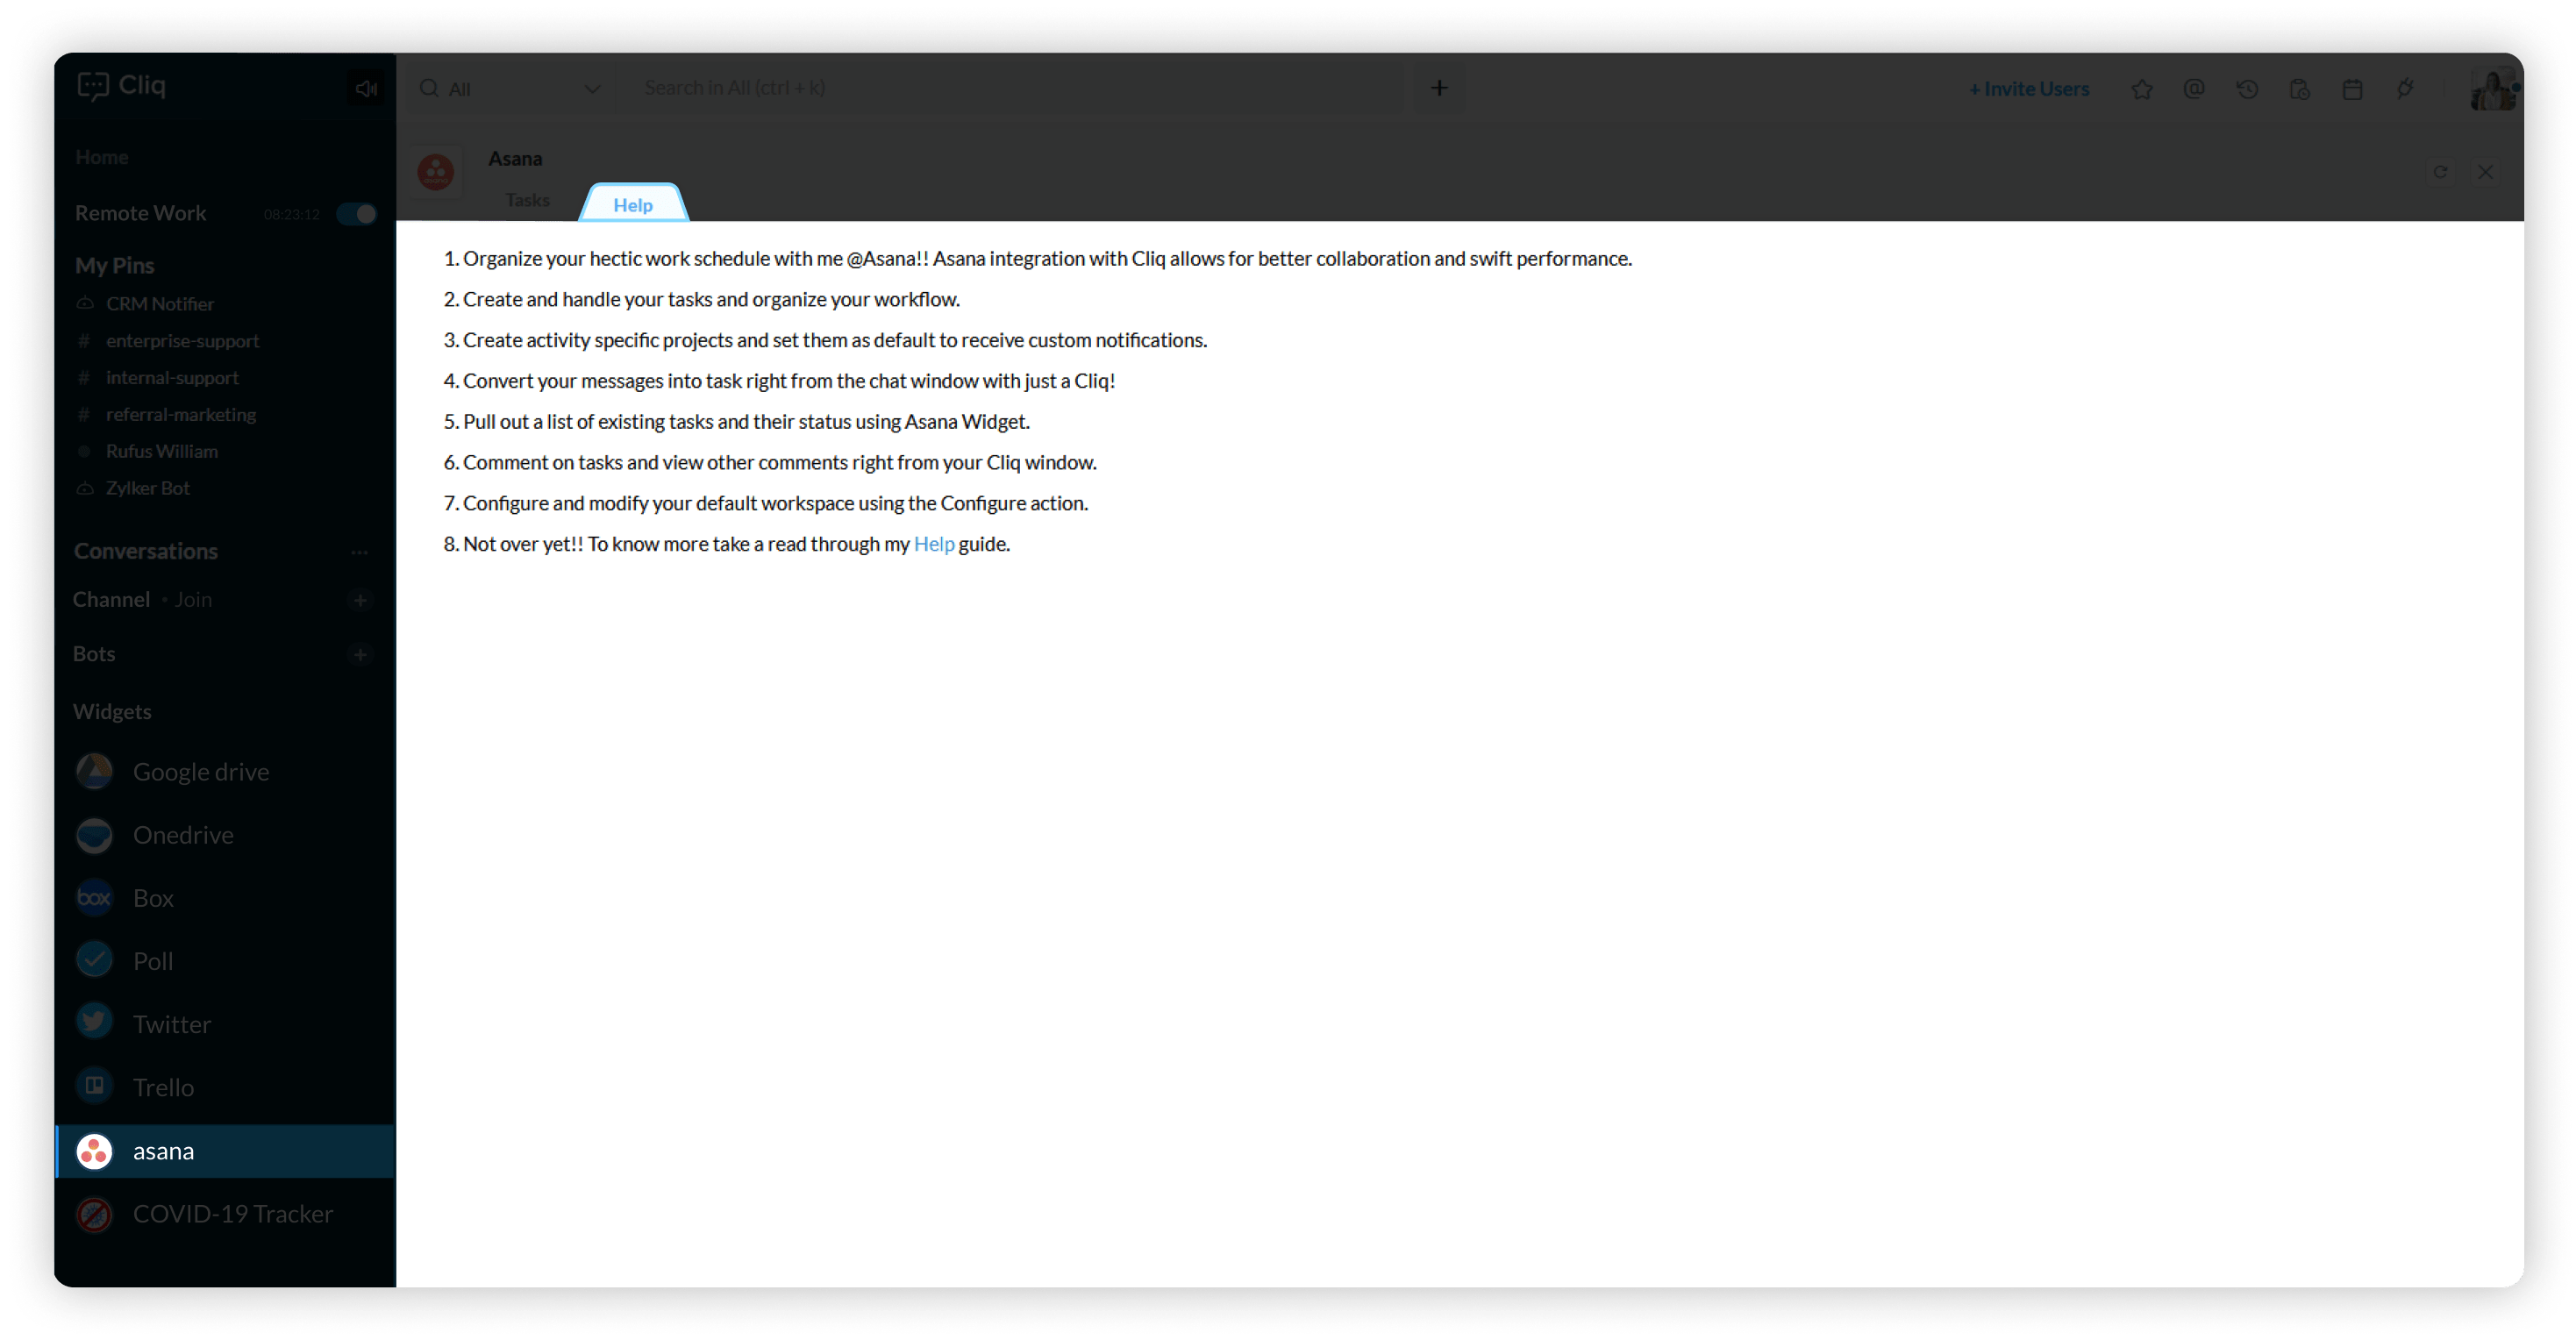
Help
The Help lists out all the capabilities available in Asana to help you use it better.
Installation
Now that you know how Asana integration works in Cliq, install it to manage your tasks, keep track of your team's performance and to turn your conversations into actions—all right from within Cliq.
Zoho CRM Training Programs
Learn how to use the best tools for sales force automation and better customer engagement from Zoho's implementation specialists.
Zoho DataPrep Personalized Demo
If you'd like a personalized walk-through of our data preparation tool, please request a demo and we'll be happy to show you how to get the best out of Zoho DataPrep.
You are currently viewing the help pages of Qntrl’s earlier version. Click here to view our latest version—Qntrl 3.0's help articles.


