Available Regions:
Getting started
Track down retarget people who stop by your site and widen your marketing point of view by installing the MailChimp integration for Cliq. Follow the given steps below to install this extension.
1. Click on the Extensions icon on the top bar followed by the Marketplace.
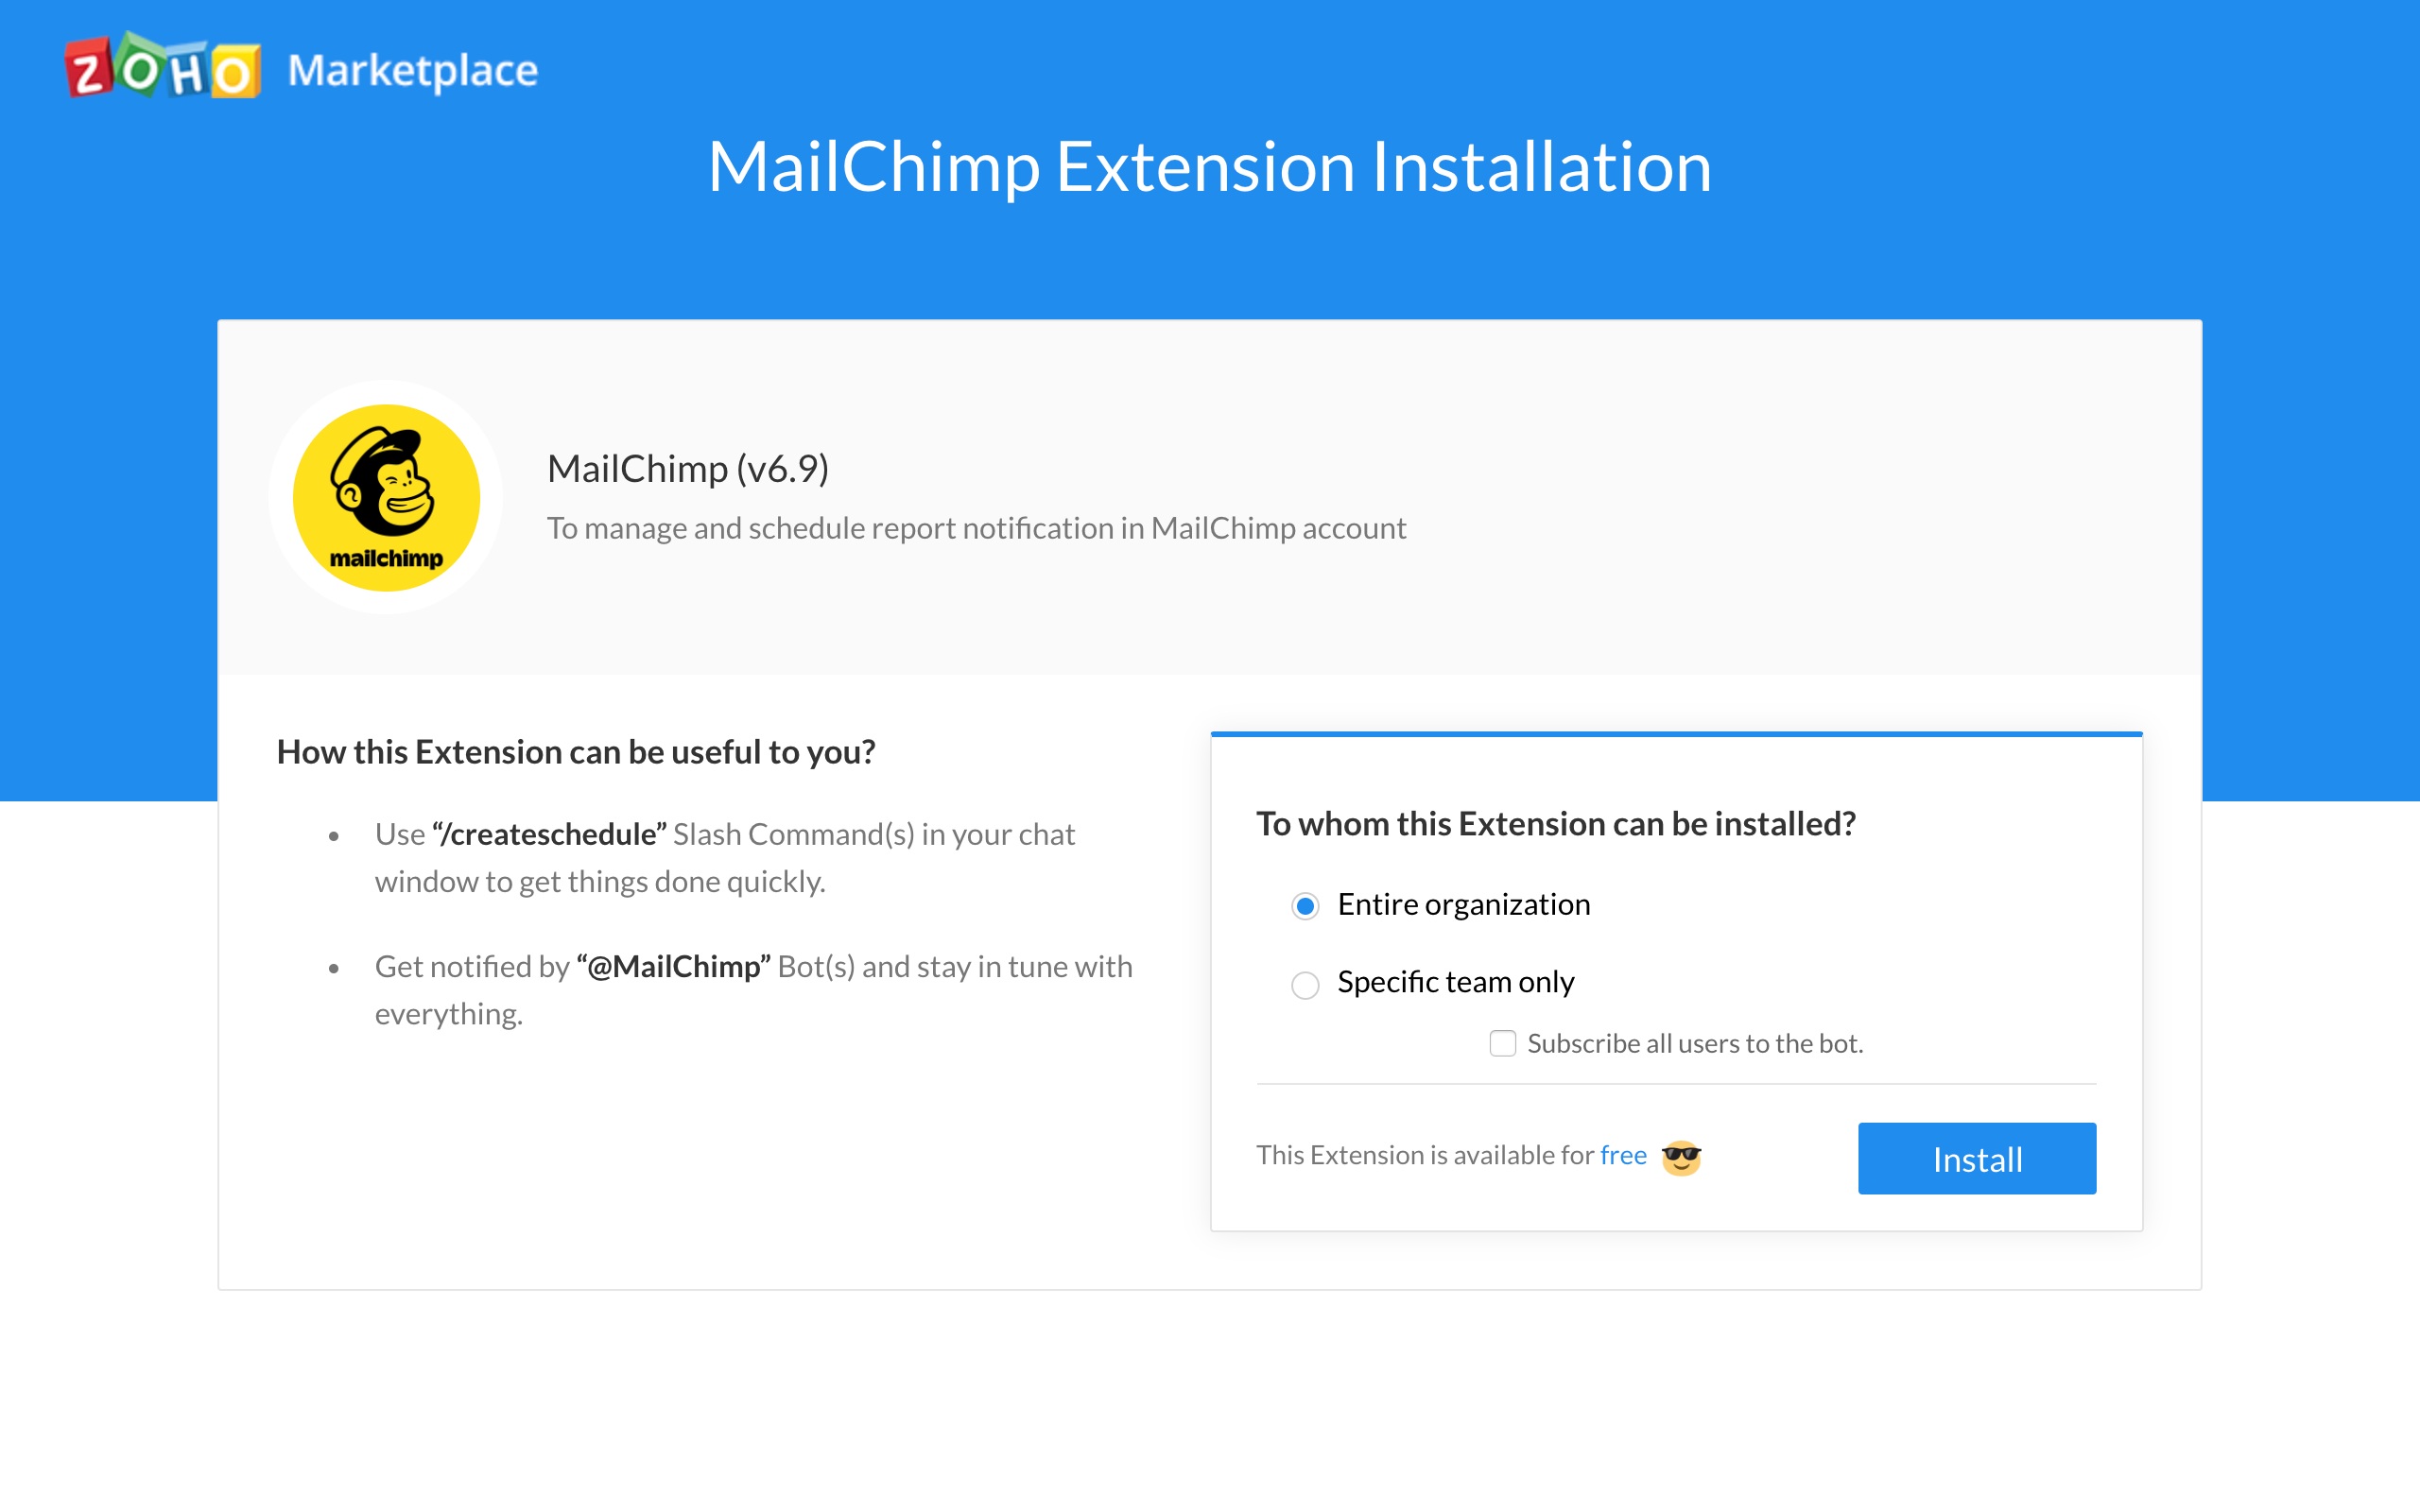
2. In Zoho Marketplace, search for MailChimp and click on the Install button.
3. Agree to the Terms of Service and Privacy Policy and click on Install.
Configure the MailChimp extension either to the entire organization or to a dedicated team in Cliq.
Entire organization
Select this option to install the extension to the entire organization.
Specific team only
Pick this option to install the extension to a dedicated team in Cliq.
Build your audience in one click using the MailChimp bot
Upon installing this extension from the Marketplace you'd be notified (Only if you are the Admin of the organization who installs this extension) about the bots utility.
If you are a member of the organization where this extension is installed, subscribe to the bot to make an optimal use of it. To subscribe,
1. Click on the + (Quick plus) icon against the Bots on the left hand side panel.
2. Look out for the MailChimp bot hover on it and click on the Subscribe button.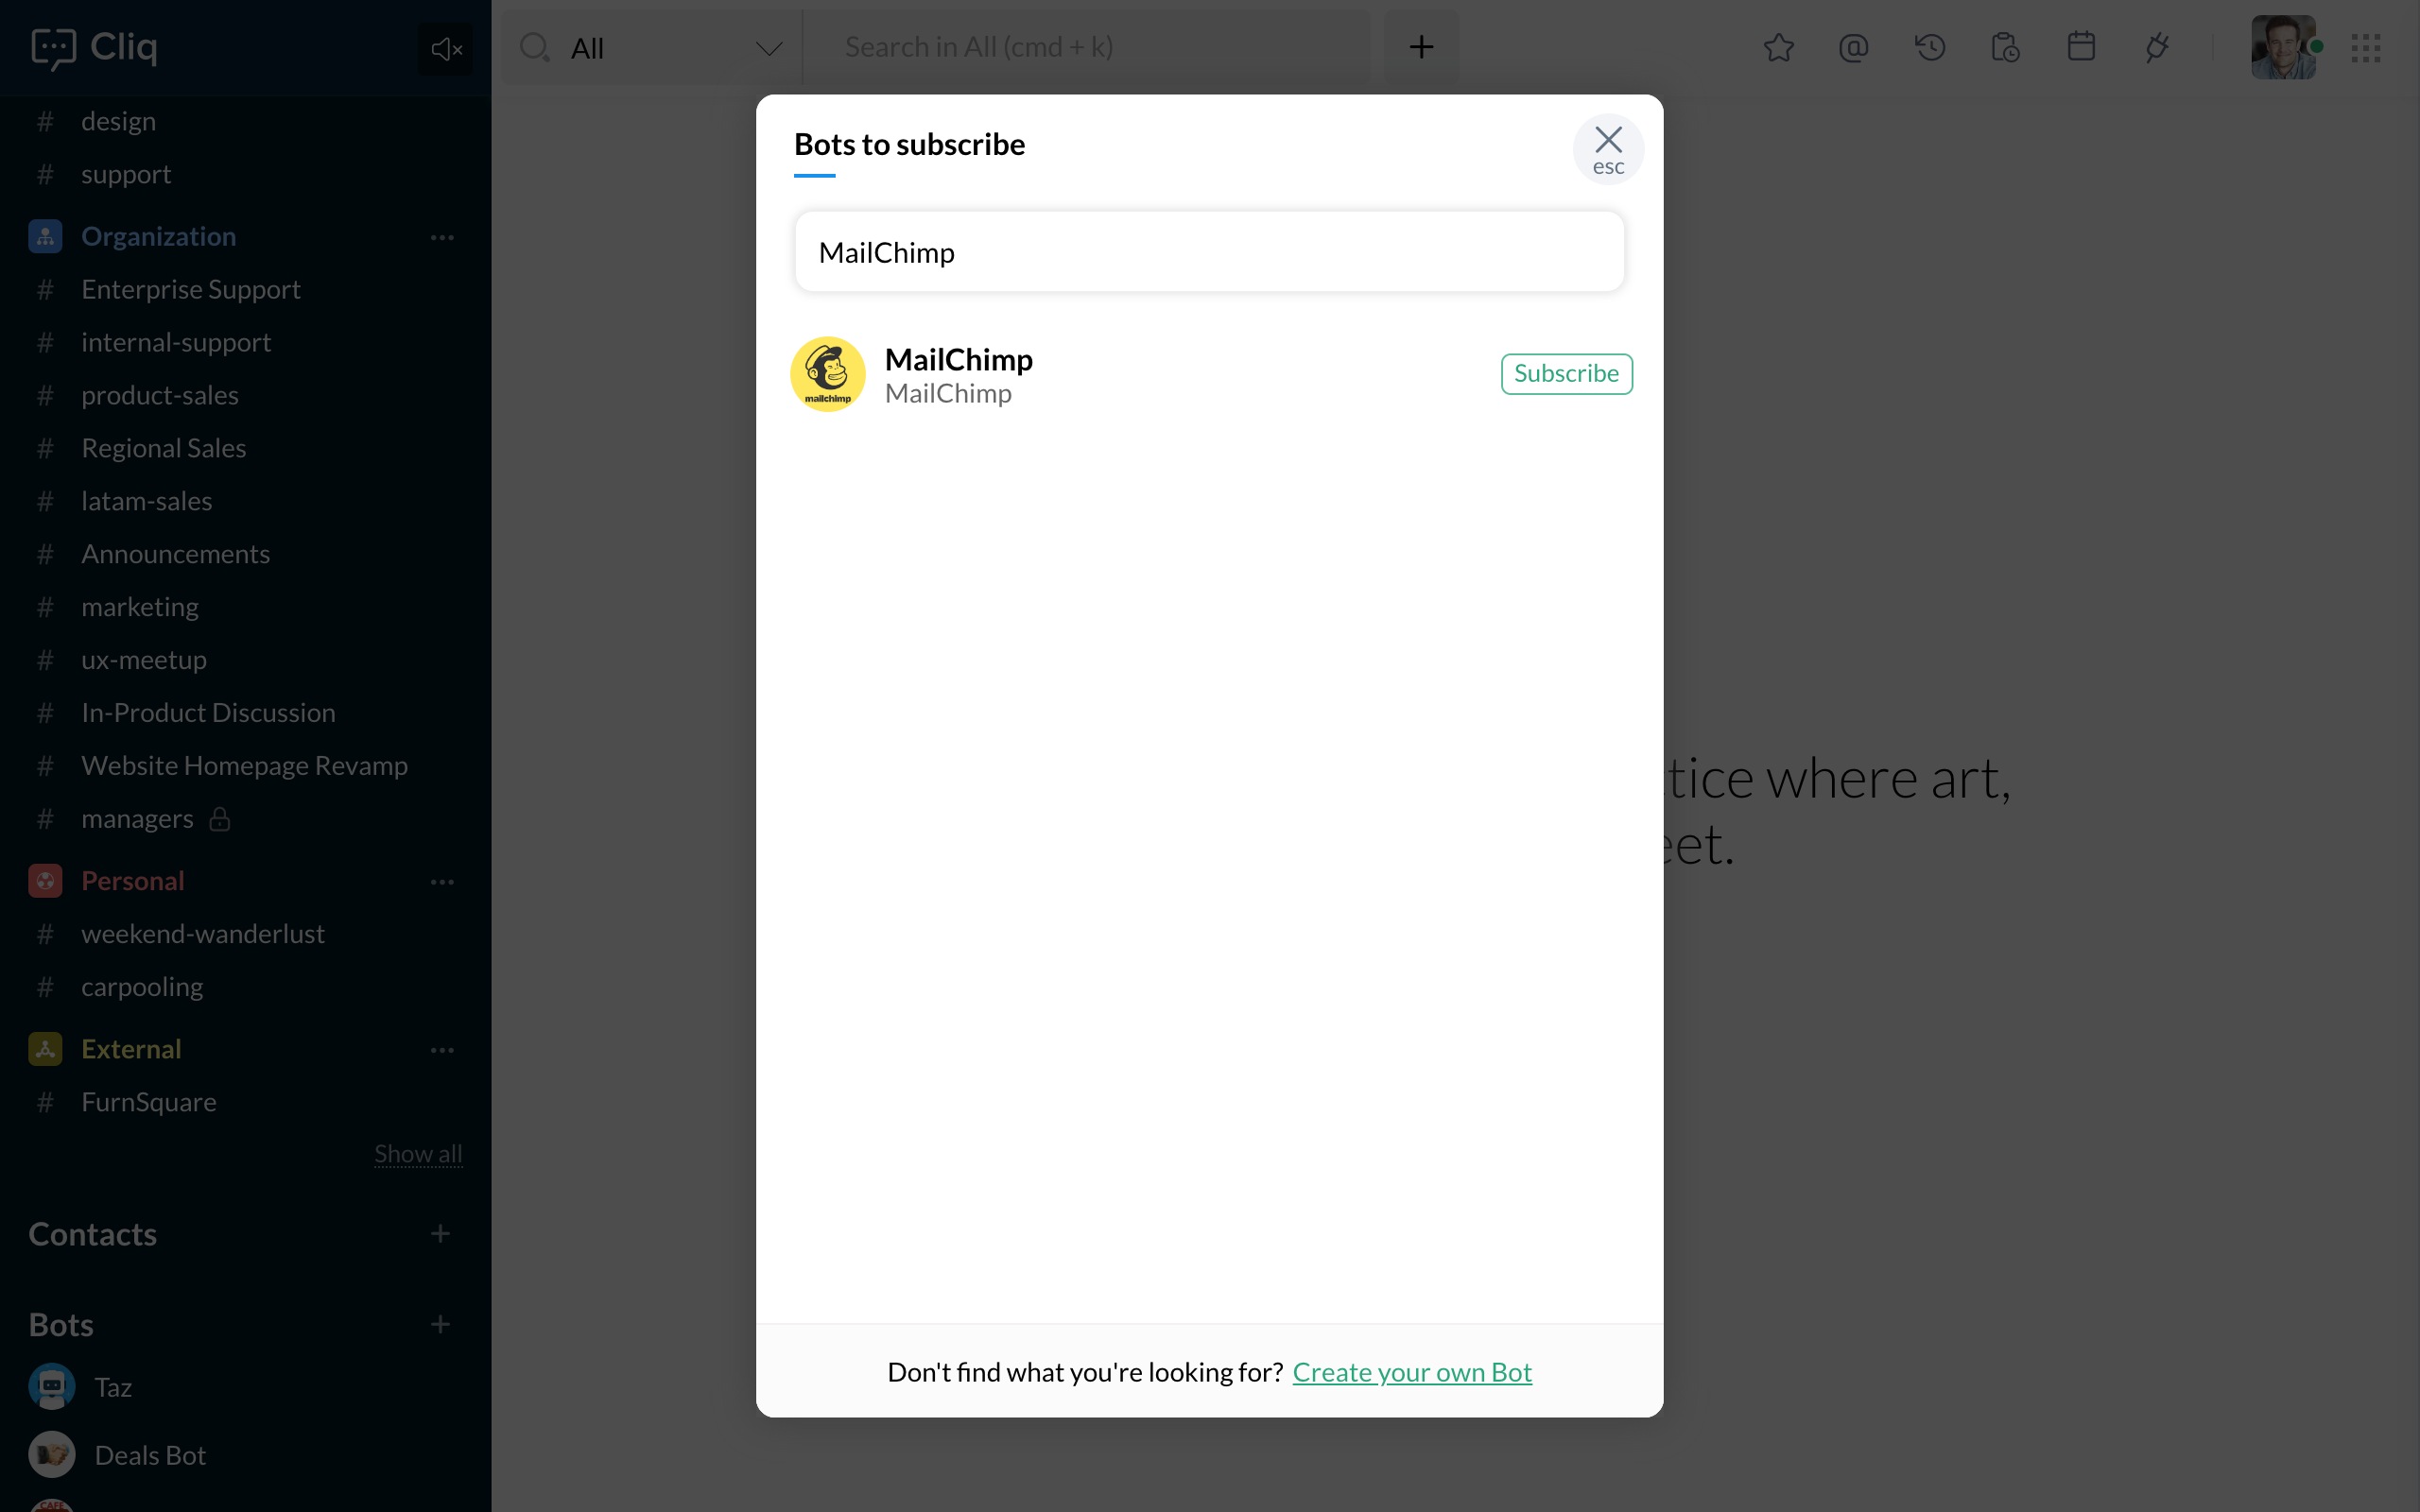
Before getting started..
Set up your MailChimp account by performing the following steps given below.
1. The first step in setting up your MailChimp account is to given in your Data Center.
2. To retrieve the Data Centre, log in to your MailChimp account. In the URL( https://us4.admin.mailchimp.com/ ), us4 is the Data Centre.
3. Now that we have retrieved the Data Centre, the next step is to Generate the API key.
4. To generate the API key, follow the steps stated below.
In your MailChimp account,
- Click on your display picture followed by Account.
- Now, click on the Extras tab and pick API keys.
- Finally, click on the Create A Key to generate the API key.
5. Now that we are done retrieving the Data Centre and the API key, specify the same during the account setting up process.
Track performance and trends of your email campaigns on the go with the bots menu action
When you head a growing business it is important to make your marketing decisions ideal. With a list of bot actions in the MailChimp integration, market smarter now.
Here's the list of bot menu actions that can come in handy.
1. Automations
2. Campaigns
3. Reports
4. Scheduler
Automations
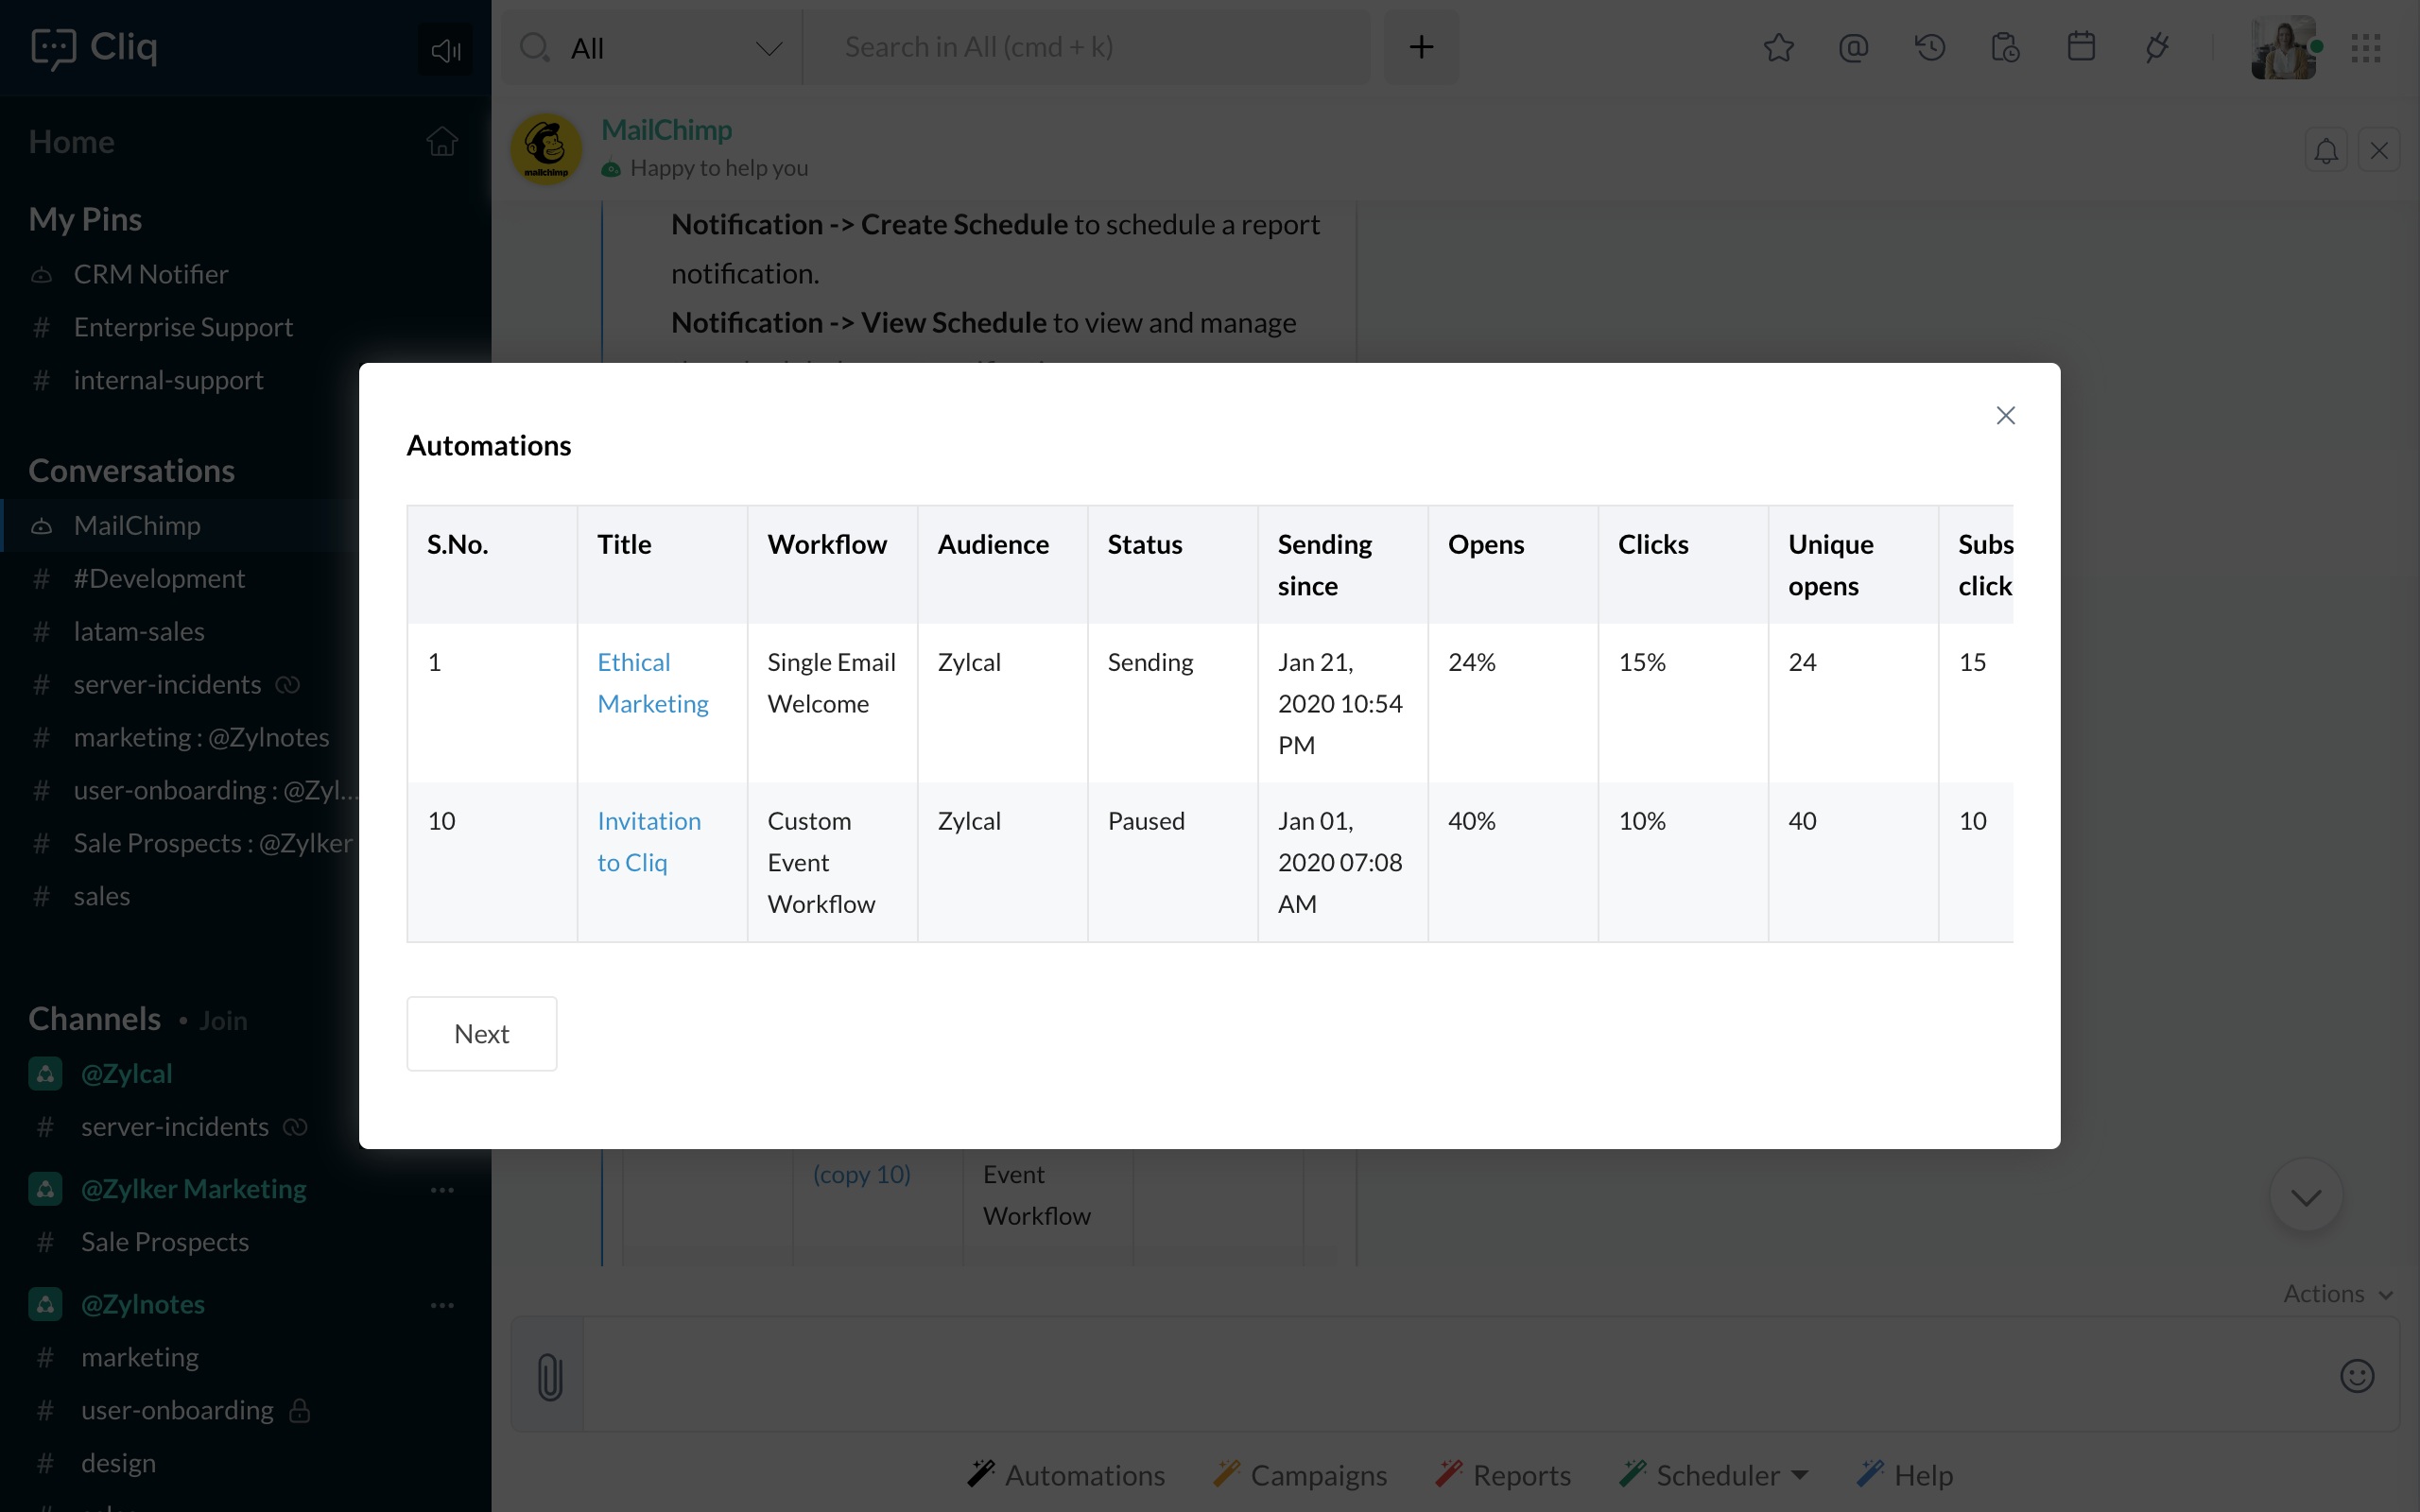
Get to view the list of emails that are sent to inform, reward and engage your contacts automatically with the bots menu action- Automations.
Campaigns
Track down the list of all email campaigns sent to your customers with the bots menu action-Campaigns.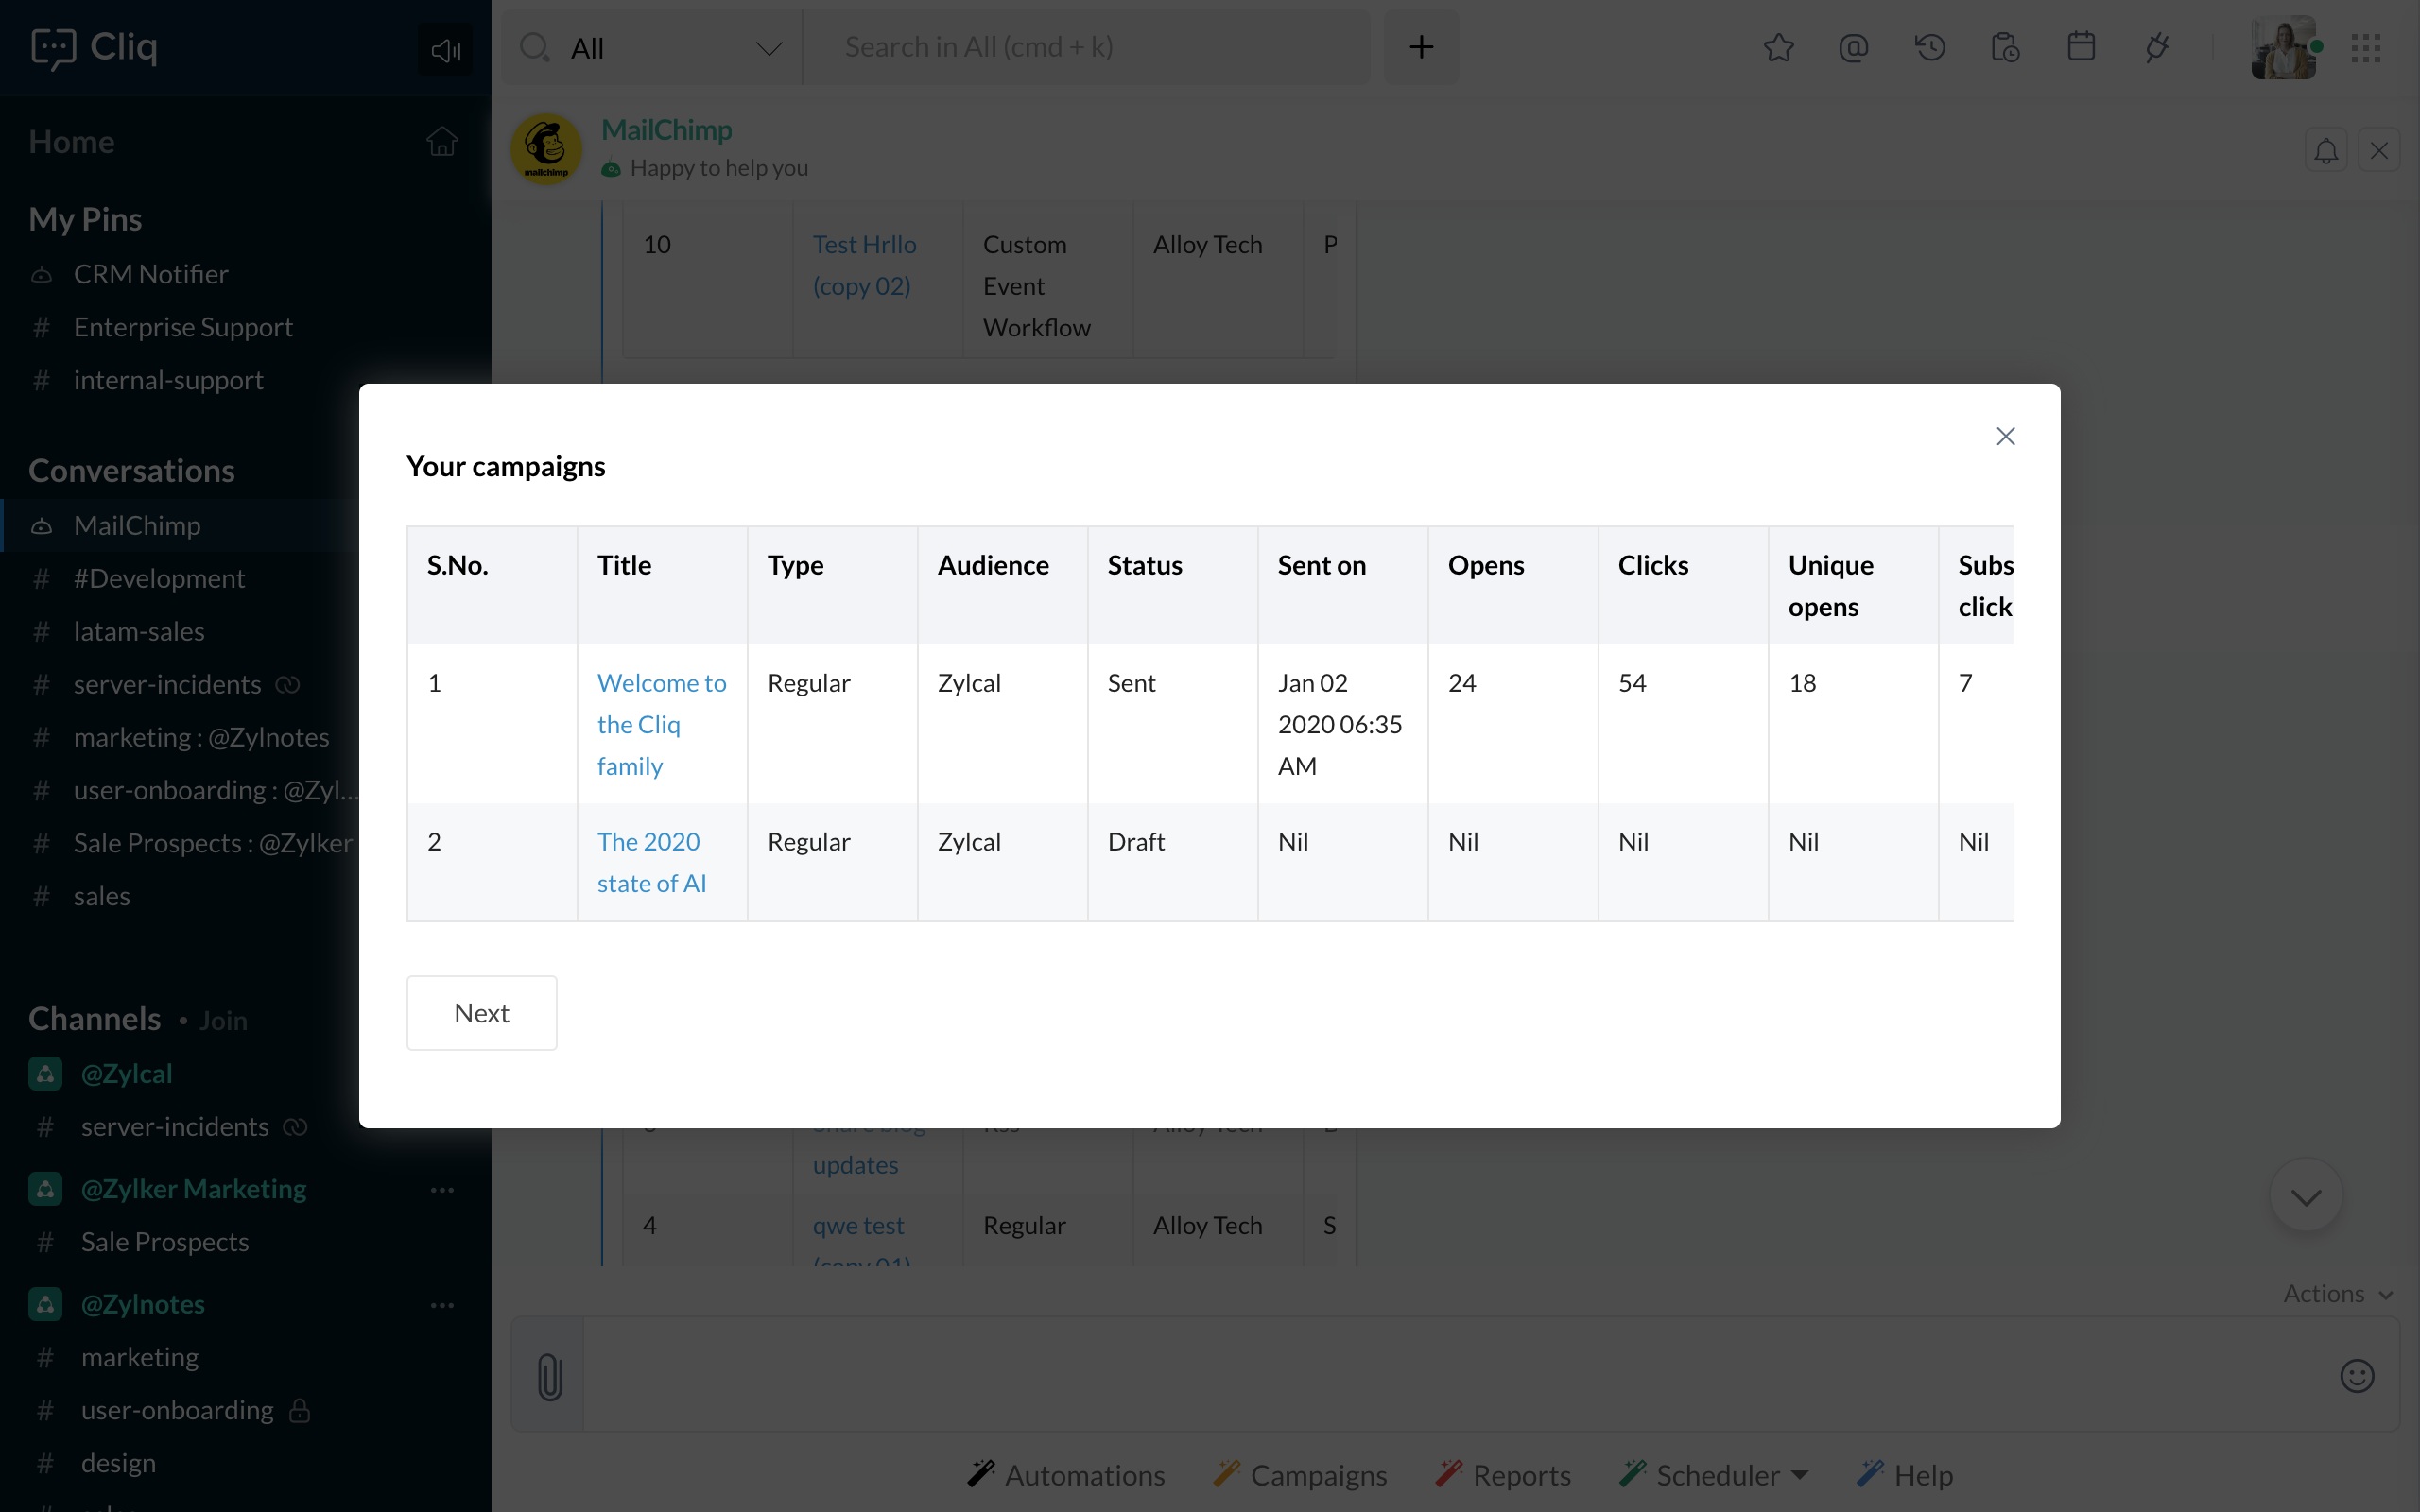
Reports
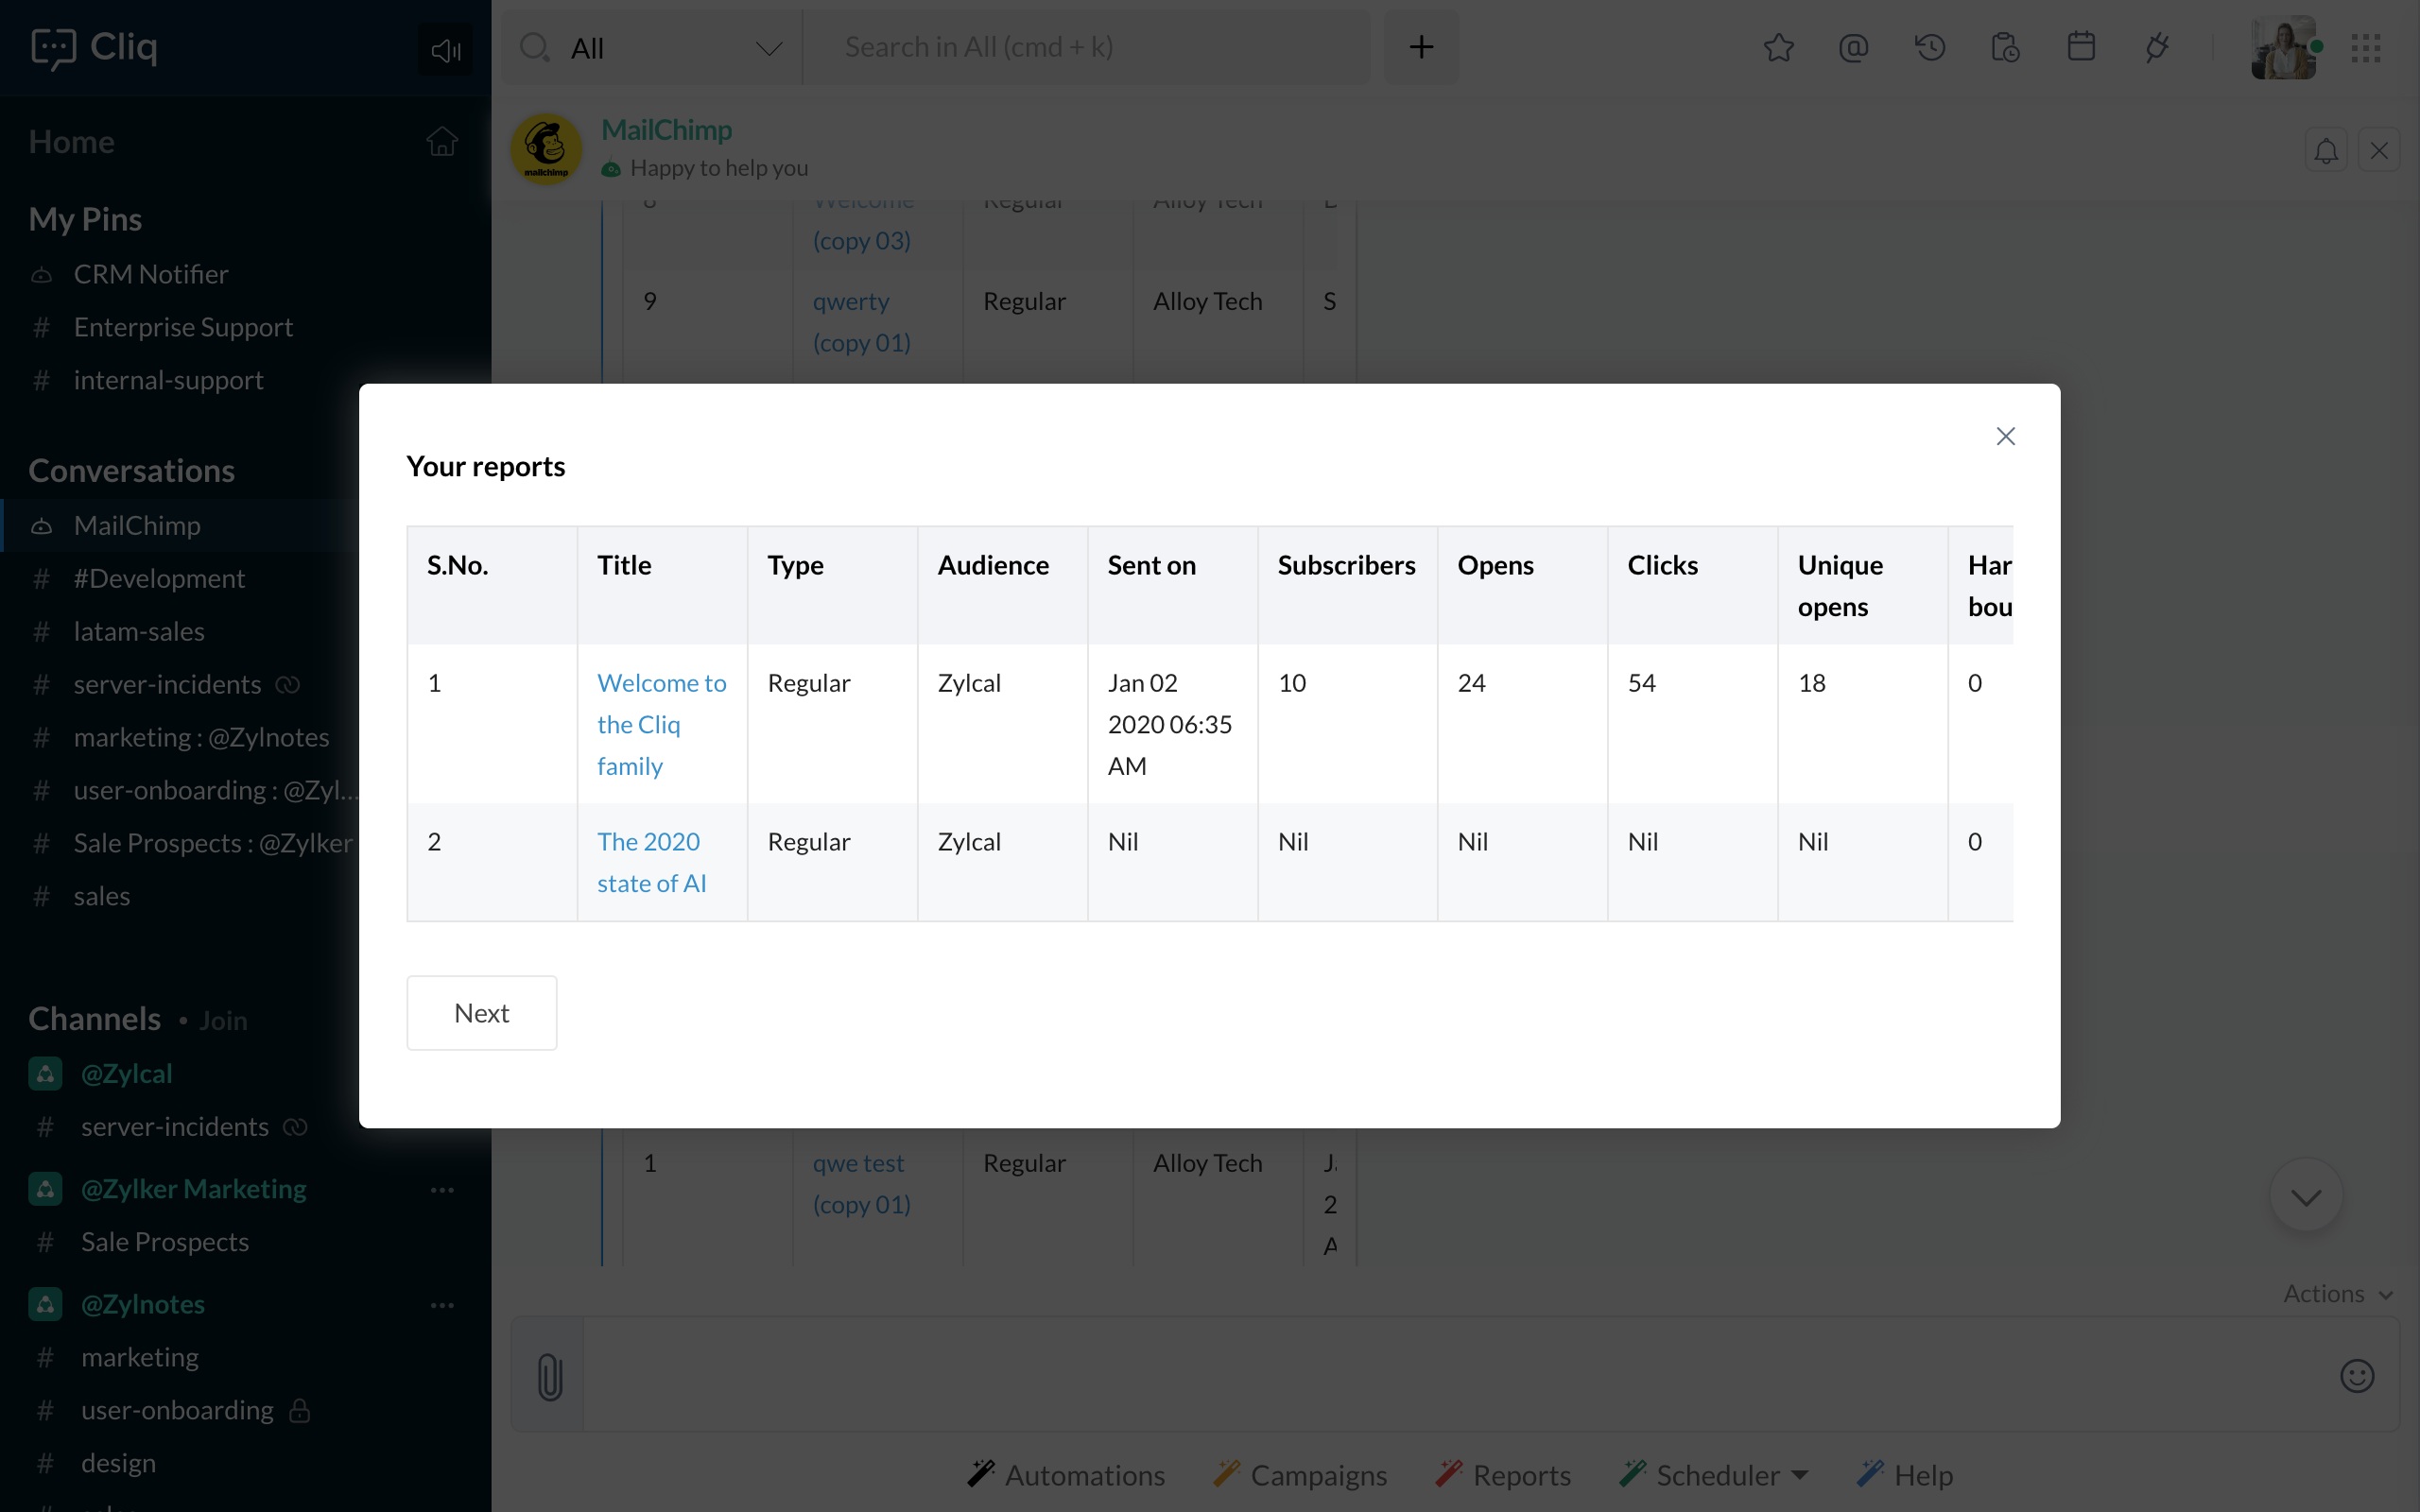
To have an insight about the email campaigns that are sent, click on the bots menu action-Reports.
Scheduler
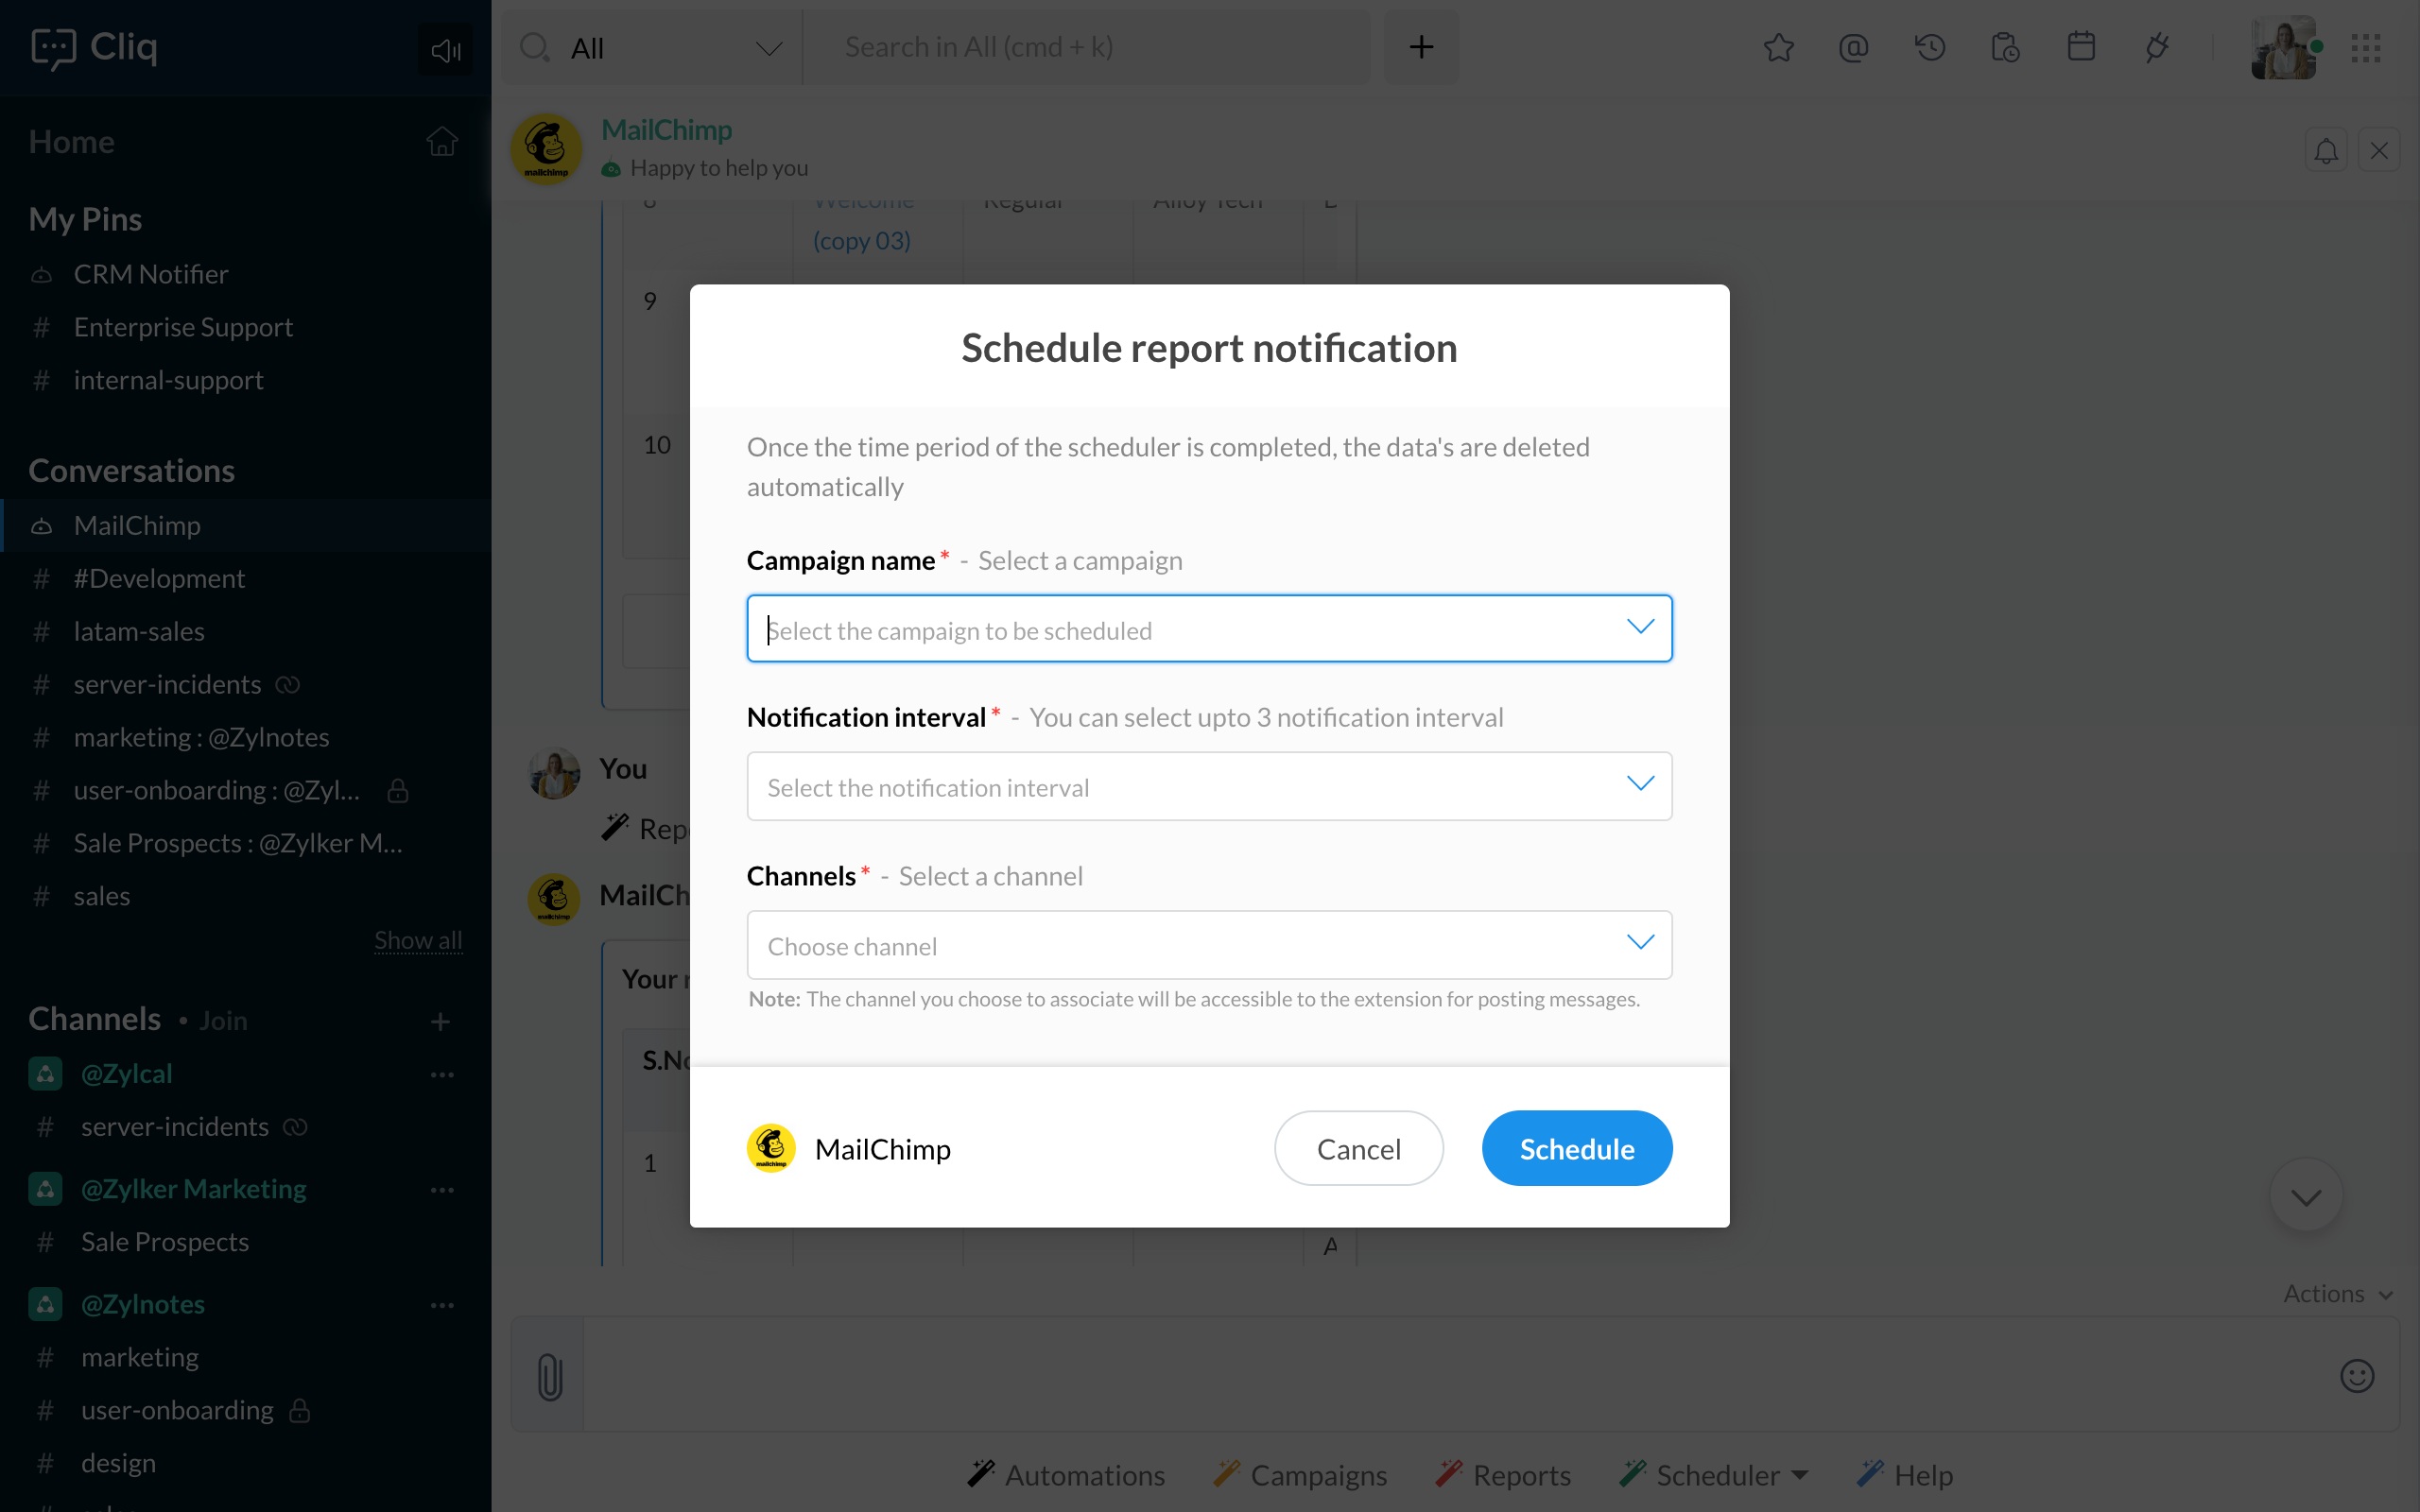
Have a dedicated channel in Cliq notify you about the reports brought to you by the bots sub action - Create.
Also, view the list of scheduled notification reports using the bots sub action-View.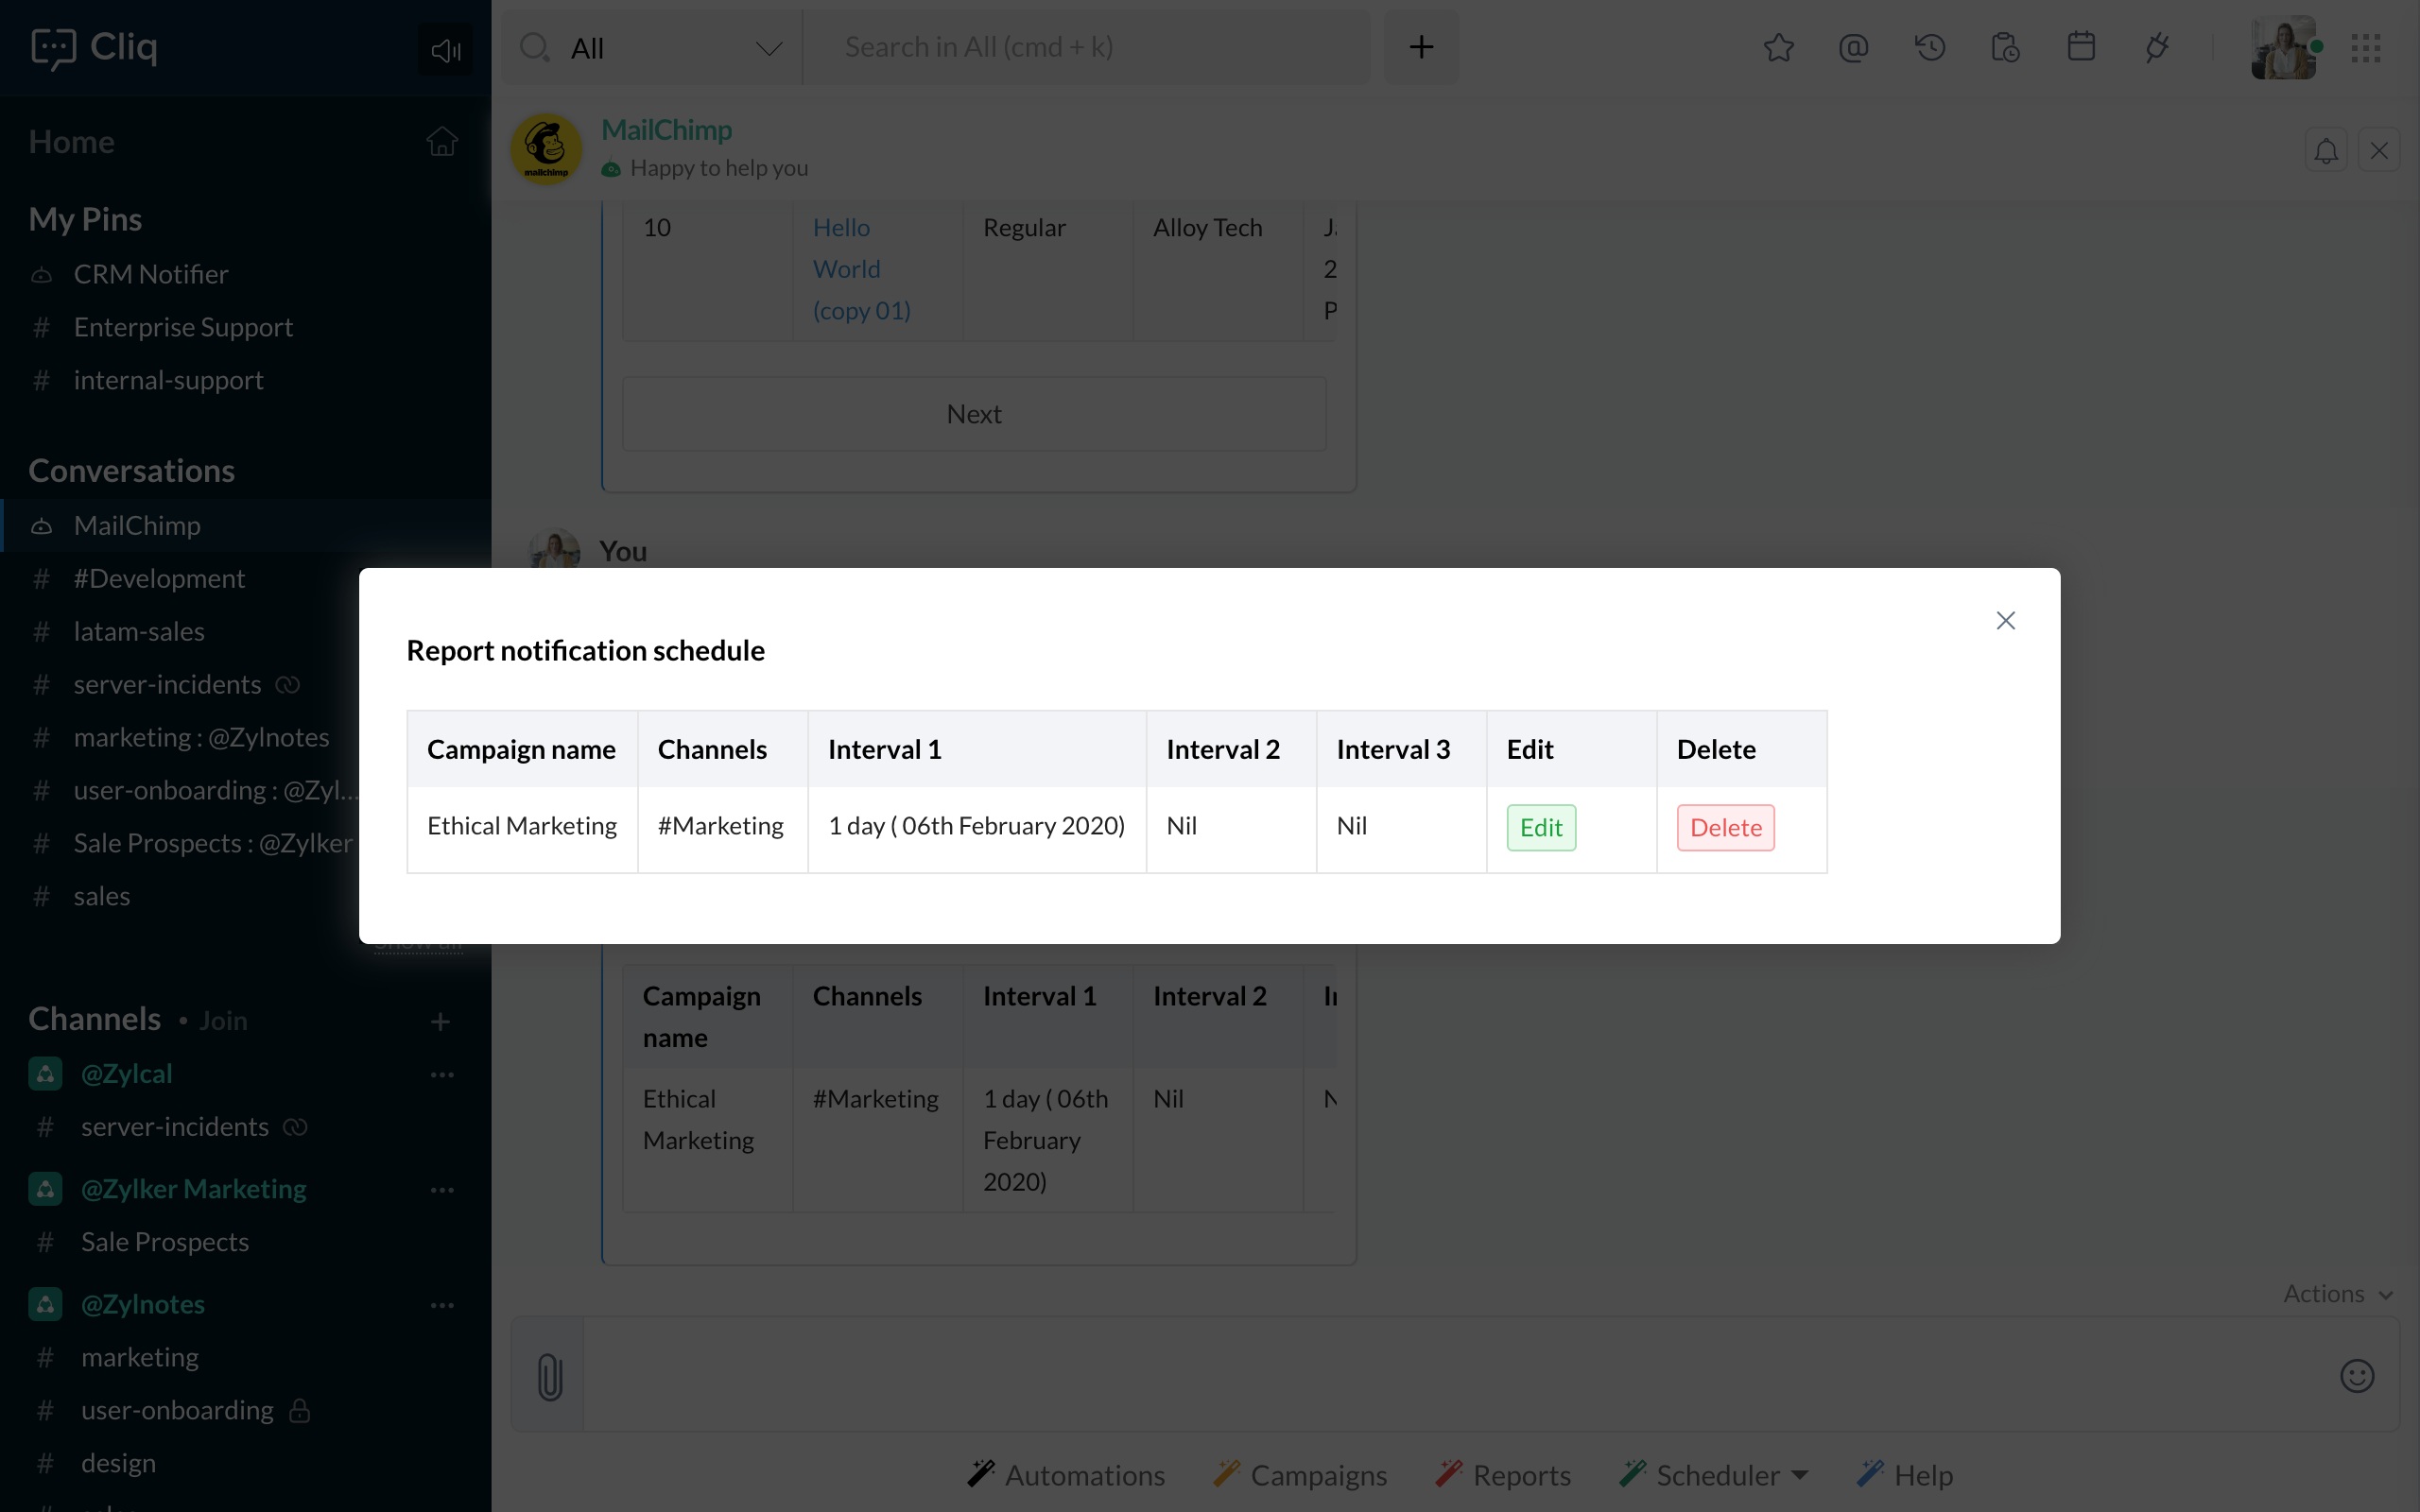
Installation
Now that you know how the MailChimp integration works inside Cliq, install it right away for your organization or to a dedicated team in Cliq to market better, faster and smarter.
Hit the install button given below to install this extension.


