Managing members, hosts, disabled accounts, and pending invites
Understand what Users and Controls helps you manage
Open Community Settings and go to Users & Controls to manage the people in your community.
This is one of the most important sections for a superhost and hosts, because it gives you direct visibility into who is part of the community, who has elevated access, who has been disabled, and which invitations are still waiting to be accepted. I'is where you maintain access control, monitor onboarding progress, and keep the community’s user base organized as it grows.
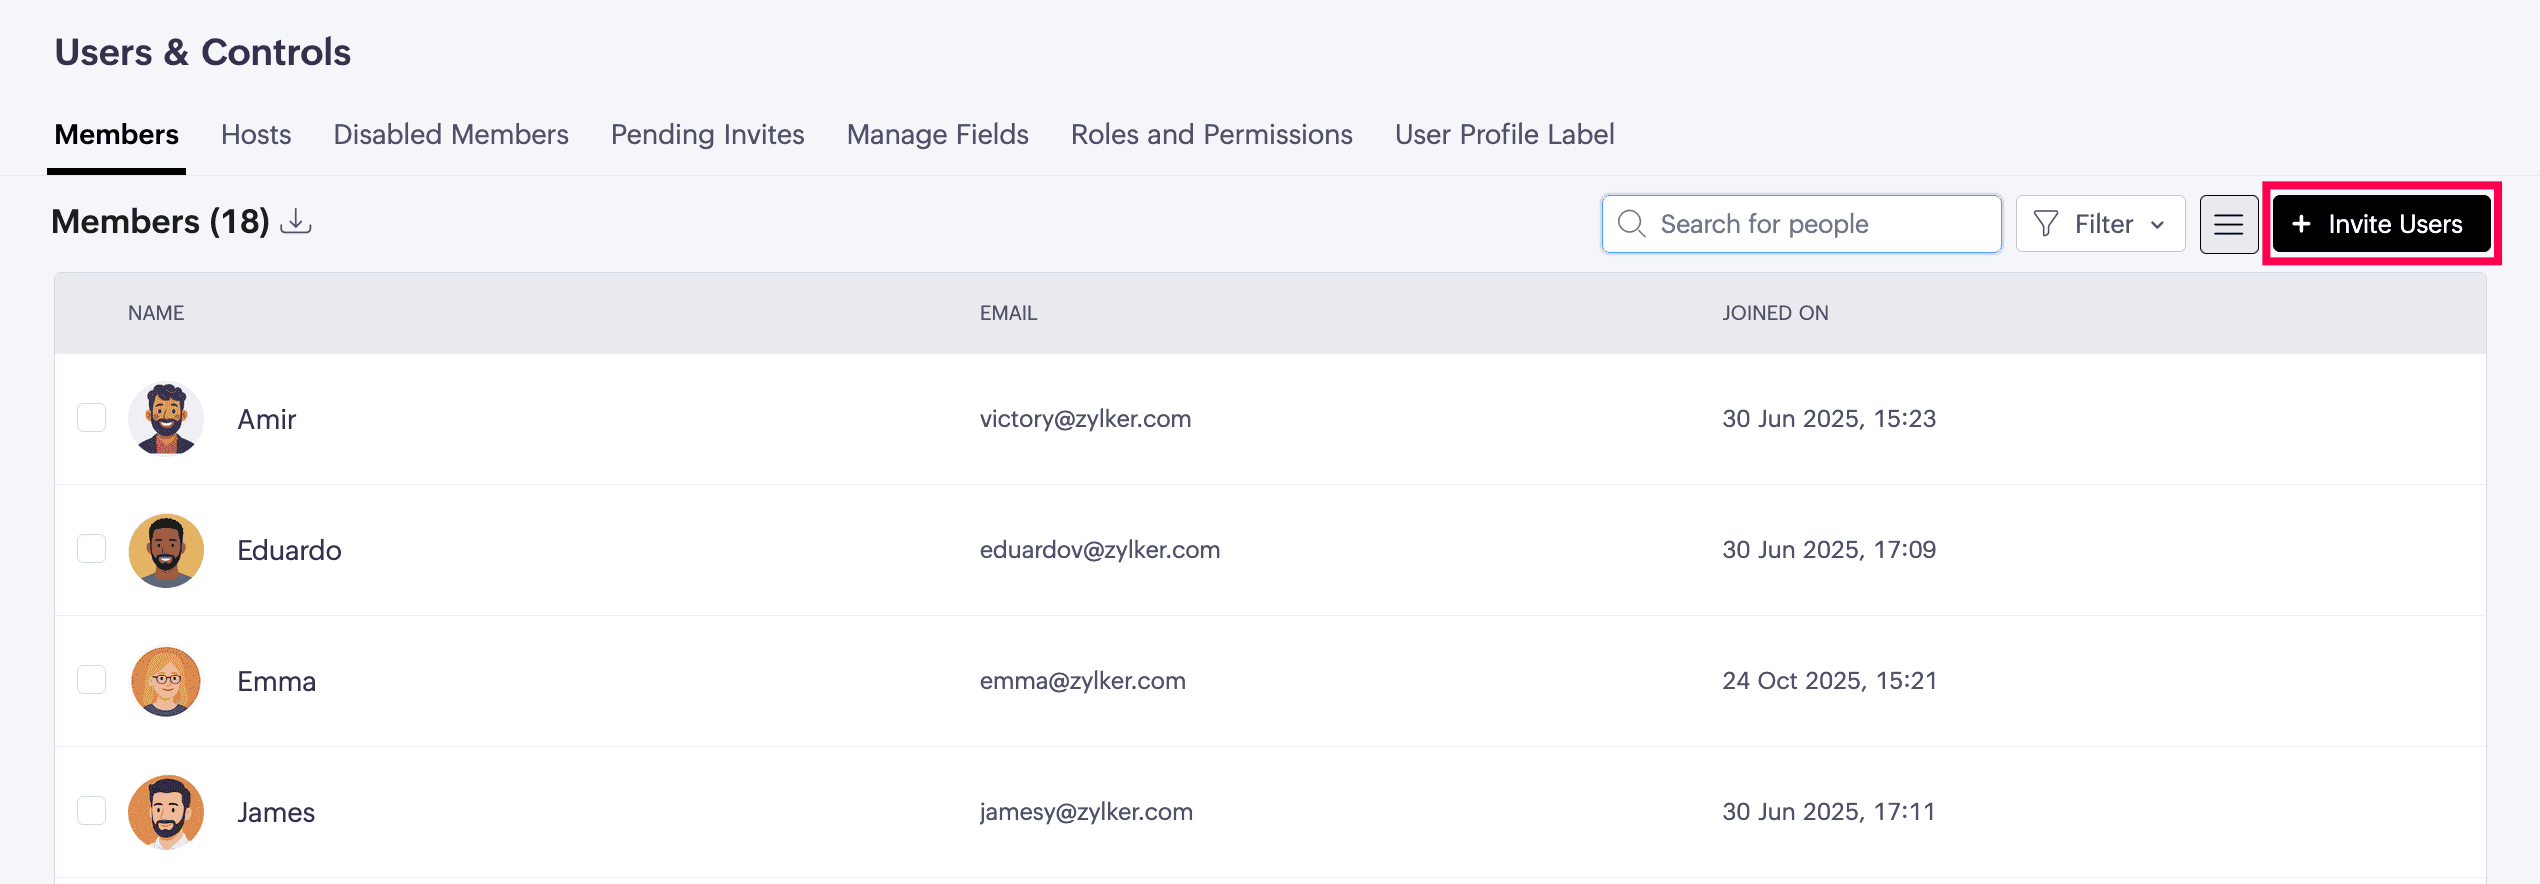
Manage members
Open Members to view and manage all members in the community. Supervise the active member base and quickly locate the right users whenever you need to review access or take action.
This is especially useful when you want to:
- Identify members from a specific location, skill or interest
- Quickly locate users who need to be added to spaces or boards
- Review the member base using profile-based criteria instead of searching for one user at a time
From Members, you can:
- Search for a member using their name or email address
- Use Filter to narrow the list
 All dropdown and multi-select profile fields created in Manage Fields are filterable here. This gives a superhost a more precise way to segment and manage members based on the profile information collected in the community.
- Switch between List and Grid view using the view icon
Manage hosts
Open Hosts to view and manage the host list for the community.
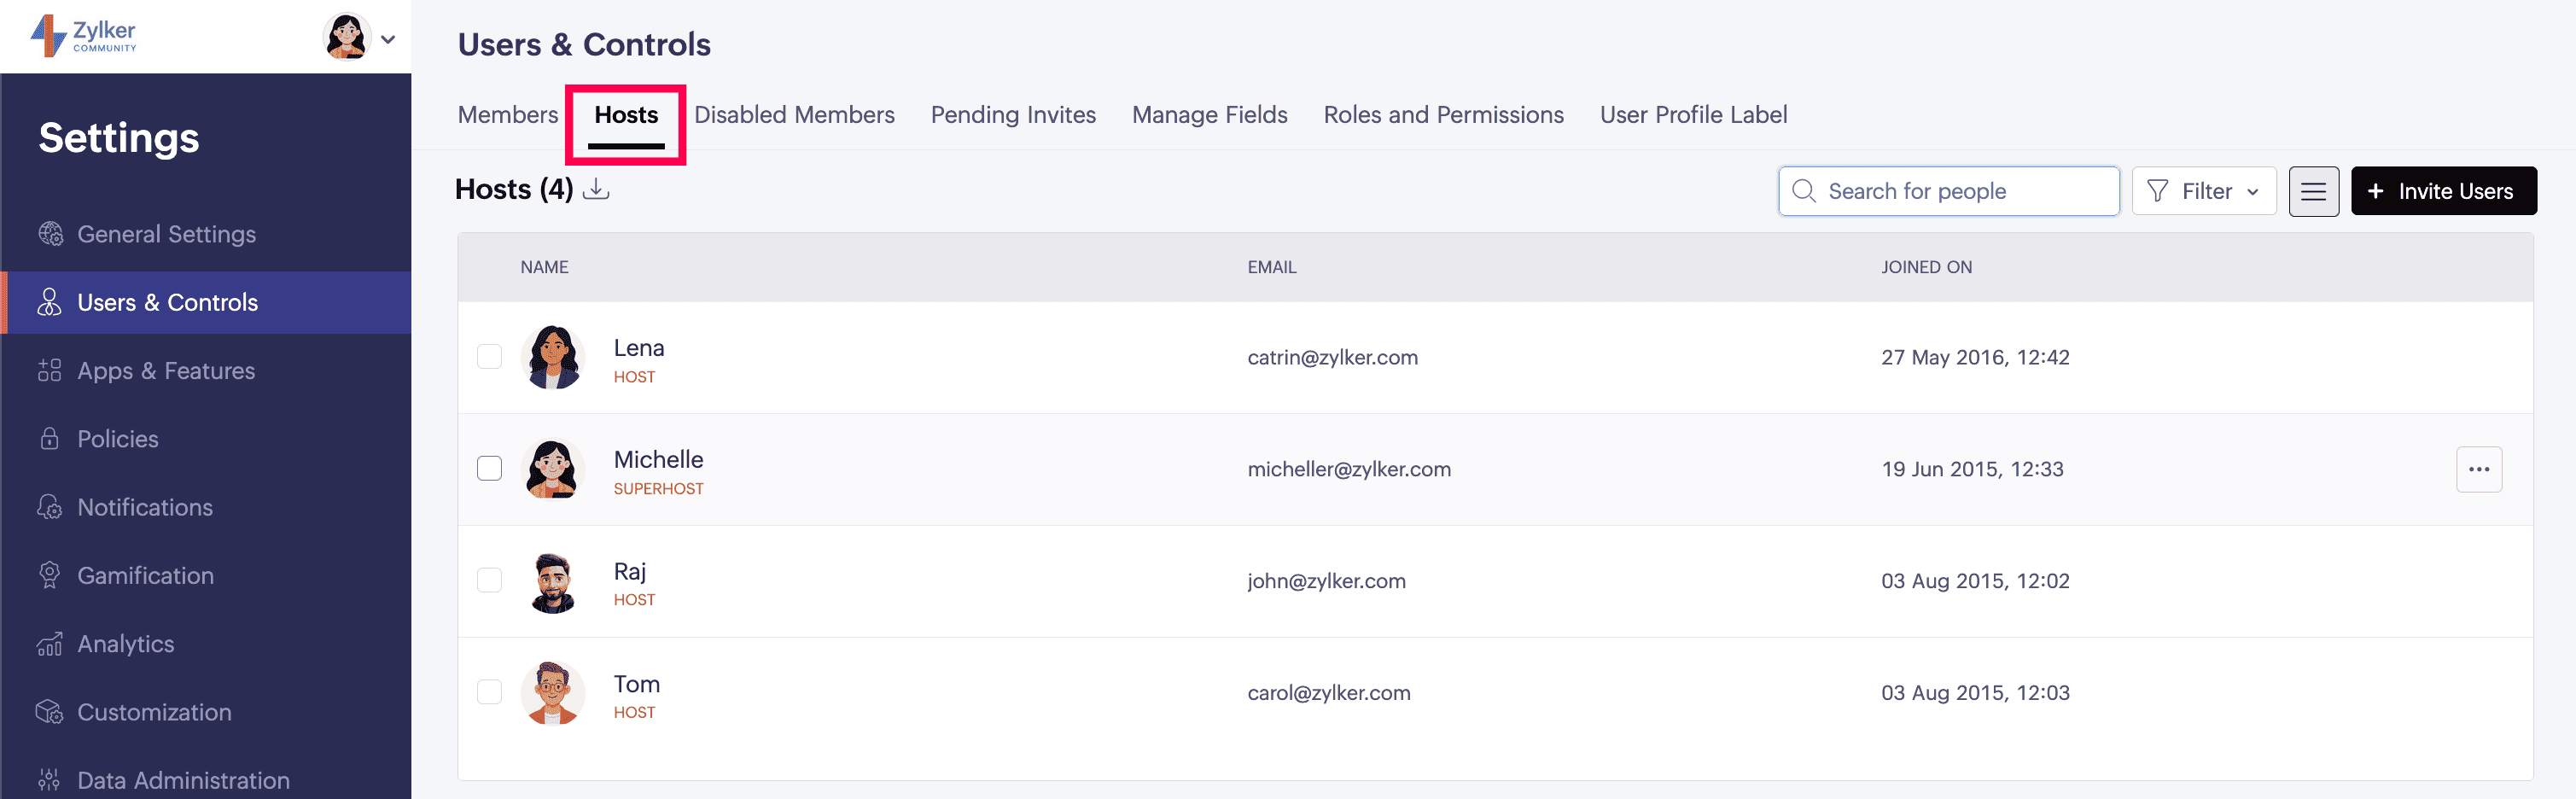
This section provides the same working experience as Members, but here you are reviewing users with host-level access.
For a superhost, this section is important because it helps you keep administrative access under control and ensure the right users are trusted with host responsibilities.
This makes it easier to:
- Review who currently helps manage the community
- Verify that host access is given only to the right users
- Keep the administrative structure clean as the community evolves
From Hosts, you can:
- Search by name or email address
- Use filters
- Switch between List and Grid view and review the full host list from one place
Invite users
Use Invite Users when you want to bring new people into the community.
This opens the same invite window used across the product, where you can invite both members and hosts. As a superhost, this keeps onboarding centralized and makes it easier to add the right type of user without leaving the user management flow.
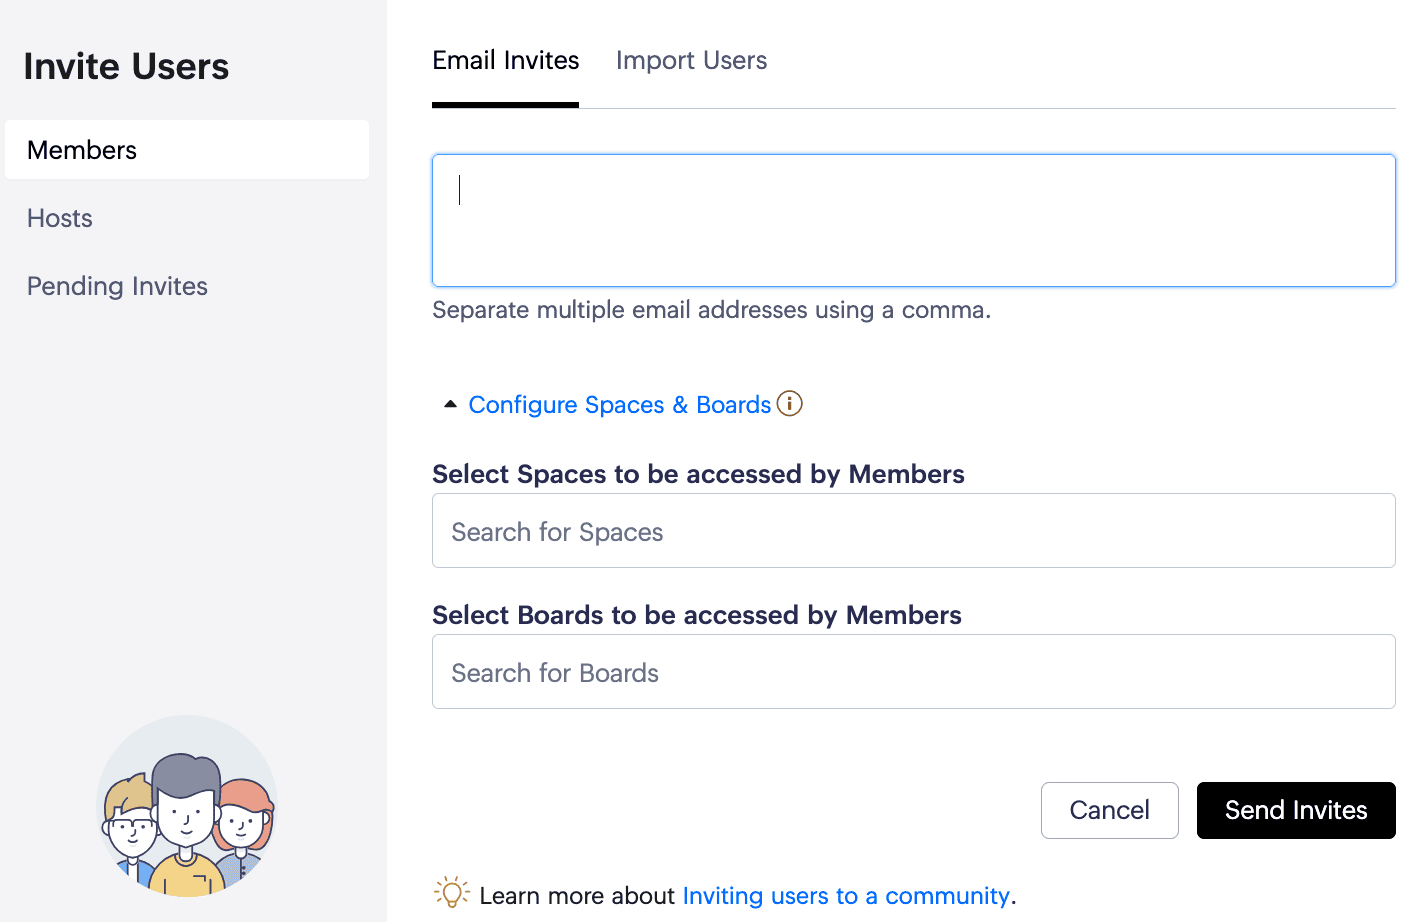
You can use Invite Users while working from these sections:
- Members
- Hosts
- Pending Invites
This is useful when you want to onboard users in batches, add a new internal admin as a host, or resend access to someone who has not joined yet.
Export user details
Use Export when you need a downloadable list of user information from the community.
From the export flow, you can choose between:
- Specific profile details
- All available profile details
You can also choose whether to export:
- With a password
- Without a password
For a superhost, this is useful for reporting, audits, record-keeping, operational review, and secure backup of user information.
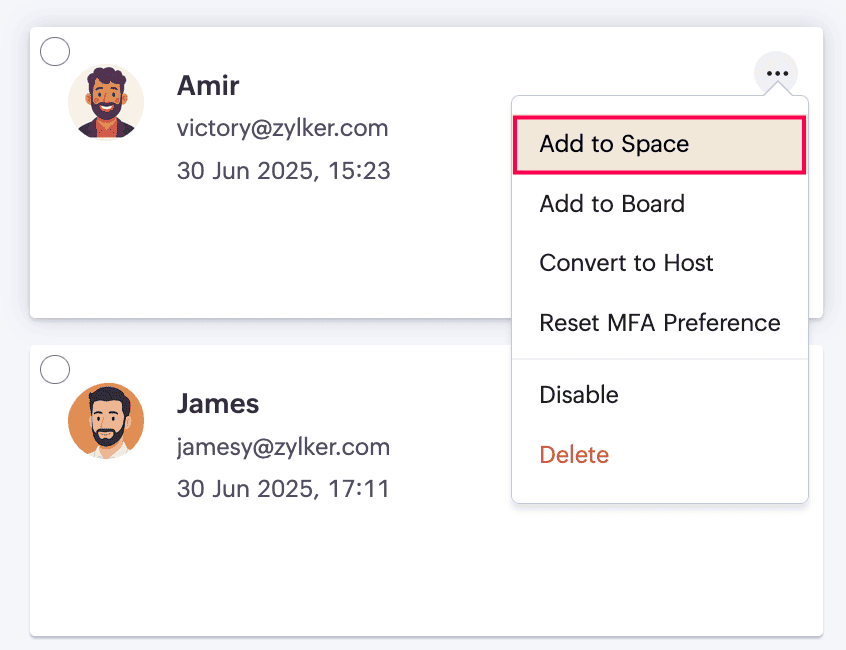
Manage users individually or in bulk
From the user lists, you can manage people one at a time or in bulk.
For individual users, open the three-dot menu on the user row/ tile (appears on mouse hover) to access actions such as:
- Add to Space
- Add to Board
- Convert to Host
- Reset MFA preference
- Disable
- Delete
These actions help a superhost control access, move users into the right working areas, and manage account status directly from the list view.
Use Add to Space to manage a user’s space membership from one place.
- Under All Spaces, you can add the user to any relevant space without asking them to find and join it manually.
- Under User Spaces, you can review the spaces the user already belongs to and use the gear icon to make them a space admin or remove them from that space.
- Use Add to Board to manage a user’s board membership from one place.
- Under All Boards, you can add the user to any relevant board without asking them to find and join it manually.
- Under User Boards, you can review the boards the user already belongs to and use the gear icon to make them a board admin or remove them from that board.
- Use Convert to Host when a member needs elevated access to help manage the community.
- Use Reset MFA preference when a user needs help reconfiguring their multi-factor authentication.
- Use Disable when you want to remove access temporarily and keep the option to restore the user later.
- Use Delete when you want to remove the account permanently. If that person needs access again later, they must be invited again.
Note: Disabling or deleting a member recycles the user license count, which means that license can be reused for another member.You can also select multiple users and apply bulk actions, such as:
- Add to Space
- Add to Board
- Disable in community
- Delete
Bulk actions are especially useful for a superhost when handling onboarding, access cleanup, or restructuring users at scale.
Restore disabled accounts
Open Disabled Members to view users whose access has been disabled.
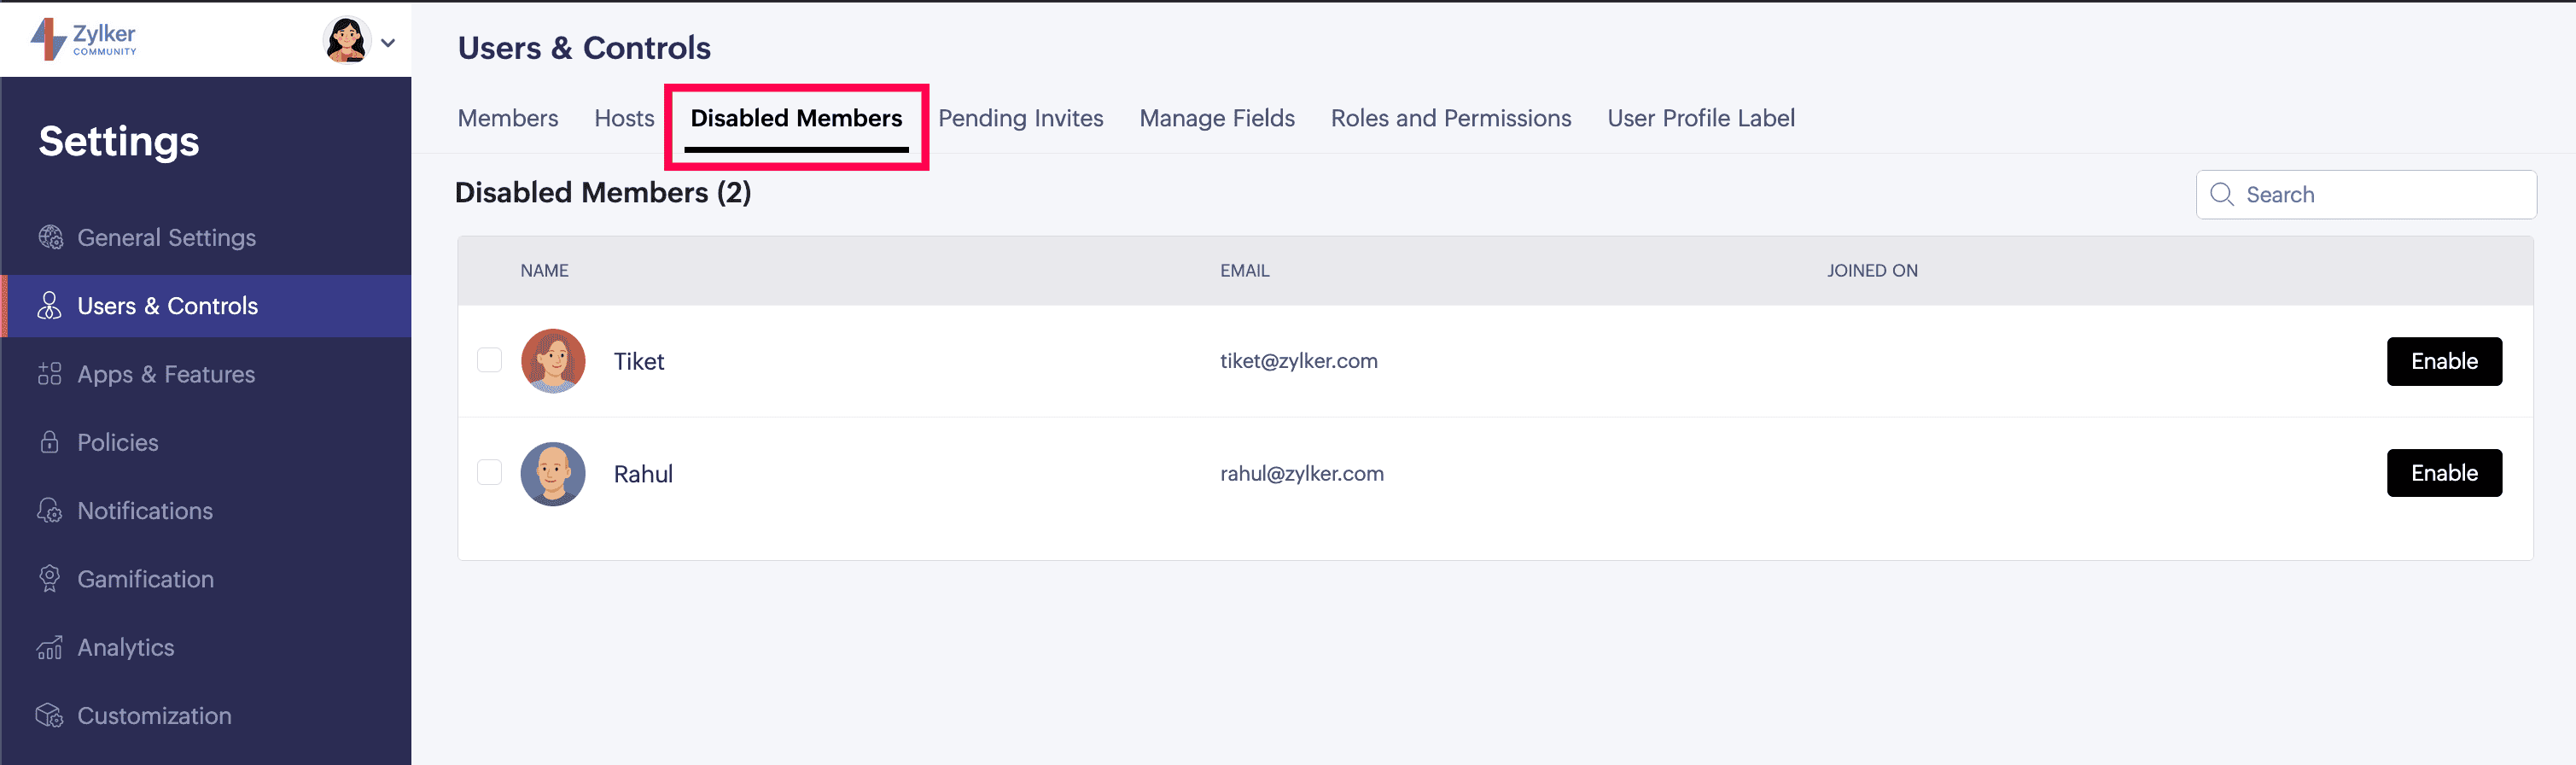
This section is useful when access was intentionally paused and you want to restore it later without re-inviting the user from scratch.
From Disabled Members, you can:
- Search by name or email address
- Use Enable to restore access individually
- Use multi-select to restore multiple users in bulk
This gives a superhost a safe middle ground between keeping a user active and deleting them permanently. It is especially useful when a member needs to be removed temporarily, but may need access again later.
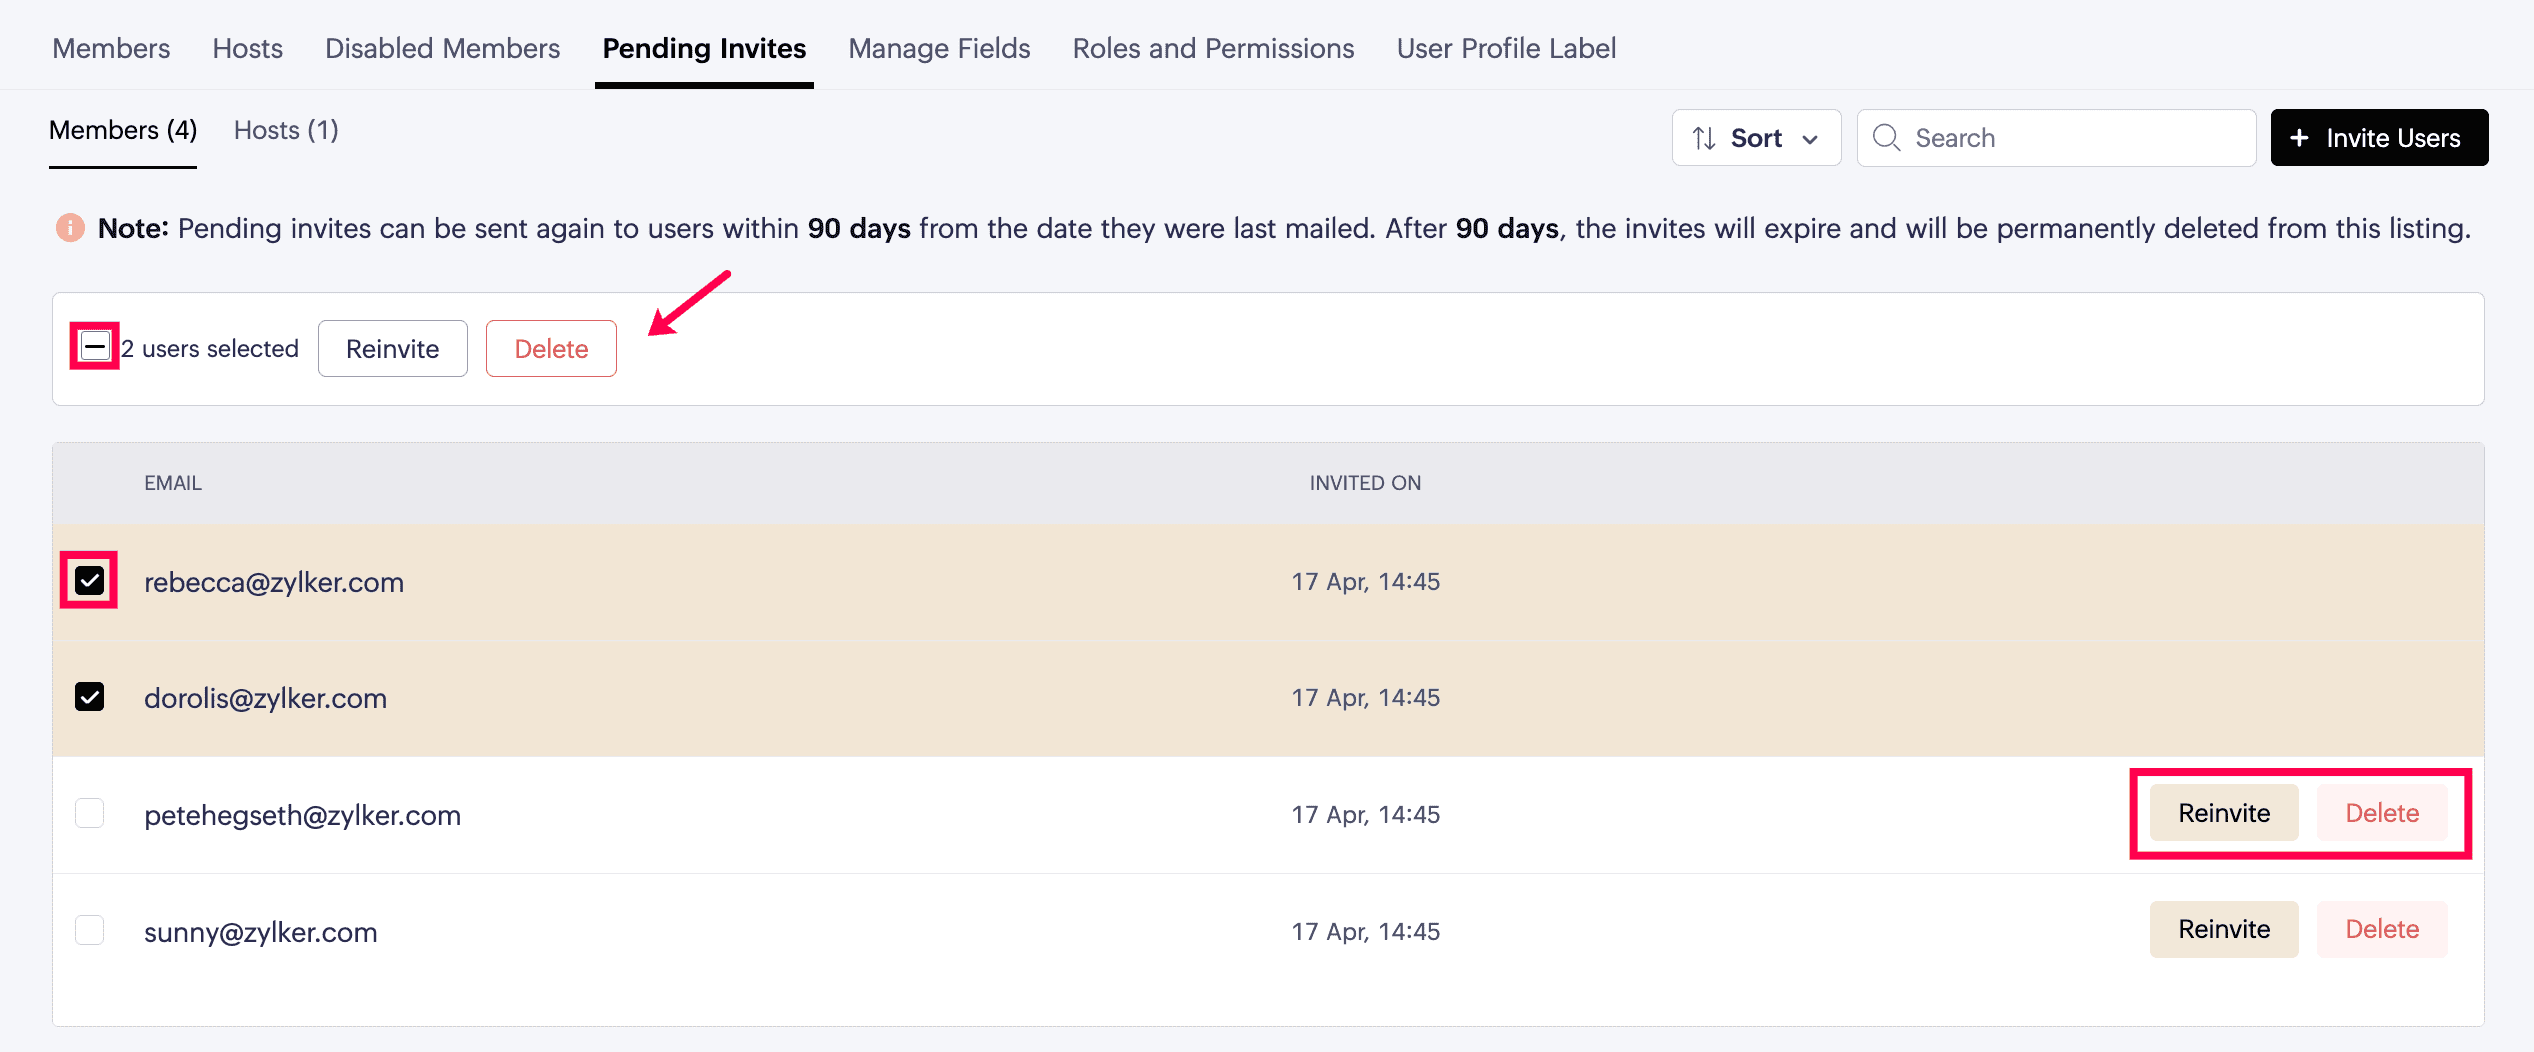
Track pending invites
Before a user appears under Pending Invites, their join request may first need host approval through Pending Requests in Closed Public communities. Once approved, the user receives an invite and is then tracked under Pending Invites until they accept it.
Open Pending Invites to review invitations that have been sent but not yet accepted, for both members and hosts.
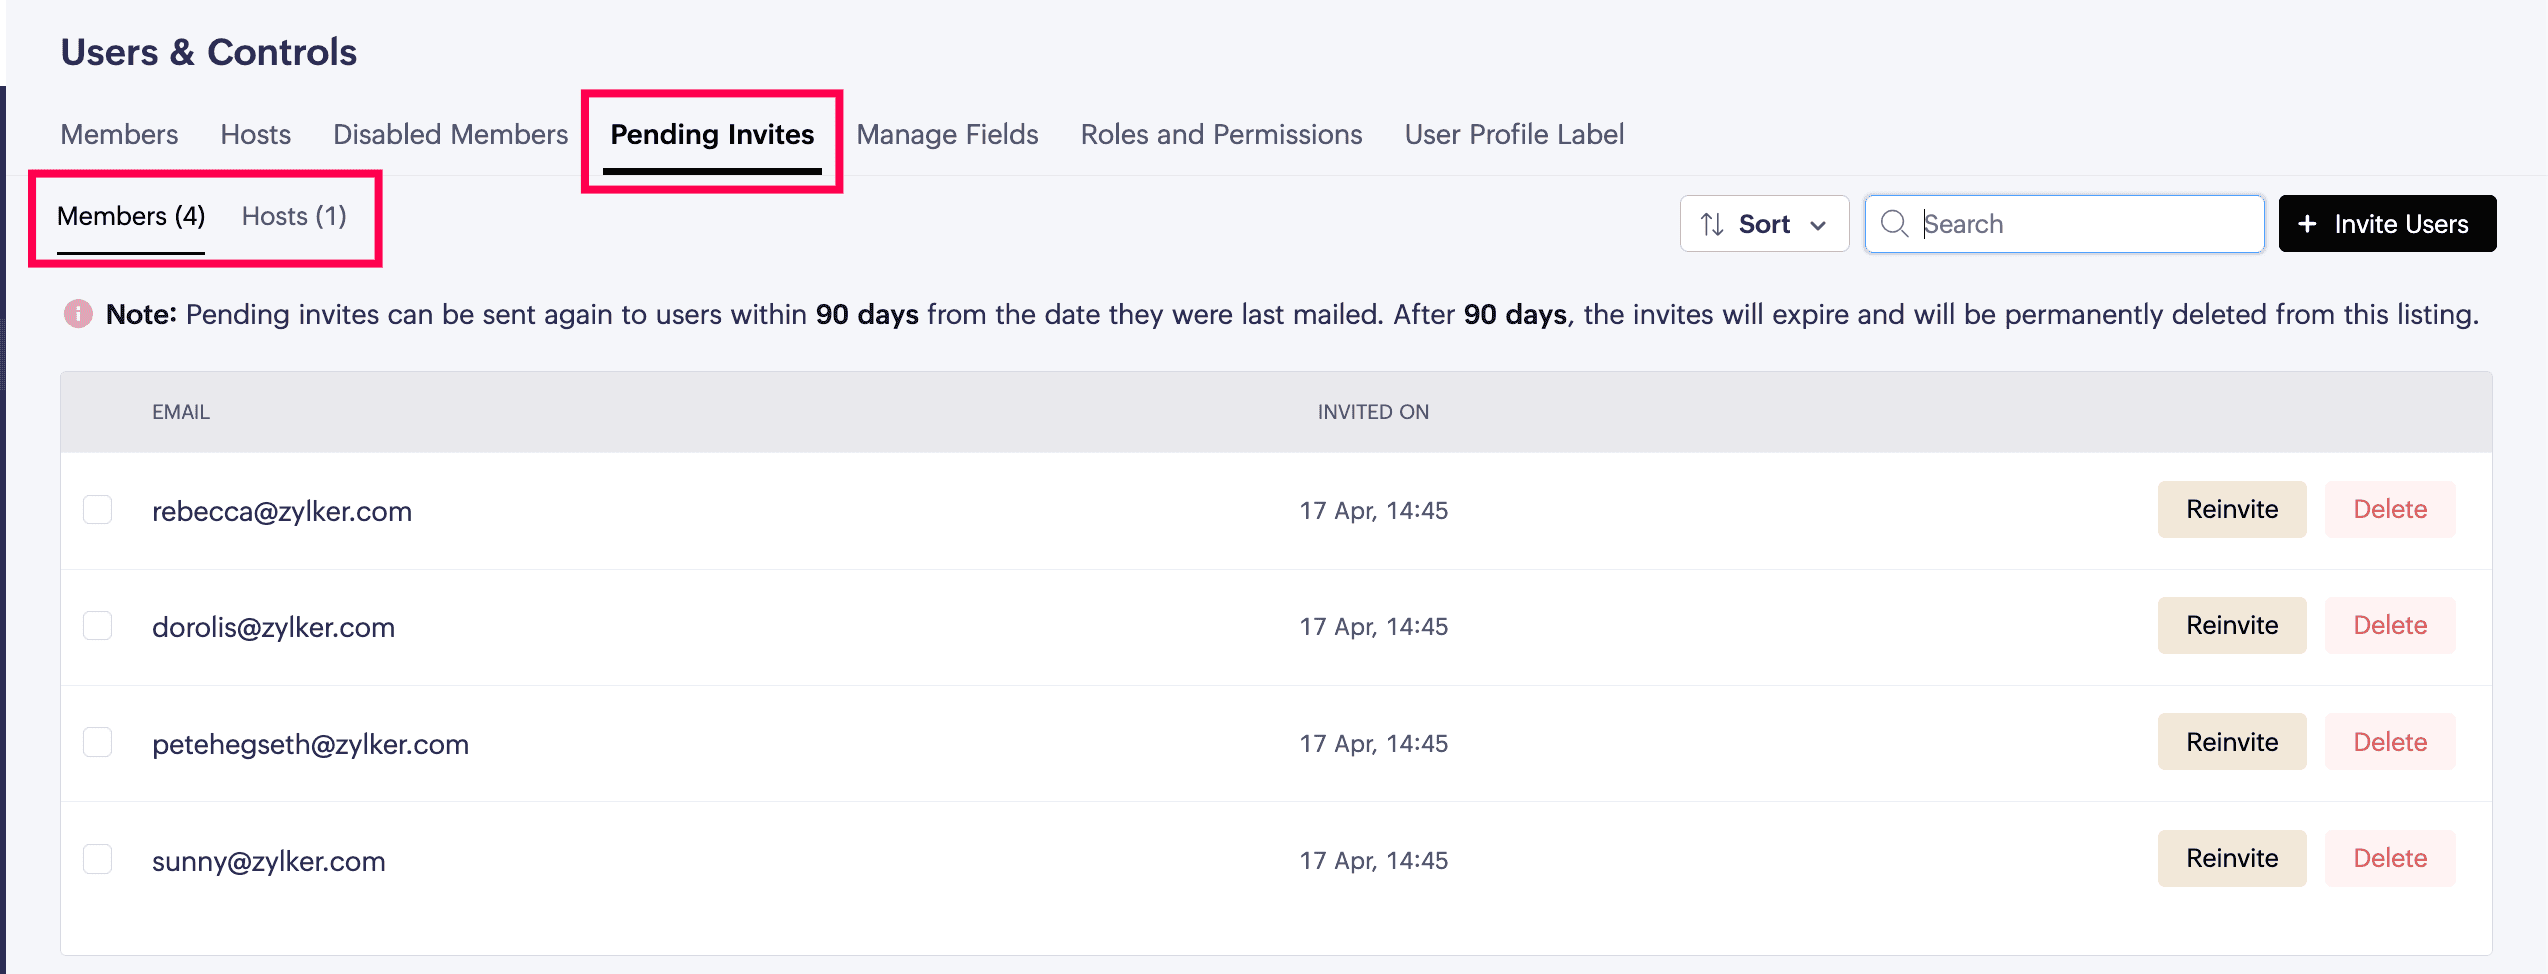
This section helps you monitor onboarding progress and understand who is still waiting to join the community.
From Pending Invites, you can:
- Sort the list by invite time or by email address
- Search by email address
- Use Invite Users to send new invitations
For each pending invite, you can:
- Re-invite
- Delete the pending invite
These actions are available individually on the user list or in bulk using multi-select.
This is especially helpful for a superhost when:
- Onboarding a new group of users
- Checking who has not yet joined after being invited
- Following up with people who may have missed their invite
- Cleaning up outdated invitations before sending fresh ones
Pending invites can be resent within 90 days from the date they were last mailed. After 90 days, the invite expires and is permanently removed from the list.

Next: After managing people and access in the community, continue with Manage Fields to design the profile fields members fill in and control how user information is collected and displayed.